Tag Archives: British Columbia

Sea to Sky Marine Trail

Canoeing the Sea to Sky Marine Trail

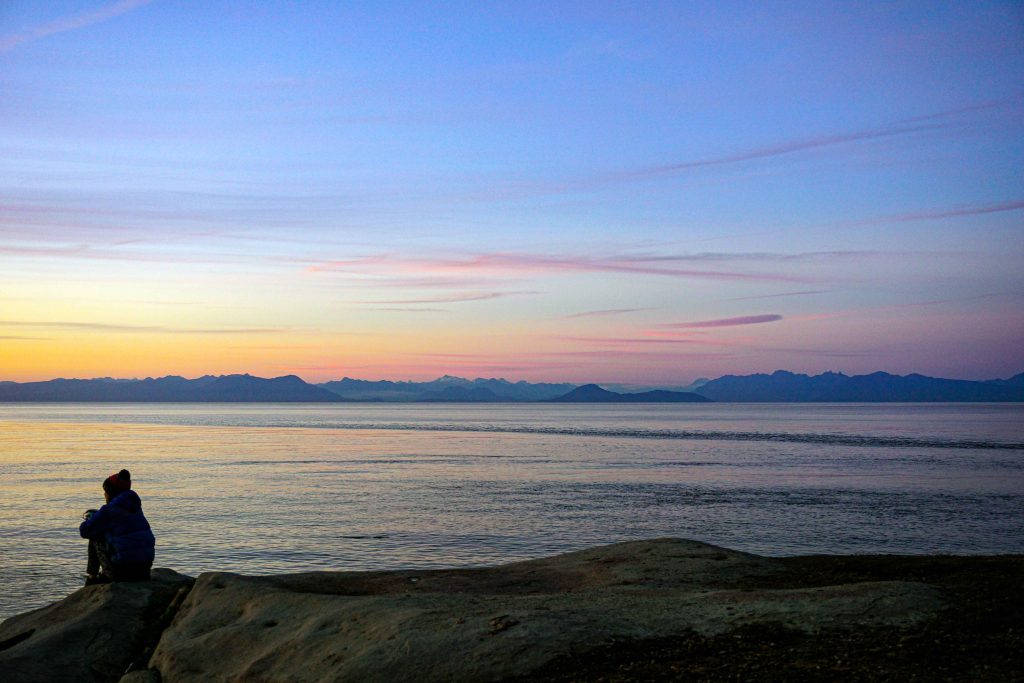
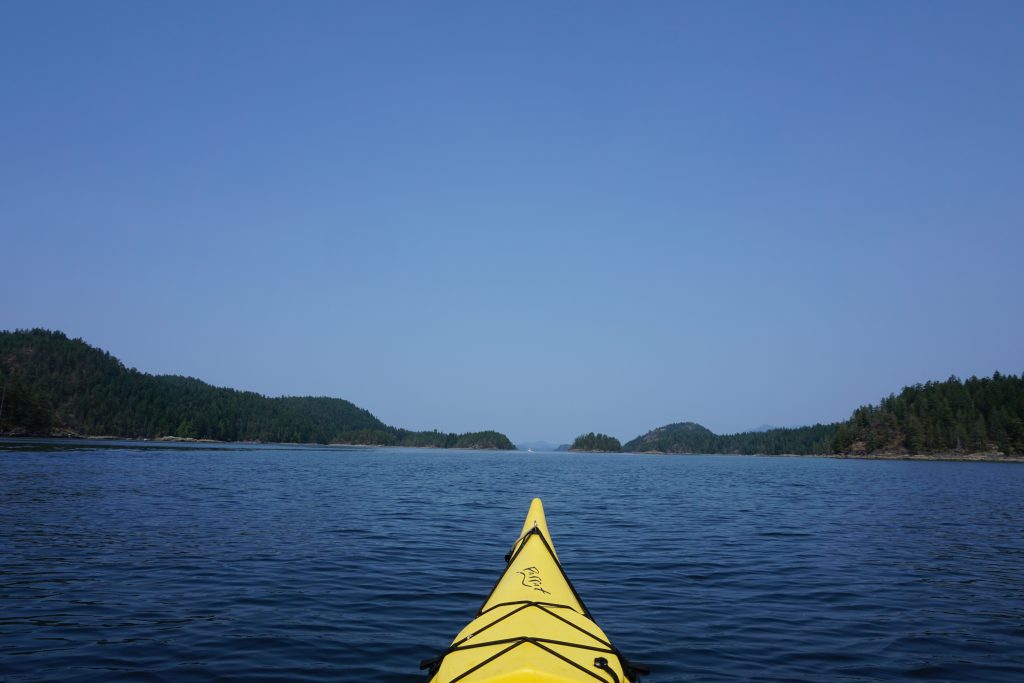
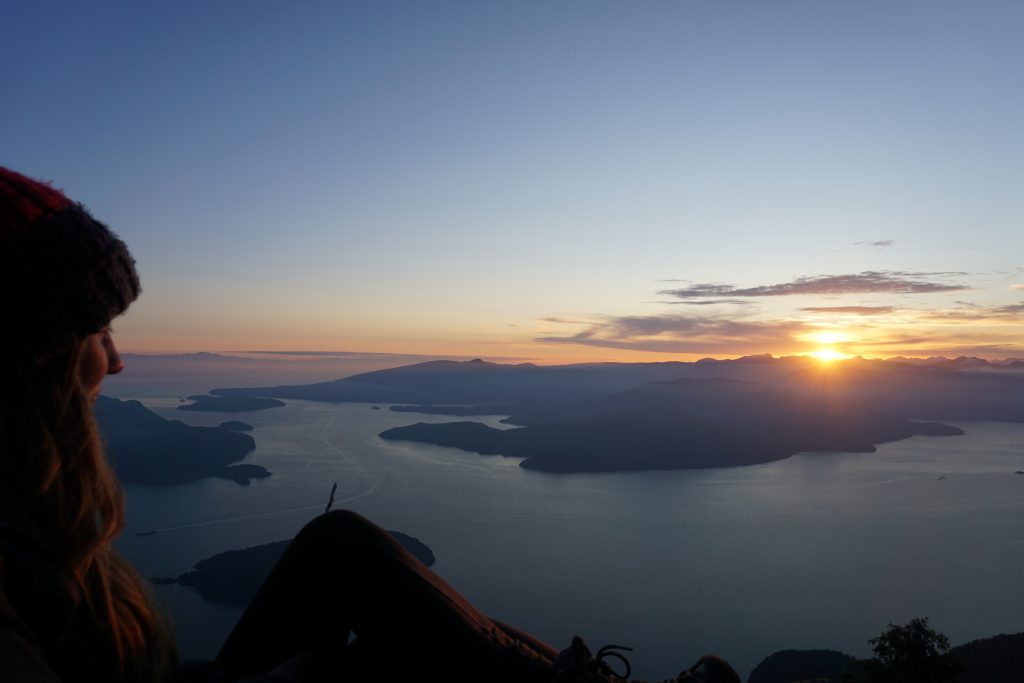
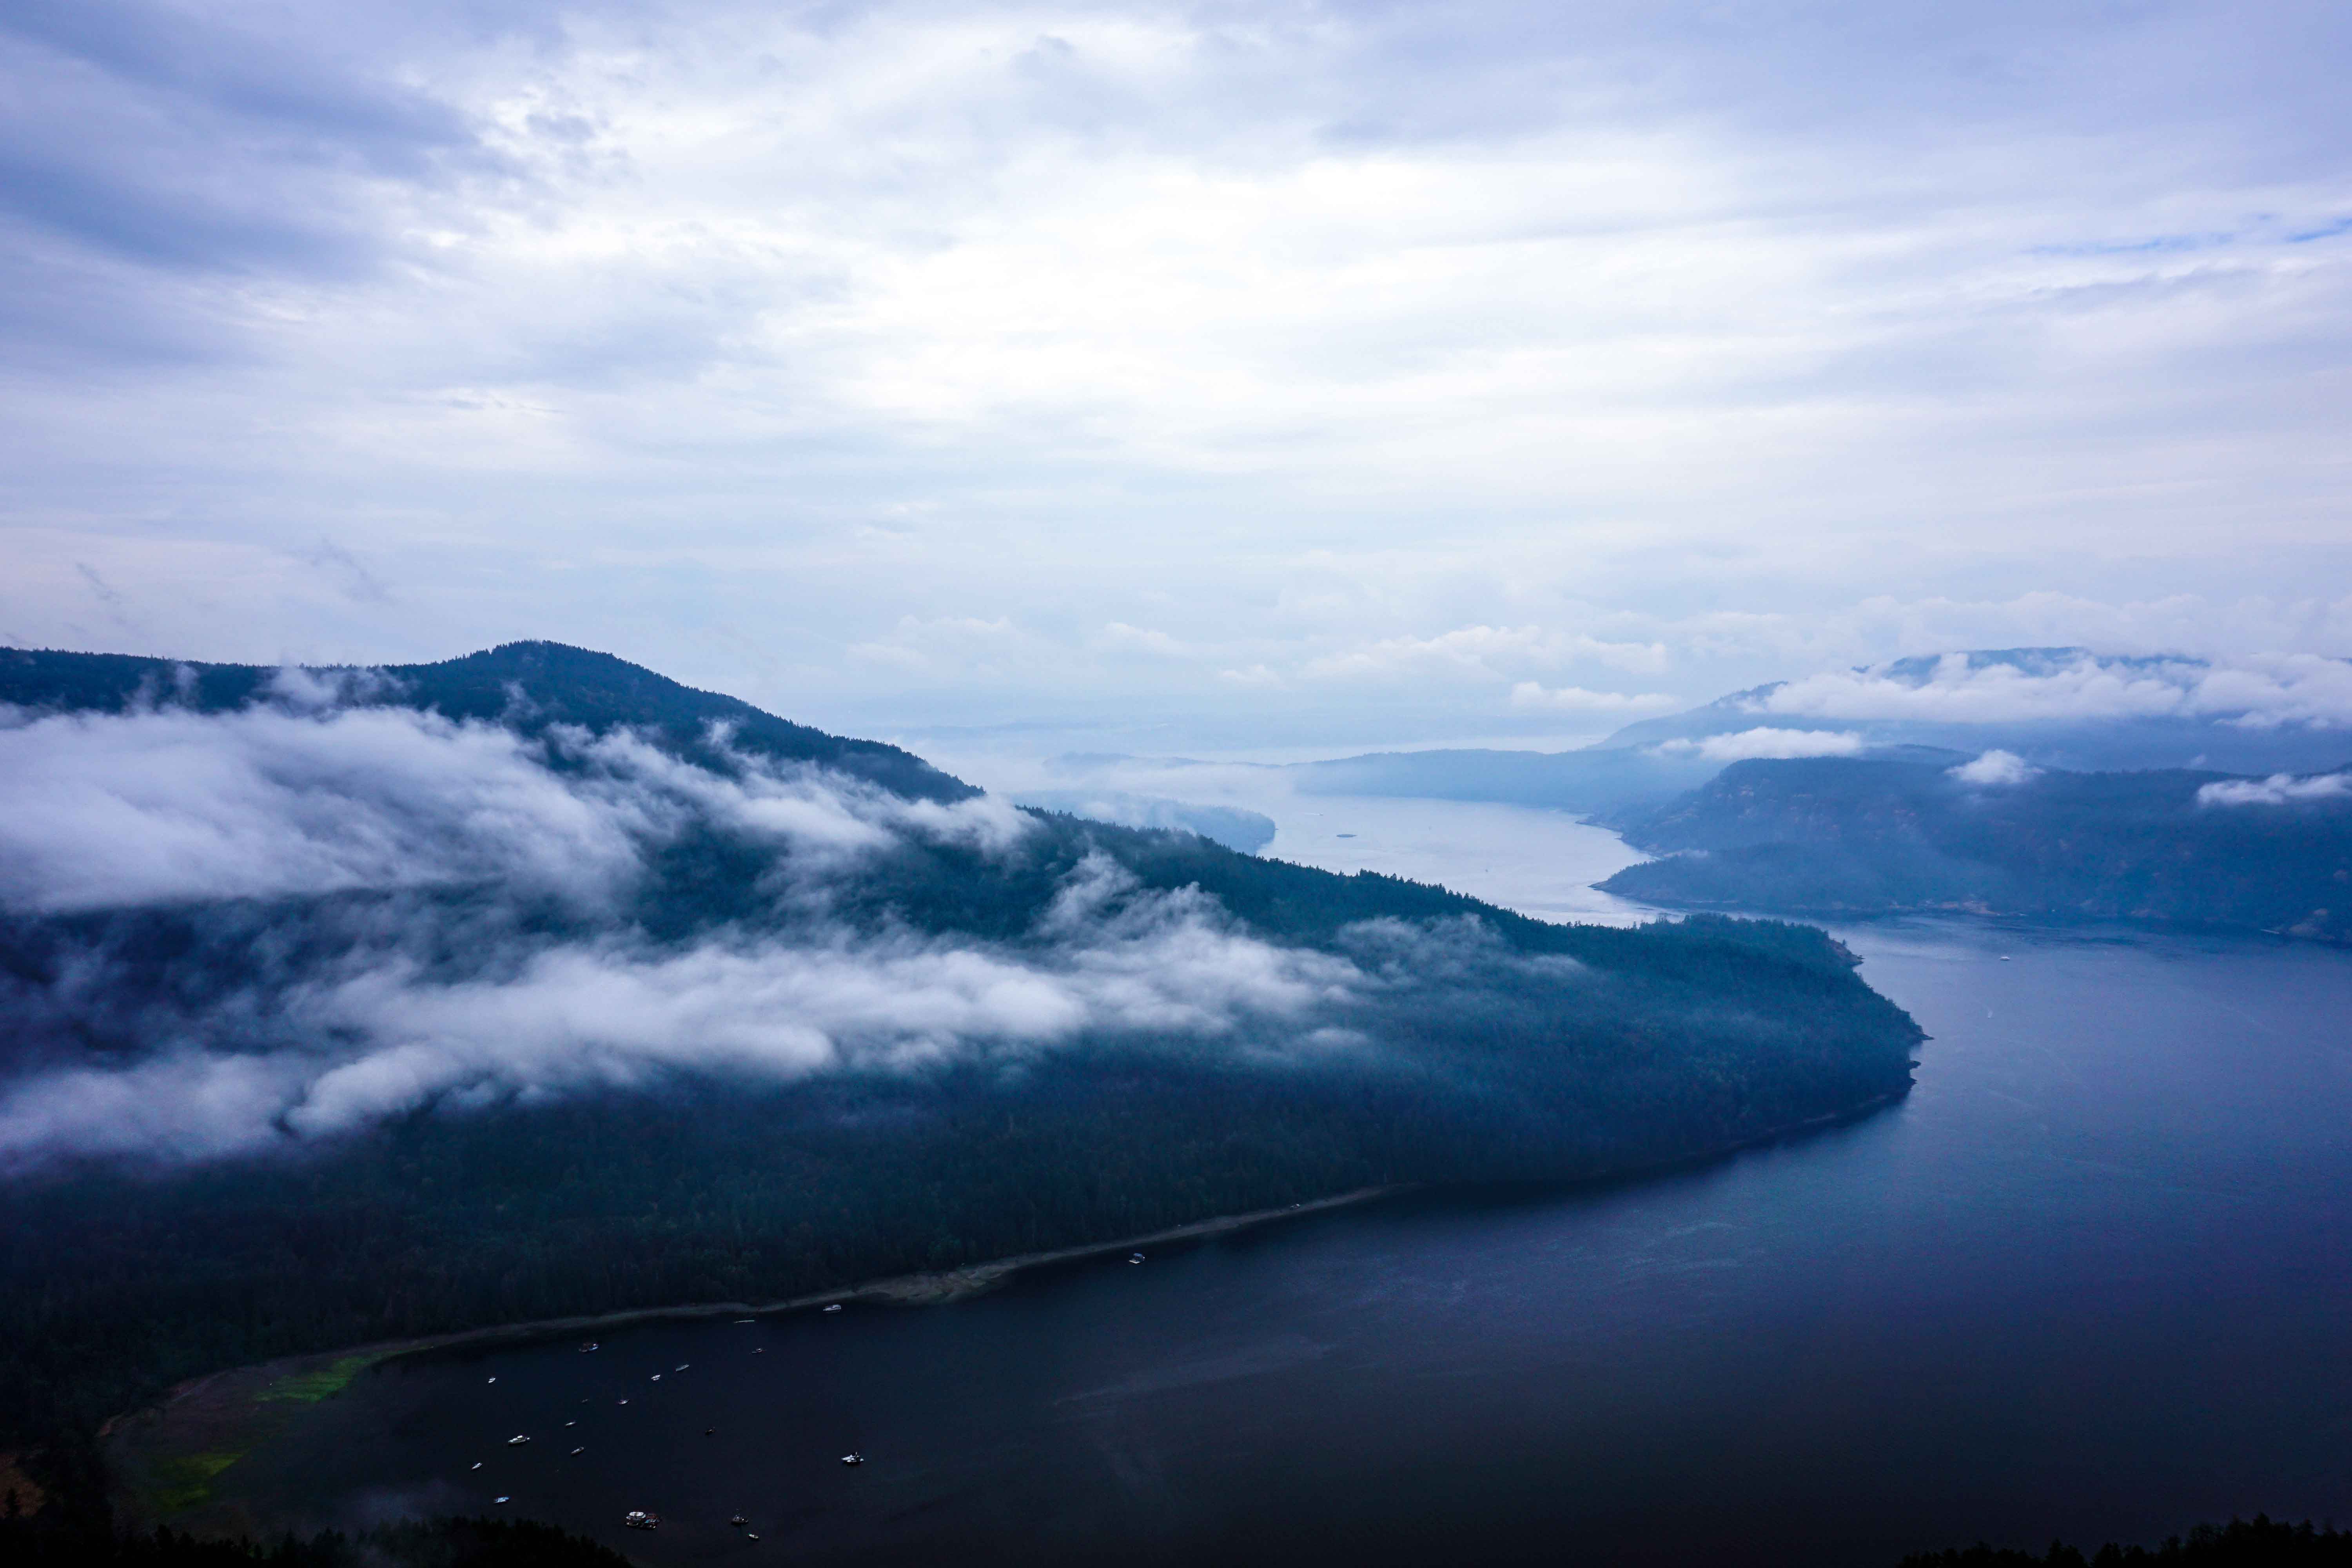
If you’ve ever driven along the Sea to Sky highway between Vancouver and Squamish, you might have looked across the Howe Sound and wondered what it’s like out there. The sea-faring vessels below look like tiny specks in the milky blue waters, and the only sign of civilisation is the plumes of smoke billowing from the Port Mellon mill.

Yet there are more facilities than you might realise. The Howe Sound is actually full of campsites complete with tent pads, toilets and bear bins. There’s nine of them altogether, and they’re all part of the Sea to Sky Marine Trail.

Sea to Sky Marine Trail
Looking across to the Sea to Sky highway

What is the Sea to Sky Marine Trail?

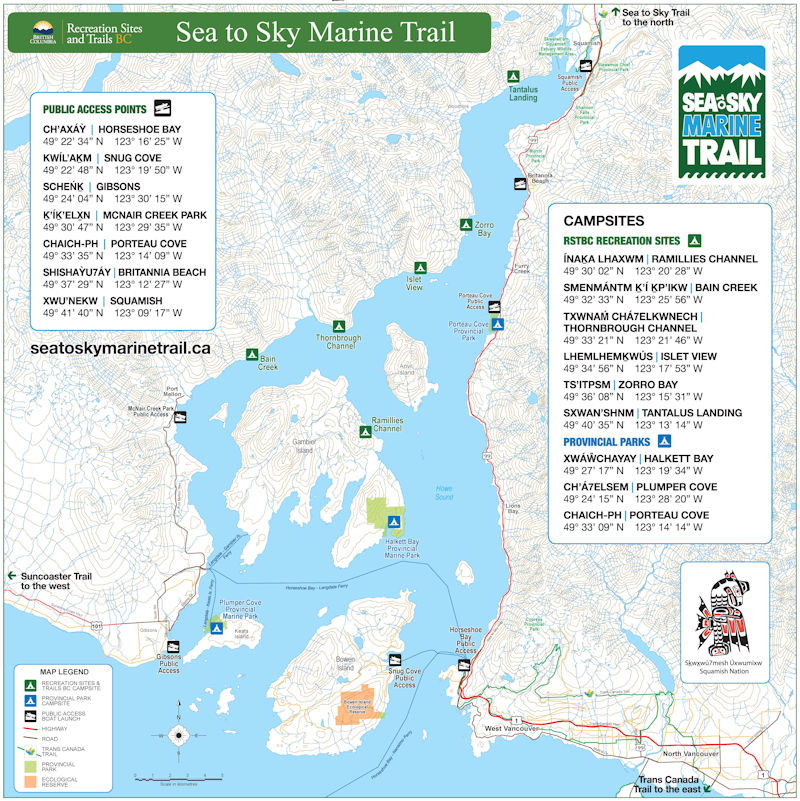
The Sea to Sky Marine Trail is a kayak/canoe route between Horseshoe Bay in West Vancouver and Squamish, B.C. It doesn’t have to be a linear route if you don’t want it to be. There are campsites dotted around the circumference of the Howe Sound, meaning you can zig zag your way along this watery wilderness as you please.

Sea to Sky Marine Trail

Campsites along the Sea to Sky Marine Trail

There are six recreation sites and three provincial park campsites to choose from. These are located on both the eastern and western shores of the Howe Sound, as well as Keats Island and Gambier Island.

The recreation sites are free to use. They were new as of 2015, thanks to the hard work of volunteers from the Sea Kayak Association of BC and BC Marine Trails.

From Squamish, the recreation sites are as follows:

  1. Tantalus Landing Recreation Site – on the western shore of the Howe Sound, 7km from Squamish
  2. Zorro Bay Recreation Site – on the western shore of the Howe Sound, 16km from Squamish
  3. Islet View Recreation Site – on the western shore of the Howe Sound, 21km from Squamish
  4. Thornbrough Recreation Site – on the western shore of the Howe Sound, 28km from Squamish
  5. Bain Creek Recreation Site – on the western shore of the Howe Sound, 34.5km from Squamish
  6. Ramillies Channel Recreation Site – on Gambier Island, 5.5km from Thornbrough access

The provincial parks either charge service fees or require a backcountry camping permit, which are available via the BC Parks website.

From Squamish, the provincial parks are as follows:

  1. Porteau Cove Provincial Park – on the eastern shore of the Howe Sound, reservations highly recommended
  2. Halkett Bay Marine Provincial Park – on Gambier Island, pre-paid backcountry permit required
  3. Plumper Cove Marine Provincial Park – on Keats Island, first-come first-serve camping with fees collected in cash on site

There are also some informal campsites, like the one on Anvil Island. These are on public land, but the facilities are not developed.

Sea to Sky Marine Trail
Coming in to land at Zorro Bay

What are the facilities like?

All the campsites have tent sites, bear caches and toilets. The best way to check what the facilities are like is to use the BC Marine Trails map. Zoom in on the Howe Sound and you’ll see each campsite is denoted with a green symbol. Read through the landing comments, camp comments and other comments.

Sea to Sky Marine Trail
The beautiful Howe Sound

Where can I launch from?

The BC Marine Trails map also shows the possible launch sites. Popular options are:

  • Horseshoe Bay
  • Brunswick Beach
  • Porteau Cove
  • Britannia Beach
  • Squamish oceanfront
  • Langdale
  • Gibsons

There are plenty of other launch sites available, including Lions Bay, McNair Creek and various options around West Vancouver. Be sure to check the parking restrictions before you go, especially if you’re leaving a vehicle overnight.

Are there any water sources?

The comments attached to each campsite on the BC Marine Trails map state whether or not there’s water available. My research found that:

  • Tantalus Landing Recreation Site – has a year-round water source
  • Zorro Bay Recreation Site – has a seasonal stream located 200m north, boat access only
  • Islet View Recreation Site – has a seasonal creek located 250m south, boat access only
  • Thornbrough Recreation Site – has a seasonal creek
  • Bain Creek Recreation Site – has a year-round water source
  • Ramillies Channel Recreation Site – has a year-round water source one nautical mile north of Gambier Creek
  • Porteau Cove – has water taps available
  • Halkett Bay – may have water at a seasonal creek
  • Plumper Cove – has water at a hand pump seasonally

Three nights on the Sea to Sky Marine Trail

The beauty of the Sea to Sky Marine Trail is that you can choose your own itinerary. Even if you have just one night, you could easily make it to a campsite, depending on where you launch from.

Day 1 – Britannia Beach to Zorro Bay

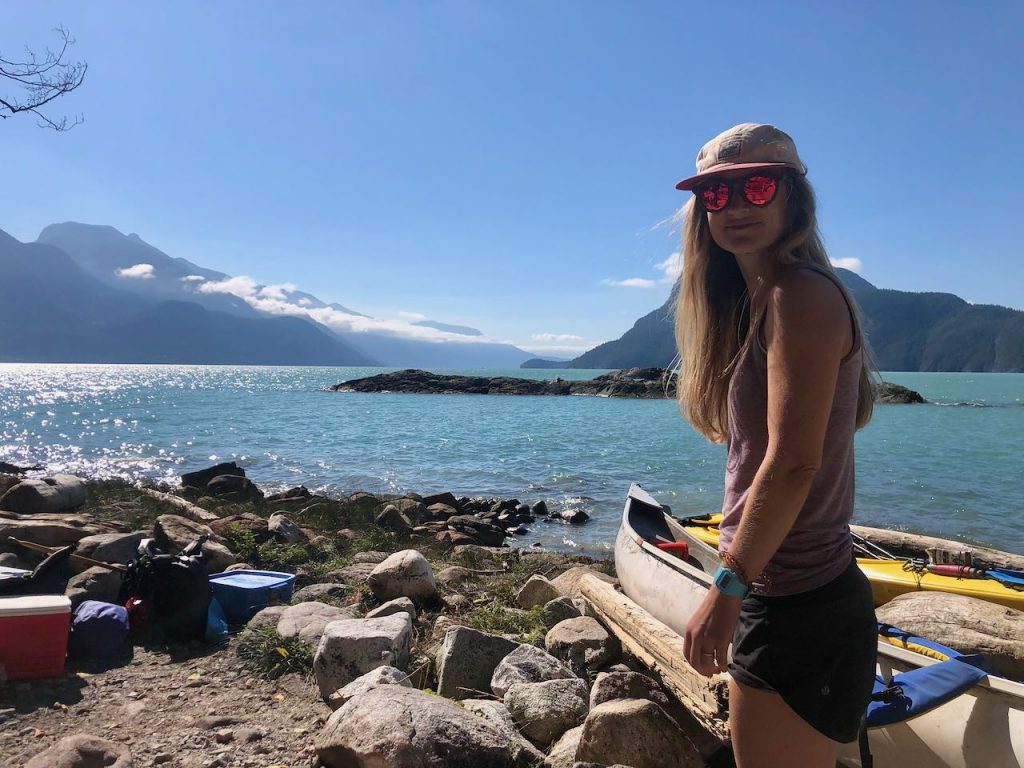
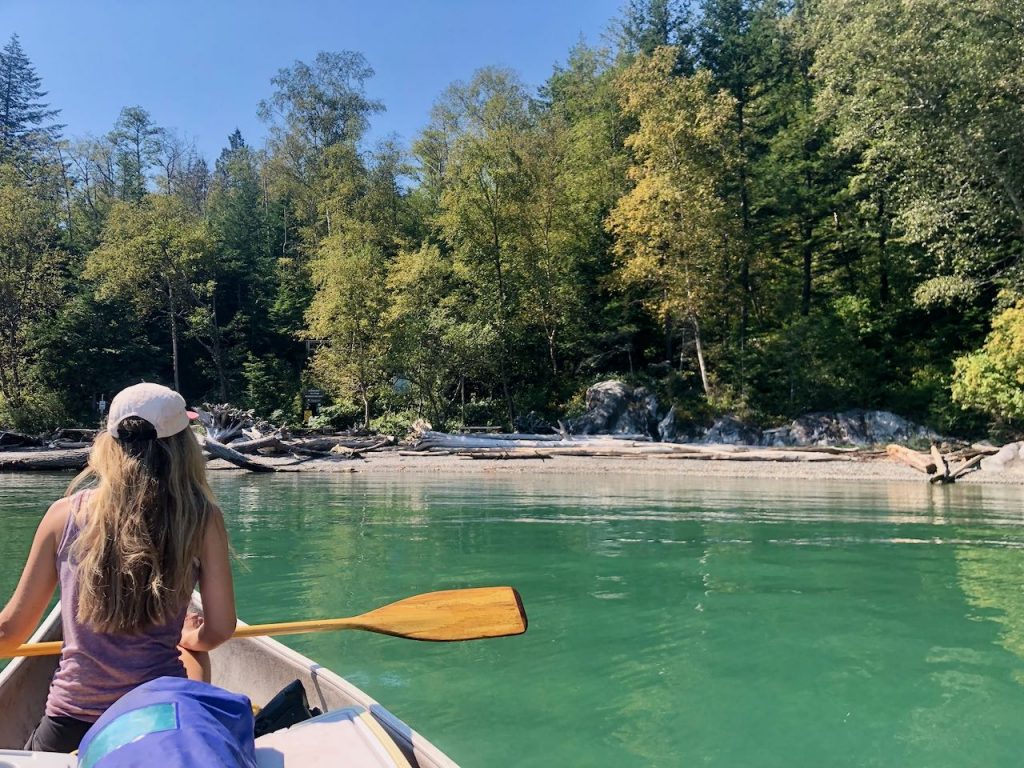
As it was, we had three nights to spare. The plan changed significantly when we decided to borrow a canoe, rather than rent a sea kayak. (Rentals are available from places like Valhalla Pure Outfitters and Squamish Watersports). Being in a much slower-moving vessel, we chose to launch from Britannia Beach and head to Zorro Bay.

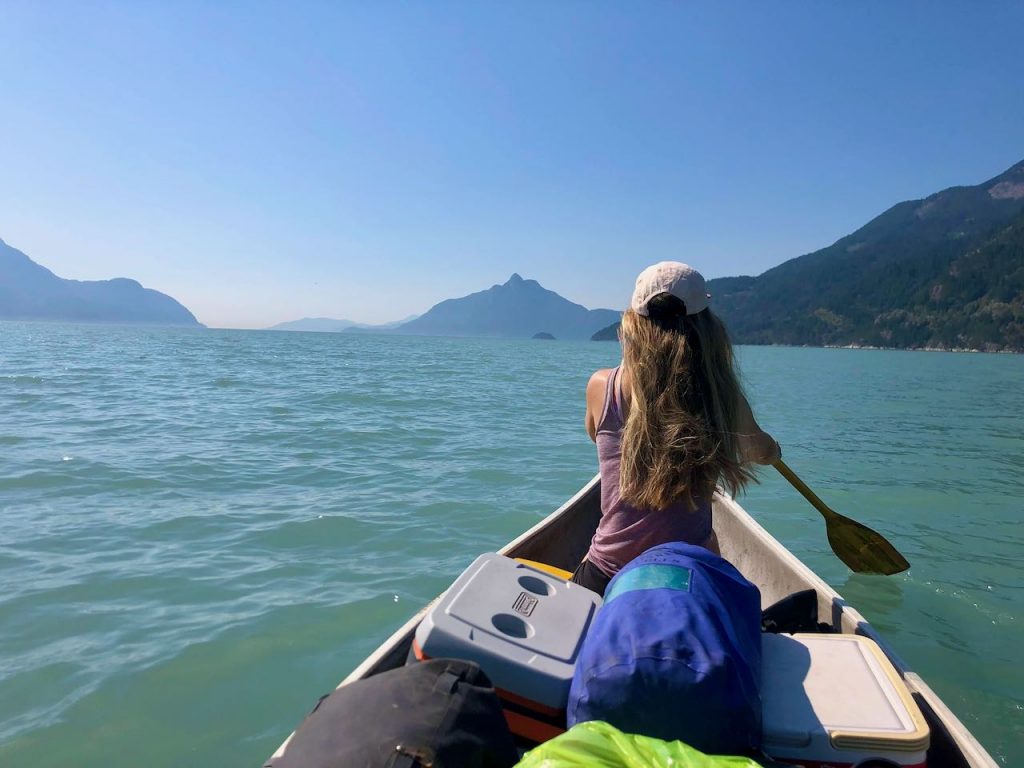
We timed our departure for slack tide, feeling concerned about having to leave the safety of the shore and cross the channel. The Howe Sound is notorious for winds which whip down through the valley. This is something to be very, very wary of when planning a trip in this area. Always check the tide times and the weather forecast, paying close attention to the wind.

There was a lot of confusion in Britannia as we figured out where to put in. In fact, there’s a community dock directly across from the mine museum. You have to cross the railway tracks on the southbound-side of the highway. There’s a sign that says private property, but actually if you swing a hard right after the railway tracks and drive past the art gallery, you’ll reach a slipway. We weren’t sure if we were allowed to park in the adjacent parking lot, but we left our car there for three nights and it wasn’t towed.

Sea to Sky Marine Trail
Launching from Britannia Beach community dock

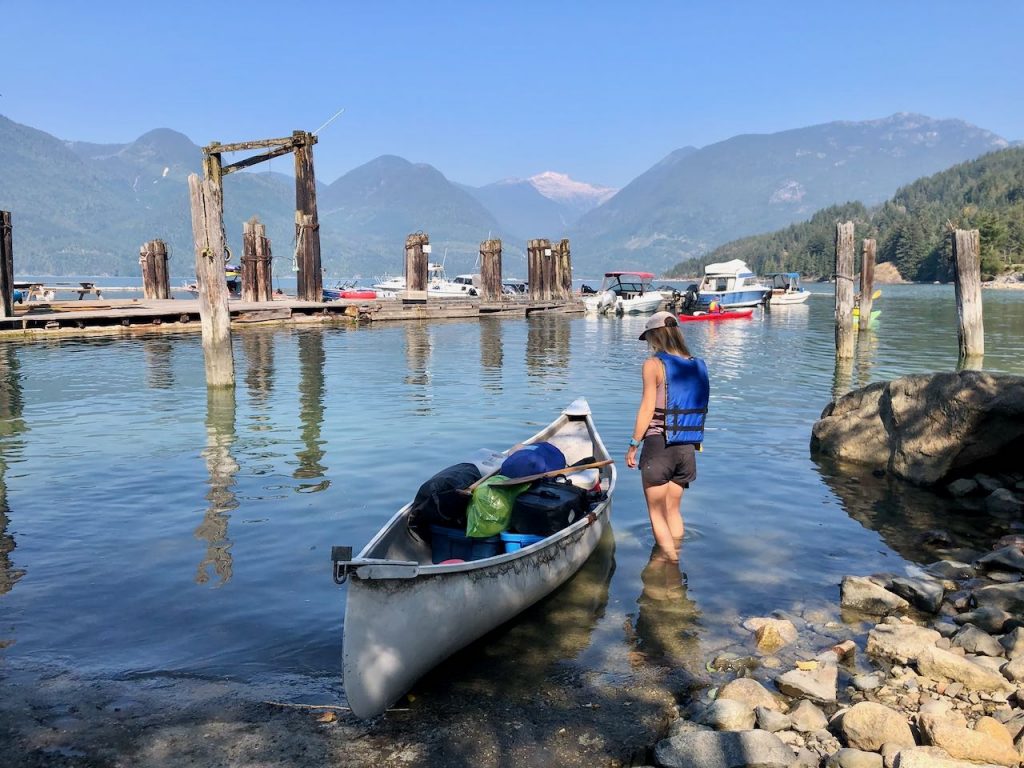
We initially stopped in a gravel lot next to the mine museum on the northbound-side of the highway. A woman working on a nearby construction site saw that we were about to portage all our stuff across the road and came to inform us that it wasn’t necessary. She also expressed some alarm that we were crossing the Howe Sound in a canoe. “That’s a long way in a canoe lady”, she bellowed. She also said that in all her 12 years of living in Britannia Beach, she’d never heard of anyone paddling to Zorro Bay in a canoe. I can’t believe that’s true, but in any event, we were committed. We were also confident that we had all the necessary safety gear and trip planning under our belts: life jackets, flares, satellite communication device, bilge, slack tide, calm winds, and favourable weather conditions.

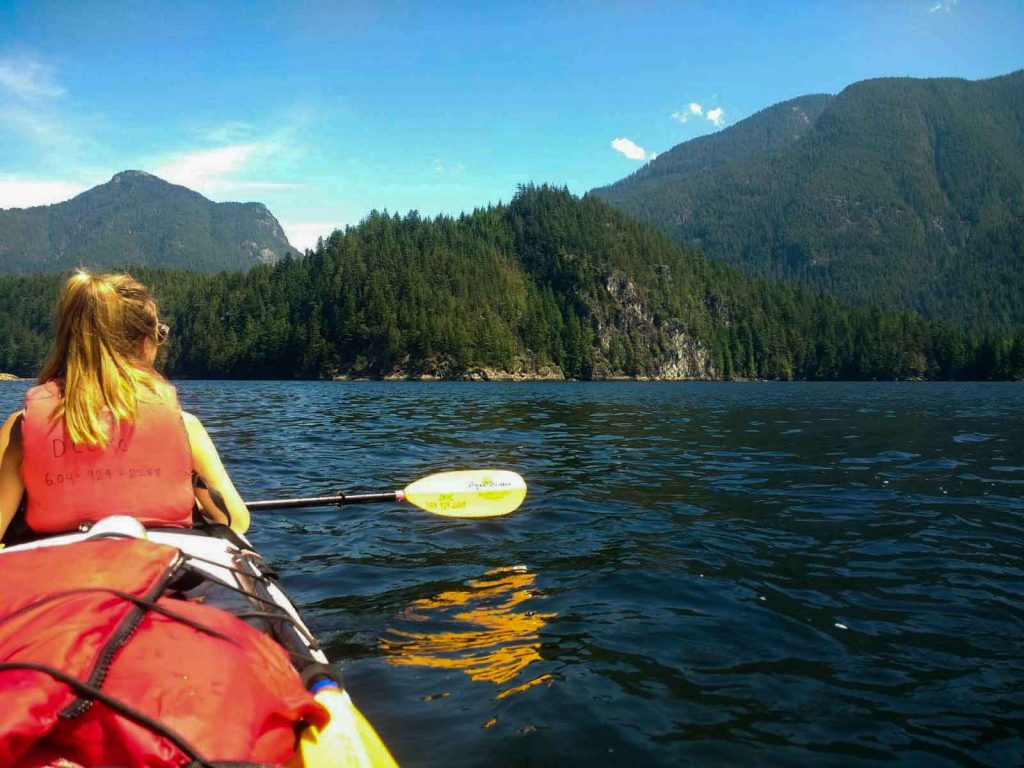
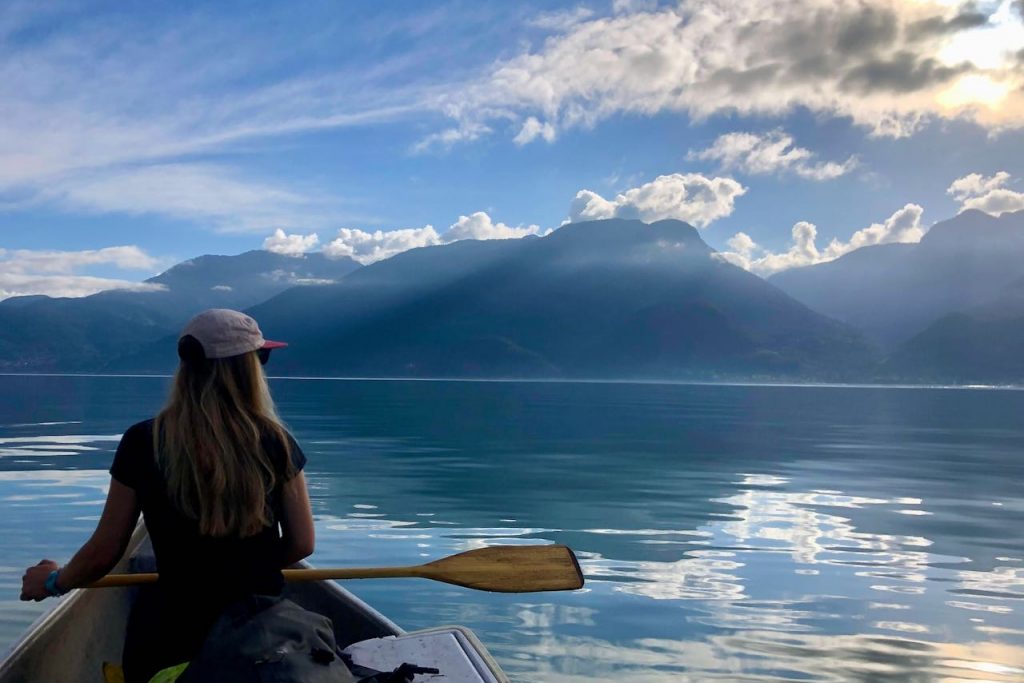
Even so, it was with some anxiety that we launched from Britannia and struck out into the ocean blue. It took just over an hour of paddling to reach Zorro Bay. It was plain sailing, and a few harbour porpoises even joined us at one point.

Sea to Sky Marine Trail
Crossing the Howe Sound

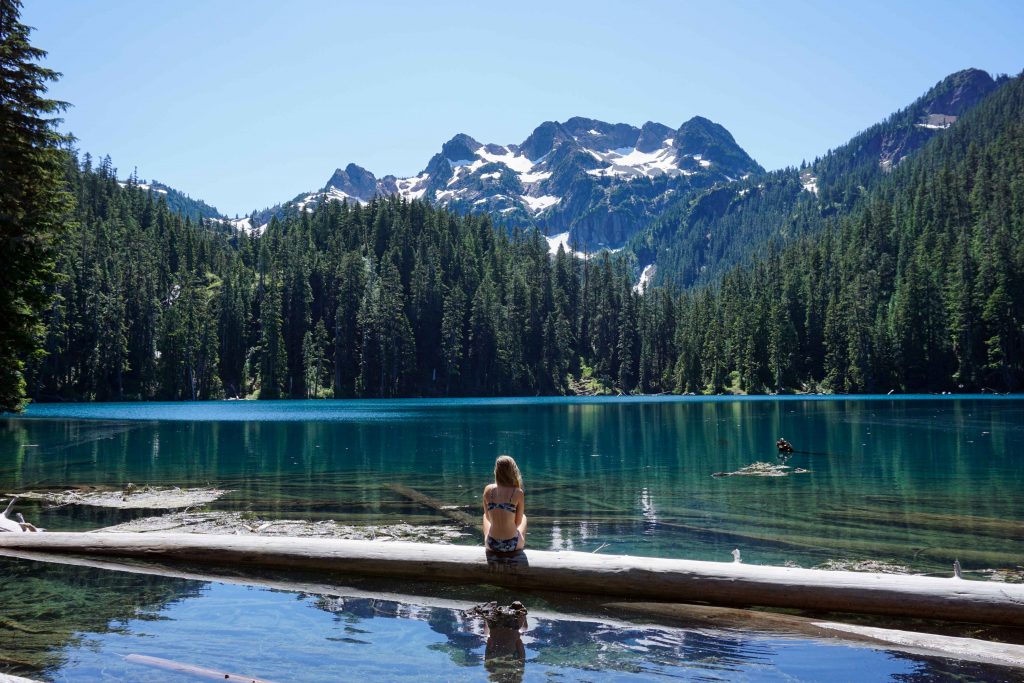
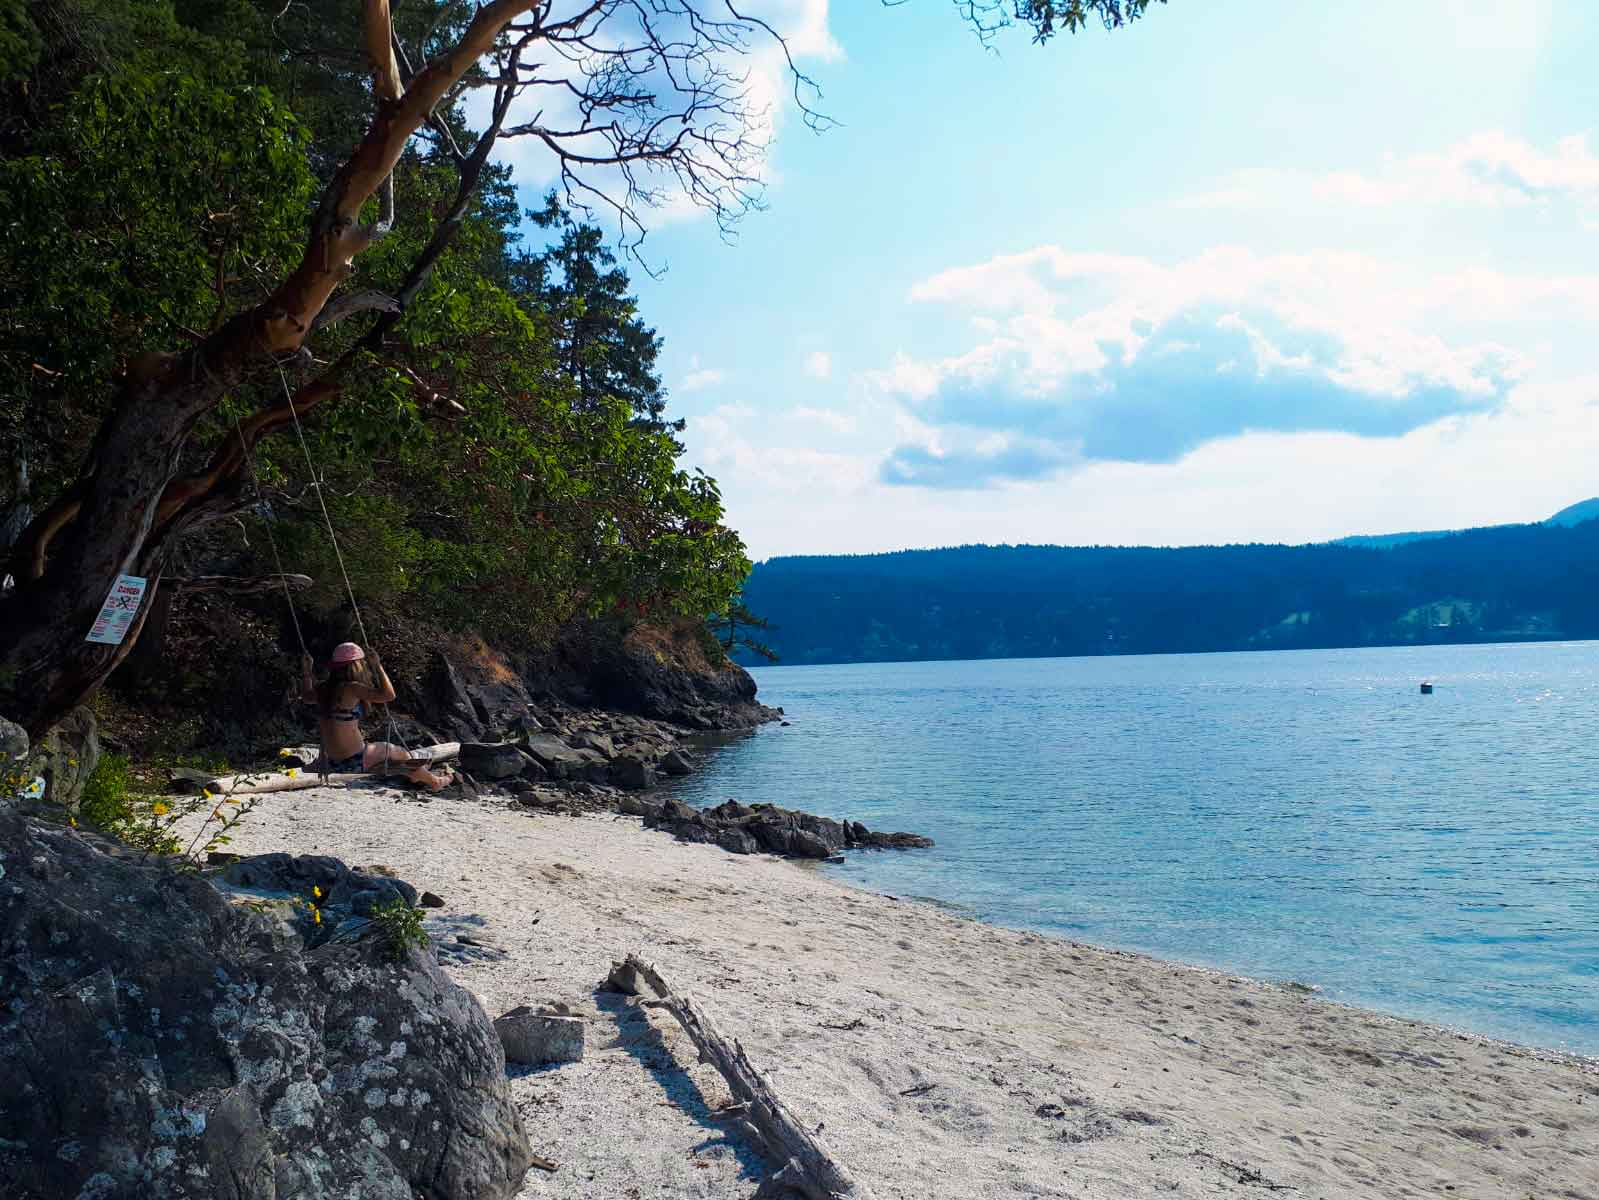
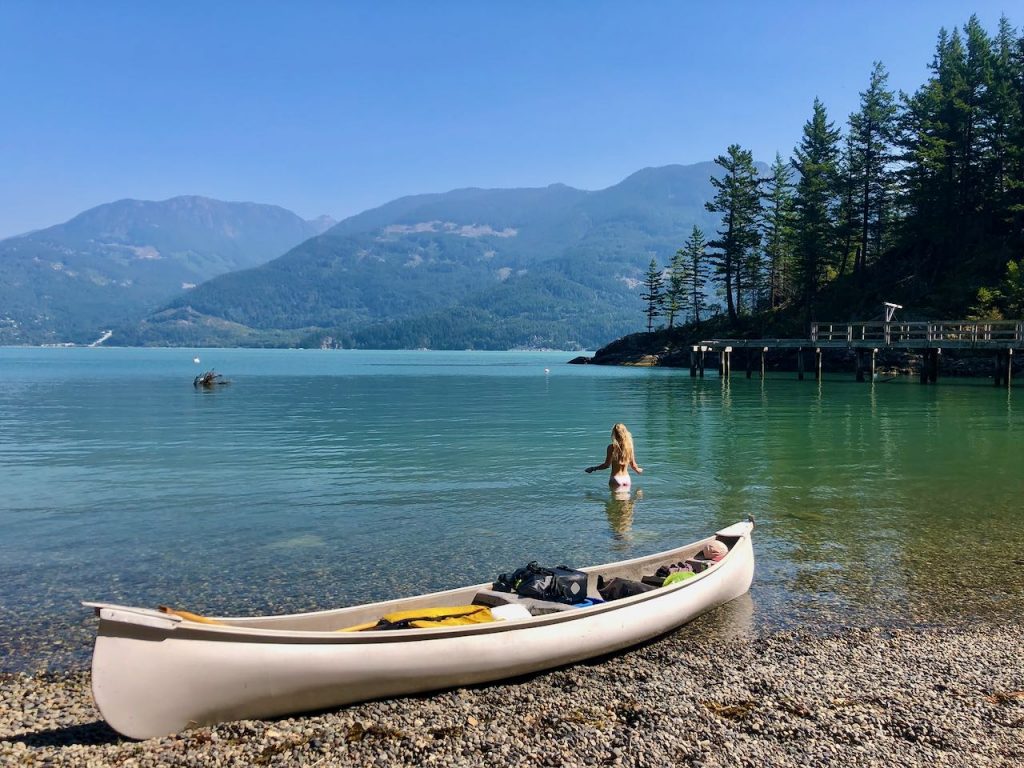
Zorro Bay is obvious from the water as there are a few white and orange government buoys floating in the bay, plus a slightly ramshackle-looking wharf and derelict cabin overlooking the beach.

Zorro Bay on the Sea to Sky Marine Trail
Zorro Bay

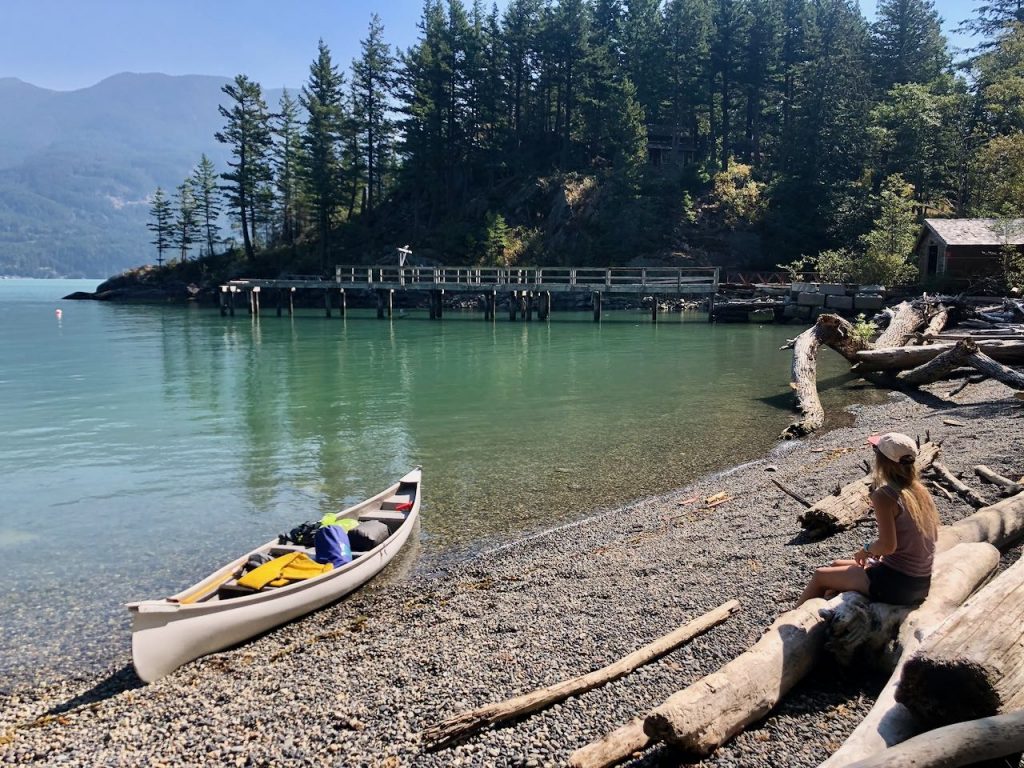
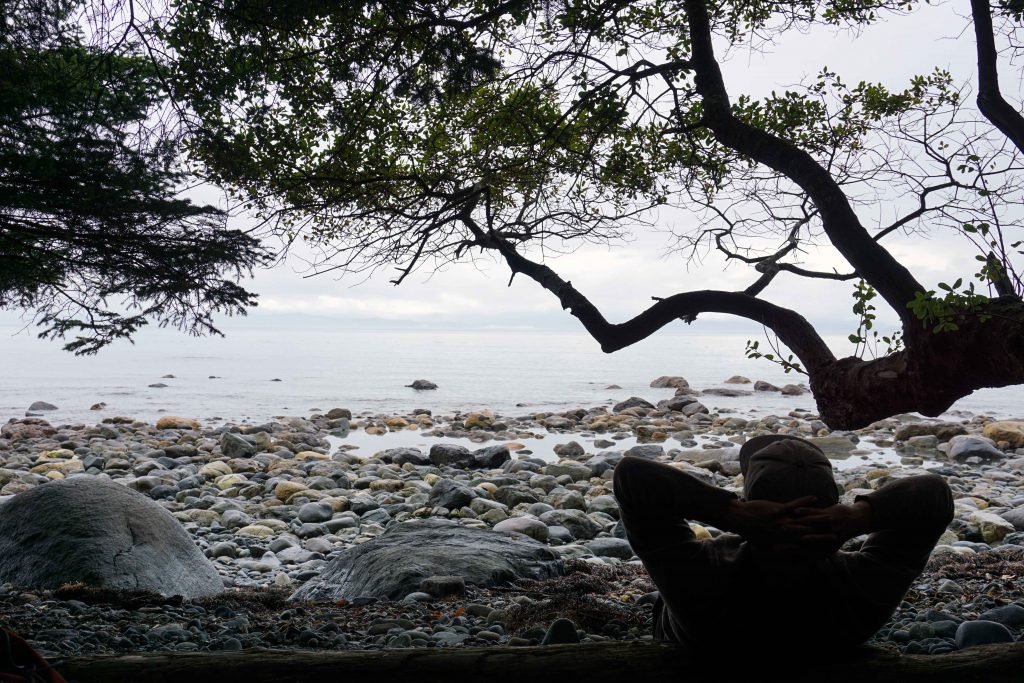
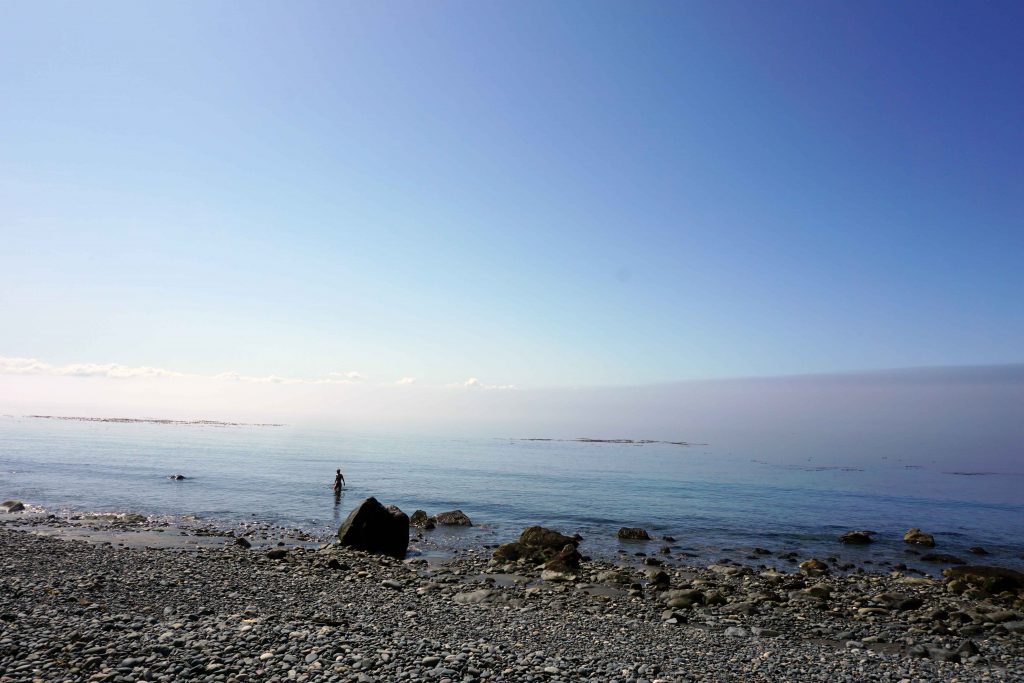
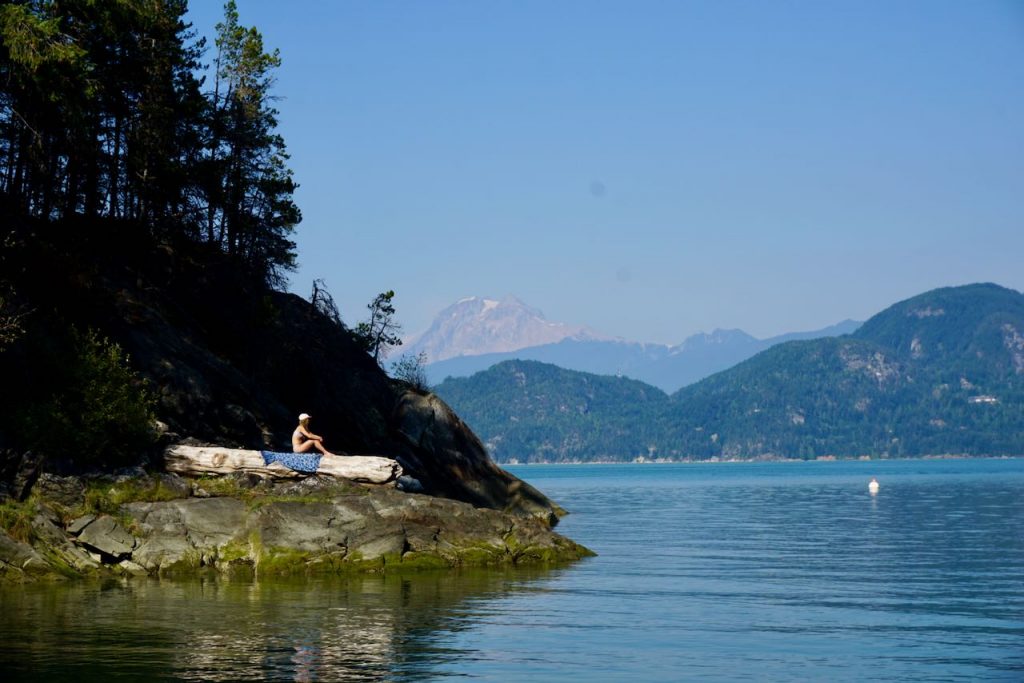
Landing is very easy north of the wharf. There are nine tent sites scattered around a steep slope above the beach. The bay is great for swimming, and although the beach loses sun in the afternoon, we clambered out onto the rocks to soak up the last of the rays. You get a great view of Mount Atwell from this vantage point too.

Sea to Sky Marine Trail
Mount Atwell in the distance

Our friends arrived later in the day, having kayaked from Squamish. The other campers were all boat users who had either motored or sailed to the anchorage. One guy warned us that he’d stood on a rusty nail by the wharf two weeks’ earlier, requiring an emergency trip to hospital for a tetanus shot. So, we kept our shoes on and watched our step.

Having arrived around lunchtime, we spent the rest of the day soaking up the glorious weather. The campsite itself is encased by private land, so you can’t roam very far. The other side of the headland has a tempting looking beach, but it’s off limits – as is the cabin.

Sea to Sky Marine Trail
Zorro Bay is good for swimming

We did go in search of the water source, which I’d read is 200m north of Zorro Bay and can only be accessed by boat. We found what we think might have been a stream, as evidenced by the damp, mossy rocks. However, it was completely dry after a long, hot summer.

Day 2 – Zorro Bay to Islet View

The lack of water at Zorro Bay meant it was a priority to find somewhere to refill. Now a party of four – one canoe and one double kayak – we struck off in the direction of Islet View. The winds had ramped up a notch and it was pretty hairy paddling once we left the safety of the bay. There was a moment when I didn’t think we’d make it, as the canoe was bouncing around in the waves and we weren’t making any headway. We kept our heads down, gritted our teeth and kept paddling.

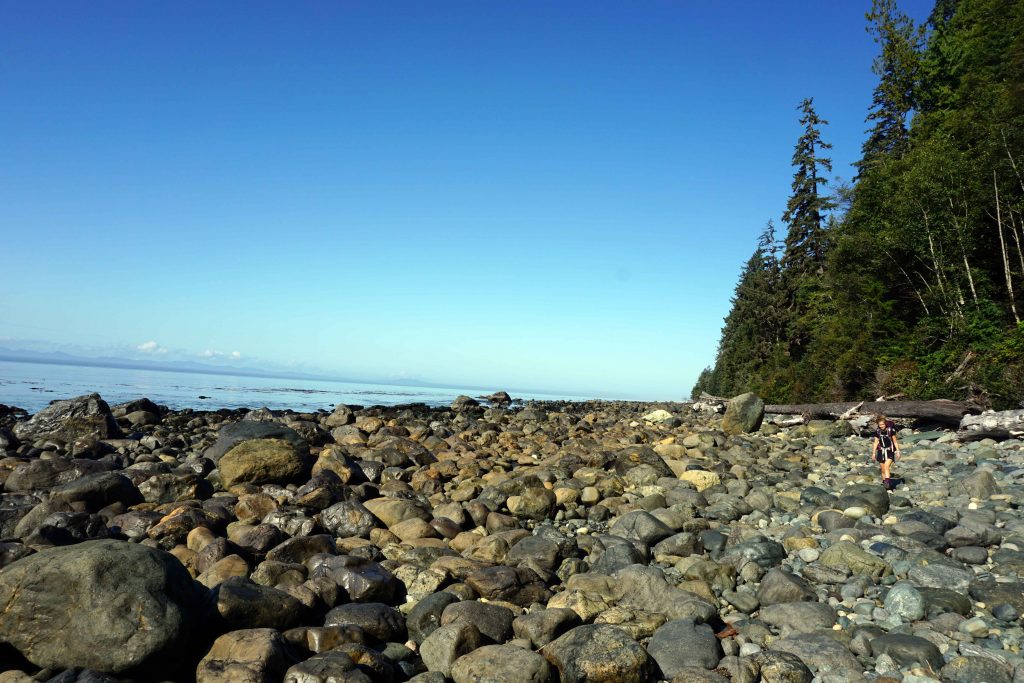
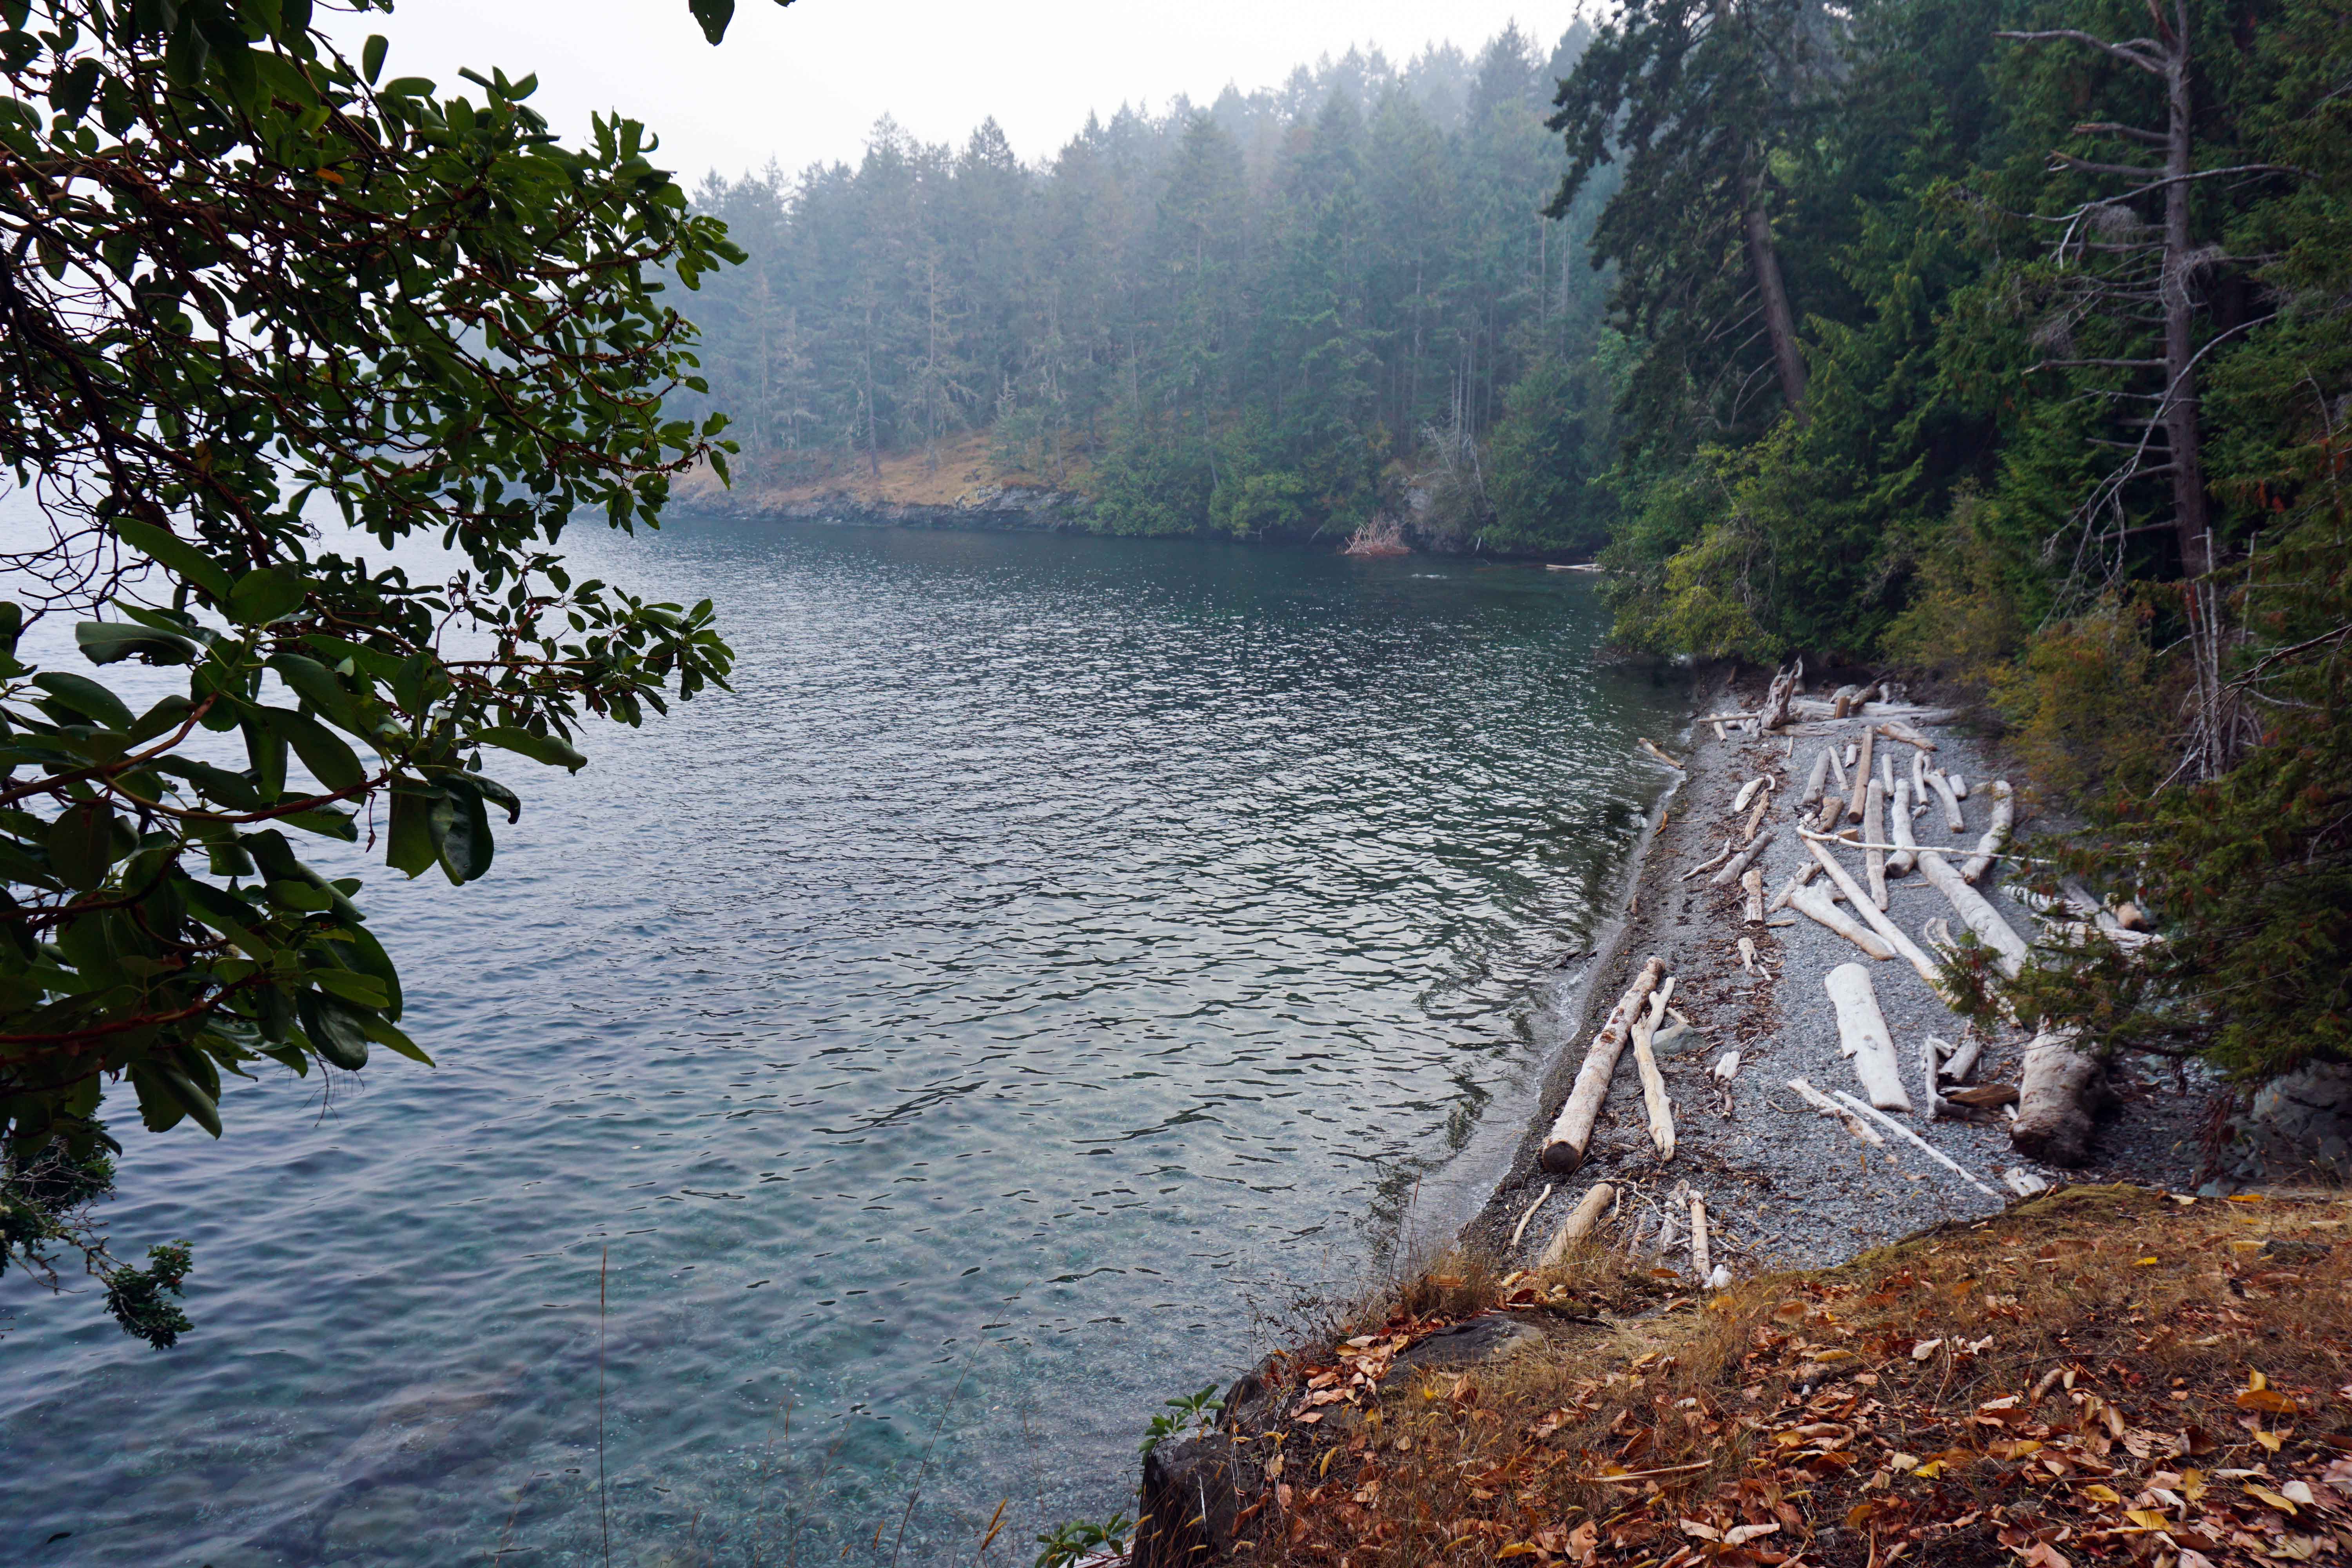
Things became easier once we rounded a point and began heading in a westerly direction. Shortly after we reached Islet View. A landing has been carved into the stone beach, but it’s hard to see in high tide – especially when the waves are crashing against the shore, as they were. It can take a bit of navigating, and later we helped a couple of kayakers who were struggling to land without smashing their hull against the rocks.

Sea to Sky Marine Trail
The landing at Islet View at low tide

We ate some food while our friends in the kayak went in search of water. We were concerned that we might have to continue on to Bain Creek or Ramillies Channel, both of which are said to have year-round water sources. However, that wasn’t an appealing prospect thanks to the wind. Happily, they discovered a ‘waterfall’ trickling down off some rocks about 250m south of Islet View. It’s boat access only, and then you have to clamber almost vertically up some wet, slippery rocks. It would likely be difficult to land at high tide, and choppy seas also make it a bit of a challenge.

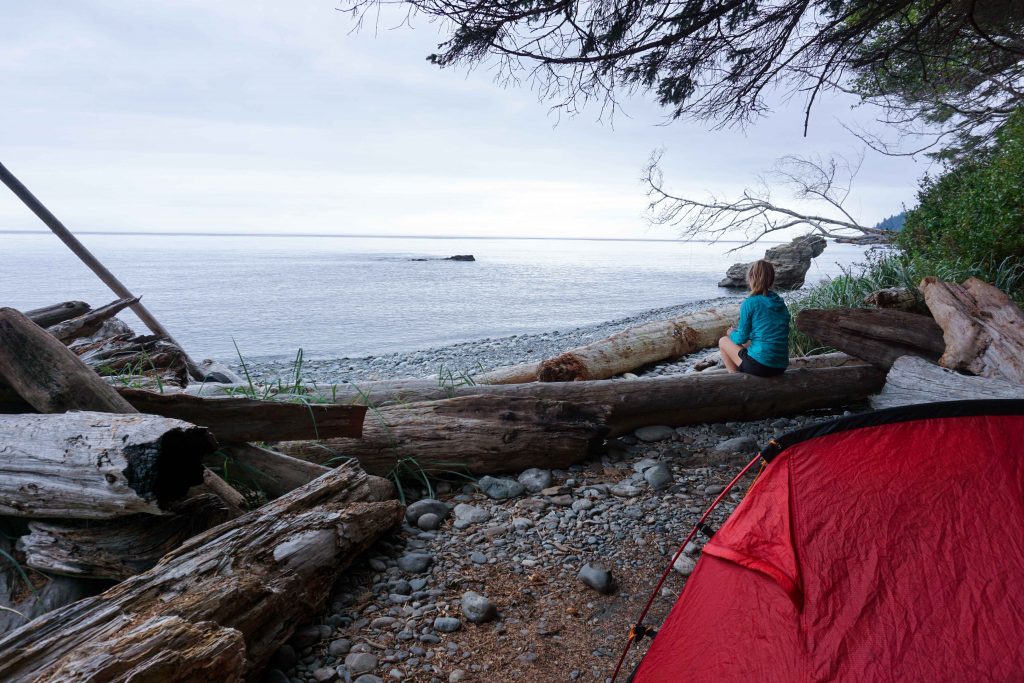
Satisfied that we had a water source nearby, we decided to set up camp at Islet View and enjoy what was turning out to be another scorcher. The tide mark was surprising high up the beach, so we hauled the vessels right up to the treeline and tied them to an overhanging branch.

The tent sites are amongst the trees, some of which are wooden platforms and some of which are clearings on the ground. There’s a particularly stunning pitch at the end of the campsite with views across the Howe Sound. The pit toilet is a composting toilet, similar to those used on the Appalachian Trail. It’s located up a steep slope, but it’s probably one of the best smelling outhouses you’ll ever use! The bear cache is quite small. We couldn’t fit all our treats in it, so had to scale a tree to hang bear bag.

Sea to Sky Marine Trail
Tent platform at Islet View Recreation Site

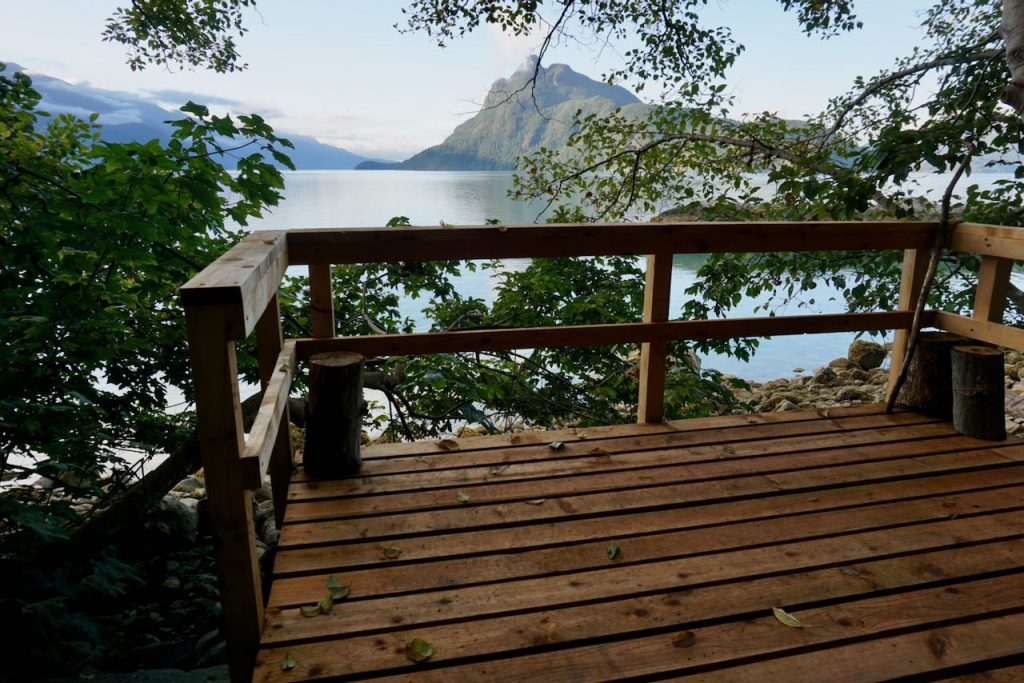
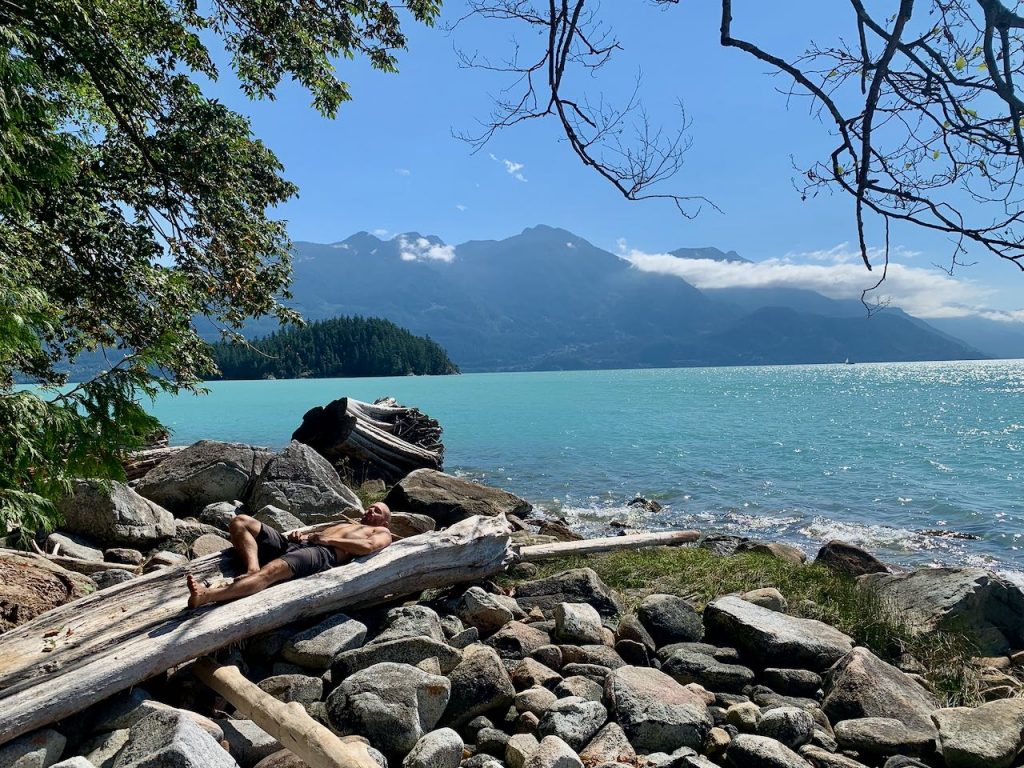
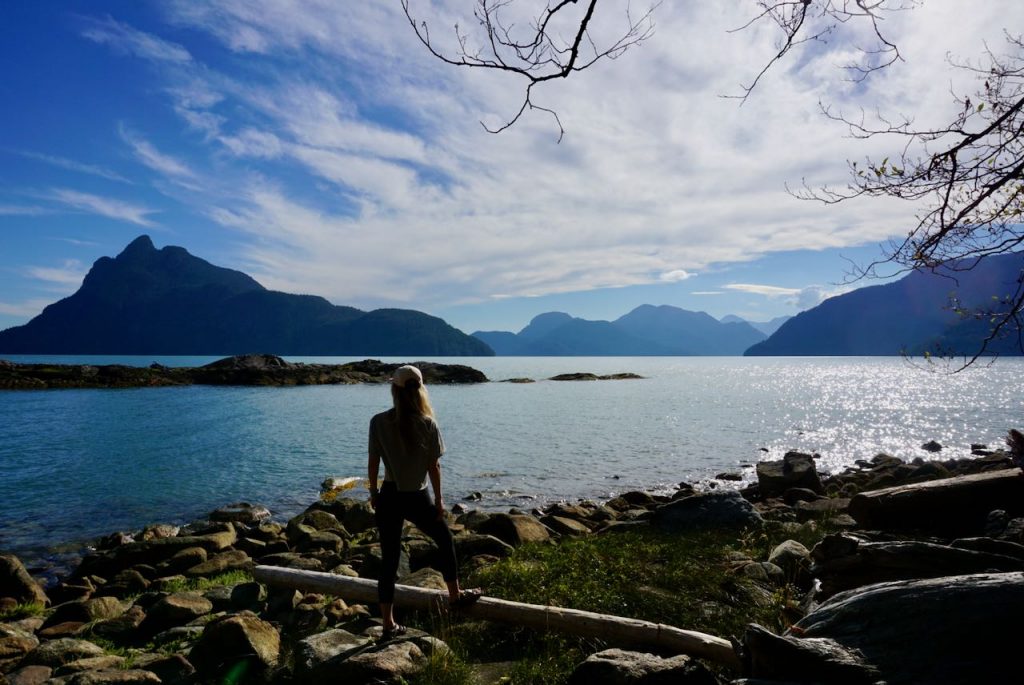
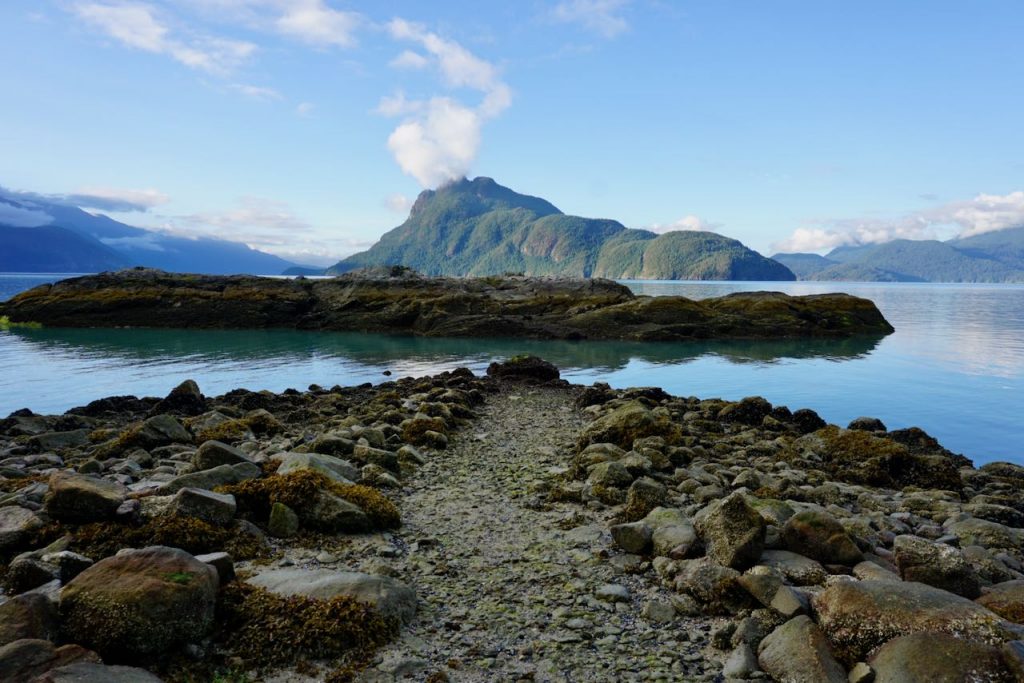
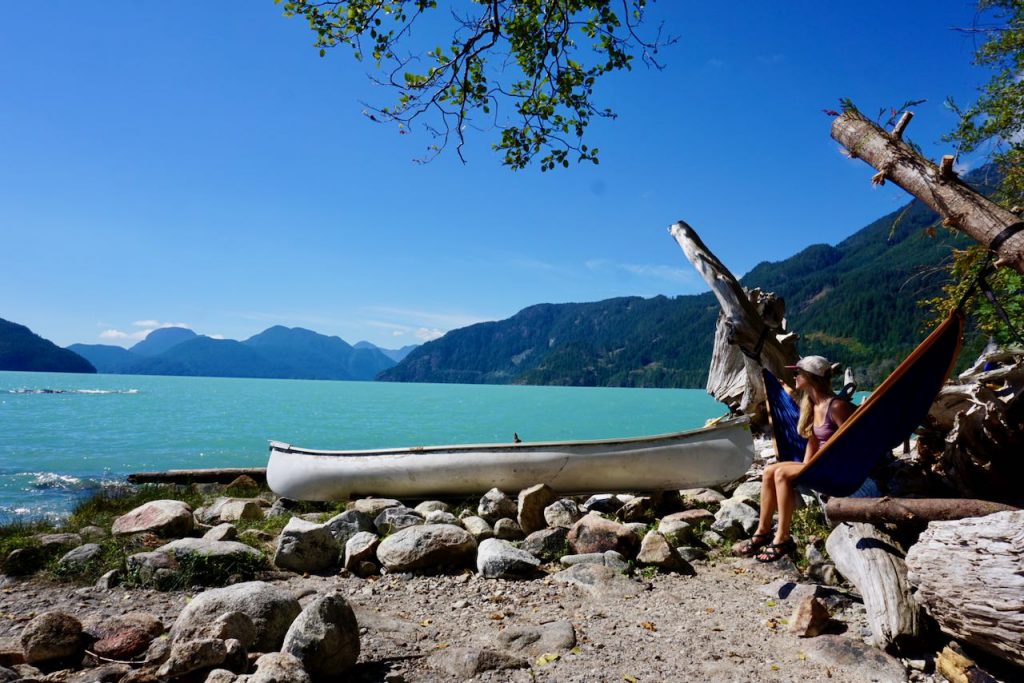
There’s a little stony seating area in between the trees and the ocean where people have made makeshift benches and camp kitchens. It’s a great place to string up a hammock and watch the seals on the rocky outcrop opposite. While the swimming isn’t as good as at Zorro Bay, the views are definitely superior. From this aspect, you can’t see the mine, the mill or hear the highway. Instead, there’s just the bright blue sea peppered with islands, including Anvil, Gambier and Kwum Kwum.

Sea to Sky Marine Trail
Relaxing at Islet View Recreation Site

By the evening we realised that the mosquitoes at Islet View are numerous – and savage, as they always are in Canada. Campfires were banned, and they were so persistent that we all retreated to our beds early in order to escape.
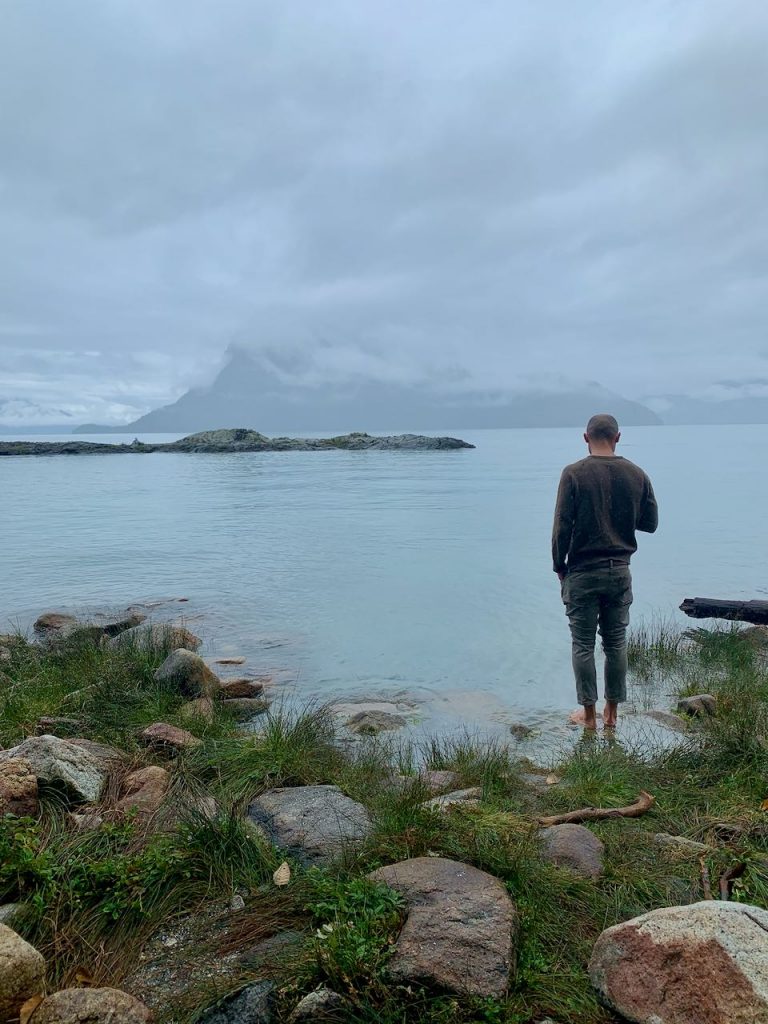
Day 3 – Islet View

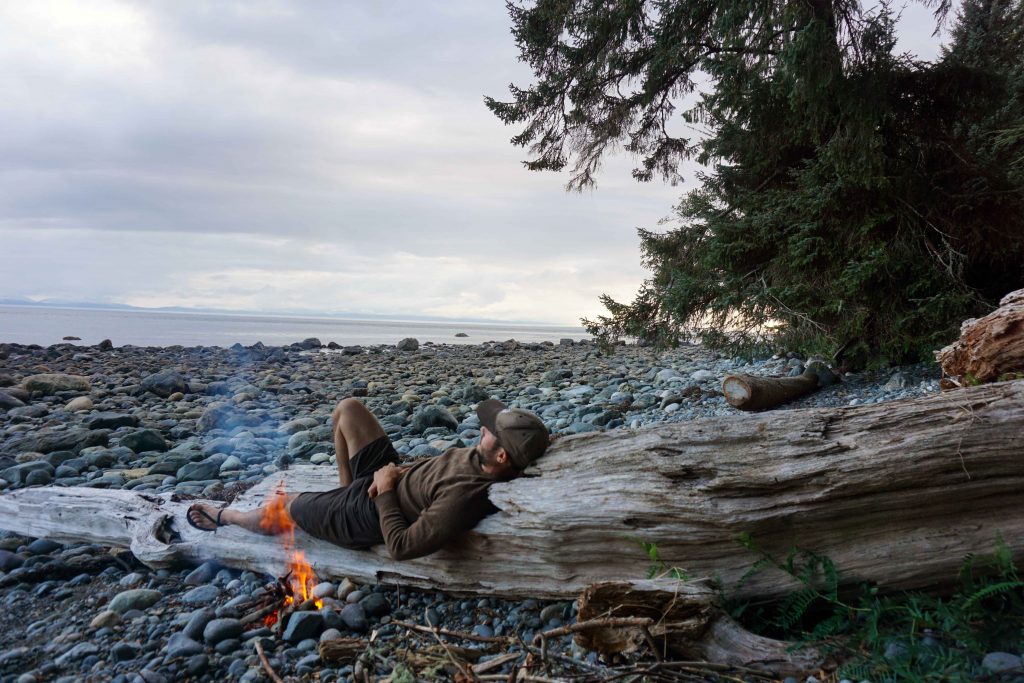
Rain was forecast and it landed right on time at 6.30am. We had the foresight to set up a tarp over the picnic table, so we had somewhere dry to sit. None of us fancied paddling in the inclement weather, so we had a lazy day of reading, snoozing and drink copious amounts of tea.

Sea to Sky Marine Trail
Rainy day on the Howe Sound

The rain cleared later in the afternoon, so we paddled up to the water source to refill our receptacles. A few kayakers dropped by but continued onwards, so it was just the four of us for the night. And the mosquitoes, of course, which hadn’t been deterred by the rain. We were all covered in bites and being driven slightly insane.

There was a loud bang during the day, and another in the dead of night, both of which sounded like a tree falling.

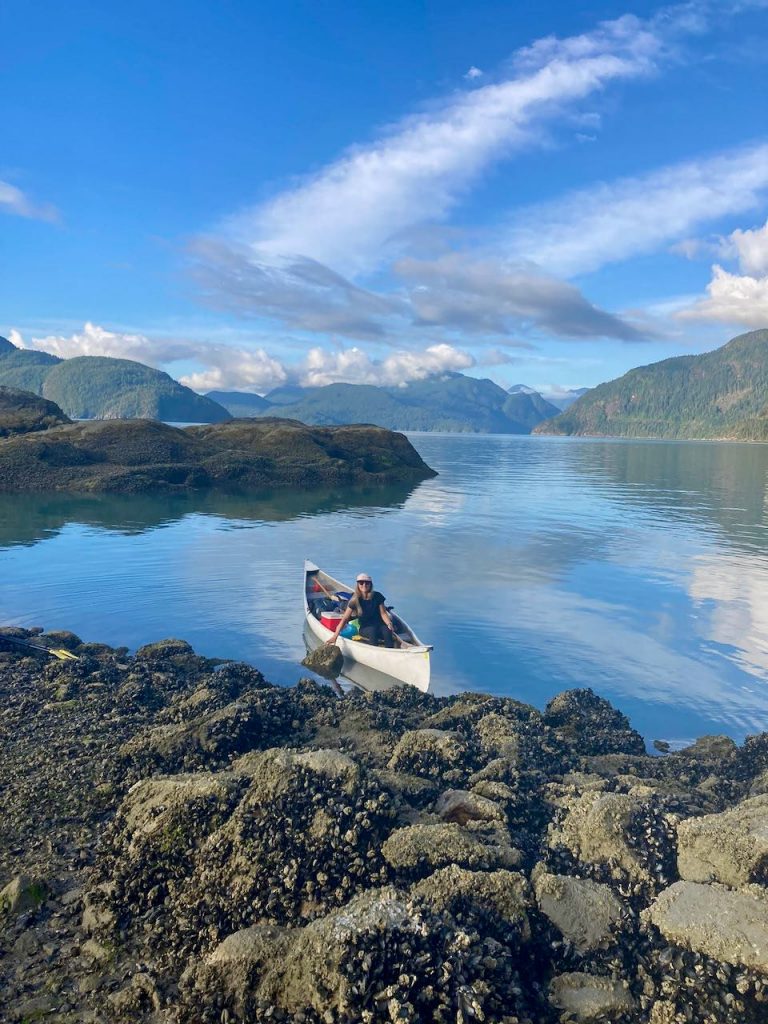
Day 4 – Islet View to Britannia Beach

We rose early to make use of the calm winds and slack tide. Unfortunately, it was a low tide, so we had to carry everything down the stinky, mussel-covered landing. We launched by 8.15am and were treated to glassy seas for the length of the return journey. It makes such a difference paddling under calm conditions.

Sea to Sky Marine Trail
Setting off at low tide

We made our way back to Zorro Bay, after which we pointed the vessel in an easterly direction, using the mine museum as a navigation landmark. It took around two hours to reach the community dock, where we were glad to see that our car hadn’t been towed.

Other things to note

I’m keen to return to explore more of the Sea to Sky Marine Trail, this time in a sea kayak, which lends itself to faster travel. Ramillies Channel Recreation Site looks especially appealing. I’ll give Bain Creek a miss as you can apparently hear Port Mellon mill.

We didn’t see anyone else in a canoe, and other people seemed quite surprised by our mode of transport. It’s fine in the smoothest of seas, but otherwise a sea kayak is more suitable.

Sea to Sky Marine Trail
Kayaking the Sea to Sky Marine Trail

Whatever route you choose, be sure to plan your trip around the tide times and the weather conditions, particularly the wind. You can find the tide times for Gibsons and the weather forecast for the Howe Sound on the Government of Canada website. Slack tide is the time the tide changes. Currents and rips are often more manageable an hour before and an hour after slack tide.

The Howe Sound also has busy ferry corridors. Ferries often struggle to see paddle-craft, especially in the dark, during choppy seas or fog. They also produce a significant wake. Check the ferry times on the BC Ferries website to avoid an encounter, or alert them to your presence via a marine VHF radio.

The Sea to Sky Marine Trail website has more information on trip planning and hazards.

Sea to Sky Marine Trail
Happy paddling!
Person on mountain bike descends through alpine meadow

Mountain Biking in the South Chilcotin Mountains

As I haul my bike up an impossibly steep slope, furiously waving away black flies and gasping for air, I wonder what the hell I was thinking. I’d done this trip the previous year and vowed that once was enough. But then I pause and look around me. The South Chilcotin Mountain Range extends for miles in every direction. Above me I can see the barren alpine, where black volcanic rock is dotted with summer snow fields. Below are verdant meadows, full of wildflowers, marmots and crystal-clear streams. There is no sign of civilisation: just mountains. That, I remember, is why I’m here. For the views. For the adventure. For the promise of some of B.C.’s finest singletrack.

Woman pushes bike up mountain trail
Hauling my bike up the High Trail

And singletrack there most certainly is, with over 200km of trails to enjoy. But my god, do you have to work for it. For two years in a row, I’ve boarded a floatplane at Tyaughton Lake and been dropped on the shores of Spruce Lake. The transport comes courtesy of Tyax Adventures – who, by the way, are not the same people as Tyax Lodge. From here, I’ve taken the Spruce Lake Main Trail and joined onto the High Trail, which winds its way to viewpoint at the top of Windy Pass. The views are absolutely amazing, but in all honesty, getting there is an uphill struggle – literally and metaphorically.

The alpine meadows

Wilderness singletrack

The thing about the South Chilcotins is that the trails aren’t regularly maintained. These are old horse pack trails, used to service the mining industry in days gone by. You can expect steep gradients, windfall, roots, rocks and snow (depending on the time of year). The climbs are not 100% ride-able. At points I’d be dismounting from my bike so often that it made sense to remain on foot. In the run-up to my second trip, my friends were asking how best to prepare. Was their fitness good enough? What climbs might it compare to on our local trails? Really, your best training regime would be to do a full body workout at altitude.

Mountain bikers walk bikes across a summer snow field on a mountain
Snow fields in July

The long distances and the need to hike-a-bike make these physically demanding days. On both occasions, my shoulders were burning just as much as my legs. Living at sea level for 99.9% of the year doesn’t help either. Spruce Lake is at 1,500m, and depending on what route you do, you can climb to well over 2,000m. Hills that I’d normally cruise up became mammoth efforts as my body struggled to suck in enough oxygen. Some people don’t notice the effects of altitude at all. Unfortunately for me, I’m not one of them. This secured my position at the back of the pack, where I’d regularly stop ‘to admire the view’ (but was actually just trying to die in private).

Stopping to admire the view/quietly die

Windy Pass and Camel Pass

But as they say, what goes up must come down. And for most mountain bikers, it’s the down they’re really after. By taking the High Trail, the first taste of this much-famed singletrack comes after the top of Windy Pass. The trail (still the High Trail) wraps around the side of the mountain, gradually descending through the alpine meadows. It’s fast and flowy. The wildflowers whip past your peripheral vision as more mountainous peaks loom in the distance.

Mountain biker descends through alpine meadow
Descending down the High Trail

On my first visit, this descent was short-lived as we cut off towards Camel Pass. To my horror, it involved another climb at an even greater elevation. The landscape increasingly began to resemble Mars: red, rocky and seemingly devoid of life. We passed through a scree field and pedalled uphill once again to a viewpoint. The wind was really blowing, so we quickly began the long descent down the Camel Pass Trail, briefly joining back onto the High Trail before finishing up with Molly Dog, Pepper Dog and the Freiburg Trail. The terrain changes rapidly, from the rock-infested alpine, down through the meadows and back into the forest. Once amongst the trees, the soil is much sandier, making bike control a lot harder.

Woman on mountain bike
Mountain biking in the South Chilcotins

I reached the end feeling shell-shocked. Was that the best or worst six hours of my life? I’d been riding for less than a year and I’d found it tough. Crossing the scree field was particularly terrifying as there is no margin for error. But it was also incredible, a day of adventure with some really high highs and jaw-dropping scenery. Still, I decided that I probably wouldn’t return to the South Chilcotins until I was a better rider – like, a much better rider. So when, a few months later, some friends ask if I’d be willing to go again, I wavered. I don’t like to be left out, but then again, the last time I had cried. In the end, the decision was made for me: I’d been booked onto the float-plane.

Floatplane on alpine lake with mountain bike wheels loaded onto the wooden wharf
Unloading at Spruce Lake

Take two

So it was that over a blisteringly hot Canada Day weekend, I was back in the South Chilcotins – despite having sworn I’d never do it again, ever, ever, ever. After some last-minute research we decided to give Lick Creek a go. Once again, the day began with a flight to Spruce Lake followed by the gruelling ascent up the High Trail. This time I was better equipped mentally for the first part of the ride. The climb was just as difficult, but at least I knew I could make it – and that the pain would stop after around two hours. We got to the top and I assumed (unlike my previous excursion) that the climbing was done and dusted.

Woman stands on mountain looking across at the view
Windy Pass

That turned out to be a mistake. After a while the High Trail takes an upwards turn once again as we searched for the High Trail Connector. Although it’s shown on Trailforks, the trail is entirely overgrown and we had to retrace our steps to High Trail South. By now I was pretty hangry and I wasn’t happy about the unnecessary climb, even if it was only about half a kilometre. We got back on course and reached the Eldorado Cabin, which is owned by Tyax Adventures. After inhaling some food, we made the final push up the Lick Creek Trail. This was the hardest part for me. Fatigue had set in and the relentless XC nature of the day thus far was frustrating. Everyone was wondering when the climbing would end and the fun would begin.

People sit on deck of wooden backcountry cabin
Eldorado Cabin

Lick Creek Trail

Finally, we reached the point where we couldn’t go any higher. It was time to go down once and for all. Unfortunately, I was so completely bushed by this point that my riding fell seriously below par. We’d been whizzing along for about a minute when my handlebars clipped a tree and I went OTB. Not a great start. We then descended through an alpine meadow where a narrow trail is carved into the ground. It’s beautiful, but also tricky as the grassy banks are above pedal height. You can’t veer off-course for fear of catching a pedal, meaning it’s a bit like riding a skinny for a couple of kilometres. The trail is very dry and exposed in parts, with a few tight, loose corners. The sandy trail bed can also make for a sketchy ride if you’re not used to it.

The Lick Creek Trail

We returned to the lodge after eight hours. I felt like I’d survived an arduous but epic journey, which in a way, is exactly what I’d done. Just like before, I couldn’t work out if I was elated or traumatised. I’d gone over the handlebars twice. I’d wondered if I was physically capable of pushing my bike up another mountain. The Lick Creek Trail had also been beyond my ability in parts. But I’d also laughed, said ‘wow’ about a million times, and traversed a spectacular landscape. When you ride in the South Chilcotins, you have to accept that it’s a type 2 kind of fun, where misery and joy go hand-in hand. You do it for the adventure, with the singletrack descents being a juicy bonus.

Mustering up some energy before the big descent

Sitting in the lodge that night, physically and mentally drained, I was adamant that I wouldn’t return for a third year in a row. Will I go back on my word? Absolutely.

Traumatised or elated? Hard to tell

Mountain biking in the South Chilcotins – what you need to know before you go

Getting a plane drop

Plane drops are arranged through Tyax Adventures. You can be dropped at Warner Lake, Spruce Lake or Lorna Lake. Trips to Warner Lake may be diverted to Spruce Lake in bad weather. Try to bag an early flight – the more time you have, the better. You can fit five people in a plane if you all take both wheels off your bikes. However, there is a weight limit. Arrive early enough to dismantle your bikes. Be prepared to put them back together again after landing at your chosen lake.

Two men dismantle bikes while standing on a wooden wharf on a lake with floatplane in the background
Dismantling our bikes ready for the short flight to Spruce Lake

Getting a guide

You can pay extra for a guide if you want. This provides peace of mind as you don’t have to worry about navigation. However, I’ve never used a guide and have navigated using Trailforks perfectly well. I take extra battery packs to ensure my phone doesn’t run out of juice.

View from a floatplane window as it flies over a forest
It’s a 15 minute flight to Spruce Lake

Not getting a plane drop

You can ride in the South Chilcotin Mountain Range without the assistance of a plane drop. You can pedal up from Tyaughton Lake or you can shuttle trails such as North Cinnabar.

Hike a bike is a common theme if you’re not shuttling

The weather

You are at the full mercy of the weather. The higher elevations have zero shade. On hot days take sunscreen and sunglasses. It can be much colder (and windier) higher up, so layers are essential. It can sleet or snow in the mountains, even during the summer months. Be prepared!

Woman lies on back on grass with gloves covering her face
Not a lot of shade in the alpine

The backcountry

Riding in the South Chilcotin Mountain Range is a true backcountry experience. You have to be self-sufficient in terms of food, water, mechanicals and safety gear. Get someone in your group to take a GPS communications device. A set of walkie talkies can also be useful. You’ll need a backpack or a trail running vest for your gear.

A true backcountry experience

Bear country

Grizzly bears are very common in the South Chilcotins. Two weeks before my first visit, the Spruce Lake Trail was closed due to a bear attack. Make noise, take bear spray and know how to use it.

Food and water

Fuel is absolutely essential out here, as is water. It’s exposed and water sources are few and far between. During my second visit, B.C. was experiencing an unprecedented heat wave. I carried a water bottle and a 1.5 litre hydration bladder, and both ran dry before the day had ended.

Choosing a route

There are lots of routes to choose from. Take a look at Trailforks for inspiration. If you go to Warner Lake, the most direct route down is the Spruce Lake Trail, which is a blue square. Options such as the High Trail and Camel Pass are much harder but deliver on views.

Woman sits on mountain bike on mountain pass
Views for days

How long does it take?

The amount of time it takes obviously depends on the route you do. I recommend starting as early as possible and taking lights, just in case. The Windy Pass/Camel Pass route took us six hours.

Where to stay

Tyax Lodge is located on Tyaughton Lake, which is a short pedal to Tyax Adventures (where you get the float-plane). They offer rooms and camping. If you camp, I suggest booking the serviced sites closest to the lake, as these are the only ones with shade. Being a guest means you can use the lodge’s amenities, such as the stand-up paddle boards and kayaks.

There are also some free recreation sites nearby. The closest to Tyax Adventures is Friburg Rec Site, which has a couple of nice pitches down towards the left-hand side if you’re looking at the lake (go down what looks like a road to someone’s house!) There’s also Mowson Pond Rec Site and Gun Creek Campground. Gold Bridge is the closest town.

Even if you don’t stay at Tyax Lodge, you can drop in and make use of their bar/restaurant. It’s also the only place you’ll get WiFi.

Note that Tyax Adventures and Tyax Lodge are not the same company.

Plane drops courtesy of Tyax Adventures

Phone signal

There is no phone signal in the area.

Bugs

Black flies, horse flies and mosquitoes were a real issue when I visited the South Chilcotins in July, but not so much in September.

Getting to the South Chilcotin

Getting to the South Chilcotins can be an adventure in itself. From Vancouver, the most direct route is to drive to Pemberton and take the Hurley River Forest Service Road. This connects Pemberton Meadows to Gold Bridge. It’s a long and bumpy ride, and you should check the road is actually open on the gov.BC website before you travel. Your other option is to go via Lillooet on Highway 99. Google Maps does not always recognise when roads are closed, so do your research before leaving home.

Hiker heading downhill towards alpine lake with mountain vista in the background

Cathedral Lakes Provincial Park: A Backcountry Camping Trip

The core area of Cathedral Lakes Provincial Park has two backcountry camping areas, stunning hikes and azure lakes chock full of trout. Even better, you can get a lift straight to the campground – if you’re willing to pay for it!

If you’re planning a trip to Cathedral Lakes Provincial Park, then here’s what you need to know.

Cathedral Lakes Provincial Park

Cathedral Lakes Provincial Park

Drive east from Vancouver and the dense, wet forest eventually gives way to the desert-like Okanagan Valley. Cathedral Lakes sits just at this interchange, making it feel as though two geological worlds have collided. The impact is remarkable. The core area of Cathedral Lakes is like a checklist of everything you could want from a backcountry camping trip. Crystal clear lakes? Check. Towering mountains with unique rock formations? Yep. Wildlife viewing opportunities? For sure. In fact, the lakes are known for their trout fishing, while the park is also home to mountain goats, bighorn sheep, deer and bears.

The core area

You’ll notice that I keep mentioning the ‘core’ area. If you look at the BC Parks map, you’ll see that the park extends from the Ashnola River down to the US border. In the middle – starting at around 2,000 metres up – is the core area. Hunting is prohibited here, and it’s also where most of the good stuff is. By good stuff, I mean the campgrounds, the lakes, and some top-notch hiking trails. Oddly for a backcountry camping trip, there’s also a privately owned lodge called Cathedral Lakes Lodge. It owns the only road leading in to the core area, as well as a patch of land on which the lodge is built.

Woman in running clothes sits next to alpine lake
Ladyslipper Lake is in the core area of Cathedral Lakes Provincial Park

Cathedral Lakes Lodge

However, you don’t have to stay at the lodge. The campgrounds are operated by BC Parks, so you can either ignore the lodge or make use of some of their facilities (like buying food and drinks). It does have a very tempting hot tub/sauna set up, but unfortunately, this is reserved for guests. It’s quite strange to have civilisation nearby, including Wi-Fi and beer on tap. But it doesn’t necessarily detract from the experience, especially if you camp at Lake of the Woods. You can also pay the lodge to drive you into the core area, saving yourself a 16km hike. This is highly unusual for a backcountry camping trip, but it’s a welcome luxury!

Getting to the core area

But as with most things ‘luxurious’, getting the shuttle isn’t cheap. At the time of writing, a return trip for an adult is $150 plus tax. If that’s too spenny then you can hike in (for free!) I’ve not done the hike, but it’s said to be a strenuous, all-day excursion. The most direct hiking trail into the core area is the Lakeview Trail, which is 16km long and has 1,357m of vertical climbing. The other options are the Wall Creek Trail (20km) or the Ewart Creek Trail (28km, making it by far the longest route). We chose the shuttle this time, but I’d be willing to give the hike a go on the next occasion…or at least get the shuttle up and hike down!

If you take the shuttle

If you take the shuttle, you can expect a white-knuckle ride in either an ancient safari-style Mercedes or a decrepit Suburban. It takes about an hour along a bumpy, steep 4×4 road. If you’re in the open-sided vehicle, bear in mind that the road is dusty, so I advise sitting close to the front and wearing sunglasses and a mask/buff. Each person can bring two large items (such as a backpack and a cooler) and one small item (such as a day pack). Again, this makes for a strange backcountry camping trip, as you can take quite a lot of luggage which you don’t have to carry very far. If you prefer camping with a cooler full of beers, then this will be music to your ears.

Old safari-style vehicle
The shuttle

Booking the shuttle

You can book the shuttle online on the Cathedral Lakes Lodge website. You can choose a one-way trip or a return trip. You start at ‘base camp’, which is the parking lot. This is a secure parking lot which remains locked, other than to allow vehicles in and out for the shuttle. This was a bonus for me as I had my mountain bike in the back of my car. The shuttle only operates during summer and autumn, with lodge operations shutting down around the beginning of October. Be wary of booking the shuttle until you know your plans: they don’t do refunds. Due to wildfires in the area, I did ask to change the dates of my trip and was given a credit.

When to visit

Seeing as the core area sits at 2,000m plus, the hiking season is limited from summer to early autumn. It snowed when I was there – and it was only 1 September. My jaw dropped when the ranger came around the previous evening to tell us there’d be a high of 4°c the following day. Thankfully, I never leave home without a down jacket. Still, we didn’t really feel prepared for such cold temperatures after a blistering hot summer. So, be warned! Pack warm clothes, gloves and a hat. The weather ‘at the top’ (i.e. in the core area) can be quite different to the weather in the parking lot.

Red tent surrounded by a light dusting of snow
Snow in August

The BC Parks website says that the campgrounds can get very full at weekends during the summer. The campsites are first-come, first-serve. To avoid the crowds, it’s better to visit during the week if you can. This is what I did and it was extremely quiet. On our second night we were the only ones at our campground. Of course, that may have been due to the fact that it snowed. If you’re willing to brave even chillier temperatures, then there are a lot of larches in the core area which turn golden during early autumn (think late September/early October).

The campgrounds

There are three backcountry campgrounds in Cathedral Lakes Provincial Park, but Pyramid Lake campground has been closed due to spruce pine beetle. Sadly, this has affected lots of trees in the park. That leaves Quiniscoe Lake and Lake of the Woods campgrounds. Quiniscoe Lake campground is closest to the lodge, so if you get the shuttle up, then you barely have to walk a few steps to find a pitch. It has bear caches and campfires are allowed. Firewood can be purchased from the park operator. Lake of the Woods is about a 15 minute walk from the shuttle drop-off, but there are no caches (only pulleys) and campfires are prohibited.

Lake of the Woods, Cathedral Lakes Provincial Park

Seeing as there was a fire ban, we opted for Lake of the Woods campground as we wanted to be further from the lodge. Personally, I think Lake of the Woods campground is prettier than Quiniscoe, with full frontal views of the mountains. But it is perhaps more exposed with greater wind chill. There are outhouses in the campgrounds which the rangers keep stocked with toilet paper. You’re asked not to pee on the ground because it attracts the mountain goats. There’s a lot of information about this in the park.

Lone mountain goat on a rocky slope
Don’t pee on the ground – the goats are attracted by the salt

Paying your fees

The backcountry campgrounds aren’t free, however. It costs $10 per night, per adult, or $5 per night, per child (between six and 15 years of age). You can either buy your permit in advance via Discover Camping. Or, you can take cash with you. There is a ranger station near the lodge, and when the ranger is on duty, he/she will do the rounds in the evening. Otherwise, there are envelopes at the information kiosk near the lodge which you can fill out and post in the adjacent letterbox. The campgrounds aren’t reservable, so paying in advance doesn’t necessarily secure you a spot.

The hiking and fishing

Most people who make the journey to Cathedral Lakes have one of two things on their mind: hiking or fishing.

There are seven lakes in the core area. Although they haven’t been stocked for decades, they have healthy populations of both cutthroat and rainbow trout. We found Ladyslipper Lake to be especially plentiful. Remember to buy a freshwater licence if you plan to fish.

Man fishing at alpine lake
Fishing at Ladyslipper Lake, Cathedral Lakes Provincial Park

The information kiosk near the ranger station has a map of the core area, along with a description of all the hiking trails. The options range from easy loops of the lakes to full day hikes. The Rim Trail is the most popular and with good reason. The route follows a ridgeline in a sort of horseshoe shape, providing 360-degree views of the Cascade Mountains and the Okanagan Mountain Range. The rock formations are like nothing I’ve seen in Canada, and looking down on the lakes from above is really spectacular.

Unique rock formations in Cathedral Lakes Provincial Park
Woman on mountain ridge smiles at camera with blue alpine lake in the distance
Looking down on Glacier Lake

Two-night itinerary

We spent two nights up at Cathedral Lakes. We took the 10am shuttle and arrived at the lodge about an hour later. After carrying our things to Lake of the Woods campground, we set up camp and had some lunch. We knew we wanted to go to Ladyslipper Lake that day but we weren’t sure of the way. So we walked back to look at the map at Quiniscoe Lake, retraced our steps to Lake of the Woods and continued on to Ladyslipper Lake. It’s not a long hike, but there is a steep uphill section. Soon the trail heads downhill and the turquoise blue of Ladyslipper Lake appeared before us. The sun was shining, so we spent a relaxing afternoon fishing and sunbathing by the lake before heading back to camp.

Hiking towards Ladyslipper Lake
Woman relaxes in sunshine next to alpine lake
Relaxing at Ladyslipper Lake

That evening the wind really picked up and the temperature dropped dramatically. That was when the ranger came round and informed us that it would be seriously cold and wet the following day. We got into bed early because it was so cold and didn’t resurface until late the next morning. At this point we weren’t too sure what to do. It had snowed in the night and there was a lot of cloud coverage. Also, we hadn’t really banked on hiking in adverse weather conditions. At about 11am we decided to go for it, and thank goodness we did! The clouds dispersed and we were treated to some really amazing views.

This was our only full day and had planned to do the Rim Trail. We retraced our steps from the day before, skirting Lake of the Woods and heading up to Ladyslipper Lake. After the little inlet the trail heads uphill towards Stone City. It was on Ladyslipper Trail that we were lucky enough to see a herd of mountain goats chilling out and munching on grass. They began moving along the trail in the direction we were headed, so we waited a while to give them some space. We then carried on up to Stone City, stopping to admire the amazing rockfaces along the way.

Herd of mountain goats in alpine meadow
The mountain goats of Cathedral Lakes Provincial Park
Woman hikes along stony trail with mountain vista behind her
Hiking up to Stone City

Once at Stone City you can take a detour to Smokey the Bear and the Giant Cleft, after which you have to return the way you came to get back to Stone City. From there, we carried on to Devil’s Woodpile. This section of the hike is where the real money shots are. The scenery is amazing and the views extend for miles in every direction.

Trail signposts in Cathedral Lakes Provincial Park
The trails are signposted
Admiring the views from the Rim Trail
Signpost on mountain trail
Devil’s Woodpile, Cathedral Lakes Provincial Park

I’d have loved to have stayed up there all day, but it was so windy and cold! We’d also started later than intended, so after Devil’s Woodpile we chose to take a right hand turn down to Glacier Lake. However, you can carry on along the ridgeline to Quiniscoe Mountain and Red Mountain. At Glacier Lake, we took the left-hand spur that leads to Quiniscoe Lake. We then returned to camp at Lake of the Woods for the evening.

Signpost on a mountain trail
Head down towards Glacier Lake, or continue along the Rim Trail
Woman hikes downhill towards alpine lake
Hiking down to Glacier Lake
Signpost on mountain trail

The following day, we had breakfast and strolled up to Pyramid Lake with our coffees. Then we packed up our camp and dropped our bags at the shuttle pick-up. Finally we hiked the loop around Quiniscoe Lake before heading back down to our car.

Getting to Cathedral Lakes Provincial Park

From Vancouver, take Highway 1 eastbound and merge onto Highway 3. Drive past Manning Provincial Park towards Keremeos. Around three miles before you reach Keremeos, you’ll see a sign for ‘Cathedral Lakes Lodge’. Turn off the highway here and follow the Ashnola Forest Service Road. You’ll go over a red bridge and pass a couple of recreation sites along the way. The road turns to gravel but keep going. If you’re taking the shuttle, continue along this road for about 13 miles (20.8km). Eventually you’ll see a bridge with a big gate on your left hand side. Wait here until the gate opens, which will be about 15 minutes before your departure time. Continue along the road a little further for the Lakeview Trailhead.

Silver car drives over red steel bridge
The red bridge

Camping nearby

If you’re on an early shuttle and you don’t want to get up at the crack of sparrow’s fart, you can always camp nearby. That’s what we did, spending the night Horeshoe Canyon Recreation Site. There are quite a few campsites down the Ashnola Forest Service Road, with other options including Red Bridge Recreation Site, Ashnola River Recreation Site, Lakeview Trailhead campground and Buckhorn campground.

Other information

Hopefully this blog post tells you everything you need to know about backcountry camping in Cathedral Lakes Provincial Parks. A few other bits of information I haven’t touched on yet:

  • Phone service is limited but you might be able to get signal near the ranger station
  • Swimming is allowed in the lakes but the water is very cold
  • There are no garbage facilities – you must pack out when you pack in
  • The hiking trails are well-marked and easy to follow
  • There isn’t an information kiosk at Lake of the Woods campground, so take a photo of the map at Quiniscoe Lake for reference

Cathedral Lakes is a really stunning area and allows easy access into the backcountry wilderness thanks to the shuttle service. It’s a trip that I thoroughly recommend!

Winter camping at red heather campground in Garibaldi Provincial Park

Winter Camping at Red Heather Campground

Red Heather campground near Squamish provides a winter wonderland for backcountry campers. The proximity of Red Heather Hut offers added peace of mind, as you can seek refuge if the weather takes a turn for the worse.

Camping at Red Heather campground

If you’re familiar with outdoor pursuits in Squamish, British Columbia, then you’ve almost certainly heard of Red Heather Hut in Garibaldi Provincial Park. It’s a popular destination for ski tourers, split boarders and snowshoers. The hut itself is just an emergency shelter; you can’t sleep in it (unless you need to) but you can warm your cockles in front of the fire. You can also pitch a tent nearby and enjoy the snowy delights of Garibaldi Provincial Park for as long as you like.

There are several backcountry campgrounds in Garibaldi, but Red Heather is a good winter option for a few reasons.

Firstly, it’s the first camping area that you come to, assuming that you park at the Diamond Head Trail parking lot. It’s just 5km from the upper lot, so you don’t have to haul your winter tent too far uphill.

Secondly, you have the security of Red Heather Hut right next door. While the hut isn’t for overnight stays, you can go inside to organise your gear, warm up in front of the fire and cook your dinner. This adds a bit of luxury, not to mention the comfort of knowing that you can retreat to the hut, if that winter sleeping bag isn’t as warm as it says.

Finally, you can use Red Heather as a base, from which you can strike out further into the backcountry. Ski tourers and split boarders can do a few laps off of Paul’s Ridge and Round Mountain before bedding down for the night. Snowshoers can head up to the ridge to enjoy the spectacular views across Garibaldi Provincial Park and the Tantalus Range (assuming it’s a clear day!)

Camping at Red Heather campground
Leaving the tent for a few laps of Round Mountain

What you need to know before you go

If you’re planning a winter camping trip to Red Heather campground, then here’s what you need to know before go.

Driving and parking

Park at the Diamond Head Trail parking lot. The access road is a narrow mountain road that’s often packed with snow and ice near the top. Winter tires (or mud and snow tires) are a must and 4WD is recommended.

There are two parking lots: an upper lot and a lower lot. If you want to access the upper parking lot (which is where the trailhead starts) then you’ll need snow chains. You can be fined if you drive past the chain-up area without chains installed.

If you don’t have chains then you can park at the lower lot and walk up. However, park rangers have been known to wait further down the road and turn away vehicles without snow chains. This will be a nuisance, as you’ll either need to go and buy some, or you’ll have to park a considerable distance from the trailhead.

Fees and permits

You don’t need a permit to enter Garibaldi Provincial Park during winter, but if you plan on staying the night, you must buy a backcountry camping permit advance of your trip. This applies, even if you’re sleeping in your own tent. You can purchase a permit on Discover Camping. Camping without a permit carries a fine.

Hiking up

The trailhead starts from the upper parking lot. There’s an outhouse here if you need.

The trail itself is narrow and tree-lined. There are no views en route, aside from a clearing at around the halfway mark from which you can see across Squamish. It’s uphill all the way until you reach the meadow, where the trail flattens out. A little further along you’ll find Red Heather Hut tucked into the trees on your right. In terms of navigation, the first part of the trail is extremely easy to follow. Later on, it opens up slightly and you’ll need to follow the orange marker poles.

The distance between the upper parking lot and Red Heather Hut is 5km. It takes between one and two hours, depending on how quickly you move.

Where to camp

Red heather campground is in the immediate vicinity of Red Heather Hut. It’s an alpine meadow and the area is relatively flat. There are no designated pitches or tent pads, so can choose your own camp site. Bear in mind that the hut has a heavy footfall, particularly at weekends. The glades behind the hut offer greater privacy on a busy weekend.

Winter camping at Red Heather campground

Red Heather Hut

You’re not allowed to sleep inside the hut, unless it’s an emergency. However, you are permitted to use the facilities. Inside, you’ll find two picnic benches and a wood burner. There’s a wood pile just outside the front door, along with an axe for chopping. The wood supply has to last the entire winter, so be conservative. There’s also a two-ring propane stove and a sink for grey water. You will need to melt snow for drinking water, which should be boiled and/or treated.

If you’re camping nearby, you may want to leave certain items inside the hut, although you do so at your own risk. Hooks line the walls so you can hang up bags, clothing and equipment. But be warned: there are lots of mice, so be sure that any food is tightly concealed.

Just beyond the hut is an outhouse. As of July 2021, BC Parks is operating a ‘bring your own toilet paper’ policy in the Sea to Sky Corridor – you’ve been warned!

Red Heather Hut
The back of Red Heather Hut

What about summer camping?

You can only camp at Red Heather during the winter months. Currently, this means between the dates of December 1 to April 30. Check the BC Parks website for up-to-date information. A camping permit is required.

The hut is open year-round as a warming hut and an emergency shelter. The wood stove should only be used in winter.

Activities nearby

This is a very popular winter recreation spot. Hikers and snowshoers typically head to Red Heather Hut before making the return journey. Ski tourers and split boarders enjoy the backcountry terrain around Round Mountain and Paul’s Ridge. It’s also possible to continue along the winter trail towards Elfin Lakes Shelter, which is 6km past Red Heather Hut. Winter camping is permitted at Elfin Lakes, and sleeping is allowed in the hut if you have a reservation. More challenging terrain can be found beyond Elfin Lakes.

Safety

There’s sign near the start of the trailhead indicating that you are entering into avalanche terrain. You should carry a beacon, probe and shovel (and know how to use them). The trail to the hut is often considered low risk, but there are sinkholes and creeks, so be sure to stick to the path and operate a buddy system.

Woman looks across blue lake and Brunswick Mountain

15 Weekend Adventures Near Vancouver

You don’t have to travel far from Vancouver to get your fix of the great outdoors. It’s so easy, in fact, that you can have some pretty incredible micro-adventures in the space of a weekend – no vacation required.

So pack your bags on a Friday afternoon and head out into the wilds with these 15 weekend getaways near Vancouver. You’ll be home for dinner on Sunday.

1. Kayak the Indian Arm

Launch a kayak from Deep Cove and paddle the length of the Indian Arm, an 18km-long fjord. At the end you’ll find a gorgeous waterfall called Granite Falls, as well as a couple of rustic campsites that are free of charge. Sea-faring vessels can be rented from Deep Cove Kayak Centre.

Related: Overnight Kayak Trip Up the Indian Arm.

Kayaking on the sea
Kayaking up the Indian Arm

2. Go backcountry camping in Seymour Provincial Park

With the North Shore Mountain on Vancouver’s doorstep, those wanting to sleep under the stars have plenty of options. Seymour Provincial Park is a good place to start, with backcountry camping allowed north of Brockton Point. During the winter months, snowshoe or ski tour to the First Pump and set up camp. The snow usually melts come late July, allowing for overnight trips to Elsay Lake.

3. Hike the Howe Sound Crest Trail

The Howe Sound Crest Trail is a 29km thru-hike from Cypress Bowl to Porteau Road (or vice versa). It’s a physical challenge and involves scaling up and down various peaks, including St Mark’s Summit, Mount Unnecessary and The Lions. The reward? Stunning scenery and some of the best views around.

Related: Hiking the Howe Sound Crest Trail.

Woman hikes through alpine meadow with purple backpack
The Howe Sound Crest Trail

4. Go hut hopping in Tetrahedron Provincial Park

Get a ferry to Langdale and head over to Tetrahedron Provincial Park on the Sunshine Coast. Leave civilisation behind by hiking, snowshoeing or ski touring between four backcountry cabins. Mount Steele is the preferred destination for most, but you could devise a route to visit all four, should you want to.

Related: Hiking in Tetrahedron Provincial Park.

Backcountry cabin in the forest
Edwards Lake cabin

5. Kayak the Sechelt Inlet

Staying with the Sunshine Coast, did you know there are nine marine access camping sites along the Sechelt Inlet – all of which are completely free to use? Rent a kayak from Pedals and Paddles, load up with supplies and zig-zag your way along the coast. Your itinerary can be dictated by the number of nights you have and the amount of energy you want to expend.

Related: Kayaking the Sechelt Inlet

Red tent on the shores of a calm inlet
Camping at Tzoonie Narrows

6. Bikepack to Galiano Island

Galiano Island is a bikepacking hotspot amongst Vancouverites, and with good reason. It’s just a short ferry journey from Tsawwassen, and the quiet roads and modest hills are ideal for touring on two wheels. Pitch a tent at Montague Harbour Marine Provincial Park or Dionisio Point Provincial Park. Then kick back and enjoy island life.

Related: Bike Touring Galiano Island.

woman sits on rock at sunset
Looking at the coastal mountains from Dionisio Point

7. Go camping in the Sea to Sky corridor

Highway 99 is famous for being one of the most scenic drives in Canada. It’s also billed as the gateway to adventure. Squamish, Whistler and Pemberton offer ample opportunities for hiking, climbing, mountain biking, fishing, horse riding, kite-surfing and skiing. Choose an activity (or two) and combine it with a spot of car camping. Front country sites include:

  • Porteau Cove Provincial Park (Porteau Cove)
  • Mamquam River Campground (Squamish)
  • Cat Lake Recreation Site (Squamish)
  • Cal-Cheak Recreation Site (Whistler)
  • Nairn Falls Provincial Park (Pemberton)
  • Owl Creek Recreation Site (Pemberton)
  • Twin One Creek, Lizzie Bay and Driftwood Bay (on the shores of Lillooet Lake near Pemberton)
Woman hiking towards glacier in sunshine
Hiking to Iceberg Lake, Whistler

8. Get a cabin on Bowen Island

Gallivanting around the great outdoors can be exhausting. For some downtime, rent a cosy cabin and enjoy the old-world charm of Bowen Island. Stretch the legs by taking a stroll around Killarney Lake. For views, hike to Dorman Point or the summit of Mount Gardner, which is snow-free for most of the year. On a clear day, the sunsets from Cape Roger Curtis lighthouse are a real treat.

Dog sits on snowy mountaintop
The summit of Mount Gardner on Bowen Island

9. Cycle and hike to Paton Peak

Paton Peak is located in the shadow of Coliseum Mountain and has beautiful views across the Seymour Lake Watershed. Come prepared to spend the night on the plateau, where you’ll see the lights of downtown Vancouver twinkling beneath you. But here’s the catch: you have to cycle nearly 10km along the Seymour Valley Trailway to the trailhead, making for a multi-disciplinary excursion into the backcountry.

Woman sits on edge of cliff and looks over lake and tree covered mountains
Paton Peak

10. Hike to (and camp at) Garibaldi Lake

Garibaldi Lake is high on the tourist to-do list, so if you’re in search of solitude, you probably won’t find it here. Even so, this is one of those bucket list destinations that you might be keen to tick off. Be sure to make a reservation at Garibaldi Lake campground. If you have the energy, you can set up your tent before continuing on to Black Tusk or Panorama Ridge.

Blue alpine lake surrounded by snowy peaks
Garibaldi Lake

11. Explore Manning Provincial Park

Manning Provincial Park is an adventure playground, regardless of the season. In summer, frolic amongst the wildflowers and swim in the lakes. In autumn, hike to see the golden larches on Frosty Mountain. Come winter, choose between downhill skiing, cross-country skiing and snowshoeing. There are campsites dotted across the park, including front country, backcountry and winter campsites.

Woman looks across mountain range
Manning Provincial Park

12. Go mountain biking on the Sunshine Coast

While there’s no shortage of trails on the North Shore, a mountain biking trip to the Sunshine Coast makes for a fun weekend, especially if you want to visit Coast Gravity Park. The campground at Porpoise Bay Provincial Park is a good base. Located on the shores of the Sechelt Inlet, you can head straight to the beach after your ride for a refreshing dip.

If you have a bit more time…

Sometimes a weekend isn’t quite long enough. The following suggestions are best if you have just one or two more days to spare.

13. Surf on Vancouver Island

Ah Tofino. Vancouver Island’s prime surf destination is a long way to go for a weekend trip, but is ideal for a long weekend or short break. Catch some waves, breathe in the salty sea air and amble along the vast sandy beaches. Guaranteed to refresh the soul.

Related: Top 5 Reasons to Visit Tofino.

Woman on top of hill looks across sandy beach and sea with waves rolling in
Cox’s Bay, Tofino

14. Go mountain biking in the Chilcotins

The South Chilcotin Ranges are a backcountry mountain biking mecca. Weave your way down dusty single track, through alpine meadows and along mountain passes. Get a helping hand with the ascent by booking a float plane with Tyax Adventures. They’ll either drop you at Warner Lake or Spruce Lake. You can begin your pedal from there.

Woman on mountain bike
Mountain biking in the South Chilcotins

15. Hike a section of the Sunshine Coast Trail

The Sunshine Coast Trail is a 180km hut-to-hut hiking trail on the northern Sunshine Coast. The whole thing takes about eight days to complete. If you don’t have that much time, pick a section and enjoy one or two nights on the trail. Inland Lake to Confederation Lake is good option, as is Saltery Bay to Fairview Hut.

In theory this could be done in a weekend. However, the journey to the northern Sunshine Coast is a fair distance from the mainland, so it might be a bit of a squeeze.

Related: My Brief Encounter with the Sunshine Coast Trail.

View of Confederation Lake hut from the lake
Confederation Lake hut

Did you like this post? Save it for later!

10 BC Adventures to Plan This Year

10 BC Adventures to Put in the Diary

With the new year looming, it’s time to start planning what the next 12 months have in store. If you’re looking for inspiration, here’s 10 adventures to put on your to-do list.

1. Take a guided tour of the backcountry

Are you eyeing up fresh lines and untracked snow? Consider taking a guided tour of the backcountry. This is the best (and safest) way to get to know a new area. Companies such as Altus Mountains Guides offer backcountry tours of Whistler and Pemberton. If you’re new to backcountry skiing or split-boarding, sign up to an introductory course. Or, take the plunge and book your AST 1+ course.

2. Hunker down in Elfin Lakes shelter

Elfin Lakes shelter is located in Garibaldi Provincial Park near Squamish, BC. The hut is open year-round, but really comes into its own during the winter months. Snowshoe or ski tour/split board up to the hut before hunkering down in front of the fire with a hot toddy. From here, you can strike out further into the park, before returning back to base each day. This is a popular destination, so book in advance through Discover Camping.

Man on skis surrounded by snowy trees
Ski touring to Elfin Lakes shelter

3. Enter a trail running race

Want to move faster and lighter in the mountains? Trail running might just be for you. Set yourself a goal by entering a trail running race. There’s something for everyone, from the 12km Cap Crusher in West Vancouver, to the Fat Dog 120 mile race through Skagit Valley and E. C. Manning Provincial Park. For a happy medium, there’s the 21km Loop the Lakes Trail in Squamish.

Want to know more about trail running? Take a look at my Beginner’s Guide to Trail Running.

Woman runs along mountain ridge
Trail running through E.C. Manning Provincial Park

4. Mountain bike on Vancouver’s North Shore

Considered the home of freeride mountain biking, Vancouver’s North Shore mountains are a pilgrimage for riders across the world. The terrain is famously challenging, and you can expect steep, technical descents full of roots, rock rolls and wood features. Beginners can find their flow on trails such as Bobsled and Roadside Attraction (Mount Fromme), Empress Bypass (Mount Seymour), and Richard Juryn (Lower Seymour Conversation Reserve).

5. Complete a thru-hike

Discover how far your two feet can take you by completing a multi-day thru-hike. There are plenty to choose from, including the West Coast Trail and Juan de Fuca trail on Vancouver Island, the Howe Sound Crest Trail near Vancouver, and the Sunshine Coast Trail (on, er, the Sunshine Coast). Nothing beats several days immersed in nature. If you’re thinking about hiking the Juan de Fuca trail, here’s what you need to know.

Woman stands on rock in front of blue lake
Hanover Lake on the Howe Sound Crest Trail

6. Kayak the Sechelt Inlet

Load a kayak with supplies and paddle up the Sechelt Inlet on BC’s Sunshine Coast. You can spend days or even weeks zig-zagging up the coastline, staying at the numerous campsites along the way. From Porpoise Bay Provincial Park, head north and select your route. Campsite options include Piper Point, Oyster Beach, 9 Mile Point, Half Way Beach, Kunichen Point and Tzoonie Narrows. Kayaks can be rented from Pedals and Paddles.

Related: Kayaking the Sechelt Inlet

Nose of yellow kayak surrounded by sea
Paddles at the ready

7. Hike to St Mark’s Summit for sunset

Watching the sun set over the Howe Sound is pastime in itself. St Mark’s Summit in Cypress Provincial Park makes a particularly fine viewing platform. Time your hike so that you reach the summit just as the sun is going down. Take extra layers to protect you from the cooler temperatures and the rabid mosquitoes. You’ll also need a head torch so you can safely make the return journey in the dark.

Woman watches sun set over sea and islands
Watching the sunset from St Mark’s Summit

8. Cycle around the Gulf Islands

The Gulf Islands are an excellent destination to explore on two wheels – despite the hills! Pack up some panniers, jump on a ferry from Tsawwassen and island-hop between Galiano, Pender, Saturna, Salt Spring and Mayne. Each island has at least one campsite if you prefer to sleep under canvas. If you’re short on time, spend a weekend touring around just one island. Salt Spring is the most populated, while Saturna has a cosy village-vibe.

Read about my time bike touring on Galiano Island and Saturna Island.

9. Go surfing in Tofino

Wait for the summer crowds to disperse before planning a surf trip to Tofino. The swell is consistent and the line-ups are less busy. Just remember a winter wetsuit – the water is always cold. In fact, it’s not just the surf. Here’s 5 Reasons Why You Should Visit Tofino.

10. Bikepack the Oregon Timber Trail

It’s not in BC, but if you’re keen to head south of the border, check out the Oregon Timber Trail. At over 660 miles long, it’s described as ‘North America’s premiere long-distance mountain bike route’. As a relatively recent innovation, some sections of the trail are still being developed. This adds to the challenge, so riders should have the necessary experience before embarking on the epic journey.

Woman stares out to sea with red tent in foreground

Hiking the Juan de Fuca Trail

The Juan de Fuca Marine Trail is a 47km hiking trail located on the west coast of Vancouver Island. If you’re thinking about hiking it, here’s what you need to know.

Shorter hikes

You can access the Juan de Fuca trail at four different trailheads – Botanical Beach, Parkinson Creek, Sombrio Beach and China Beach. If you’re looking for a day hike, you can park at any of these locations and explore a section of the trail as an out-an-back hike. If you prefer not to turn back on yourself, you could always shuttle cars or catch the West Coast Trail Express back to your vehicle.

For a kids-friendly option, park at China Beach and walk the 2km down to Mystic Beach. To make it longer, carry on to Bear Beach, which is another 7km from Mystic Beach. For something longer still, start at Sombrio Beach and walk all the way to Botanical Beach. From there, get a friend to drive you back to Sombrio or reserve a spot on the West Coast Trail Express from Port Renfrew – just make sure you get to the bus on time!

Bear Beach

Hiking the whole trail

If you want to complete the whole trail, you can do so in one day as a trail run, or as a multi-day hike. The number of days you need is entirely up to you. If you travel quickly, you could do it over two days, spending the night at either Sombrio Beach or Chin Beach. However, this will be a push for many. Also, it would be a shame to rush your way through this beautiful corner of the world.

I hiked it over three nights and four days. I front-loaded the distance, with a long first day followed by three fairly relaxing days. This gave me more beach-chilling time – always a good thing! It also gave me a day each to hike the most difficult sections.

Man lies on beach log next to campfire
Sometimes it’s good to relax!

Camping on the Juan de Fuca trail

There are six campsites to choose from along the way. No reservations are needed. At each you’ll find bear caches and outhouses. You don’t need a permit to hike the trail, but the campsites cost $10 per night, per person. You can pay online before you go, or take cash and use the self-registration envelopes when you’re there.

The trail is open year-round and can be hiked in either direction. If you hike from north to south, the starting point is Botanical Beach (near Port Renfrew) and the end is China Beach (near Jordan River). If you’re going in this direction, you will reach the campsites in the following order –

  • Payzant Creek
  • Little Kuitshe
  • Sombrio Beach
  • Chin Beach
  • Bear Beach
  • Mystic Beach

Payzant Creek and Little Kuitshe campsites are in the forest, so can get muddy. Sombrio Beach and Mystic Beach campsites are often busy, as they are readily accessed from the road, making them popular with non-hikers. Chin Beach can also fill up quickly. Because the campsites are first come, first serve, it’s a good idea to leave early in the morning to bag the best spots.

What’s the trail like?

As you might expect from a coastal hike, the trail is undulating. Most of the flat sections are on the beaches. You may have heard of (or even hiked) the Juan de Fuca’s more famous neighbour, the West Coast Trail. While the West Coast Trail is known for its boardwalks and ladders, the Juan de Fuca trail is known for its technical terrain and relentless elevation change.

Hiking through the forest
And along the beaches

On the trail map, you’ll see that some sections are classed as ‘moderate’, others as either ‘difficult’ or ‘most difficult’. The most difficult section requires you to traverse up and down steep ravines, which can be tiring, especially with a heavy pack on. Thankfully it was fairly dry while I was there, but no doubt it could get very slippery in bad weather. Which brings me on to my next point…

The Juan de Fuca trail is very wet, partly thanks to the number of creeks which pass through it, and partly thanks to its location on the west coast of Vancouver Island. Even at the end of summer there were deep sections of mud. Wet weather gear is a must and gaiters are recommended. The creeks mean you can refill your water pouches whenever you need, although the water should be treated or boiled before drinking.

Here’s how I hiked the Juan de Fuca trail

My boyfriend and I hiked the Juan de Fuca trail at the end of August, opting to go from north to south. Here’s how it went down…

Day 1 – Port Renfrew to Sombrio Beach – 20kms

After sleeping in our car at the Jordan River Regional Park Campground for a night, we got up early and moved the car to the China Beach day use parking lot. Be sure to remove your valuables because break-ins have been known.

I’d reserved a space on the West Coast Trail Express, so waited by the highway for it to arrive at around 8am. I didn’t think it was going to stop, but in fact, it pulls into a rest stop a little further up the road, on the far side of the highway.

After about an hour we reached Port Renfrew. We got off the bus and hiked 2km up the road to the Botanical Beach trailhead, which is the start (or end) of the Juan de Fuca trail. This is a bit of a nuisance, but it’s as close as you can get in the bus. You might want to hitch a lift!

Shortly before Payzant Creek there’s a sign to Providence Cove. This is a lovely spot to have lunch and a swim.

Two people making tea on a portable stove on a stone beach
Taking a lunch break at Providence Cove on the Juan de Fuca trail

We had planned to spend the first night at Little Kuitshe, but made good progress so continued on to Sombrio Beach. This is a long first day at over 20kms, but it made the remaining days much more leisurely.

Tent pitched on empty stone beach
Camping at Sombrio Beach

Day 2 – Sombrio Beach to Chin Beach – 8kms

After sheltering from the rain in the morning, we started late and reached our next destination – Chin Beach – in the middle of the afternoon. The delay also meant we caught the tail-end of high tide at Chin Beach, so had to don our sandals and wade through the shallow ocean. Everyone else waited on a rocky outcrop, but I was glad we carried on because by the time we’d put up the tent the campground was full. Better to arrive early on busy weekends!

Day 3 – Chin Beach to Bear Beach – 12kms

On day three we hiked as far as Bear Beach, which was my favourite campground. It’s a long beach with sites at both the northern and southern end. In my opinion, the southerly end is better. This is the most difficult section of the hike.

Man stares out to sea
Camping at Bear Beach

Day 4 – Bear Beach to China Beach – 9kms

On the final day we hiked back to the car at the China Beach day use parking lot, although not before a final dunk in the ocean at Mystic Beach. I was glad to finish at my car, rather than worrying about making the bus on time.

Woman swims in sea
Swimming at Mystic Beach

If you’re hiking it in this direction, I would say this is a fairly standard itinerary, as we often saw the same faces at each campground.

What you need to know before you go

If you’re planning on hiking the Juan de Fuca trail, here’s what you need to know before you go –

  • If you don’t have two cars to shuttle then you can book the West Coast Trail Express. It can pick you up at Victoria, Sooke, China Beach, Sombrio Beach, Parkinson Creek or Port Renfrew
  • You don’t need to reserve anything other than the West Coast Trail Express (if using)
  • You don’t need a permit but the campsites are $10 per person, per night
  • Some campsites – particularly Chin Beach and Mystic Beach – fill up quickly, so leave early in the morning to get the best spot
  • Remember to camp above the tideline
  • Certain sections of the trail are cut off at high tide – check the tide times and plan accordingly
  • There are lots of bears in the area – be bear aware
  • The trail is very well-marked and has km markers along the way
  • There is no phone reception in the area
  • Dogs are allowed on the trail
  • It can get very muddy so gaiters are recommended (but not essential)
  • You don’t need to take much water as you can fill up along the way. The water must be boiled or treated before drinking

My thoughts on hiking the Juan de Fuca trail

If you want to try a multi-day thru-hike, the Juan de Fuca trail is a great place to start. At 47kms, the trail isn’t overwhelmingly long, but it still presents challenges. Although there isn’t any cell reception, it also feels quite safe. You aren’t too far from a road and there’s four access points along the way, meaning you can opt out if you need. It’s also much cheaper than the West Coast Trail, for which you need to buy a permit.

Everyone has a different idea of what is ‘difficult’. A trail runner told me that, pound for pound, the Juan de Fuca trail is harder than the West Coast Trail. Why? Because of the terrain. There’s lots of big step-ups and step-downs, logs to clamber over and mud to negotiate. You have to constantly watch your footing, or the tangled web of tree routes will trip you up. And the constant elevation change can be a killer on the joints.

Terrain aside, I didn’t find the hike too difficult. For me, the biggest negative of the Juan de Fuca trail is the proximity of the logging industry. Cutblocks go right up to the trail, and in certain sections the second growth forest looks like it’s dead. But perhaps it’s important to see – that way, we can better appreciate the old growth forests that still remain. And anyway, four days of forest wandering, beach camping and tree hugging is always a joy.

In some sections the cutblock goes right up to the trail
Some of the forest looks like it’s dead

Did you like this post? Save it for later!

Empty beach

5 Reasons to Visit Tofino

Drive as far west on Vancouver Island as you can possibly go and you’ll find yourself in Tofino – a small coastal town of about 2,000 residents, situated on the traditional territory of the Tla-o-qui-aht First Nation.

It’s not easy to get to. There’s no public transport, so you must drive, fly, or book yourself onto a private bus. It’s at the very end of the road. Travel any further and you’ll find yourself in the Pacific Ocean.

Yet despite its humble size and remote location, Tofino is high on the tourist to-do list. Why? I can give you five very good reasons.

1. Pacific swell

There’s one thing that Tofino is known for above all else – surfing. Of course, there is so much more to this place than just riding waves. But it’s a big draw (and let’s face it, there isn’t an abundance of world-renowned surf spots in Canada). One local even told me that Tofino has the most consistent swell in the whole of North America. I can’t verify this claim, but if you don a winter wetsuit and paddle out, the Pacific Ocean is sure to provide sooner or later. Top surf beaches include Chesterman’s, Cox’s Bay and Wickaninnish (which is also the closest surf beach if you’re staying down the road in Ucluelet).

2. Rainforest walks

Tofino sits on the tip of the Pacific Rim National Park, offering no less than 511km² of temperate rainforest to explore. It’s thick with old growth trees that have lichen dripping from the branches – a sure sign that you’re breathing fresh rainforest air. There aren’t many mountains to conquer, but there are plenty of easy-to-navigate trails that weave along the coast. The walk from Wickaninnish Beach to Florencia Bay is a good place to start – known as the Nuu Chah Nulth Trail. If you’re craving some elevation, head to Cox’s Bay and hike up the hill at the southern end of the beach. It is a bit of a scramble, but the views at the top are worth it.

Woman looks across forest and sea from high vantage point
The view across Cox’s Bay
Two women look across rainforest from high vantage point
Looking across the rainforest from the top of Cox’s Bay

3. Canadian-sized beaches

My mother-in-law says that everything in Canada is big. Judging by the size of the beaches in Tofino, she might well be right. At low tide, the aptly named Long Beach spans a whopping 16km (10 miles). And there’s plenty of others to choose from, including Chesterman’s Beach, Florencia Bay, Cox’s Bay…and so the list goes on. At each, you’ll find the dense rainforest extends right up to the coastline. When the trees finally give way, you’re met with vast stretches of golden sand, refined over the years by the rolling waves of the Pacific Ocean. Due to their westerly position, all the beaches enjoy fantastic sunsets.

Man stares out across empty beach
Florencia Bay

4. Nature, nature everywhere

Following the Clayoquot protests of the 1990s, Tofino and the surrounding area was named a UNESCO Biosphere Reserve. Having been threatened by the logging industry, it is now a nature lover’s paradise once again. The peninsula is encased by water, with the Pacific Ocean on one side and the Clayoquot Sound on the other. Sightings of orcas, humpback whales and grey whales are not unusual. Bald eagles rule the sky, while wolves, bears and deer stalk the forest. There is a sense of the wild in Tofino, and thanks to all the trees, the oxygen-rich air is as fresh as can be.

Back of woman in a red kayak on the sea
Exploring the Clayoquot Sound by kayak

5. West Coast living

Tofino is the very epitome of West Coast living. For non-North Americans, this is a difficult concept to explain. It’s a lifestyle; a way of being. It’s a laid-back vibe, where people cycle to the beach, wetsuit on and surfboard strapped to the rack. It’s jaw-dropping sunsets and small, independent eateries which punch above their weight. It’s a hotchpotch of wooden buildings, ranging from rickety wood cabins to grandiose beach-front pads. It’s a place that makes you forget about work and all the chores waiting for you at home. It’s a place you don’t really want to leave.

Man cooks using a beach fire
Preparing dinner post-surf

When to visit

Tofino touts itself as a year-round tourist destination. The summer months are peak season, during which the crowds can be heavy. May and September are quieter, yet still enjoy good weather. If storm watching is your thing, head there in winter. The ocean puts on quite a show.

Where to stay

Tofino is full of holiday rentals, most of which are available to book through websites such as AirBnB and VRBO. There’s something to suit all budgets. For camping, options include Bella Pacifica Campground, MacKenzie Beach RV and Camping, and Long Beach Campground.

If you can’t find what you’re looking for, try Ucluelet instead (known to the locals as Ukey). It’s at the other end of the peninsula and is a 40 minute drive from Tofino town centre.

What do to

  • Get a surf lesson with Surf Sister or Pacific Surf Co.
  • Book a kayak trip with Tofino Kayaking Company
  • Walk from Wickaninnish Beach to Florencia Bay
  • Drive up Radar Hill and marvel at the views
  • Head to Ukey and walk the Wild Pacific Trail
  • Eat a Tacofino and get a growler from Tofino Brewing Co.
  • Book a boat trip to Hot Springs Cove
  • Have a sunset beach fire on Chesterman’s Beach
  • Book a fishing charter and catch your dinner
View from Mount Erskine

An Active Guide to Salt Spring Island

Salt Spring Island is the largest of the Gulf Islands and is a firm favourite amongst those looking to escape the hubbub of the city. And with good reason. It’s just a short trip from either Vancouver Island or the Lower Mainland, but once you step off the ferry, island life quickly kicks in. There’s a decidedly laid-back vibe here, with arts, crafts and food being high on the list of priorities.

Food is a particular passion on Salt Spring, especially of the homegrown, artisan variety. Cheese, coffee, salt, meat, vegetables, baked goods, wine, ale and cider – it can all be found here in abundance. The plethora of markets, roadside stalls, farm shops and independent eateries ensure you can never go far without devouring something totally delectable. All locally grown and produced, of course.

But as I found out on a recent visit, Salt Spring Island also has a few treats in store for the outdoors enthusiast. So, here’s my active guide to Salt Spring Island.

Cycling

Salt Spring Island is a popular destination for those touring on two wheels. If you visit in the summer months, it won’t be long before you see a Lycra-clad cyclist lugging a pair of panniers up a hillside.

Upon telling a local that I, too, intended to cycle around the island, his eyes widened and a torrent a warnings quickly poured forth. It was too hilly, he said, and too dangerous. The roads don’t have separate cycle lanes and the drivers aren’t particularly accommodating.

Feeling a little deflated, I made my way to Salt Spring Adventure Company and made further enquiries. The staff allayed my fears, saying that while there are hills, you can always get off and push (or rent an e-bike). And yes, you do have to cycle in the hard shoulder, and yes, some of the roads are busy. However, if you are reasonably confident on a bike, and you stick to the quieter roads, you’ll be just fine. So, I rented a bike and off I went.

There are two recommended routes – the northern loop (approximately 35km) and the southern loop (approximately 50km). If you’re keen, you could do the whole thing.

I opted for the northern loop, heading out of Ganges on the Upper Ganges Road, skirting St. Mary’s Lake, peddling to the northern-most tip before heading back along Sunset Drive for a pit-stop at Vesuvius Café. There was one final hill to conquer before reaching Salt Spring Wild Cider, where it was time to relax in the apple orchards while quenching my thirst.

It cannot be denied that some of the hills are real thigh-burners. And some of the roads are unpleasantly busy. But on the whole, it’s a beautiful way to spend a day. The winding country lanes take you through pastoral landscapes where vines grow and cattle lazily munch. During August the hedgerows were bursting with blackberries, and there’s plenty of quaint cafes, farm shops and roadside stalls to keep you fuelled. If it all gets too much, you can always stop in one of the freshwater lakes for a swim.

Three friends sit at a table in an apple orchard

Enjoying a cider after a thigh-burning bike ride

Swimming

Unless it’s blistering hot outside, sea swimming probably won’t be high on the agenda. The waters surrounding Salt Spring Island are incredibly cold. The warmest waters are up by Vesuvius, but even those are frigid.

But never fear, there is a handful of freshwater lakes around the island, perfect for a dunk. St Mary’s Lake is by far the largest, with Cusheon Lake, Stowell Lake and Weston Lake being other options.

Pebble beach with logs on

Caution – the water is cold!

Hiking

Baynes Point is the highest point on Salt Spring Island. Standing at 602m, you won’t be scaling any mountains during your visit. Nevertheless, there are some great hikes to be had.

A favourite was the hike to Baynes Point from Burgoyne Bay. The steep, steady climb takes you through the heart of Mount Maxwell Provincial Park, one of the largest contiguous protected areas in the Gulf Islands. When you reach the lookout, you are rewarded with stunning views across the sea to Vancouver Island. You can actually drive to this point, but if you ask me, the rewards are greater if you arrive on two feet!

Another good hike is Mount Erskine. It’s not as long, but the walk through the forest is extremely peaceful, and the views are just as breathtaking (although the mill at Crofton, which can be seen across the water, is a bit of an eyesore!) If you have kids with you, they’ll also love the little fairy doors which are dotted throughout Mount Erskine Provincial Park.

View across the sea from Baynes Point

The view from Baynes Point, Salt Spring Island

Trail running

It often follows that where there’s good hiking, there’s also good trail running! Ruckle Provincial Park is particularly plentiful in that department. I was staying at the campsite, so followed the trail up to Yeo Point and back. There’s not much elevation and there are a few little beaches to stop at for a rest (and a swim, if you can brave the cold water).

Man balances on a log

Exploring at Yeo Point

Kayaking

Kayaking is another popular past-time on Salt Spring Island, although you do need to be wary of the ferry traffic. Kayaks can be rented from Salt Spring Adventure Company and they can offer some top tips on destinations to hit up. Or, you can always go on a guided tour.

I decided to paddle over the Chocolate Beach on Third Sister Island, which is a short jaunt from Ganges Harbour. With clear blue waters, a white crushed shell beach and a wooden swing hanging from an arbutus tree, you’d be forgiven for thinking you’d landed on a tropical island.

Tree swing on Chocolate Beach

Chocolate Beach on Third Sister Island