Tag Archives: mountain biking

Mountain biking in Fernie

Mountain Biking Road Trip: Rossland, Nelson and Fernie

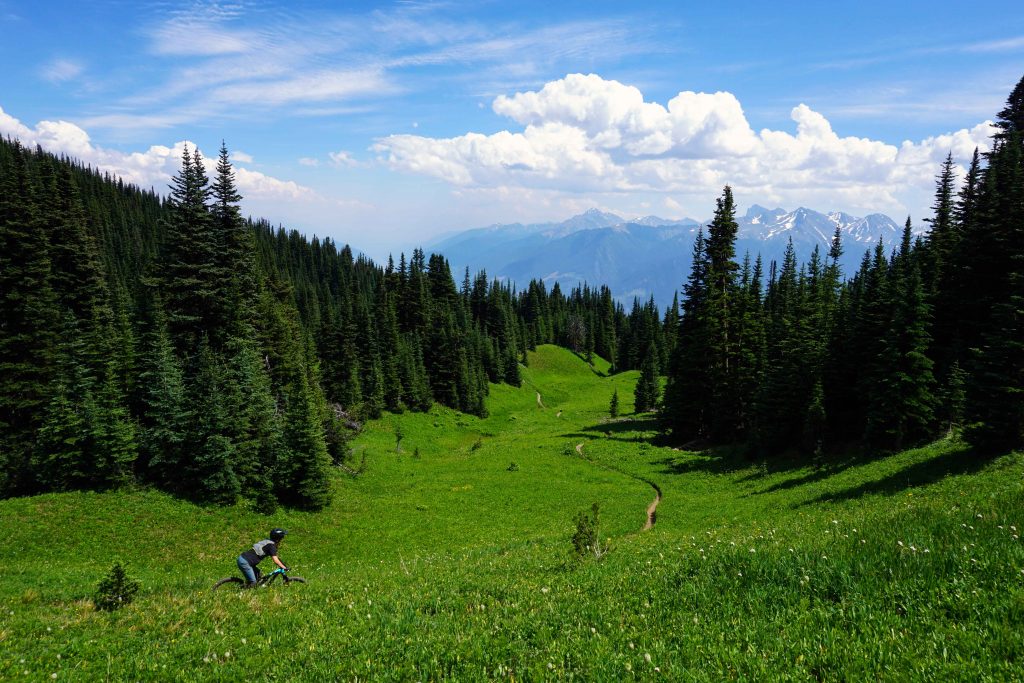
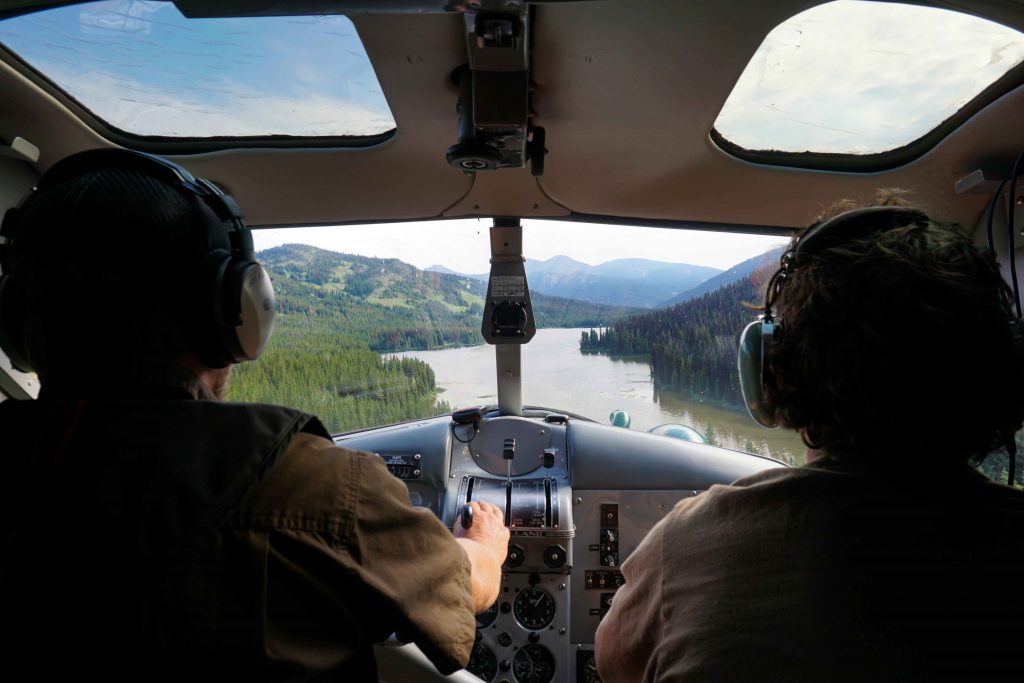
The Kootenay region of south-east British Columbia is best known as the Powder Highway – a winter destination much-loved for its world-class resorts and serious snowfall. Come summer, however, mountain bikers crawl out the woodwork looking for a different type of powder: brown powder.

In fact, this corner of B.C. has some of the finest trails around, with bike parks, flowy singletrack, X-C terrain, steep downhills and even an IMBA ‘epic’ on offer. Throw in the quaint towns, amazing scenery and ubiquitous breweries and you’ve got yourself one hell of a mountain biking road trip. The full Kootenay MTB tour would include the likes of:

  • Rossland
  • Nelson
  • Kaslo
  • Cranbrook
  • Fernie
  • Kimberley
  • Invermere and Panorama
  • Golden (including Kicking Horse Bike Park)
  • Revelstoke

During the summer of 2021, this was my intended itinerary. Yet the wildfires meant a delayed start, forcing me to scale back my trip to three of the big hitters: Rossland, Nelson and Fernie. Here’s what I found.

Rossland

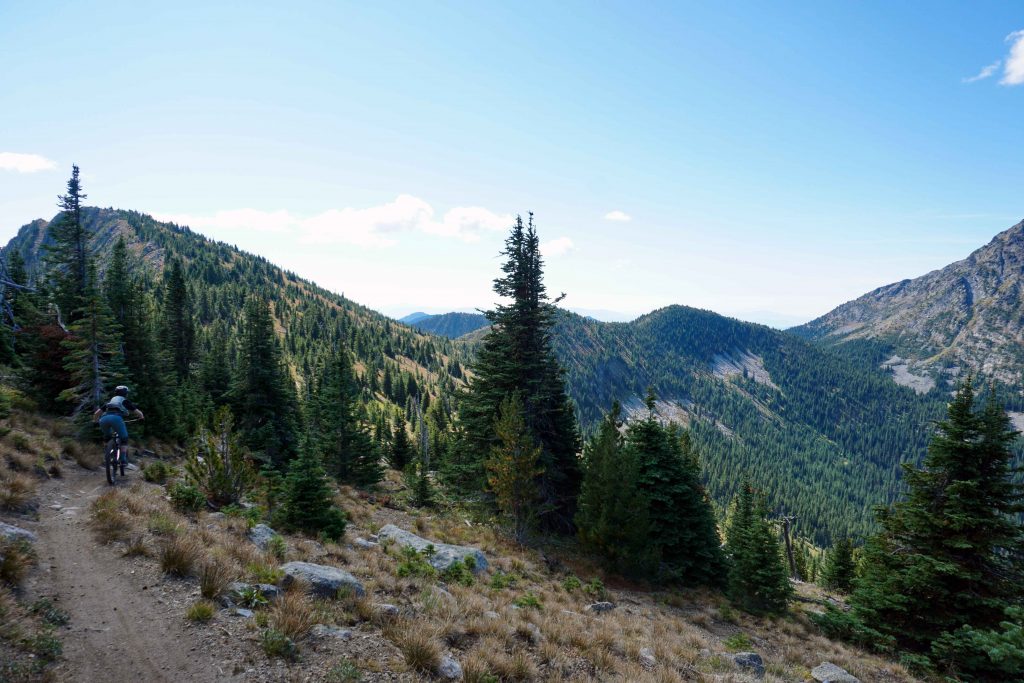
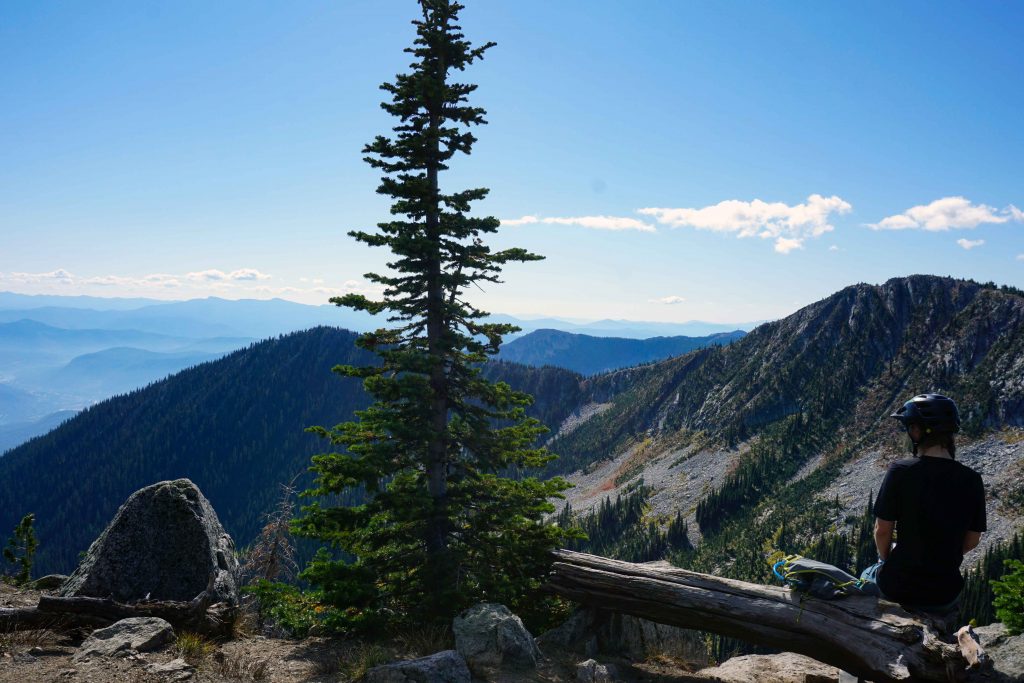
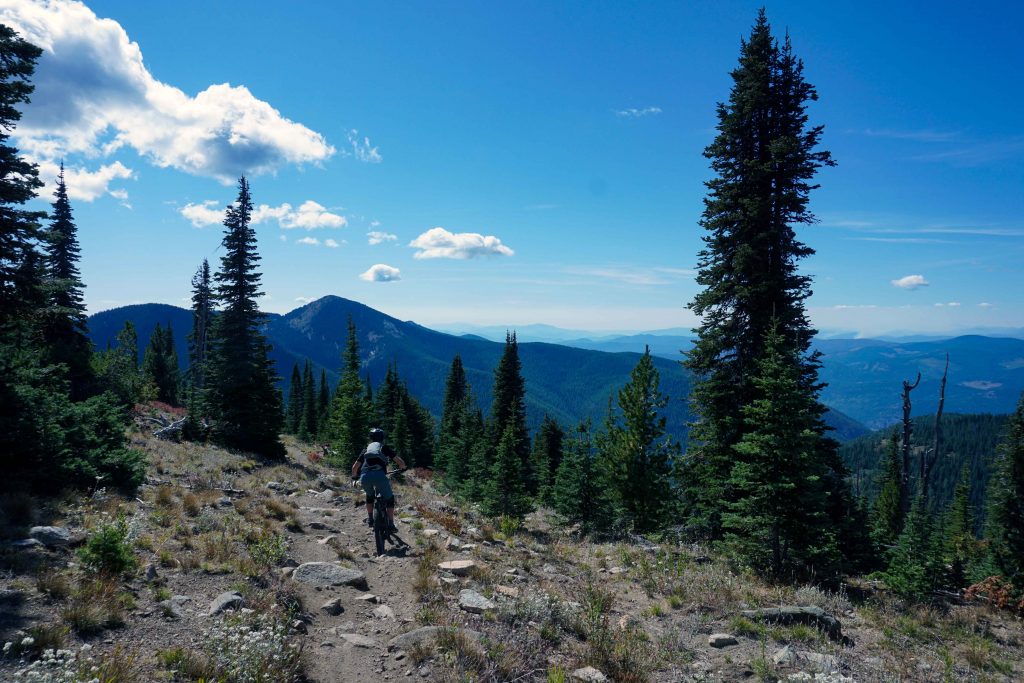
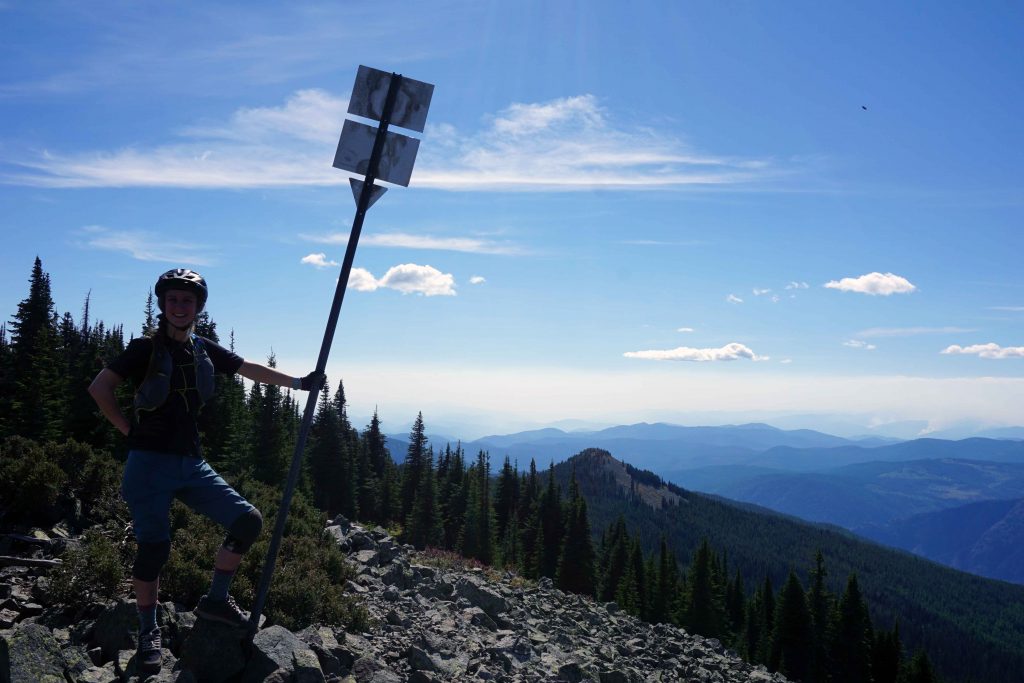
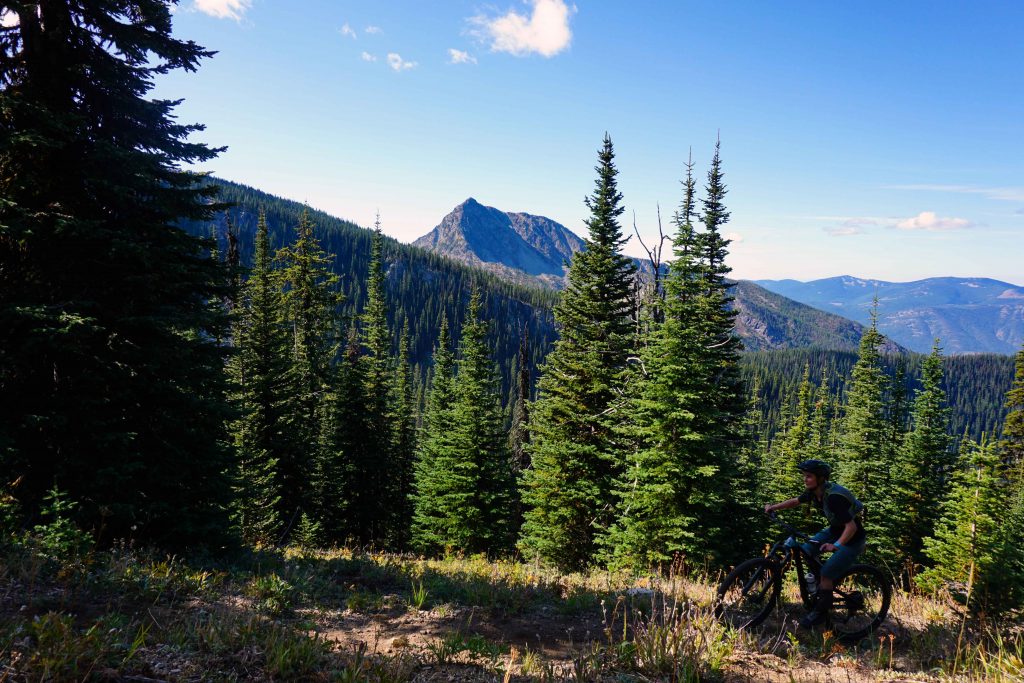
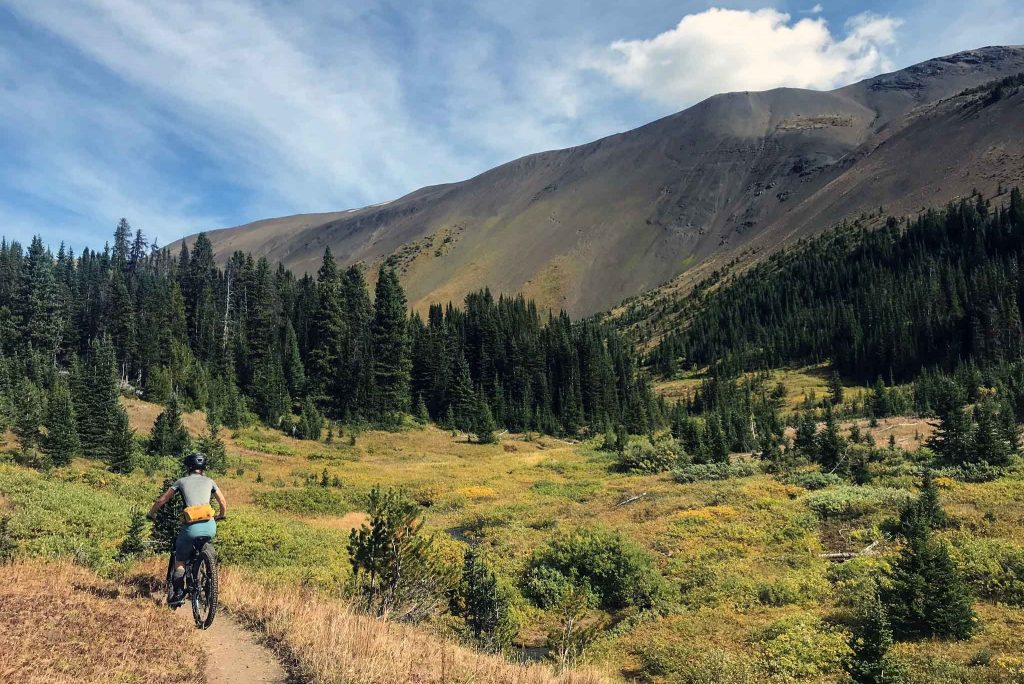
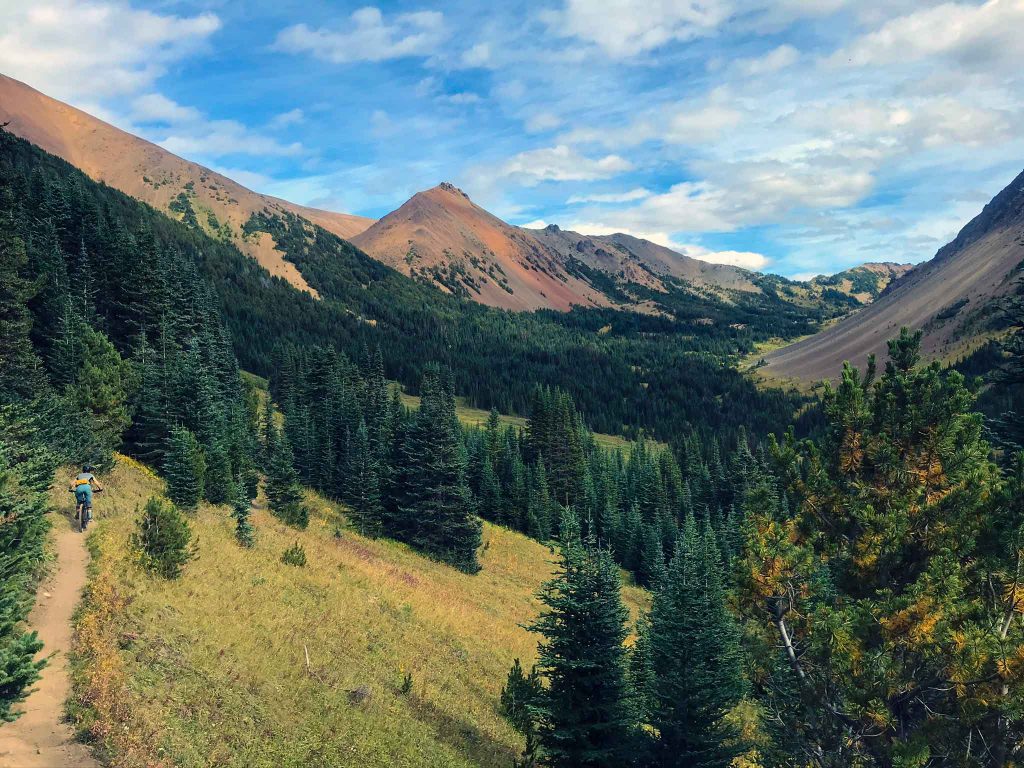
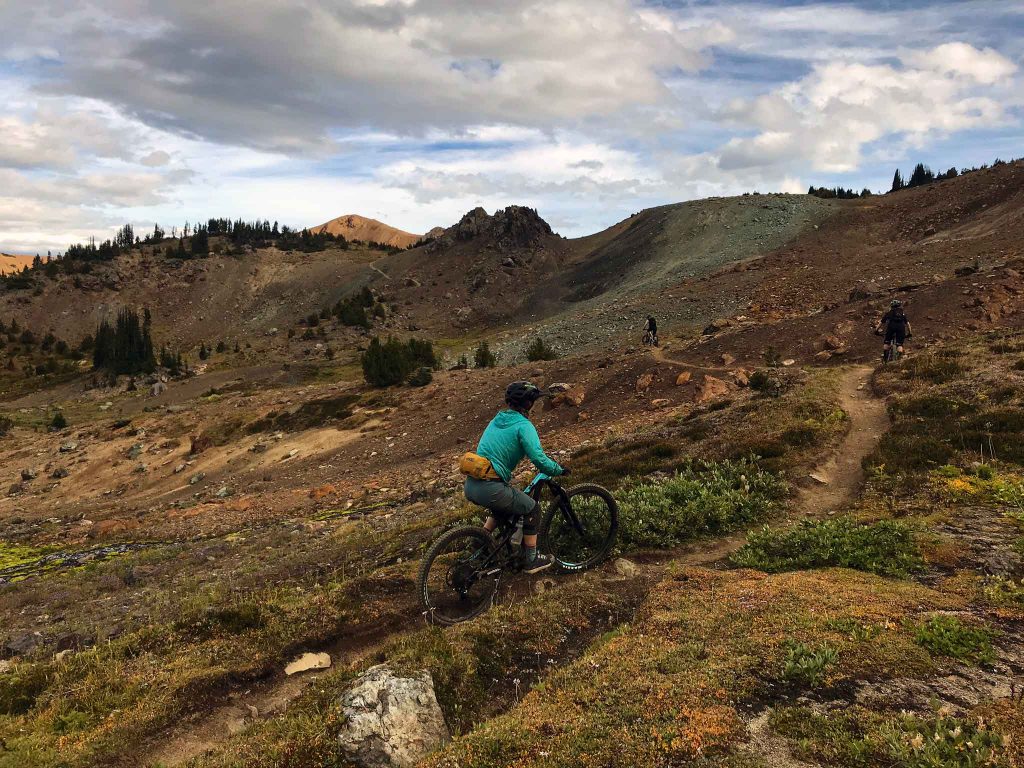
You can’t talk about mountain biking in Rossland without mentioning the Seven Summits trail. Named an official epic by the International Mountain Bicycling Association (IMBA), and awarded 2007 ‘Trail of the Year’ by Bike magazine, it’s considered the crown jewel of Rossland’s trail network. It’s a big day out, spanning 30.4km (36km when combined with the Dewdney trail). It’s also physically demanding, with 1,035m of vertical gain and a high point of 2,194m.

If you’re eyeing up the Seven Summits trail, then I have a separate blog post detailing everything you need to know: Mountain Biking the Seven Summits Trail in Rossland. Alternatively, you could just shuttle the Dewdney trail, which is a fast 5.8km descent through the forest.

But Rossland’s not a one trick pony; there are plenty of other trails to choose from too. The Larch Ridge loop is a fun little introduction. You’ll also pass the parking lot on the highway if you’re coming from Vancouver or Kelowna, so you may as well stop for a pedal. You start with a bit of cross-country on the Larch Ridge trail, followed by a descent on the Monticola trail, finishing with an uphill back to your car along COG.

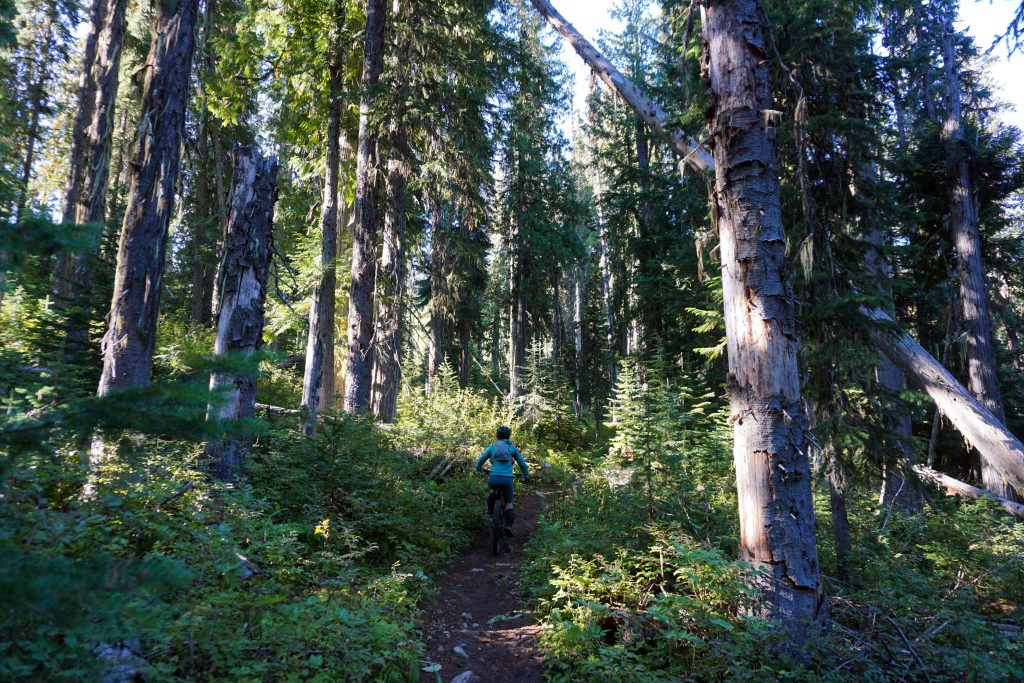
The Monte Christo – KC area is another riding area, conveniently located at the top of town. The trails feature a lot of flowy singletrack, but they don’t seem to link up very well (perhaps I was just doing it wrong). We did a few laps incorporating North Star, Milky Way (upper and lower), Techno Grind, Stardust and Cemetery. We also took the Green Door trail down to neighbouring Warfield, but the pedal back to Rossland was a bit of a slog, and not a particularly inspiring one at that. Milky Way was a highlight for me, and is described by Trailforks as ‘one of the funnest trails around.”

Other popular trails include SMD and Whiskey (in Malde Creek), plus the all trails over on Red Mountain.

Personal favourite trail in Rossland: Seven Summits combined with the Dewdney trail.

Person mountain biking along mountain ridge
The Seven Summits trail in early September

Where to stay in Rossland

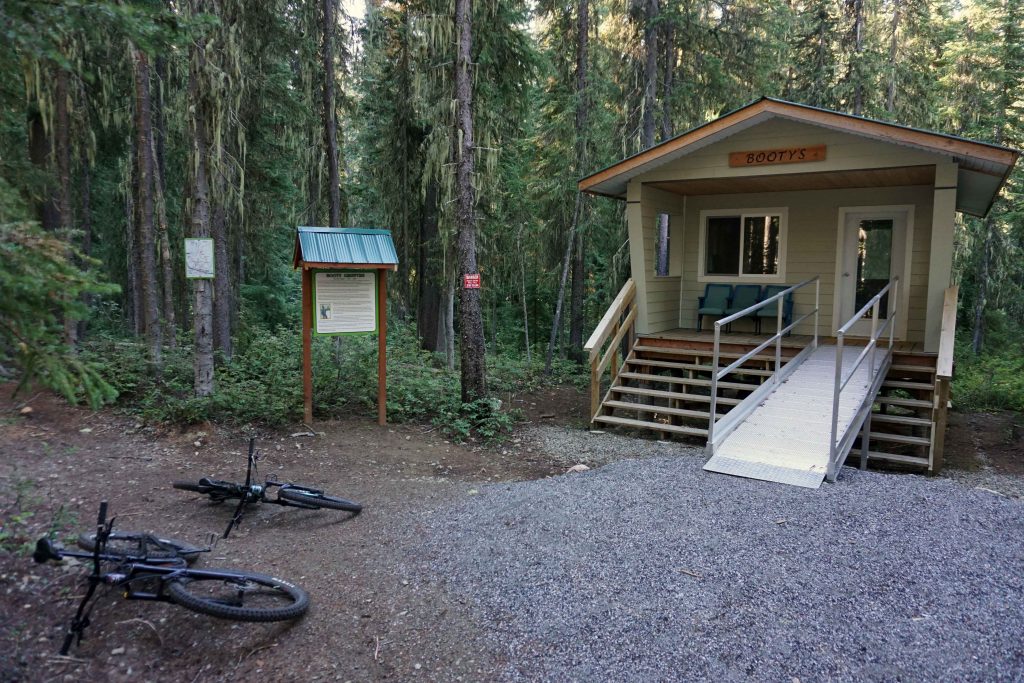
The Rossland Lions Community Campground is a good base. You can ride to town and up to the Monte Christo area from here. It’s also right next to the skills park. I can recommend pitch number 10 as having a good amount of shade! The campground also has free showers.

For a cheaper option still, you could sleep in your vehicle at Nancy Greene Provincial Park, although you’ll have to drive to the trails from here. The camping is described as ‘parking lot style sites’, so it’s not the most attractive location. There are also some sneaky free camping spots along the 3B highway, in between Nancy Greene Provincial Park and Rossland.

If you’re looking for an actual roof over your head, you’ll find loads of accommodation at Red Mountain Resort.

Other info

It’s pretty much obligatory to finish the day at Rossland Beer company, which is also next to the Revolution Cycles bike shop.

Nelson

Just an hour from Rossland is Nelson, another major mountain biking destination. There’s some seriously sendy stuff here if you want it, such as Bedframe (on Morning Mountain) and Newtsac (on Nelson’s North Shore). Turnstyles and Lefty are machine groomed trails (both on Morning Mountain) which offer bike park style laps. Yes please.

For a big day on Morning Mountain, climb up the ascent trails (Bottom’s Up, Upper Bottoms, Fairly High and Very High) onto the West Giveout FSR. You can also shuttle to this point. Ride further up the FSR to join onto Power Slave, which can be quite loose and steep in parts. This flows into Bear’s Den, and a quick freewheel back down the FSR brings you to Mister Slave. This connects you to the lower trails, where you can choose between Turnstyles, Placenta Descenta and Illuminati. Placenta Descenta is quite chundery, whereas Illuminati is more varied. I would give Oil Can a miss.

Over on the Nelson’s North Shore, the vibe is more slab-tastic. You can pedal or shuttle up the Kokanee Glacier Road/Bradley Creek FSR. Goosebumps is pretty much the only intermediate option over here. Expect rocks faces and slabs.

That’s all we had time for, but there are other mountain biking areas in Nelson. Be aware that Mountain Station can be subject to trail closures due to active logging.

Personal favourite trail in Nelson: Turnstyles.

Where to stay in Nelson

Those camping have two options: Nelson City Campground and Kokanee Creek Provincial Park.

The benefit of Nelson City Campground is that it’s a short walk to town, which is great if you want to get stuck into Nelson’s food and drink scene. However, some of the pitches are crazy small, which is why you’ll be asked to provide your vehicle size when you make a reservation. If you end up with one of those dinky little sites, you’ll likely feel quite hemmed in.

Kokanee Creek, on the other hand, has normal sized pitches with fire rings. You can also saunter down to the lakeshore beach, and you’re a hop and a step from Nelson’s North Shore. But it’s a 20 minute drive into town, and even further to Morning Mountain.

For accommodation with four walls, check out the Adventure Hotel, plus all the offerings on AirBnB and VRBO.

Other info

Nelson is a lively town full of heritage buildings, independent stores, art galleries and restaurants. Most of the action takes place on historic Baker Street.

When riding, remember that you’re in grizzly bear country. There are plenty of signs on the trails reminding you to “make noise”.

Fernie

Fernie has a bike park and a whopping 378 trails to choose from. So, you’re going to have a good time in Fernie. We got to the bike park on the last day of the season, which was Labour Day in Canada. It feels a lot smaller and more jaded than bike parks such as Whistler and Sun Peaks. The Elk Chair can only take two bikes at a time and is incredibly slow. Unfortunately, the Timber Chair was also out of action, so we didn’t get to explore the whole resort. But nevertheless, it’s a great day out with trails for all abilities. Duff Dynasty is a fun green, while at the other end of the spectrum you’ve got super spicy Kodiak Karnage.

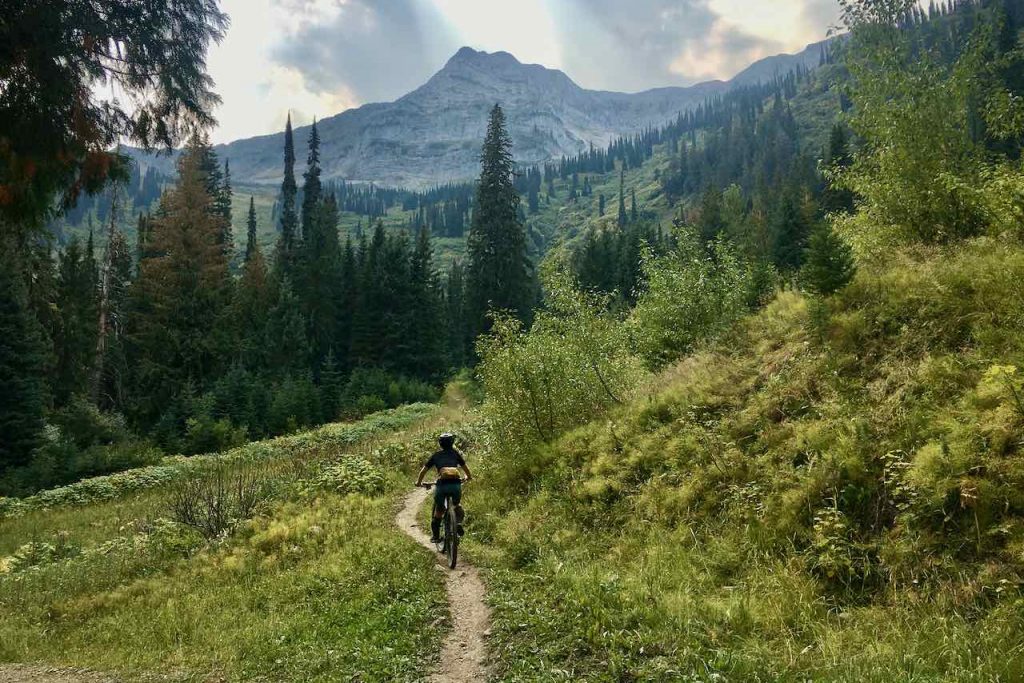
We spent the rest of the time riding Mount Fernie and Mount Fernie Provincial Park. This is partly because we could ride straight there from our campsite, and partly because we spoke to some locals who listed off all their favourite trails in Fernie – and they all happened to be in that area. They recommended: Project 9, Verboten, Eric’s Trip, Red Sonja, Slunt (S-Bomb) and Brokeback Ridge. We rode them all and can confirm that they’re all amazing. For the most part they were fast and flowy singletrack. Oddly, they didn’t really feel like black diamonds by B.C.’s standards. The exception is Verboten which is rocky and rooty.

A few things to note: some of the climb trails are seriously steep and require thighs of steel. Also, if you ride Eric’s Trip and Mic Mac you’ll have to ride along the Highway trail if you’re parked/staying in the provincial park.

There are tons of trails on the other side of the highway, with popular riding areas including Castle Mountain and Morrissey Ridge. The same locals told us that there has been a lot of logging up there, which they described as “depressing”. That’s another reason we gave it a miss this time round.

Mountain biking in Fernie

Where to stay in Fernie

Mount Fernie Provincial Park has a primo campsite with really nice pitches, fire rings and showers. You can also pay by card (if you haven’t reserved in advance) which I’ve not experienced before with BC Parks. You can ride straight from the trails from here, which is always handy.

Free camping can be found up at Michel Creek by the river. We stopped in for a look and there were a few fishing/hunting parties there. However, it’s quite far out of town. Fernie has a couple of hostels: the Raging Elk Hostel and HI Fernie Backpacker Hostel. As you’d expect from a ski town, there’s also a range of hotels and AirBnBs.

Other info

There is some serious wildlife in Fernie. You cannot leave anything out in your campsite that might even vaguely smell of food. You also have to be vigilant on the trails – it’s not uncommon to see a mamma Moose with a calf. Riders have been charged in the past. And yes, it’s grizzly bear country.

Personal favourite trail in Fernie: Project 9.

We explored Rossland, Nelson and Fernie over 11 days, which included driving from/back to North Vancouver. Of course, we only scratched the surface of the riding on offer. I can’t give you the insight that a local could – it’s just an overview of what we found and what we enjoyed/didn’t enjoy. Hopefully you find some of the information useful if you’re planning a mountain biking trip to the Kootenays.

I’m hoping to do more riding in the Kootenays, so if you have any more tips, please feel free to share them in the comments!

Person on mountain bike descends through alpine meadow

Mountain Biking in the South Chilcotin Mountains

As I haul my bike up an impossibly steep slope, furiously waving away black flies and gasping for air, I wonder what the hell I was thinking. I’d done this trip the previous year and vowed that once was enough. But then I pause and look around me. The South Chilcotin Mountain Range extends for miles in every direction. Above me I can see the barren alpine, where black volcanic rock is dotted with summer snow fields. Below are verdant meadows, full of wildflowers, marmots and crystal-clear streams. There is no sign of civilisation: just mountains. That, I remember, is why I’m here. For the views. For the adventure. For the promise of some of B.C.’s finest singletrack.

Woman pushes bike up mountain trail
Hauling my bike up the High Trail

And singletrack there most certainly is, with over 200km of trails to enjoy. But my god, do you have to work for it. For two years in a row, I’ve boarded a floatplane at Tyaughton Lake and been dropped on the shores of Spruce Lake. The transport comes courtesy of Tyax Adventures – who, by the way, are not the same people as Tyax Lodge. From here, I’ve taken the Spruce Lake Main Trail and joined onto the High Trail, which winds its way to viewpoint at the top of Windy Pass. The views are absolutely amazing, but in all honesty, getting there is an uphill struggle – literally and metaphorically.

The alpine meadows

Wilderness singletrack

The thing about the South Chilcotins is that the trails aren’t regularly maintained. These are old horse pack trails, used to service the mining industry in days gone by. You can expect steep gradients, windfall, roots, rocks and snow (depending on the time of year). The climbs are not 100% ride-able. At points I’d be dismounting from my bike so often that it made sense to remain on foot. In the run-up to my second trip, my friends were asking how best to prepare. Was their fitness good enough? What climbs might it compare to on our local trails? Really, your best training regime would be to do a full body workout at altitude.

Mountain bikers walk bikes across a summer snow field on a mountain
Snow fields in July

The long distances and the need to hike-a-bike make these physically demanding days. On both occasions, my shoulders were burning just as much as my legs. Living at sea level for 99.9% of the year doesn’t help either. Spruce Lake is at 1,500m, and depending on what route you do, you can climb to well over 2,000m. Hills that I’d normally cruise up became mammoth efforts as my body struggled to suck in enough oxygen. Some people don’t notice the effects of altitude at all. Unfortunately for me, I’m not one of them. This secured my position at the back of the pack, where I’d regularly stop ‘to admire the view’ (but was actually just trying to die in private).

Stopping to admire the view/quietly die

Windy Pass and Camel Pass

But as they say, what goes up must come down. And for most mountain bikers, it’s the down they’re really after. By taking the High Trail, the first taste of this much-famed singletrack comes after the top of Windy Pass. The trail (still the High Trail) wraps around the side of the mountain, gradually descending through the alpine meadows. It’s fast and flowy. The wildflowers whip past your peripheral vision as more mountainous peaks loom in the distance.

Mountain biker descends through alpine meadow
Descending down the High Trail

On my first visit, this descent was short-lived as we cut off towards Camel Pass. To my horror, it involved another climb at an even greater elevation. The landscape increasingly began to resemble Mars: red, rocky and seemingly devoid of life. We passed through a scree field and pedalled uphill once again to a viewpoint. The wind was really blowing, so we quickly began the long descent down the Camel Pass Trail, briefly joining back onto the High Trail before finishing up with Molly Dog, Pepper Dog and the Freiburg Trail. The terrain changes rapidly, from the rock-infested alpine, down through the meadows and back into the forest. Once amongst the trees, the soil is much sandier, making bike control a lot harder.

Woman on mountain bike
Mountain biking in the South Chilcotins

I reached the end feeling shell-shocked. Was that the best or worst six hours of my life? I’d been riding for less than a year and I’d found it tough. Crossing the scree field was particularly terrifying as there is no margin for error. But it was also incredible, a day of adventure with some really high highs and jaw-dropping scenery. Still, I decided that I probably wouldn’t return to the South Chilcotins until I was a better rider – like, a much better rider. So when, a few months later, some friends ask if I’d be willing to go again, I wavered. I don’t like to be left out, but then again, the last time I had cried. In the end, the decision was made for me: I’d been booked onto the float-plane.

Floatplane on alpine lake with mountain bike wheels loaded onto the wooden wharf
Unloading at Spruce Lake

Take two

So it was that over a blisteringly hot Canada Day weekend, I was back in the South Chilcotins – despite having sworn I’d never do it again, ever, ever, ever. After some last-minute research we decided to give Lick Creek a go. Once again, the day began with a flight to Spruce Lake followed by the gruelling ascent up the High Trail. This time I was better equipped mentally for the first part of the ride. The climb was just as difficult, but at least I knew I could make it – and that the pain would stop after around two hours. We got to the top and I assumed (unlike my previous excursion) that the climbing was done and dusted.

Woman stands on mountain looking across at the view
Windy Pass

That turned out to be a mistake. After a while the High Trail takes an upwards turn once again as we searched for the High Trail Connector. Although it’s shown on Trailforks, the trail is entirely overgrown and we had to retrace our steps to High Trail South. By now I was pretty hangry and I wasn’t happy about the unnecessary climb, even if it was only about half a kilometre. We got back on course and reached the Eldorado Cabin, which is owned by Tyax Adventures. After inhaling some food, we made the final push up the Lick Creek Trail. This was the hardest part for me. Fatigue had set in and the relentless XC nature of the day thus far was frustrating. Everyone was wondering when the climbing would end and the fun would begin.

People sit on deck of wooden backcountry cabin
Eldorado Cabin

Lick Creek Trail

Finally, we reached the point where we couldn’t go any higher. It was time to go down once and for all. Unfortunately, I was so completely bushed by this point that my riding fell seriously below par. We’d been whizzing along for about a minute when my handlebars clipped a tree and I went OTB. Not a great start. We then descended through an alpine meadow where a narrow trail is carved into the ground. It’s beautiful, but also tricky as the grassy banks are above pedal height. You can’t veer off-course for fear of catching a pedal, meaning it’s a bit like riding a skinny for a couple of kilometres. The trail is very dry and exposed in parts, with a few tight, loose corners. The sandy trail bed can also make for a sketchy ride if you’re not used to it.

The Lick Creek Trail

We returned to the lodge after eight hours. I felt like I’d survived an arduous but epic journey, which in a way, is exactly what I’d done. Just like before, I couldn’t work out if I was elated or traumatised. I’d gone over the handlebars twice. I’d wondered if I was physically capable of pushing my bike up another mountain. The Lick Creek Trail had also been beyond my ability in parts. But I’d also laughed, said ‘wow’ about a million times, and traversed a spectacular landscape. When you ride in the South Chilcotins, you have to accept that it’s a type 2 kind of fun, where misery and joy go hand-in hand. You do it for the adventure, with the singletrack descents being a juicy bonus.

Mustering up some energy before the big descent

Sitting in the lodge that night, physically and mentally drained, I was adamant that I wouldn’t return for a third year in a row. Will I go back on my word? Absolutely.

Traumatised or elated? Hard to tell

Mountain biking in the South Chilcotins – what you need to know before you go

Getting a plane drop

Plane drops are arranged through Tyax Adventures. You can be dropped at Warner Lake, Spruce Lake or Lorna Lake. Trips to Warner Lake may be diverted to Spruce Lake in bad weather. Try to bag an early flight – the more time you have, the better. You can fit five people in a plane if you all take both wheels off your bikes. However, there is a weight limit. Arrive early enough to dismantle your bikes. Be prepared to put them back together again after landing at your chosen lake.

Two men dismantle bikes while standing on a wooden wharf on a lake with floatplane in the background
Dismantling our bikes ready for the short flight to Spruce Lake

Getting a guide

You can pay extra for a guide if you want. This provides peace of mind as you don’t have to worry about navigation. However, I’ve never used a guide and have navigated using Trailforks perfectly well. I take extra battery packs to ensure my phone doesn’t run out of juice.

View from a floatplane window as it flies over a forest
It’s a 15 minute flight to Spruce Lake

Not getting a plane drop

You can ride in the South Chilcotin Mountain Range without the assistance of a plane drop. You can pedal up from Tyaughton Lake or you can shuttle trails such as North Cinnabar.

Hike a bike is a common theme if you’re not shuttling

The weather

You are at the full mercy of the weather. The higher elevations have zero shade. On hot days take sunscreen and sunglasses. It can be much colder (and windier) higher up, so layers are essential. It can sleet or snow in the mountains, even during the summer months. Be prepared!

Woman lies on back on grass with gloves covering her face
Not a lot of shade in the alpine

The backcountry

Riding in the South Chilcotin Mountain Range is a true backcountry experience. You have to be self-sufficient in terms of food, water, mechanicals and safety gear. Get someone in your group to take a GPS communications device. A set of walkie talkies can also be useful. You’ll need a backpack or a trail running vest for your gear.

A true backcountry experience

Bear country

Grizzly bears are very common in the South Chilcotins. Two weeks before my first visit, the Spruce Lake Trail was closed due to a bear attack. Make noise, take bear spray and know how to use it.

Food and water

Fuel is absolutely essential out here, as is water. It’s exposed and water sources are few and far between. During my second visit, B.C. was experiencing an unprecedented heat wave. I carried a water bottle and a 1.5 litre hydration bladder, and both ran dry before the day had ended.

Choosing a route

There are lots of routes to choose from. Take a look at Trailforks for inspiration. If you go to Warner Lake, the most direct route down is the Spruce Lake Trail, which is a blue square. Options such as the High Trail and Camel Pass are much harder but deliver on views.

Woman sits on mountain bike on mountain pass
Views for days

How long does it take?

The amount of time it takes obviously depends on the route you do. I recommend starting as early as possible and taking lights, just in case. The Windy Pass/Camel Pass route took us six hours.

Where to stay

Tyax Lodge is located on Tyaughton Lake, which is a short pedal to Tyax Adventures (where you get the float-plane). They offer rooms and camping. If you camp, I suggest booking the serviced sites closest to the lake, as these are the only ones with shade. Being a guest means you can use the lodge’s amenities, such as the stand-up paddle boards and kayaks.

There are also some free recreation sites nearby. The closest to Tyax Adventures is Friburg Rec Site, which has a couple of nice pitches down towards the left-hand side if you’re looking at the lake (go down what looks like a road to someone’s house!) There’s also Mowson Pond Rec Site and Gun Creek Campground. Gold Bridge is the closest town.

Even if you don’t stay at Tyax Lodge, you can drop in and make use of their bar/restaurant. It’s also the only place you’ll get WiFi.

Note that Tyax Adventures and Tyax Lodge are not the same company.

Plane drops courtesy of Tyax Adventures

Phone signal

There is no phone signal in the area.

Bugs

Black flies, horse flies and mosquitoes were a real issue when I visited the South Chilcotins in July, but not so much in September.

Getting to the South Chilcotin

Getting to the South Chilcotins can be an adventure in itself. From Vancouver, the most direct route is to drive to Pemberton and take the Hurley River Forest Service Road. This connects Pemberton Meadows to Gold Bridge. It’s a long and bumpy ride, and you should check the road is actually open on the gov.BC website before you travel. Your other option is to go via Lillooet on Highway 99. Google Maps does not always recognise when roads are closed, so do your research before leaving home.

Mountain Biking the Seven Summits Trail in Rossland

Nestled in the heart of British Columbia’s West Kootenay region is Rossland, a little mountain town with international repute. Not only has it been called the mountain biking capital of Canada (a pretty ballsy statement, if you ask me), it’s also home to the Seven Summits trail. Named an official epic by the International Mountain Bicycling Association (IMBA), and awarded 2007 ‘Trail of the Year’ by Bike magazine, it’s considered the crown jewel of Rossland’s trail network.

In fact, Canada only has three IMBA epics, all of them located in British Columbia. This accolade is bestowed on trails that deliver a “true backcountry riding experience”. As the IMBA says, official epics are “immersive rides that are technically and physical challenging, beautiful to behold and worthy of celebration”. They must also be “demanding, majority singletrack trail experiences in a natural setting and at least 20 miles in length”.

I can confirm that the Seven Summits trail ticks all of those boxes.

It’s long, spanning 30.4km (36km when combined with the Dewdney trail). It’s demanding, with 1,035m of vertical gain and a high point of 2,194m. It’s 95% singletrack, slap bang in the middle of the Rossland range. And it’s challenging, taking the average Joe six hours or more to complete.

Those are the stats. But what’s it like to ride?

Rocky. Relentless. And really f*@king fun.

Person mountain biking along mountain ridge
The Seven Summits trail in early September

Trail report

I rode the Seven Summits on a glorious September day during a perfect weather window – no smoke, no rain and just the right temperature.

Confusingly, you don’t actually ‘summit’ seven different peaks. You do, however, pass by them in one way or another. This is a relief, because frankly, there’s quite enough climbing involved for any normal human being. For the most part, these climbs are 100% rideable if you have the legs. There are some steep sections and technical elements, but advanced riders with good fitness will stay on their bikes the entire time.

Person on mountain bike pedals along forest trail
On the first climb

I wish I could say that I breezed along with the endurance of a XC athlete, but that would be a lie. I played it tactically, setting a gentle pace and walking the steeper uphill sections. The first climb to the top of Mount Elgood is the worst, taking you from the highway to the highest point on the trail.

After about an hour I started to question my decision – was I going to be able to make it to the end? My apprehension wasn’t helped by a conversation I’d had with some locals the night before. After mentioning that I was doing the Seven Summits in the morning, I was met with groans and mutterings of “why, why are you doing that to yourself? I HOPE YOU LIKE ROCKS!”

Confidence-inspiring.

At the top of Mount Elgood, however, my faith was restored. The forest gives way to the sub-alpine, where the weary pedaller is treated to 360° views. The sky was clear and I could see right across the Rossland range to neighbouring Washington state. Then it was time for the first descent. Fast and flowy singletrack swept me quickly along the ridgeline. The terrain in this section isn’t technically difficult, the scenery is beautiful and a great big grin was plastered across my face.

Woman on top of mountain summit looks across the Rossland range
The top of Mount Elgood
360 degree views
Person on a mountain bike on a mountain ridge
The first descent

Tight, loose and lumpy

Soon enough my confidence was wavering once again as I reach a highly exposed and narrow section of the trail. This was the only time I had to walk on the descent – I just don’t have a head for heights. Even so, I was feeling buoyed by the sheer awesomeness of my surroundings. From what I’d sampled, the downhills were going to be seriously fun and cruisy.

Actually, the rest of the trail can’t really be described as ‘cruisy’. Fun, yes, but the technicality of the terrain steps up a notch later on. Those locals I’d met in the bar the night before weren’t joking about the rocks, either. At times it’s tight, loose and lumpy, although manageable for the intermediate rider. While the Seven Summits is rated as a black diamond, I suspect that’s mainly due to the physical demands of the trail. For B.C., it’s probably more of a blue with a black section here and there.

And demanding it most certainly is. I found the middle part of the trail especially hard-going, physically and mentally. At this stage you’re encased in the forest, and the climbs seem to come thick and fast. Sometimes I’d just be getting into the groove on a downhill when it was time to pedal again. I hauled myself up the last major ascent with the elation of someone who’s just summited Everest. I was assured that there’d be no more climbing thereafter. That information was misleading, as there were still a few short, punchy hills to tackle.

Woman in mountain biking gear stands on top of rocky mountain summit
At the top of the last ‘big’ climb

Thankfully, I wasn’t so exhausted that I couldn’t enjoy the final descent, which included the 6km Dewdney trail. And my god, what a descent it is. You begin in open grasslands, weave your way down through the forest and end up back at the highway. There are a few forest service roads to cross along the way, which proved useful for resting my hands.

An epic trail

I arrived in the parking lot smiling from ear to ear. I found the day challenging, but in a good way. Compared to somewhere like the Chilcotins, for example, the trail maintenance is superb. Despite being a backcountry experience, you can ride the length of the trail – no hike-a-bike needed. The landscape is spectacular and forever changing. You go from the forest, to the alpine, through a ski resort, past wildflowers, along grassy slopes and back into the forest once again.

Mountain biker pedals through an alpine meadow
Alpine meadows

And in my opinion, the riding is highly entertaining. It might not float everyone’s boat – it’s rocky and there are no features. But the swooping singletrack is so much fun, while the odd technical section keeps you on your toes. The final descent was probably the longest, fastest downhill I’ve ever experienced, and for me made the effort of the preceding six hours totally worth it.

In short, the Seven Summits is the total package.

Woman on mountain bike smiles at the camera.
Fun times on the Seven Summits trail

Mountain biking the Seven Summits trail – what you need to know

When to ride the Seven Summits

The trail is typically ridden from early July to early October when the first snow falls. The Kootenay Columbia Trails Society (KCTS) carries out annual maintenance before officially ‘opening’ the trail each summer. Take a look at their Facebook page for updates.

The route

The Seven Summits trail is officially 30.4km long, but 36km if you tag the Dewdney trail to the end (which is highly recommended). It is intended to be ridden from north to south. When going in this direction, it starts just behind the parking lot at the Nancy Green Summit/Strawberry Pass trailhead. Once on the trail, the route is well-marked, so there’s no point in me providing a detailed account. If in doubt, take a look at Trailforks. When you round Grey Mountain (which is part of Red Mountain Resort) then you’re about halfway.

The KCTS carry out extensive maintenance, so the entire thing is rideable.

Logistics

The Seven Summits trail is a point-to-point ride, so you’ll need two vehicles. Park one vehicle at the bottom of the Dewdney trail – this is where you’ll end. The parking lot is located on Highway 22, 12km south of Rossland. Pile into the second vehicle and head back towards Rossland, this time diverting up Highway 3B to the Nancy Green Summit/Strawberry Pass trailhead. This is where you’ll start your ride.

If you don’t have two vehicles, you can use a shuttle service.

Shuttle service

The Kootenay Gateway is an adventure centre in Rossland which offers a shuttle service for the Seven Summits trail. Reservations are required. Departure times are usually 7am or 8am. You meet outside the store in town (2118 Columbia Avenue) 15 minutes before departure and load your bike onto the trailer. You then follow the minibus in your own vehicle to the parking lot at the bottom of the Dewdney trail. Once you’ve parked, you hop in the minibus with all your gear and get transported to the starting point. That way, your car is waiting for you at the end of the day.

Food and water

Water sources along the trail are slim-to-none. Don’t expect to be able to refill your water bottles. You’ll need to carry a lot of water – and snacks!

Bears

Black bears are commonly sighted along the Seven Summits trail.

How long does it take?

How long is a piece of string? It’s impossible to answer this question. If you know how long you’d normally take to ride 36km with 1,035m of vertical gain at altitude, then you have your answer. Personally, it took me 6.5 hours and I stopped a lot for food, rest and photos. I also walked some sections of the climbs. I was the slowest person on the shuttle bus that day.

E-bikes?

E-bikes are not currently allowed on the Seven Summits trail. Having said that, there was someone on my shuttle with an e-bike, which is weird now I think about it…

Mountain biker pedals uphill with mountain vista in the background
Cardio is hardio

Exiting the trail

If you need to exit the trail for any reason, then there are two hiking trails between Mount Plewman and Grey Mountain, both of which lead to a parking lot on Highway 3B. The south-side road at Red Mountain Resort is your last option to leave the trail. After this, you have to see it through to the end.

Skill level

The Seven Summits is a black diamond trail, while the Dewdney trail is a blue square. Trailforks states that the Seven Summits is ‘not suitable for beginners, with the majority of riding falling between intermediate and advance levels’.

I agree that it’s definitely not suitable for beginners. At the time of riding, I was hovering around the intermediate level, able to clean some (but not all) black diamond trails in the Sea to Sky corridor. I was worried that the Seven Summits would be beyond my ability. As it turned out, I rode the entire thing from end to end, save one section which has a lot of exposure. However, that was due to my fear of heights rather than the difficulty of the trail.

While the first half of the trail is flowy singletrack, the second half does become tighter and more technical. There are no features. You won’t find any drops, jumps, woodwork or big berms. But what you will find is loose, rocky terrain. It’s hard to gauge whether someone is ‘good enough’ to ride the Seven Summits trail. If you’re comfortable on tech, then you’ll be in good standing.

Fitness level

As for fitness, well, it’s a big day out. 36km over a mountain range is obviously going to involve a serious amount of cardio. Trailforks describes the climbs as ‘lung bursting’, which is pretty accurate. They’re also relentless, the first one being four miles long. Although it’s then followed by a descent, it’s not long before you’re pedalling once again. That process is repeated over, and over, and over again. Physical and mental endurance is essential, as is a decent level of cardiovascular fitness. So long as you start early, you can take it at your own pace and walk sections of the climb where the grade becomes steep.

Toilets

There is a toilet near the start of the Nancy Green Summit/Strawberry Pass trailhead. Leave the parking lot and pedal through a relatively flat area of forest for a few minutes. You’ll then reach the ‘Booty’s’ backcountry shelter and outhouse – which is not stocked with toilet paper. This is the only facility on trail.

Backcountry cabin with two mountain bikes in the foreground
Booty’s cabin, which has an outhouse nearby

Other info

Did I mention the trail is rocky? Pinch flats are a real concern. Take spare inner tubes and the necessary bike tools. You’re in the backcountry, so you need to be self-sufficient. Phone service is patchy, so taking a satellite communication device is a good idea (along with the other 10 Essentials!)

Mountain biking in the Chilcotins

10 Things Every Beginner Mountain Biker Should Know

Mountain biking is so very different from any other kind of cycling. You’re on a piece of equipment that looks just like a bike (ok, it is a bike). But you’re then expected to roll over rocks, slide over roots and traverse slippery wood features. There are uphill bits, downhill bits and cross-country bits. There are technical trails and flow trails. You have to learn cornering, jumps and drops. And each is a specialist skill in its own right.

All of this can be seriously overwhelming for a beginner mountain biker. But there comes a moment when it all starts to click. When you start to realise what you – and your bike – are capable of. There’s a light-bulb moment and you wonder: why did nobody tell me that before? Maybe because to a seasoned mountain biker, it seems obvious. But for a beginner, nothing’s a given.

So, to speed up your learning curve, here are 10 things that every beginner mountain biker should know.

1. Your bike is designed for the terrain

You probably wouldn’t ride your road bike up to a log and expect to roll over it. It’s just not designed to do that. But a mountain bike is! Mountain bikes are built specifically for the terrain you’re riding. That root in front of you? Your bike will go over it. That lumpy looking rock? No problem. Trusting your bike is such a big step and it’s probably the first hurdle you’ll need to overcome.

2. Momentum is your friend

Having said that, your bike isn’t going to ride roughshod over the trail if you’re at a complete standstill. You need to keep some momentum. Otherwise, your front wheel simply isn’t going to make it over that root, or whatever it might be. Now, that doesn’t mean you have to go hell for leather. But there is such a thing as going too slowly. By keeping a bit of pace, everything will feel much smoother.

3. You need to set your bike up properly

Getting a bike which fits your body size important, or you’ll either feel like you’ve got too much bike or too little bike. Every brand is different, so if you’re in the market for a bike, try a few and see what fits you best. After that, the main consideration is to set your sag. This is when you set your suspension according to your weight. If you’ve rented a bike from a shop, they’ll probably do this for you. If your sag is wrong, it makes everything feel like concrete.

4. There’s a right and a wrong body position

If there’s one thing to work on in the early days of your mountain biking career, it’s your body position. Get this right and you’ll be safe. Get it wrong and you risk flying over the handlebars. If you don’t have a willing friend or partner to show you the ropes, you could sign up for lessons. Or, search ‘mountain biking neutral position’ online and watch some tutorials.

In short, when you’re going downhill you need to stand up (and your saddle should be down). You pedals should be level and evenly weighted, with your heels slightly dipped. Your legs should have a slight bend in them and your knees should point outwards, like a cowboy or a frog. Then you want to hinge forwards from your hips, as though you’re going to do a deadlift in the gym. Keep going until your chin is in line with the handlebar stem. Grip your handlebars, keeping a bend in your elbows, and place your index fingers over the brakes.

Mountain biking in the Chilcotins

5. Stay loose

As if this wasn’t enough to think about, there’s another vital ingredient to the perfect body position: staying loose. If you’re rigid, you can’t move your bike around underneath you. Nor can you respond to the trail, just swerving to avoid a stray stone. By having those bent elbows and cowboy legs, you and the bike can move independently of each other. This is easier said than done when you’re scared out your wits, but try to relax – it really helps.

6. Braking is an art form

When you’re going downhill, you want your index fingers to be on your brakes at all times. But rather than hovering your fingers over them, you actually want to gently squeeze them until they’re almost on. It’s hard to describe, but the idea is that you don’t want to slam on your brakes. Mountain bike brakes are powerful and if you suddenly jam them on, you’ll probably go over the handlebars (OTB, as the lingo goes). By having them at the ‘biting point’, you can lightly feather your brakes as and when they’re needed. This is known as modulating your brakes.

7. Remember to look ahead

This sounds like a silly thing to say, but remember to look ahead – and look in the direction you’re going. There will always be obstacles on the trails that you need to avoid. But if you start looking at that obstacle, it becomes much more likely that you’re going to hit it. Consider a corner that’s got a giant rock to the side. Don’t fix your gaze on the rock. Instead, focus on the corner. You might just find that you get round it without a second thought.

8. It’s not just about the downhill

This won’t be true for everyone, especially those who have a downhill bike and are planning only on doing shuttles or going to the bike park. But for everyone else, mountain biking involves going uphill too. Climb trails present their own set of challenges and this is something to work on, just as much as the downhill. In fact, climb trails are great at improving your bike balance, something which will benefit every aspect of your riding.

Mountain biking in the Chilcotins
You have to go uphill too!

9. Everyone’s different

Learning a new sport is humbling. It’s also very frustrating. It’s tempting to compare yourself to other beginners and wonder why they’re so much better than you. But remember that everyone’s different. Moreover, everyone’s got their strengths and weaknesses. You might be terrified of wood features, but others might secretly fear technical trails. This is your journey of progression and you can take it at your own pace.

10. Persistence is key

As with any sport, persistence is undoubtedly key. Being a beginner mountain biker is no easy task. It can take a lot of blood, sweat and tears before you start to feel confident on the bike. But you will get there – it just takes time and patience. You might look at a trail for the first time and think: “no way, not ever”. Then you might look at it a second time and think: “hmm maybe’. Then you might look at it for the third time, or the 33rd time, and decide it’s not so scary after all. This is the process that all mountain bikers go through. By all means, set some goals. But just know that it may take a while to reach those goals. So long as you’re having fun in the meantime, that’s all that matters.

Mountain biking in the Chilcotins
It’s not always easy

Did You Like This Post? Save it for later!