Tag Archives: camping

Winter camping at red heather campground in Garibaldi Provincial Park

Winter Camping at Red Heather Campground

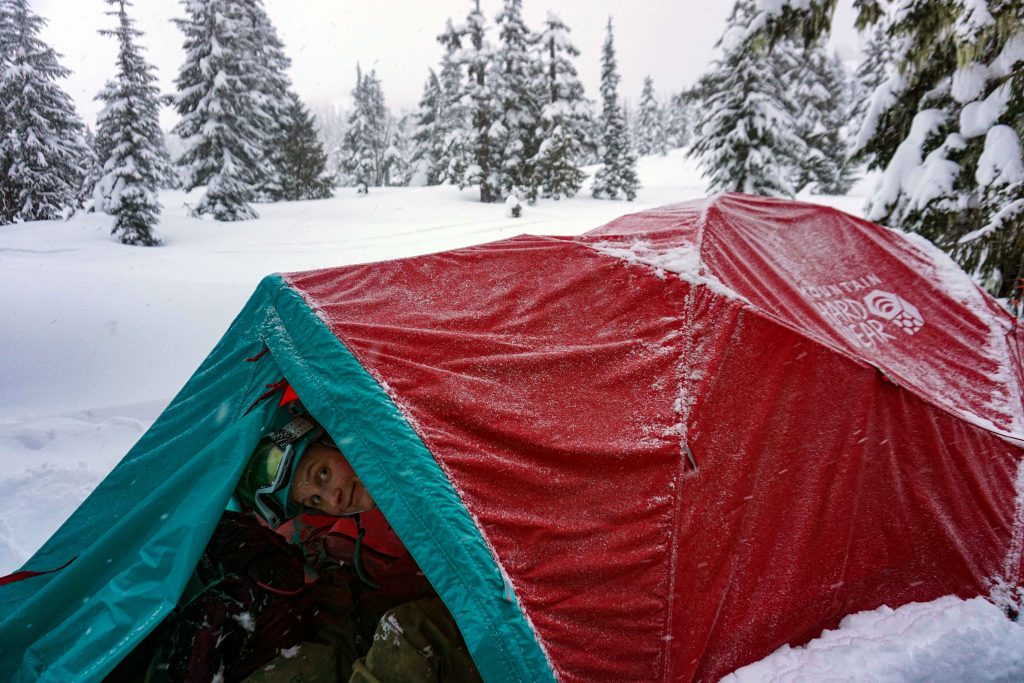
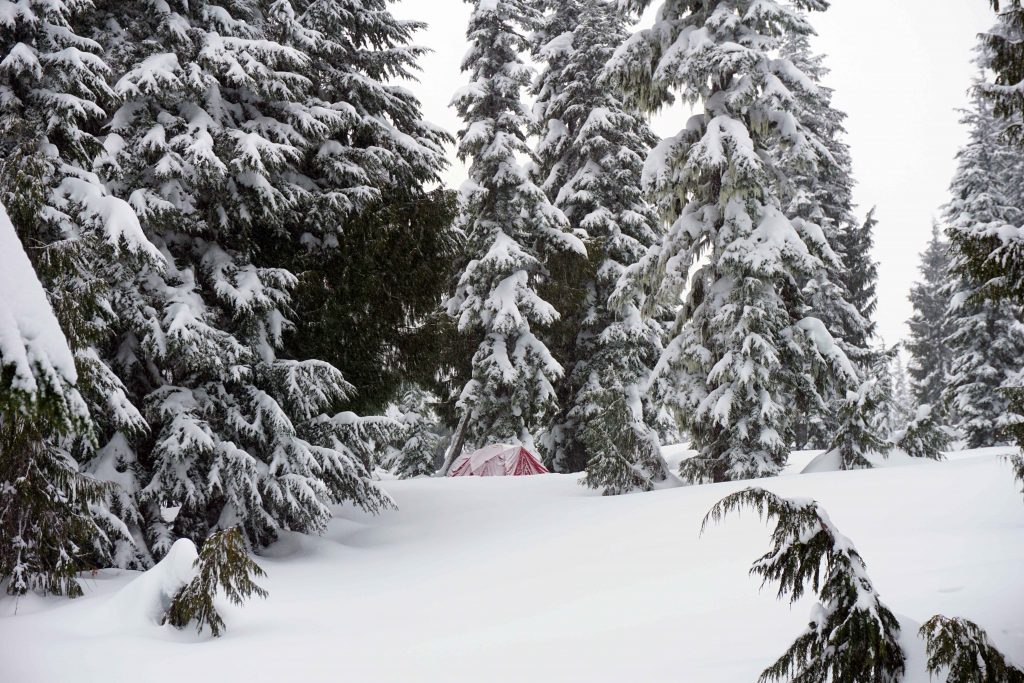
Red Heather campground near Squamish provides a winter wonderland for backcountry campers. The proximity of Red Heather Hut offers added peace of mind, as you can seek refuge if the weather takes a turn for the worse.

Camping at Red Heather campground

If you’re familiar with outdoor pursuits in Squamish, British Columbia, then you’ve almost certainly heard of Red Heather Hut in Garibaldi Provincial Park. It’s a popular destination for ski tourers, split boarders and snowshoers. The hut itself is just an emergency shelter; you can’t sleep in it (unless you need to) but you can warm your cockles in front of the fire. You can also pitch a tent nearby and enjoy the snowy delights of Garibaldi Provincial Park for as long as you like.

There are several backcountry campgrounds in Garibaldi, but Red Heather is a good winter option for a few reasons.

Firstly, it’s the first camping area that you come to, assuming that you park at the Diamond Head Trail parking lot. It’s just 5km from the upper lot, so you don’t have to haul your winter tent too far uphill.

Secondly, you have the security of Red Heather Hut right next door. While the hut isn’t for overnight stays, you can go inside to organise your gear, warm up in front of the fire and cook your dinner. This adds a bit of luxury, not to mention the comfort of knowing that you can retreat to the hut, if that winter sleeping bag isn’t as warm as it says.

Finally, you can use Red Heather as a base, from which you can strike out further into the backcountry. Ski tourers and split boarders can do a few laps off of Paul’s Ridge and Round Mountain before bedding down for the night. Snowshoers can head up to the ridge to enjoy the spectacular views across Garibaldi Provincial Park and the Tantalus Range (assuming it’s a clear day!)

Camping at Red Heather campground
Leaving the tent for a few laps of Round Mountain

What you need to know before you go

If you’re planning a winter camping trip to Red Heather campground, then here’s what you need to know before go.

Driving and parking

Park at the Diamond Head Trail parking lot. The access road is a narrow mountain road that’s often packed with snow and ice near the top. Winter tires (or mud and snow tires) are a must and 4WD is recommended.

There are two parking lots: an upper lot and a lower lot. If you want to access the upper parking lot (which is where the trailhead starts) then you’ll need snow chains. You can be fined if you drive past the chain-up area without chains installed.

If you don’t have chains then you can park at the lower lot and walk up. However, park rangers have been known to wait further down the road and turn away vehicles without snow chains. This will be a nuisance, as you’ll either need to go and buy some, or you’ll have to park a considerable distance from the trailhead.

Fees and permits

You don’t need a permit to enter Garibaldi Provincial Park during winter, but if you plan on staying the night, you must buy a backcountry camping permit advance of your trip. This applies, even if you’re sleeping in your own tent. You can purchase a permit on Discover Camping. Camping without a permit carries a fine.
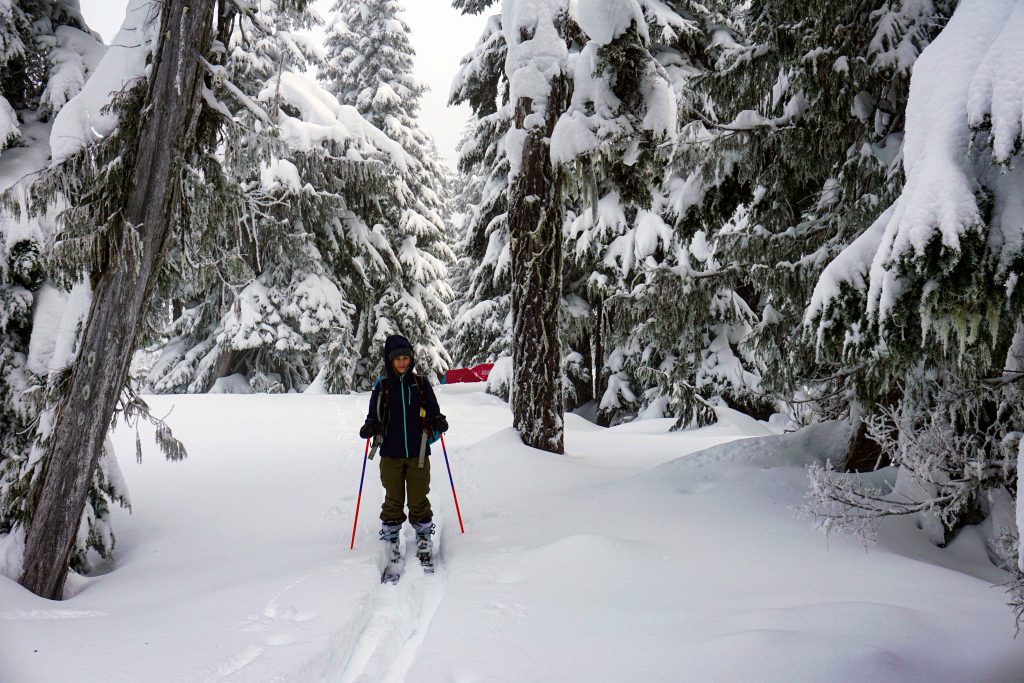
Hiking up

The trailhead starts from the upper parking lot. There’s an outhouse here if you need.

The trail itself is narrow and tree-lined. There are no views en route, aside from a clearing at around the halfway mark from which you can see across Squamish. It’s uphill all the way until you reach the meadow, where the trail flattens out. A little further along you’ll find Red Heather Hut tucked into the trees on your right. In terms of navigation, the first part of the trail is extremely easy to follow. Later on, it opens up slightly and you’ll need to follow the orange marker poles.

The distance between the upper parking lot and Red Heather Hut is 5km. It takes between one and two hours, depending on how quickly you move.

Where to camp

Red heather campground is in the immediate vicinity of Red Heather Hut. It’s an alpine meadow and the area is relatively flat. There are no designated pitches or tent pads, so can choose your own camp site. Bear in mind that the hut has a heavy footfall, particularly at weekends. The glades behind the hut offer greater privacy on a busy weekend.
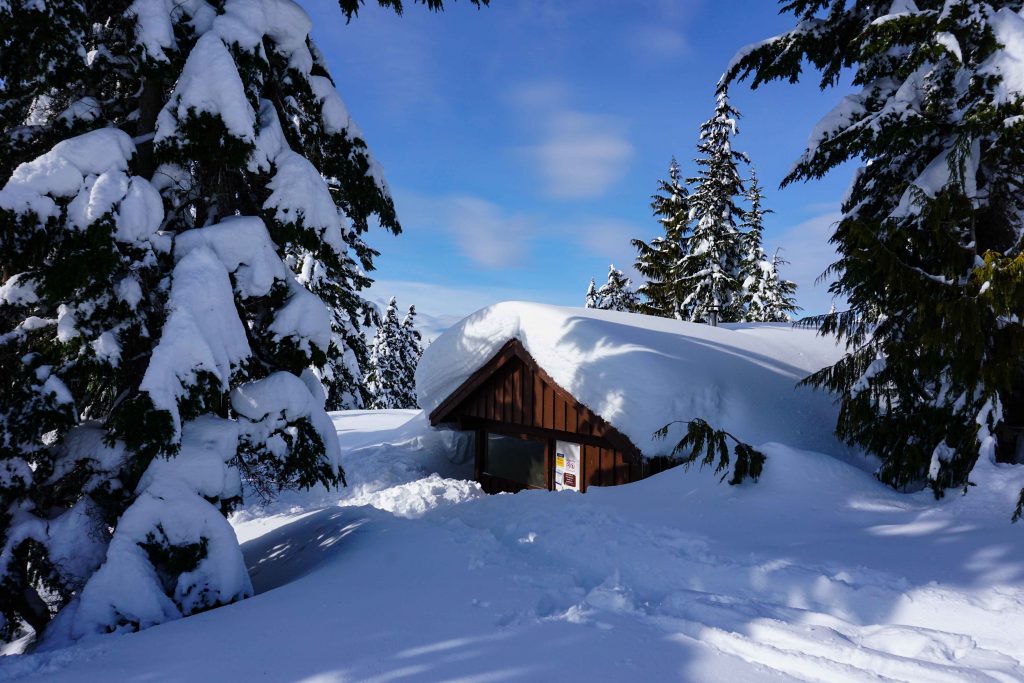
Winter camping at Red Heather campground

Red Heather Hut

You’re not allowed to sleep inside the hut, unless it’s an emergency. However, you are permitted to use the facilities. Inside, you’ll find two picnic benches and a wood burner. There’s a wood pile just outside the front door, along with an axe for chopping. The wood supply has to last the entire winter, so be conservative. There’s also a two-ring propane stove and a sink for grey water. You will need to melt snow for drinking water, which should be boiled and/or treated.

If you’re camping nearby, you may want to leave certain items inside the hut, although you do so at your own risk. Hooks line the walls so you can hang up bags, clothing and equipment. But be warned: there are lots of mice, so be sure that any food is tightly concealed.

Just beyond the hut is an outhouse. As of July 2021, BC Parks is operating a ‘bring your own toilet paper’ policy in the Sea to Sky Corridor – you’ve been warned!

Red Heather Hut
The back of Red Heather Hut

What about summer camping?

You can only camp at Red Heather during the winter months. Currently, this means between the dates of December 1 to April 30. Check the BC Parks website for up-to-date information. A camping permit is required.

The hut is open year-round as a warming hut and an emergency shelter. The wood stove should only be used in winter.

Activities nearby

This is a very popular winter recreation spot. Hikers and snowshoers typically head to Red Heather Hut before making the return journey. Ski tourers and split boarders enjoy the backcountry terrain around Round Mountain and Paul’s Ridge. It’s also possible to continue along the winter trail towards Elfin Lakes Shelter, which is 6km past Red Heather Hut. Winter camping is permitted at Elfin Lakes, and sleeping is allowed in the hut if you have a reservation. More challenging terrain can be found beyond Elfin Lakes.

Safety

There’s sign near the start of the trailhead indicating that you are entering into avalanche terrain. You should carry a beacon, probe and shovel (and know how to use them). The trail to the hut is often considered low risk, but there are sinkholes and creeks, so be sure to stick to the path and operate a buddy system.

Kayaking up a fjord

Overnight Kayak Trip Up the Indian Arm

Just a 30-minute drive from Downtown Vancouver is the southerly most reach of the Indian Arm, an 18km-long fjord lined with snow-capped peaks, beautiful waterfalls and three different (and entirely free) campsites. This makes it the perfect location for an overnight kayaking trip, especially for first-timers or those who don’t want to stray too far from the city.

What you’ll need

If this is one expedition that you’re keen to try, then the first port of call is, of course, to find yourself a sea-going vessel. If you don’t own one yourself, or you don’t have a friend you can tap up, there are plenty of kayak rentals to be found around Vancouver. Mountain Equipment Co-op is one option, as is Deep Cove Canoe and Kayak.

The latter is certainly the more expensive choice, but it’s also the most convenient. You’ll find this small but extremely busy outfit at the end of the Indian Arm, making it the ideal spot from which to launch. They’ll provide you with a life jacket, some safety equipment and a brief explanation as to what to do, should you capsize. After that, you’re on your own.

While you won’t want to carry too heavy a load (it’s more work, after all), it’s useful to know that the kayaks provided by Deep Cove Canoe and Kayak are surprisingly spacious. The double kayaks boast three separate storage compartments, which although watertight, can get a little damp. Packing your belongings (or at least your clothes) in a dry bag is therefore a good idea.

Seeing as the campsites are free, you don’t need to bring cash. But you will need to bring everything else, as there are no showers, food supplies or potable water at any point along the way. But be sure to pack out what you pack in, as there isn’t a garbage collection service. Oh, and campfires are absolutely prohibited year-round, so leave the firewood at home.

The outbound journey

Once you’re afloat on the water, be ready to develop neck ache as you ogle at the jaw-dropping real estate that immediately greets you on the western shore. In fact, human habitation can be found the length of the Indian Arm. You might think this disappointing (or even comforting), but it’s also somewhat deceptive, as you’re actually within touching distance of BC backcountry.

With Mount Seymour Provincial Park on one side and Say Nuth Kaw Yum Provincial Park on the other, you’re encased by dense forest and towering mountains. As you glide past, keep an eye out for bald eagles soaring up above and black bears roaming through the trees. In the water itself you can expect seals, sea otters and a variety of fish, including salmon.

Woman sits on top tower

Spying for sea otters

After about 45 minutes of paddling you’ll stumble upon a smattering of tiny islands, the first of which is Jug Island, followed by Raccoon Island, and finally Twin Islands. You can stop at any of these for a rest and a swim, and camping is permitted at the most northerly of the Twin Islands, making it the closest campsite to Deep Cove.

If you choose to continue along the Indian Arm then you’ll pass two gothic looking buildings on the eastern shore. These are the Buntzen Lake Power Houses, which were originally built in the 1900s. They are still owned by BC Hydro so you can’t land here, but it’s fun to paddle past and peer into the eerie edifices.

From here the shoreline becomes less populated, and you finally feel like you’re entering the wilderness. Unfortunately if you visit during a warm weekend, then your dreams of peace and solitude will likely be shattered by the numerous sailing boats, power boats and revelers who also enjoy these waters.

Even so, no one can detract from the beauty of your surroundings. Of particular note is Silver Falls on the western shore. Partially hidden behind the foliage, this waterfall plunges down into the ocean with incredible force. But unless you’re an experienced paddler, be sure not to get too close, as the currents at the foot of the falls can be tricky to navigate.

A little further on is the second campsite, known to some as Berg’s Landing and to others as Bishop Creek. Located opposite Croker Island, there aren’t any camping platforms, but you’ll find large grassy areas to pitch a tent. This site is certainly quieter than its neighbour at Granite Falls, but there are more bear sightings here, so be bear aware.

As you round the corner of Croker Island, the most northerly point of Indian Arm finally comes into view. Here you’ll see the Wigwam Inn, which is privately owned by the Royal Vancouver Yacht Club. In the distant reaches is the estuary, where the Indian River meets the sea. And then there’s Granite Falls, which for many is their desired resting place for the night.

Kayaking on the sea

Kayaking up the Indian Arm

Camping on the Indian Arm

As the name suggests, Granite Falls is a torrent of water that cascades down over a huge slab of granite. It’s a spectacular sight, and there’s a great little plunge pool at the base which makes for a very refreshing swim on a hot day. As far as facilities go, there are a few tent pads, as well as more rustic set-ups beyond the outhouses.

If you plan on camping here, land your kayak on the beach by the lighthouse and pull it above the tideline. Then go bag yourself a spot, preferably not too close to the waterfall, or the wind could carry the spray straight to your door. If you find the campsite to be full or too busy for your liking (which does happen!) you can always retreat back to Berg’s Landing.

Woman stands in front of water cascading down granite rockface

Granite Falls

The return journey

When you’re ready to return to civilisation, take note that strong headwinds can rip through the valley, making it hard going on the way home. This is particularly true during warmer weather thanks to a phenomenon known as anabatic winds, although storms are also a risk during winter. Typically, it takes paddlers between three and five hours one way.

Conditions are generally calmer during the morning, and the tide times can also make a huge difference to the amount of manpower needed to get from A to B. That’s why no matter where you’re kayaking in the world, be sure to plan your trip according to the conditions and the tides. And always take life jackets, rope for towing and a bilge pump.

Kayaking in Vancouver

If you’re still a little nervous about the prospect of venturing across the ocean for an overnight kayak trip, you can always try a guided tour first, or ask a professional for advice. With the right planning and knowledge, it is a great experience and one you’re sure not to forget in a hurry – in spite of the blistered hands!

Did You Like This Post? Save it For Later!

Tent pad on East Curme Island

Camping 101 – Camping for Beginners

A friend of mine recently said that she’d like to attend a camping workshop. Noting my surprise (after all, we’d been camping together just the previous week), she replied that it was alright for me, as I was a ‘good camper’.

That got me to thinking about my own first camping experience at the tender age of 15. I was with some school friends, we packed a bizarre assortment of food, had an ancient tent that we didn’t know how to put up, and spent most the night shivering under our flimsy sleeping bags.

I’ve learned a lot since then, thanks in part to a group of mates who were willing to show me the ropes. But if you don’t have an experienced camping buddy to hand, then the prospect of spending a night under canvas can seem a little daunting.

However, please do not let this put you off! Camping is a lot of fun and it’s something the whole family can enjoy – even the pet pooch. You just need get a grasp of the basics, after which it all comes down to one thing: practise.

Camping for beginners – what you need to know

If you consider yourself to be a camping beginner, then there are a few things you absolutely should do to ensure your maiden camping voyage is a success. So, here’s my camping 101 for beginners.

Get the right gear

When you’re in the great outdoors, the line between being comfortable and being miserable often comes down to whether or not you have the right gear. And when it comes to camping, there’s a lot of gear to be had.

Now then, you might not really want to spend a great deal of money on your first camping trip. After all, you don’t even know if camping is for you. This is perfectly understandable. If so, ask a friend if you can borrow their stuff, or find a shop that rents out camping gear.

It’s also important to know that you do not need every single little gadget on offer. At the very least, you will need –

  • A good quality tent that doesn’t let in wind or rain
  • A good quality sleeping bag that is designed for the temperatures you will be camping in
  • A roll mat or blow up bed
  • A camping stove and gas/propane
  • Pots, pans and cooking utensils, including a knife
  • Crockery and cutlery
  • A lighter or matches
  • Fresh water or a water purification system
  • A light, lantern or torch
  • Something to use as a bin
  • A first aid kit and hand sanitiser
  • Toilet paper (just to be safe)

Unless you are planning quite a spartan camping trip, you’ll also probably want to take –

  • A pillow
  • A cool box with ice packs
  • Stuff to wash your dishes with
  • Camping chairs
  • A camping table (if the campsite does not have them)
  • Firewood, if your destination allows campfires

If you are planning on buying some (or even all) of your own camping gear, then it is best to buy right and buy once. In other words, take your time to find a quality product that suits your needs and is in your price range.

If you see a tent that is as cheap as chips, there’s probably a reason for it, but you won’t find out until you’ve experienced your first adverse weather conditions. There’s nothing worse than bunking down for the night in a storm, only to find that wind rips through your tent and leaks mercilessly.

Take a look at online reviews to see what other people are saying, and don’t be afraid to go into specialist camping shop to ask for advice. While it may cost you a little extra to get the quality goods, you’ll be thankful in the long-run.

Practise before you go

Once you’ve equipped yourself with all the camping gear, have a test run!

If you have a garden then it’s a great idea to spend a whole night under the stars. This means you’ll know how to put the tent up, whether or not it’s comfy enough, how your camping stove works, what utensils you need, and how to take the tent down again.

Even if you don’t have your own garden, you can go to a local park and at least practise putting up your tent and packing it away again. This can be invaluable and will save a lot of head-scratching (and even arguing) when you do finally pop your camping cherry.

Plan your trip

Next, plan exactly where you are going to go and when. If this is your first camping trip, it might be wise to choose somewhere with good facilities, such as hot showers, flushing toilets and washing up sinks. That way you can be eased in gently.

You should also think about what kind of experience you’re after. Not all campsites are made equal. Some are family-friendly, others allow dogs, and some have a lake, beach or activity centre. For some these features will be a real plus, while for others they will be a real no-no.

While you’re still getting used to this camping lark, it can be helpful to select somewhere that isn’t too far away from a town or city. Then if you forget something, or you just can’t face cooking in the rain, you can jump in the car and head back to civilisation.

Prepare, prepare, prepare

Once you’ve chosen your campsite, your next task is to prepare, prepare, and then prepare some more. I find that in these situations, lists are your friends. Make a list of everything you need to take, including all your food, clothes and toiletries.

On the subject of food, you should also plan what meals you are going to have and on what nights. If you are going to have a barbecue one night and a chick pea curry another night, then have the barbecue first, so the meat doesn’t go off.

I like to visualise the trip from start to finish, during which I write down what I’m going to need for each scenario. For example, when I arrive, I’m going to want to set up my sleeping quarters. So I need my tent, sleeping bag, pillow and roll mat.

Then I’ll want a cup of tea. So I need a stove, possibly a lighter or matches, a kettle or pot, some water, tea bags, milk and a mug. Soon enough it will be time to cook, so I’ll need a chopping board, knife, pan, oil, salt and pepper…and so it goes on.

This may seem excessive, but it’s incredibly infuriating to arrive at a campsite, only to find you left the tin opener at home. As you get better at camping then the more intuitive your preparation becomes. I even have a pre-packed camping box stashed under my bed.

But while you’re starting out, it’s best to list what you need and tick everything off once you know it’s been packed. That way, you can rest assured that you have thought of everything and nothing has been left at home.

Check the conditions on the day

On the morning of your camping trip, be sure to check the weather and the traffic.

Although it may have been forecast wall-to-wall sunshine at the start of the week, it may now have turned to rain (or vice versa). If so, make sure you are prepared for the conditions by packing wet weather gear, warm clothes, sunscreen, sunglasses, a hat or whatever it might be.

The purpose of checking the traffic is to ensure that you do not arrive at the campsite too late. Putting up a tent in the dark is no mean feat, especially if you’re a camping virgin. Give yourself plenty of time and arrive during daylight!

Enjoy yourself!

Lastly, don’t forget that camping is meant to be an enjoyable experience. It’s a time to be in the great outdoors, to convene with nature and to have a little bit of an adventure. Yes, we’ve all made a cuppa before. But isn’t it so much more exciting making tea outside on a stove?

While there might not be any TV, there are plenty of activities to keep you entertained, even if it’s just reading a book, playing cards or going for a walk. It’s the perfect opportunity to wind down and relax, to move at a slower pace and to just enjoy the company of friends and family.

And if the weather is seriously intent on scuppering your plans, don’t be afraid to bail. There is no shame in calling off a camping trip because of incessant rain or howling winds. It’s better to enjoy yourself than to have a negative experience and give up on camping altogether.

Happy camping everyone!

Man fishes at sunrise on East Curme Island

Road Tripping on the Northern Sunshine Coast

The northern Sunshine Coast has everything you could ask for – whether you want to hurl yourself down mountain bike trails at Duck Lake or relax on Savary Island’s white sandy beaches, there’s something for everyone.

After spending five fun-filled days there, some friends asked if I would share my itinerary with them. I thought I’d share it here too, just in case anyone is planning a trip to this spectacular corner of the world. However, a word of warning – we crammed as many activities as possible into the little time we had. For a more chilled approach, you may want to pick and choose or spend longer at each destination.

Happy travels!

Day 1 – Inland Lake Provincial Park

Firstly, we had to get to the southern Sunshine Coast, so we drove from Vancouver to Horseshoe Bay, where we boarded the ferry bound for Langdale. Reservations are highly recommended in the summer months. We then continued from Langdale to the second ferry at Earl’s Cove, the cost of which is included in your ticket. You can’t reserve this ferry, so it’s a case of turning up and hoping for the best.

When we arrived at Saltery Bay we headed to Inland Lake Provincial Park, where I’d made an online reservation for the campsite. At the time of writing, it’s $18 per party, per night.

We had planned to mountain bike at Duck Lake first, and you can rent bikes at Suncoast Cycles if you need. However, we were a little behind schedule, so we bypassed this and went straight to the campsite.

After pitching our tents, we set off to explore the 13km walkway around the lake. There were three of us and we only had two bikes, so we took it in turns to run/cycle around, stopping at frequent intervals for a swim. The water’s lovely and warm and there are some small beaches to relax on.

Man stands on wooden platform in lake

Inland Lake

Day 2 – Confederation Lake

The next day we packed up our hiking bags, moved the car all of 20m to the day-use parking lot at Inland Provincial Park, and hiked up to Confederation Lake. We retraced our steps from the previous day, going around the lake for about 2km, after which there’s a sign pointing uphill to Confederation Lake.

The steep climb takes you through an old growth forest and eventually pops out on the shores of Confederation Lake. Being part of the Sunshine Coast Trail (SCT), there’s a free wooden hut that you can stay in, or you can pitch a tent. If you don’t want to stay the night, this is still a worthwhile (and do-able) day hike – not only for the exercise, but also for the gorgeous destination!

We spent the rest of the day swimming in the lake, which like Inland Lake, is balmy during the summer months. There’s an old rowing boat you can take for a spin, and we tried fishing for trout but with no success. The Vomit Vista viewpoint is just another 800m further on if you can manage it and offers lovely views of the mountains.

For a more in-depth description of the hike, read about my brief encounter with the SCT.

Three friends sit outside a wood cabin

My Swiss Family Robinson

Day 3 – Okeover Inlet

After a relaxing morning swimming and fishing at Confederation Lake, we packed up our bags and headed back down the hill to the car. We got onto Highway 101 and drove to Dinner Rock campsite near Lund. This is a free campsite by the ocean, and while it looked perfectly nice, someone advised us that a large group had been causing all sorts of noise issues and we might be better off at Okeover Arm Provincial Park instead.

Feeling that we were in need of a good night’s sleep, we duly took his advice and rocked up at the Okeover Arm Provincial Park campground. I’d not made a reservation but there was plenty of space. The park warden came around later to collect our fees, which at the time of writing is $18 per party, per night.

We spent the rest of the evening pottering around the campsite. There are some little beaches down by the inlet, all full of oyster shells. It’s an absolutely stunning spot to watch the sunset – on a warm summer’s day the sky becomes a colour palette of reds, and the surrounding mountains each turn a different shade of purple.

Couple look across sea inlet at sunset

Okeover Inlet

Day 4 – Savary Island

In the morning we drove into Lund, which is a pretty little fishing village. We parked the car in the upper hotel car park and paid at the hotel reception desk. I’d pre-booked a Lund Water Taxi to take us to Savary Island, which at the time of writing is $22 per person, $3 per bike, plus tax. We hadn’t had breakfast, so headed to the incredibly popular Nancy’s Bakery for one of her famous cinnamon bun rolls.

It takes just 15 minutes to get to Savary Island, but when you step off the boat, you feel like you’ve been magically transported to a Thai island. Think dusty unpaved roads, long stretches of white sandy beaches, and a seriously laid-back vibe that will make you reluctant to return to the mainland.

We already had two bikes, so hired a third at Savary Bike Rentals, which is a short (uphill) walk from the dock. This is definitely the best way to get around the island, although the terrain is not suitable for thin-wheeled road bikes. Cycling can also be something of a hazard, as I spent more time ogling at all the beautiful wood cabins than watching where I was going.

As you do a loop around the island, there are various little galleries and shops you can stop at. We stumbled upon one family-run business selling lemonade and ice coffees from their kitchen. After placing our order, we were duly ushered onto the deck to relax in deckchairs overlooking the ocean.

Above all else, Savary Island is known for its vast beaches and warm waters. In fact, you’ll find the warmest waters here north of Mexico. So of course, beach hopping was the main activity of the day. The tide was out (and the tides here are huge) so we couldn’t really swim, only paddle. We did discover that low-tide is also excellent for clam-picking, but alas, we weren’t equipped.

We finished off our bike tour at Riggers, the only pub on the island. It was then back to Lund where we indulged in dinner at the Boardwalk Restaurant before heading back to our camp at Okeover Arm Provincial Park.

Woman stands in sea up to her ankles

Savary Island

Day 5 – Desolation Sound

We were conveniently placed the next day for the short journey to Powell River Sea Kayak at Okeover Inlet. I’d reserved some kayaks for two days, so we got the paperwork sorted, loaded up the kayaks and launched shortly after 10am. There’s a parking lot where we left our car.

The waters along the Inlet were very calm, although things did get a little choppier as we reached the open ocean of Desolation Sound. After about 3 hours of paddling a mother orca and her calf swam past. They must have been about 30m away, which was incredible.

Read more about my experience kayaking with orcas in Desolation Sound.

Shortly after we reached the Curmes Islands and decided to occupy a couple of camping pads on East Curme Island. If you want to stay the night, you need to buy a backcountry camping permit in advance, which is $5 per person. There are tent pads and outhouses here, but nothing else. If you run out of water, you can paddle over to Unwin Lake and refill from the freshwater stream.

This is an incredibly beautiful spot overlooking Desolation Sound and we all wished we could stay for longer. In fact, the folks at Powell River Sea Kayak were surprised we had paddled so far just for a night, as most people set up base here and then explore the surrounding area for a few days. Even so, it was well worth it!

Tent pad on East Curme Island

Home for the night on East Curme Island

Day 6 – Back to Vancouver

Then it was time to go home. We kayaked back in windy conditions, hopped in the car and made the long journey back to Vancouver. You can buy your return ferry ticket at Saltery Bay.

We were all pretty exhausted, but at the same time we were chuffed to have had such an amazing road trip. It’s incredible what you can pack into such a short space of time, and it’s certainly opened my eyes to the delights of the northern Sunshine Coast. I’ll definitely be back, and am particularly keen to explore the Sunshine Coast Trail and Desolation Sound in more detail.

‘Til next time!

Did you like this post? Save it for later!