Tag Archives: ski touring

Wendy Thompson Hut near Pemberton

Winter Camping at the Wendy Thompson Hut

The Wendy Thompson Hut is located in the Marriott Basin north of Pemberton, British Columbia. You’ll need a reservation to stay in the hut, or you can camp nearby – and tick off all those backcountry objectives while you’re at it.

Winter camping in the Marriott Basin

There’s an area in British Columbia known to the locals simply as ‘the Duffey’. The Marriott Basin is located within this region and it has an extra special draw – a picture perfect backcountry hut, built in memory of local paramedic Wendy Thompson.

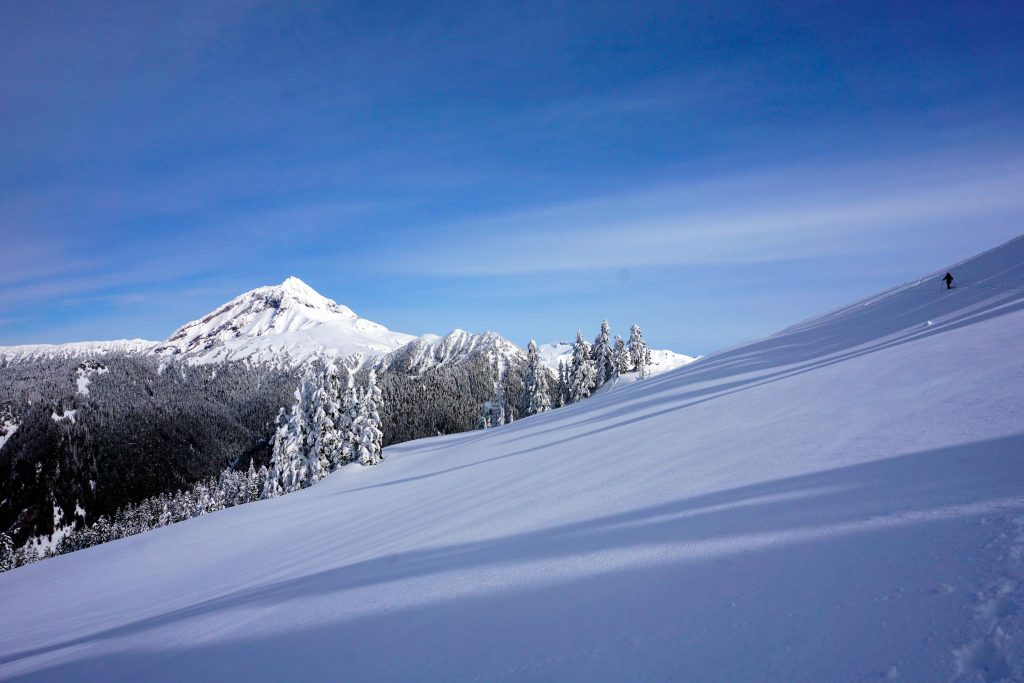
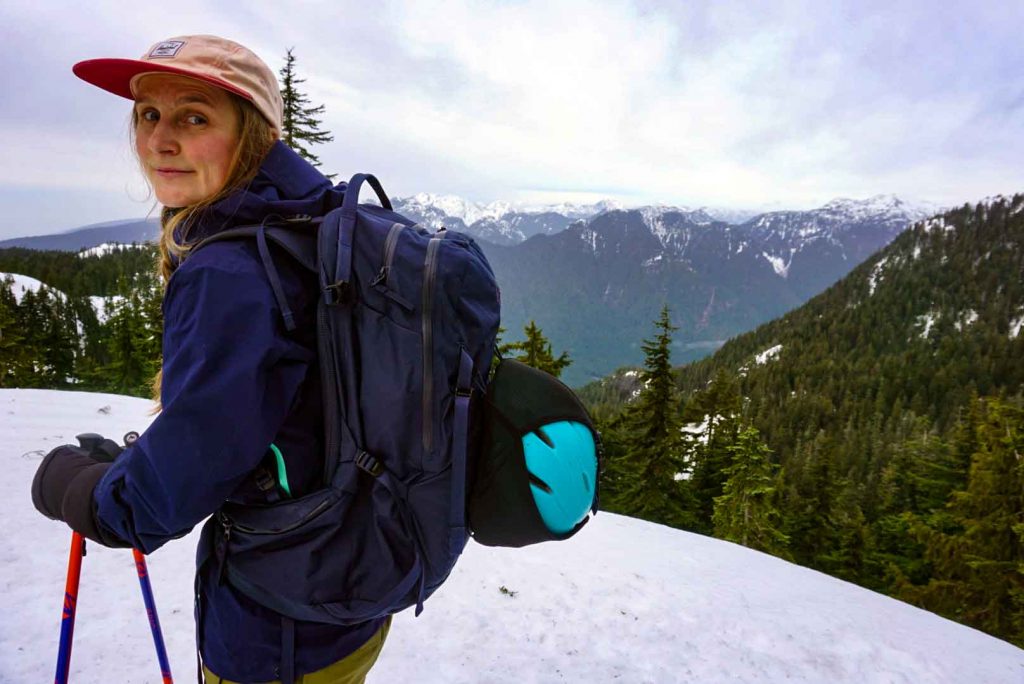
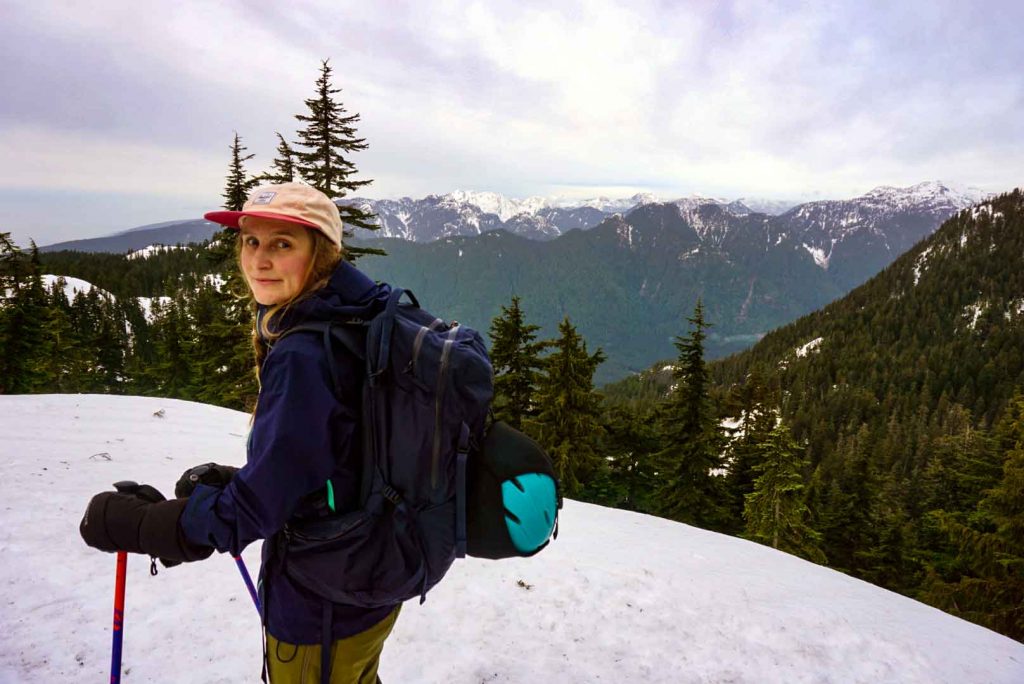
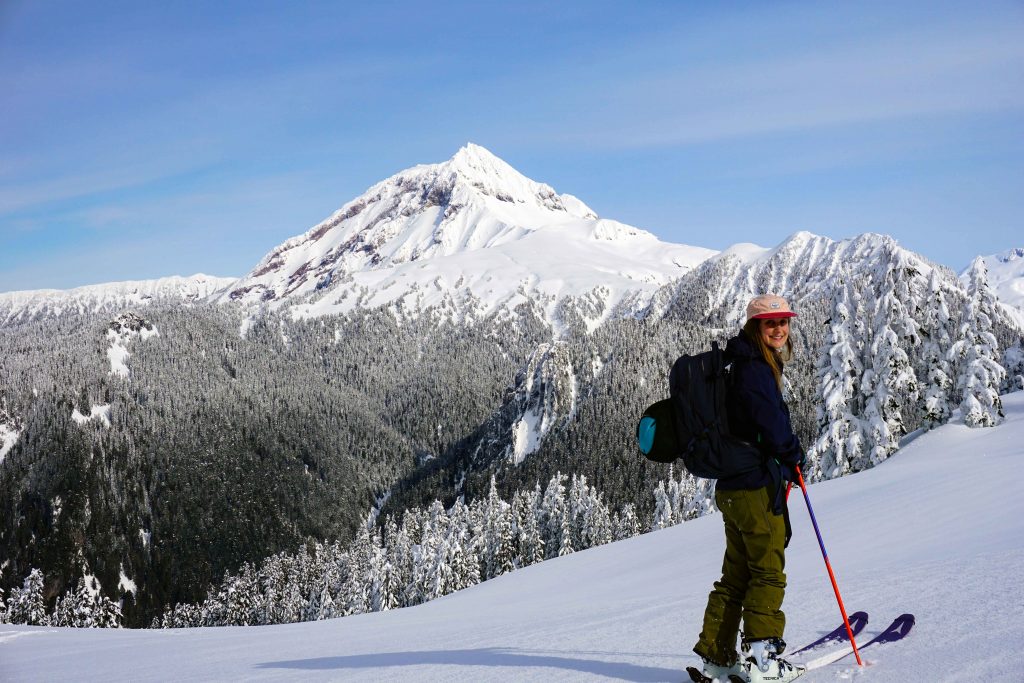
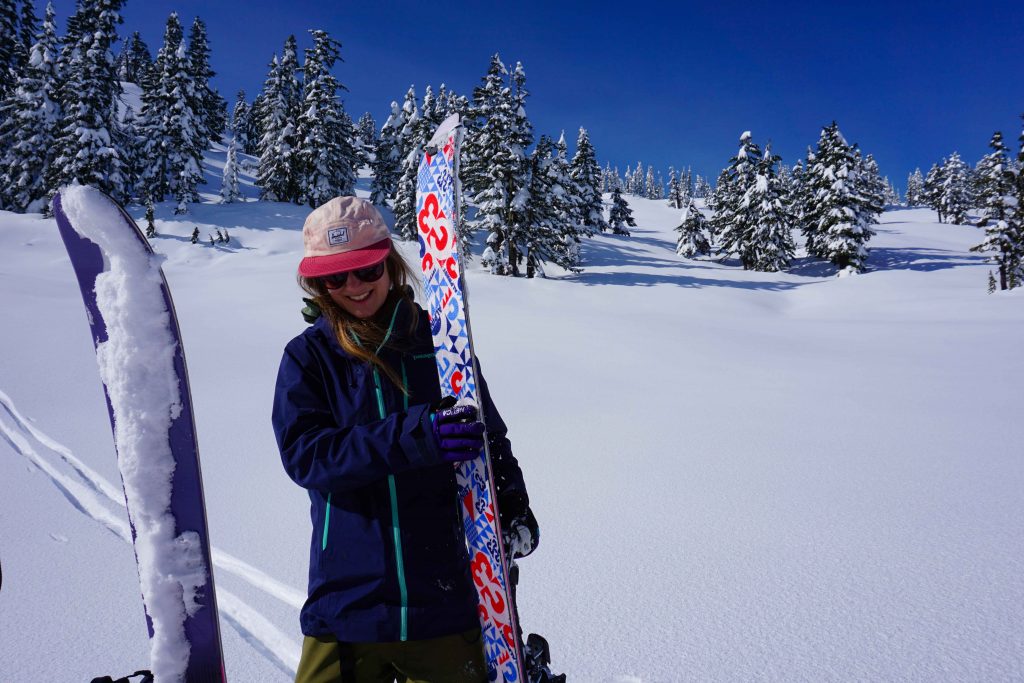
The hut is operated by the Alpine Club of Canada (ACC). When it’s open, you need a reservation to bag one of the 16 sleeping spots. It tends to get booked up very quickly, so if you miss out, you could pitch a tent nearby instead. Either way, you’ll be treated to spectacular scenery and huge amounts of terrain. Ski tourers and split boarders will find lines a-plenty, with everything from mellow glades to larger objectives, such as Mount Marriott and Pk 2300.

Snow covered backcountry terrain
There’s plenty of terrain to explore

What you need to know before you go

If you’re planning a winter camping trip to the Marriott Basin, then here’s what you need to know before you go.

Driving and parking

The parking lot is located on Highway 99 north of Pemberton. If you’re heading north, drive past the Joffre Lake trailhead and continue over a bridge signposted Cayoosh Creek. Shortly after you will see a salt shed on your right-hand side. There is a parking lot opposite (on the left-hand side), and another small lot further along the road (on the right-hand side). The spaces are limited, so if you’re visiting on a weekend, be sure to arrive early to avoid disappointment.

Note: if you’ve visited this area in summer, you may have driven along the access road and parked there. However, this isn’t possible in winter. You will need to park in the ploughed area just off the highway.

The route

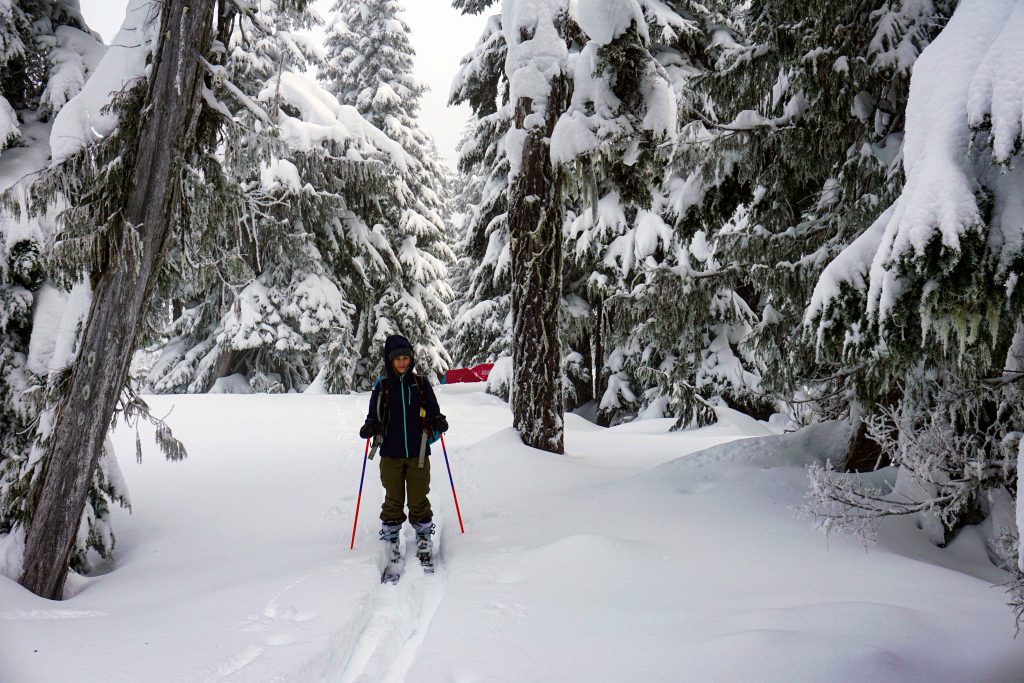
Most people ski tour to the hut, but if you want to hike then you will need snowshoes and spikes.

In winter, you have to hike/skin along the full length of the access road before you actually reach the trailhead. If you’ve driven from Pemberton, then the access road is just before the larger parking lot on the left-hand side. It can be seen on both Trailforks and Google Maps.

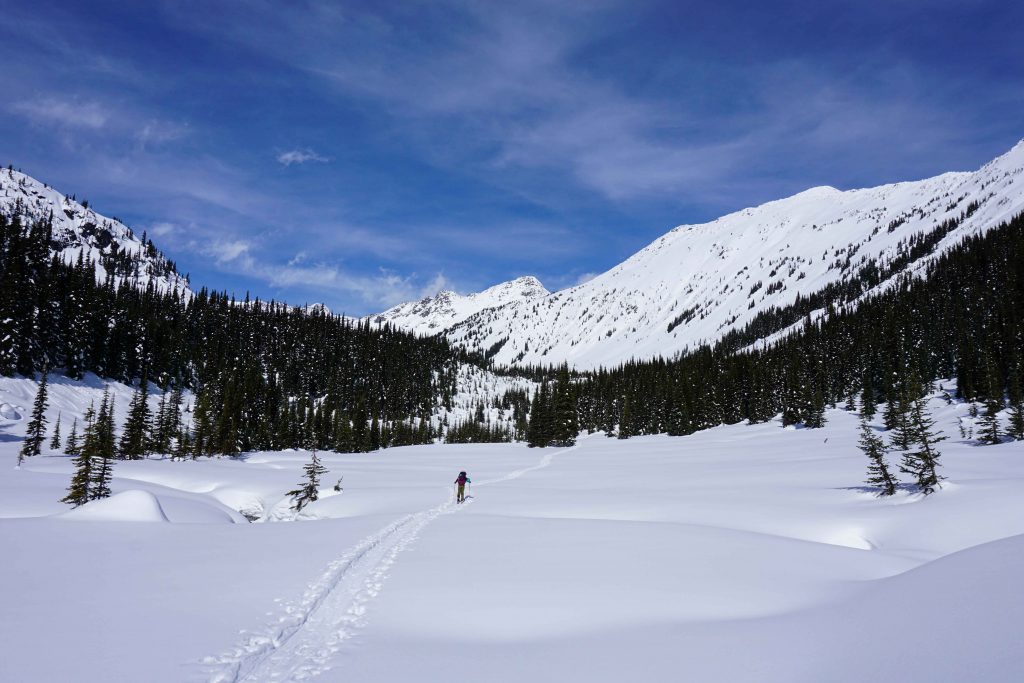
The road is fairly flat with a few lumps and bumps in. At about the halfway point there’s a fork and you need to stay on the lower left-hand spur. After about 2kms, you’ll reach the actual trailhead. You’ll know you’ve arrived because there’s an avalanche terrain warning sign.

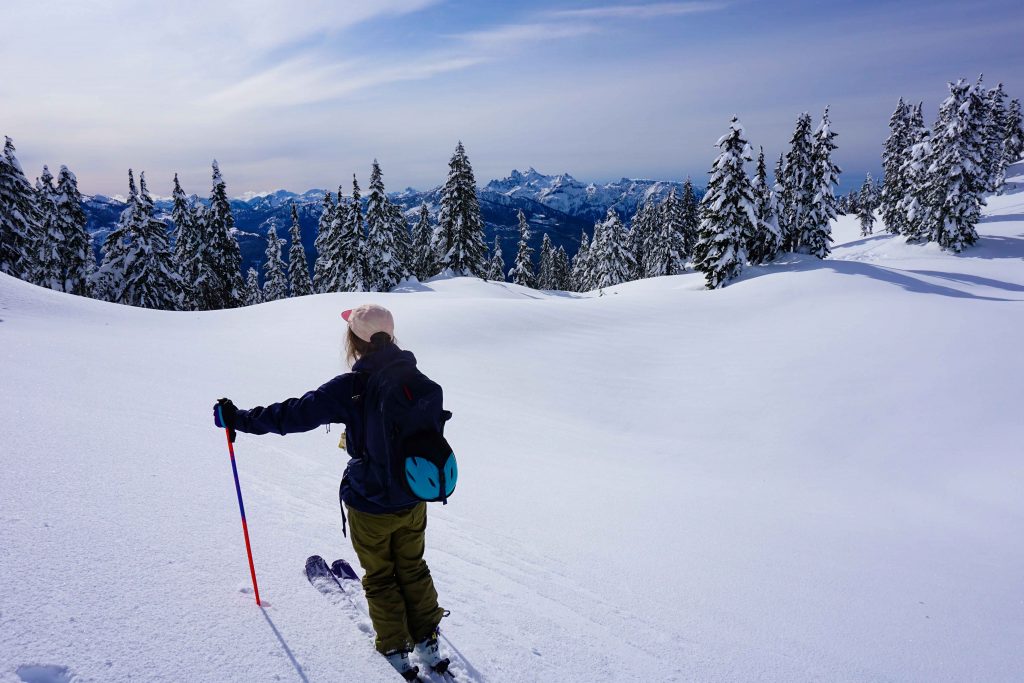
From here, you enter the forest and begin to gain elevation quickly. The winter route is not marked and navigation is not easy. It can be tempting to follow other people’s skin tracks, but these won’t necessarily go towards the Wendy Thompson Hut. Instead, take a compass and a map of the area, such as John Baldwin’s “Duffey Lake” map which has the hut marked on it.

You will see orange markers, but these indicate the summer hiking route along the Marriott Basin Hiking Trail. This is not always practical to follow in winter. However, if you keep the markers in sight then you can feel confident that you’re on the right course. There is no phone service in the area, but it can be useful to download the Trailforks app in advance and set it to ‘hike’ mode. You can then check your location against the trail.

Marriott Basin Trail
The fork in the trail – stay left to the ‘WTH’

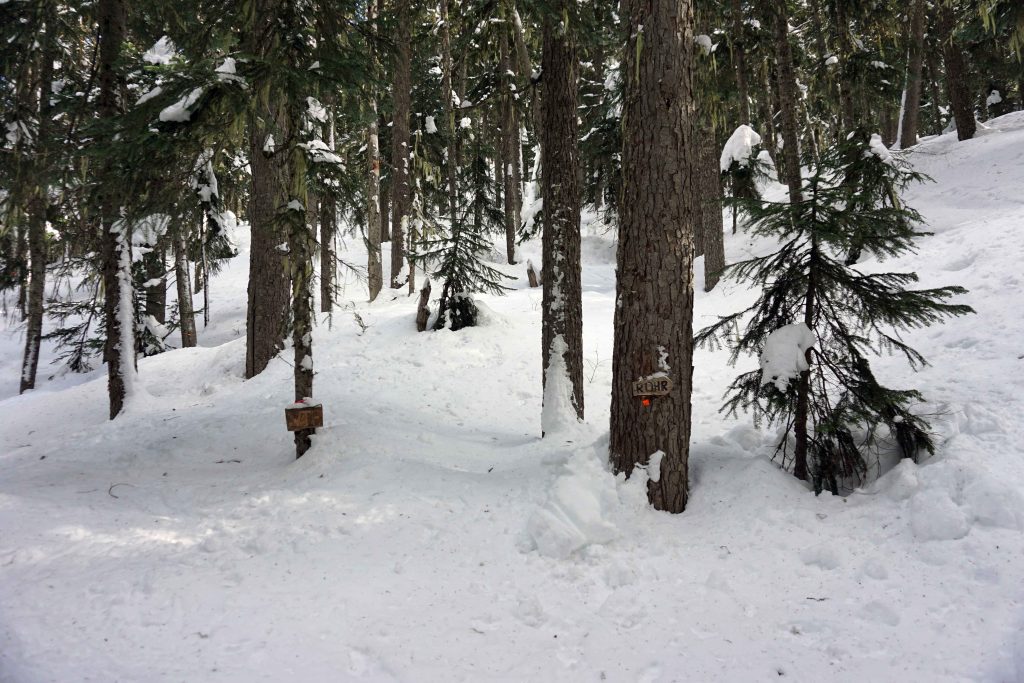
Continue through the forest until you reach a junction with two wooden signposts nailed to two trees. One says ‘Rohr’ and the other says ‘WTH’. Go left towards the Wendy Thompson Hut. After gaining more elevation you’ll eventually come to a flat, snow-covered meadow. The orange markers disappear at this point so you’ll need to rely on your navigation skills.

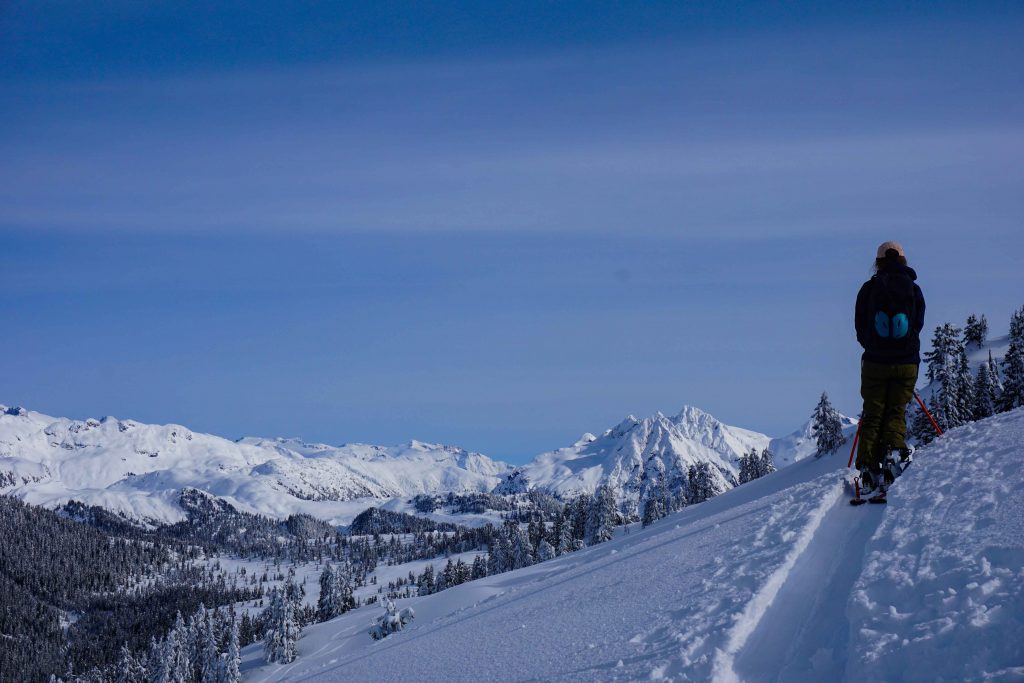
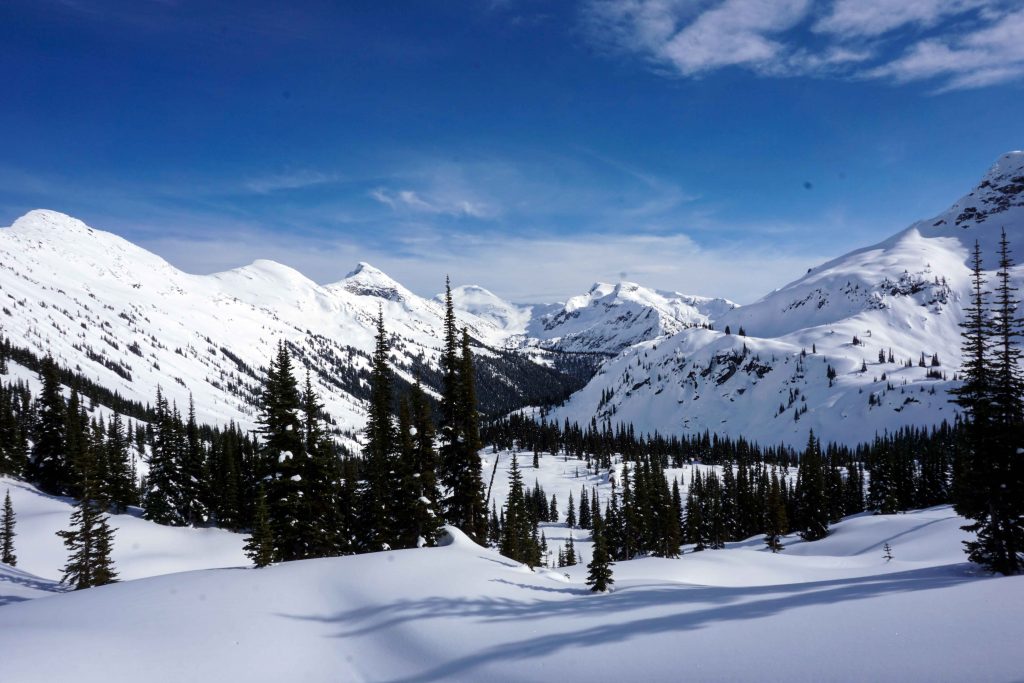
Go straight across the meadow in a northwesterly direction. You are now on a fast, flat section that runs alongside a creek. The area has far fewer trees, meaning you can enjoy the incredible views of the surrounding mountains for the first time. Take care because you are passing underneath an avalanche path, as evidenced by the scarred slopes above you.

Marriott Basin Trail
The snow-covered meadow

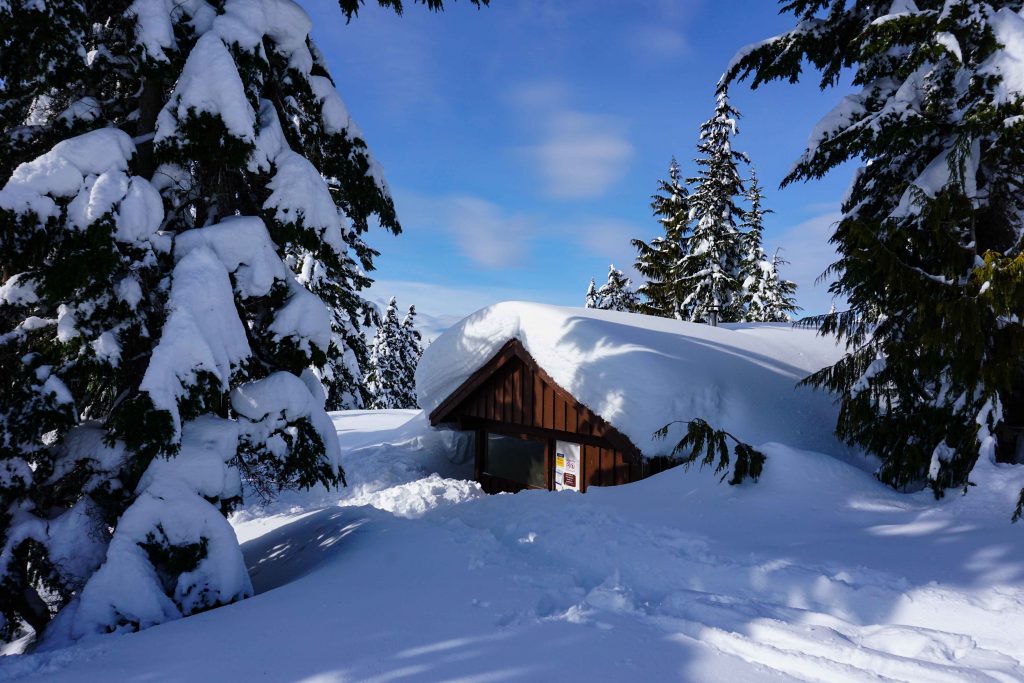
Next, you’ll go up and over some snow-covered boulders, after which you’ll come to Marriott Lake. This is frozen in winter; if not, you’ll need to traverse around it. Head to the other end of the lake. From here, the trail snakes around to the right and back into the trees. The final push is a short, sharp uphill section. Continue to climb to 1,860m and the Wendy Thompson Hut appears before you.

Marriott Basin Trail
Marriott Lake is frozen in the winter

The Wendy Thompson Hut

The Wendy Thompson Hut is operated by the Alpine Club of Canada (ACC). It sleeps 16 people (plus four custodians) and is stocked with sleeping mattresses, a large kitchen with four sinks and three food prep stations, solar lighting on both levels, USB chargers and a common area. There’s also an outhouse.

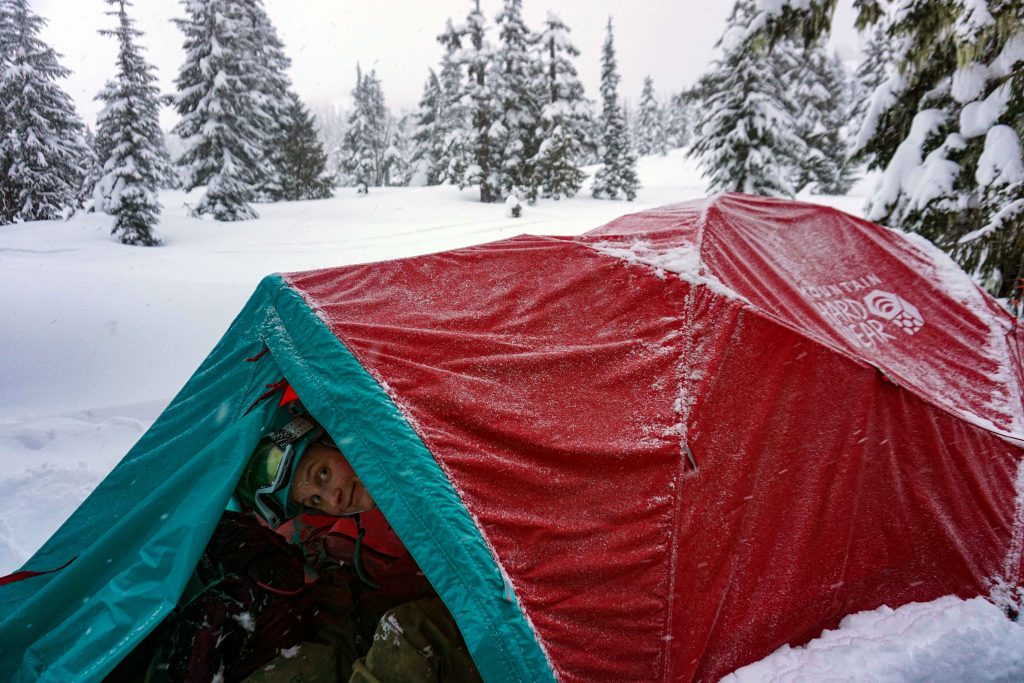
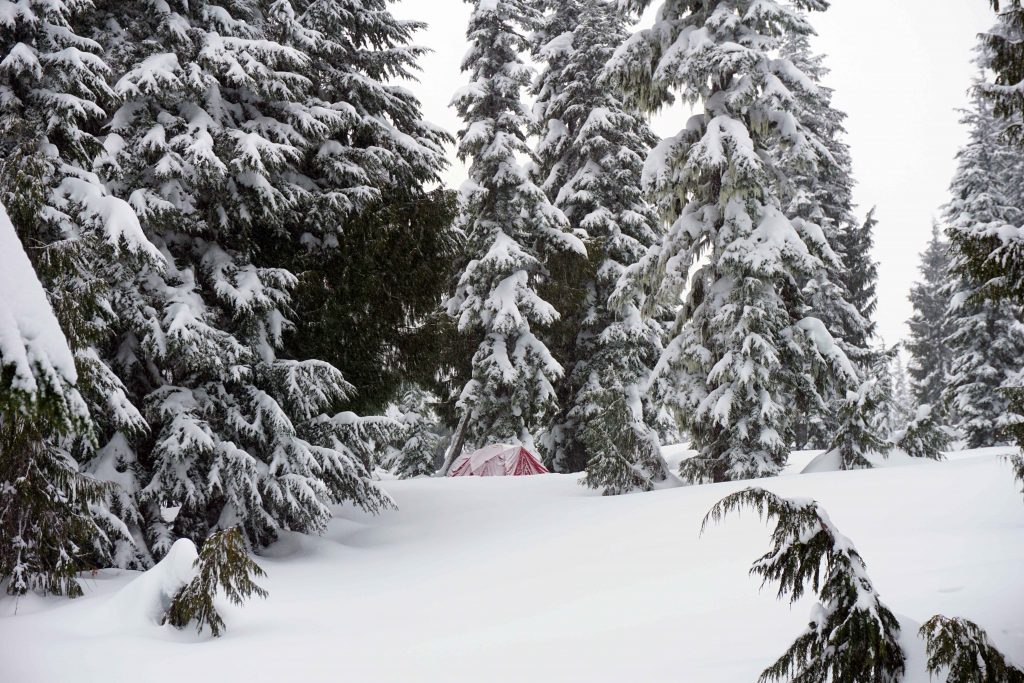
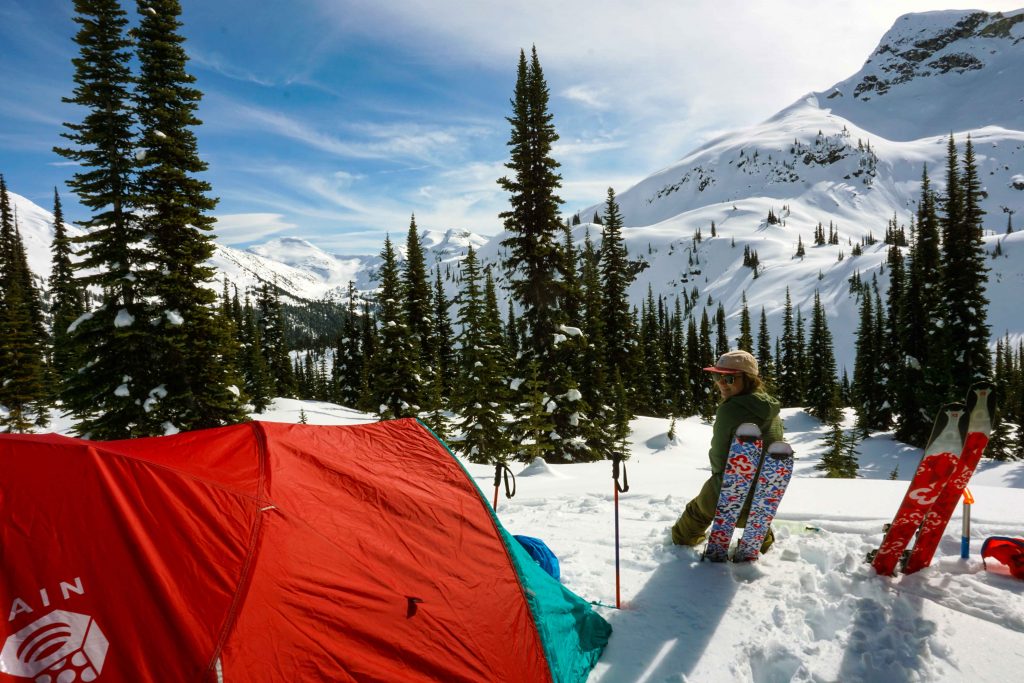
Winter camping near the hut

If you don’t bag a spot in the hut, or the hut’s closed, then you can camp nearby. The ACC prefers that you camp in the meadows or further from the hut to reduce the environmental impact.

Backcountry camping near the Wendy Thompson Hut

Reservations and fees

If you want to stay at the Wendy Thompson Hut then you must make a reservation. The hut is incredibly popular, particularly during winter weekends, so you’ll need to book well in advance of your trip. You can do this via the ACC’s website.

If you camp, the ACC requests that you pay a fee because you are still using the amenities, such as the outhouse.

There are discounted rates for ACC members and children.

Avalanche safety

This route is located in avalanche terrain, so you need to have the necessary training (AST 1 minimum) and the correct avalanche safety tools, including a transceiver, beacon and probe.

Other useful information

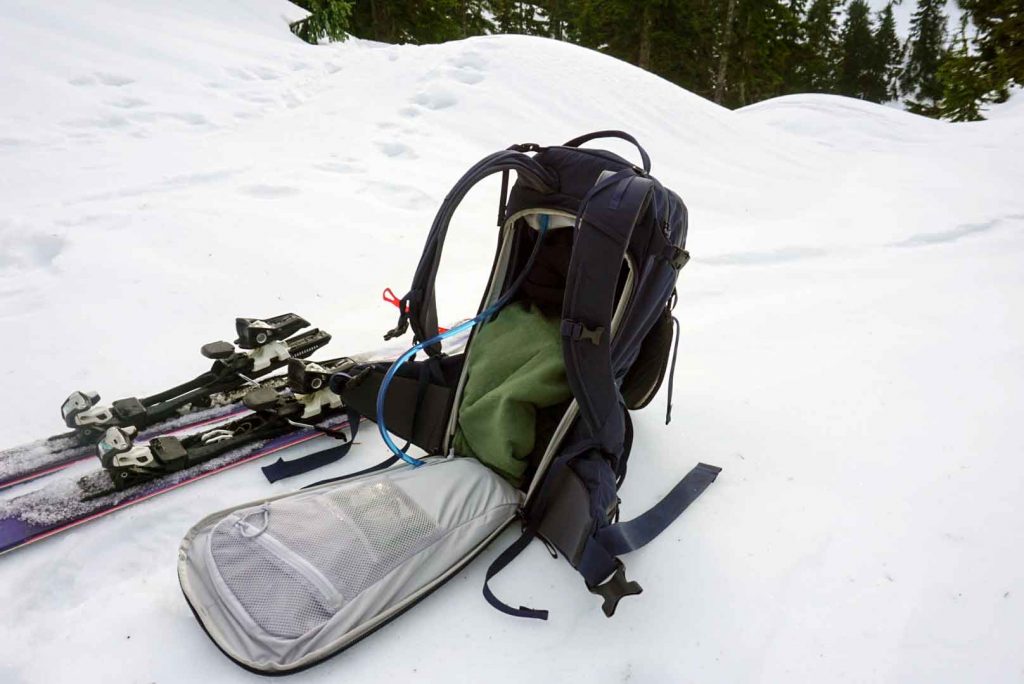
  • There is no phone service – take a satellite communication device with you.
  • The first half of the trail is steep and heavily treed.
  • Navigation is difficult – be prepared for this.
  • The ACC suggests it takes around two to three hours to reach the hut. However, this may be a bit optimistic for those who do not know the way and/or have a heavy pack on. Leave yourself plenty of time, you might just need it.
  • The total distance is around 12km with over 500m elevation gain.

Related: Winter Camping at Red Heather Campground

Snow covered backcountry terrain

My First Time Backcountry Skiing

We glide along the ridge like lemmings, each of us chasing the tracks of the person in front. Suddenly, the leader drops down an east-facing aspect. The rest of us follow behind in hot pursuit. Within minutes, I’m full of regret. The gradient is too steep for my ability and I’m overcome with fear. Panic seizes my body, rendering me unable to ski properly. But I don’t say anything – the others are ahead of me and I need to keep up.

Down we go, further and further, my mind a whirl of activity. I thought this line would bring us back into the resort, but it’s nowhere to be seen. But then, I wasn’t entirely sure I’d understood the plan. Everyone else seemed confident about the lay of the land. I reason that they know more than me. I suppress my mounting anxiety and push on, not wanting to be the weak link.

Finally, we regroup. It becomes clear that errors have indeed been made. We don’t know where we are. Below is a seemingly never-ending slope which we think might – might – bring us to a road. To the right is deep gully, a place no backcountry skier wants to be. It seems there is no choice but to transition and skin back up from where we came. I assess the route. It’s steep. We’re tired. And the light is fading. Between four of us, not one person has a head torch.

Survival mode takes over

I stop obsessing over my shoddy ski form and start concentrating on the task at hand. This is a situation we don’t want to be in, and we need to get out of it – fast. I dig deep as we zig zag our way back up the mountainside. I try to stay positive, encouraging the others and laughing about our terrible kick turns. But secretly, all I can think about is the light. It’s January in British Columbia and it’s nearly 3.30pm. The sun is dipping and we don’t have long until darkness falls.

Thankfully, we turned around just in time. We make it back to the ridge and retrace our steps from earlier in the day, knowing this will lead us to safety. After what feels like an eternity, we are back at the car. There were no avalanches or rescue calls. No one was injured. But we are all shaken. Myself especially. This was my first time backcountry skiing, aside from my AST 1 course. I start to question whether it’s a sport I actually want to pursue.

backcountry ski tourer in the distance surrounding by snowy slopes
Beware of bluebird brain

A litany of errors

What started as a pleasant bluebird day in the mountains quickly escalated into something much scarier. Perhaps it doesn’t sound like a catastrophe, but it could easily have become one. The reality was that we were lost in a vast mountain range without phone signal. No one else knew where we were. Night was looming and it was about to become very cold. We had put ourselves in a very vulnerable position. It wasn’t an experience I wanted to repeat. Ever.

In the coming days, we discuss where we went wrong. Really, it was a litany of errors that began almost as soon as we arrived. We changed the plan at the last minute. We dropped into a pitch without assessing the slope at the top. And we had grossly misjudged our position, as there were in fact a few gullies in between us and the resort. The biggest blunder of all: we didn’t have a single light source, even though I know full well that this is one of the 10 Essentials of backcountry safety.

An important lesson

A range of emotions followed. Fear. Anger. Confusion. Even embarrassment. How could we have been so stupid? What were we thinking? We were all relatively new to backcountry skiing at that point, but we had done the necessary training. We knew what the rules were. But as uncomfortable as these emotions were, they were entirely necessary. It was the only way to understand where we had erred, both individually and as a group.

After a period of self-reflection, I returned to ski touring once again. I wasn’t ready to hang up my skins just yet. But I learned from the events of that day – an essential practice for any backcountry skier. Now, I have turned the experience into a positive one. I got an insight into how quickly things can go wrong, but I was fortunate enough to avoid the consequences. It was an important lesson, and one that came right at the start of my backcountry career.

As painful as it is to recount, it is a story that should be shared with anyone heading into the backcountry, no matter what the season. It is a tale of caution. One that highlights how unforgiving the mountains can be, and that while you can never eliminate all the risks, there is so much that you can control. You can educate yourself. You can apply your knowledge. You can treat every outing as a chance to grow. If you fail to do this – whether through ignorance or arrogance – then you tread a very fine line. On this occasion, I got away with it. Others might not.

Winter camping at red heather campground in Garibaldi Provincial Park

Winter Camping at Red Heather Campground

Red Heather campground near Squamish provides a winter wonderland for backcountry campers. The proximity of Red Heather Hut offers added peace of mind, as you can seek refuge if the weather takes a turn for the worse.

Camping at Red Heather campground

If you’re familiar with outdoor pursuits in Squamish, British Columbia, then you’ve almost certainly heard of Red Heather Hut in Garibaldi Provincial Park. It’s a popular destination for ski tourers, split boarders and snowshoers. The hut itself is just an emergency shelter; you can’t sleep in it (unless you need to) but you can warm your cockles in front of the fire. You can also pitch a tent nearby and enjoy the snowy delights of Garibaldi Provincial Park for as long as you like.

There are several backcountry campgrounds in Garibaldi, but Red Heather is a good winter option for a few reasons.

Firstly, it’s the first camping area that you come to, assuming that you park at the Diamond Head Trail parking lot. It’s just 5km from the upper lot, so you don’t have to haul your winter tent too far uphill.

Secondly, you have the security of Red Heather Hut right next door. While the hut isn’t for overnight stays, you can go inside to organise your gear, warm up in front of the fire and cook your dinner. This adds a bit of luxury, not to mention the comfort of knowing that you can retreat to the hut, if that winter sleeping bag isn’t as warm as it says.

Finally, you can use Red Heather as a base, from which you can strike out further into the backcountry. Ski tourers and split boarders can do a few laps off of Paul’s Ridge and Round Mountain before bedding down for the night. Snowshoers can head up to the ridge to enjoy the spectacular views across Garibaldi Provincial Park and the Tantalus Range (assuming it’s a clear day!)

Camping at Red Heather campground
Leaving the tent for a few laps of Round Mountain

What you need to know before you go

If you’re planning a winter camping trip to Red Heather campground, then here’s what you need to know before go.

Driving and parking

Park at the Diamond Head Trail parking lot. The access road is a narrow mountain road that’s often packed with snow and ice near the top. Winter tires (or mud and snow tires) are a must and 4WD is recommended.

There are two parking lots: an upper lot and a lower lot. If you want to access the upper parking lot (which is where the trailhead starts) then you’ll need snow chains. You can be fined if you drive past the chain-up area without chains installed.

If you don’t have chains then you can park at the lower lot and walk up. However, park rangers have been known to wait further down the road and turn away vehicles without snow chains. This will be a nuisance, as you’ll either need to go and buy some, or you’ll have to park a considerable distance from the trailhead.

Fees and permits

You don’t need a permit to enter Garibaldi Provincial Park during winter, but if you plan on staying the night, you must buy a backcountry camping permit advance of your trip. This applies, even if you’re sleeping in your own tent. You can purchase a permit on Discover Camping. Camping without a permit carries a fine.

Hiking up

The trailhead starts from the upper parking lot. There’s an outhouse here if you need.

The trail itself is narrow and tree-lined. There are no views en route, aside from a clearing at around the halfway mark from which you can see across Squamish. It’s uphill all the way until you reach the meadow, where the trail flattens out. A little further along you’ll find Red Heather Hut tucked into the trees on your right. In terms of navigation, the first part of the trail is extremely easy to follow. Later on, it opens up slightly and you’ll need to follow the orange marker poles.

The distance between the upper parking lot and Red Heather Hut is 5km. It takes between one and two hours, depending on how quickly you move.

Where to camp

Red heather campground is in the immediate vicinity of Red Heather Hut. It’s an alpine meadow and the area is relatively flat. There are no designated pitches or tent pads, so can choose your own camp site. Bear in mind that the hut has a heavy footfall, particularly at weekends. The glades behind the hut offer greater privacy on a busy weekend.

Winter camping at Red Heather campground

Red Heather Hut

You’re not allowed to sleep inside the hut, unless it’s an emergency. However, you are permitted to use the facilities. Inside, you’ll find two picnic benches and a wood burner. There’s a wood pile just outside the front door, along with an axe for chopping. The wood supply has to last the entire winter, so be conservative. There’s also a two-ring propane stove and a sink for grey water. You will need to melt snow for drinking water, which should be boiled and/or treated.

If you’re camping nearby, you may want to leave certain items inside the hut, although you do so at your own risk. Hooks line the walls so you can hang up bags, clothing and equipment. But be warned: there are lots of mice, so be sure that any food is tightly concealed.

Just beyond the hut is an outhouse. As of July 2021, BC Parks is operating a ‘bring your own toilet paper’ policy in the Sea to Sky Corridor – you’ve been warned!

Red Heather Hut
The back of Red Heather Hut

What about summer camping?

You can only camp at Red Heather during the winter months. Currently, this means between the dates of December 1 to April 30. Check the BC Parks website for up-to-date information. A camping permit is required.

The hut is open year-round as a warming hut and an emergency shelter. The wood stove should only be used in winter.

Activities nearby

This is a very popular winter recreation spot. Hikers and snowshoers typically head to Red Heather Hut before making the return journey. Ski tourers and split boarders enjoy the backcountry terrain around Round Mountain and Paul’s Ridge. It’s also possible to continue along the winter trail towards Elfin Lakes Shelter, which is 6km past Red Heather Hut. Winter camping is permitted at Elfin Lakes, and sleeping is allowed in the hut if you have a reservation. More challenging terrain can be found beyond Elfin Lakes.

Safety

There’s sign near the start of the trailhead indicating that you are entering into avalanche terrain. You should carry a beacon, probe and shovel (and know how to use them). The trail to the hut is often considered low risk, but there are sinkholes and creeks, so be sure to stick to the path and operate a buddy system.

Woman in snowy mountains wearing the blueNorrøna Lyngen 35L Ski Touring Pack

Kit Review – Norrøna Lyngen 35L Ski Touring Pack

The Norrøna Lyngen 35L ski touring pack is the ideal pack for day trips into the backcountry.

Product description

Norrøna says: ‘The highly functional Lyngen 35L pack is our lightest backpack designed for ski touring’. It’s described as ‘a ski mountaineering pack with room for your equipment during a full day in the mountains.’

The review: Norrøna Lyngen 35L ski touring pack

At first glance, this bag has everything you’d expect of a touring pack. There’s a dedicated compartment for your avalanche safety gear and skins, including integrated dividers for your probe and shovel so they don’t slide around. And at 35 litres, there’s just enough space for layers and food.

When you come to inspect the pack more closely, you’ll realise (with some delight) that there are more design features than you initially thought. Some of them are simple, yet subtly work to make your life easier. Take the separate compartment for your safety gear, for example. It has red zip ties, while all the others are blue. In the panic of an avalanche burial, you’ll waste no time zippering and unzippering the wrong pockets. As they say, the devil is in the detail. And it seems Norrøna has really taken the time to consider the details, allowing them to create a product that’s truly fit for purpose.

When you reach the trail head, this pack starts working for you straightaway. First up, you can secure your keys to the internal key hook. Then, you can put your helmet in the external helmet carrier (which, by the way, can be rolled up and stowed away for the descent). The net does a great job of keeping snow out, because let’s be honest, no one likes a damp helmet. There’s also an ice axe/pole attachment, although I’ve not had cause to use this yet. The top pouch provides a convenient place to keep your googles. And if you need to boot pack, the two loops at the bottom of the bag enable an A-frame ski carry system. It’s also possible to carry your skis diagonally, if that’s your jam.

Woman on skis in snowy mountains
The helmet carrier at work

While you’re on the move, the large hip pockets allow easy access to snacks and other items, like your phone. You can also wriggle your way into the main compartment from the left-hand hip pocket, allowing you to drag out a deeply packed layer or camera without having to take off your pack.

Talking of the main compartment, this is where all your other gear lives, including your layers and water. The entire back panel opens up, a clever design that allows you to see and organise all your clothes, even when your skis are attached to the pack. Inside the back panel is a large zippered compartment which is perfect for housing a water bladder. You can then route the hose through a hole and straight into the shoulder strap, which zippers open and shut to provide a hydration sleeve. This is so pleasing, as your tube isn’t flapping around and benefits from a layer of insulation. The back compartment also has a mesh pocket for those items that can easily get lost, such as a head torch, compass and first aid kit.

The hose sits inside the shoulder strap

When the pack is empty, it’s lightweight at 1.19kg. It’s also incredibly comfortable. The heat moulded back panel acts as padding, and there are plenty of straps and cinches so you can get the fit just right. I’m a petite female with a small frame. As such, I’m normally very aware of my backpack while skiing. But thanks to the ergonomic design, this pack sits tight when you need it to, regardless of whether you’re skinning up or making your descent.

If there is one drawback, it’s that the material is water-resistant and not waterproof, although this is pretty standard. My first ski tour with this pack was during a wet west coast day near Vancouver. The clothes in the main compartment fared well and were only slightly damp, thanks to their location at the back of the pack. Everything else got pretty soggy and I was glad none of my electronics were in the hip pockets. As a result, I’ve started putting things in waterproof stuff sacks to ensure they stay dry. Also, at 35 litres I would definitely class this as a day bag. Those wanting to do multi-day tours will want something with a larger capacity.

Open backpack on snowy ground
The back panel opens up

Time will tell how well this pack endures. Worryingly, Norrøna themselves have rated the pack as only three out of six for durability. However, the five-year warranty provides extra peace of mind.

The verdict

The Norrøna Lyngen 35L ski touring pack has been thoughtfully designed to meet all your day touring needs. It has a mid-level price point compared to other products, yet performs extremely well, combining comfort with high-level functionality. Would I recommend it? Absolutely.

Ski touring at Round Mountain

How to Get Started Backcountry Skiing

Backcountry skiing is the natural progression for a lot of people wanting to push their skiing to the next level. Resorts can be busy and expensive. Lift lines can be long. And no matter how early you arrive on a powder day, it’s mere minutes before those fresh lines are tracked out.

Not to get too purist about it: there’s always a time and a place for the ski hill! But sometimes you just want something a little more, well, spiritual. A day out in nature. A physical challenge. Oh, and lots of untouched snow all to yourself. You might only have the energy for one lap, but you might just make the best turns of your life. 

If this sounds appealing, then backcountry skiing could be for you.

What is backcountry skiing?

Backcountry skiing refers to any kind of skiing that’s not within the boundary of a ski resort. This means it hasn’t been controlled for avalanches and isn’t covered by ski patrol.

You can either access this terrain by taking the chairlift up and then skiing, touring or boot-packing beyond the boundary lines. This area is known as the side-country or the slack-country. Alternatively, you can make the expedition entirely human powered. This involves hiking up, usually with climbing skins on the bottom of your skis, before transitioning to downhill mode and skiing back down again.

Ski touring in the backcountry
Skinning along a skin track

How to get into backcountry skiing

Even to the seasoned resort skier, getting into backcountry skiing can seem like daunting proposition. Take a few turns out of bounds and you suddenly feel very vulnerable – and with good reason. It’s a wild place out there, full of terrain traps, tree wells and avalanche hazards. There are precious few people, and ski patrol won’t be sweeping the area at the end of the day, so it’s up to you to get home safely.

All these risks are very real, but that doesn’t mean you have to be a pro mountaineer to start backcountry skiing. If you have a reasonable level of fitness and are comfortable skiing blue runs, then there’s no reason why you shouldn’t take up backcountry skiing.

But before you leave the resort boundary behind, you need to equip yourself with a little bit of know-how first. You may be a highly experienced skier, and you are probably oh so very eager to play in that pristine powder. However, backcountry skiing is a different kettle of fish to resort skiing. It’s practically a different sport. Because of this, you need to start at the very beginning.

So, here’s how to get into backcountry skiing.

1. Try an intro to backcountry skiing course

First up, you could try an introductory backcountry skiing course. These courses teach you the basics of ski touring, including how to use your equipment and how to plan a safe route. Then you head out into the field to experience it for yourself.

Trying before you buy is a great idea. Backcountry gear is an expensive investment, so it’s good to know that you actually like it before you splash the cash. It’s not for everyone, especially if you’re less-than-confident about your fitness or skiing ability.

2. Take your AST 1

If you’re keen as a backcountry bean, then you absolutely must take your Avalanche Skills Training Level 1 (AST 1). Find a course provider approved by Avalanche Canada or Avalanche Quebec.

During the course you’ll learn how to travel safely in the backcountry. You’ll cover route planning, terrain traps, avalanche risks, companion rescue and snow assessment. You should not attempt to ski in the backcountry until you’ve completed your AST 1.

Top tip for ladies – some companies offer women’s only AST 1 courses, including Altus Mountain Guides in Whistler.

3. Get the gear

A ski touring set-up is different to a resort set-up. Most important are the avalanche safety tools, which encompass an avalanche transceiver, a probe and a shovel. You’ll also need climbing skins and alpine touring bindings.

This equipment is required to do your AST 1. However, you can always rent to begin with. This gives you the chance to build your ski touring set-up gradually. Find out exactly what you’ll need with this Ski Touring Kit List.

4. Find a group of fellow ski tourers

Now you’re equipped with the right knowledge and safety tools to head out into the backcountry. The next step is to find a group of fellow ski tourers (or split boarders) to accompany you.

Do not travel in the backcountry alone. Instead, find some friends who have also taken the AST 1 (at least). These people might have to save your life, so you better be confident that they know what they’re doing.

Ski touring in the backcountry
In search of simple terrain

5. Start simple

Then, start off with something easy. You might even want to skin up some local trails or gentle logging roads first. This gives you the chance to dial down those kick turns and do some beacon practice before heading out into the wilds.

Be sure to stick to simple terrain when you’re starting out. You’ll learn all about this during your AST 1. You can work your way up to bigger backcountry adventures once you’re more adept at identifying avalanche hazards.

If you live in British Columbia, John Baldwin’s book Exploring the Coast Mountains on Skis is a great resource. Each trip is given a difficulty rating and is classed according to the Avalanche Terrain Exposure Scale (ATES).

6. Take a guided tour of the backcountry

If you’d like to experience more of the backcountry in a safe way, you could always take a guided tour. Your guide will be grateful that you’ve got your avalanche skills training under your belt.

You could also ask a more experienced friend to take you out for the day too. However, don’t rely on your friend, just because he or she has been backcountry skiing for longer. Keep communicating with each other and stay involved in the decision-making process. You’ve recently done your AST 1, so all that important safety information will be fresh in your mind. If you’re not happy with something, speak up.

7. Keep learning

Backcountry skiing is one long learning curve. Re-read your AST handbook at the start of every season. Do a companion rescue skills course to refresh your memory. Take the AST 2. Just because you learned what to do in an avalanche situation five years ago, doesn’t mean that you’ll remember what to do if a burial actually occurs. This could be the difference between life and death.

So, no matter who you are, keep educating yourself on avalanche terrain, map reading, first aid, survival skills and even weather forecasts. You don’t know when you might need it.

Woman on skis stands on snowy hill with mountains in the distance

Ski Touring Kit List

There’s something so magical about ski touring. You can get far from the madding crowd in search of new terrain, untouched lines and fresh pow. But before you can earn your turns, you’ll need to invest in some new gear.

If you’re new to ski touring, then take a deep breath. You’re going to need to modify your traditional downhill resort set-up. This can be overwhelming – firstly because there are so many options out there, and secondly because, let’s be honest, it’s not cheap.

If you’re operating on a budget, then check sites like Craigslist and Facebook Marketplace for second-hand gear. Stores usually offer discounts on last year’s stock, and you can wait for those annual sales to come round. It’s also a good idea to start shopping around sooner, rather than later. That way you can collect your gear bit by bit, rather than having a last-minute splurge at the start of the season.

Here’s a run-down of everything you’ll need for a ski touring set-up.

Skis

OK, this seems obvious – you’ll need a pair of skis to go ski touring. You’re going to want something that can float through powder, as opposed to a pair of narrow-waisted carvers. Ski technology is incredibly advanced these days and ski aficionados can talk for hours about rockers, camber and width. Basically, you’ll want some powder skis or some all-mountain skis that are wider underfoot.

If you’re a snowboarder, you’ll need to get a splitboard mounted with splitboard bindings.

Bindings

Ski touring bindings are special because they have an uphill mode and a downhill mode. There are two options available: frame bindings and tech bindings. Traditionally tech bindings (i.e. pin bindings) were aimed at uphill efficiency but compromised on safety during the descent. New technology is now combining the best of both worlds, but only a few companies currently offer such products (like the Salomon Shifts), meaning they have a much higher price point.

Whichever you choose, be sure that your bindings are compatible with your touring boots.

Touring boots

Which brings me onto my next point: touring boots. Like bindings, touring boots have a skinning mode and a skiing mode. You don’t realise how important this is until you start hauling yourself up a mountainside. If you have alpine ski boots on, your feet will quickly become sore and blistered. This is definitely not what you want in the backcountry. In fact, you want to take care of your feet at all costs. Make sure your boots are comfortable. If not, consider getting a custom liner, such as an Intuition liner.

Skins

Skins are like carpets you put on the bottom of your skis during the ascent. One side is gluey and sticks to the underside of your ski. The other side usually consists of nylon or mohair and lets you glide effortlessly across the snow. Skins come in different sizes, so select some that fit your skis. You’ll then need to trim the edges (and possibly adjust the tail and tip clips) so they sit flush with your edges.

Ski touring kit
Skinning up

Avalanche transceiver

Now onto the safety equipment. First up, an avalanche transceiver. This might just save your life one day, so if you’re going to buy anything new, this is it. Transceivers are worn across your chest at all times while you’re in the backcountry. They have a send and receive mode. You keep them on send or ‘transmit’. In the event that one of your companions is buried, you switch onto receive or ‘search’. Your device will pick up the signal being transmitted by your buried companion. You’ll then know where to dig.

Some avalanche beacons are considered safer than others, and some get an extremely bad press indeed. Research different models and check the news, reviews and advice from industry experts before you invest.

Shovel

Shovels have many uses in the backcountry. Most importantly, they allow you to move snow fast in the event of an avalanche burial. They’re also useful for digging snow pits and snow caves. There are specific snow sport shovels on the market. These are lightweight and durable. Most also have handles that fold down or detach, meaning you can easily fit them into your backpack.

Probe

A probe is essentially a long metal stick that is used in an avalanche situation. This is a crude description for such an important piece of kit, but you get my point. Once you’ve located the rough area of your buried companion, you whip out your probe and insert it straight down into the snow. You keep going until you hit a human. Backcountry probes break down so they can be carried in your bag and feature a pull cord for quick deployment.

Lightweight/moisture wicking clothes

You probably already have a closet full of ski clothes. But check – are your jacket and pants insulated? If you’ve been skiing in resort, then they likely are. This is because it’s cold on a chairlift. But when you’re out touring, you can get incredibly hot while skinning up. Then, you can get incredibly cold while transitioning and skiing down. This means lots of lightweight layers are key.

For your outer layers, you’ll want a shell jacket and pants/bibs that are uninsulated. Anything else will be too hot and heavy. Ideally, you want to achieve the holy trinity of lightweight, breathable and waterproof. For your base and mid-layers, choose moisture-wicking materials such as merino wool. Stay away from cotton.

Backpack

You’ll need somewhere to put your shovel, probe, layers, skins (when your skiing down), food, water and all your other items. You might feel that any old backpack will do. However, there are dedicated ski touring backpacks available. These have a separate compartment for your avalanche tools, ensuring they’re easy to reach when you need them.

Related: Kit Review – Norrøna Lyngen 35L Ski Touring Pack.

The usual ski stuff

Then there’s all the other usual ski stuff, like a helmet, goggles, poles and gloves.

Other bits and bobs

And finally, all the other bits and bobs. Some of these items will be personal to you. For example, while skinning I prefer to wear a cap, sunglasses and a pair of lightweight gloves. But you’ll learn what works as you go.

Then there’s the other essential safety items, like a compass, a map of the area, a multi-tool, a first aid kit, sunscreen and a head torch. You’ll also want some kind of communication device – you know, just in case anything should happen. Mobile phones don’t always work out of bounds (or in bounds, for that matter) so you might want to invest in a satellite communication device. Ultimately, the choice is yours, but it can provide peace of mind while you’re shredding around the backcountry.