Backcountry skiing is the natural progression for a lot of people wanting to push their skiing to the next level. Resorts can be busy and expensive. Lift lines can be long. And no matter how early you arrive on a powder day, it’s mere minutes before those fresh lines are tracked out.
Not to get too purist about it: there’s always a time and a place for the ski hill! But sometimes you just want something a little more, well, spiritual. A day out in nature. A physical challenge. Oh, and lots of untouched snow all to yourself. You might only have the energy for one lap, but you might just make the best turns of your life.
If this sounds appealing, then backcountry skiing could be for you.
What is backcountry skiing?
Backcountry skiing refers to any kind of skiing that’s not within the boundary of a ski resort. This means it hasn’t been controlled for avalanches and isn’t covered by ski patrol.
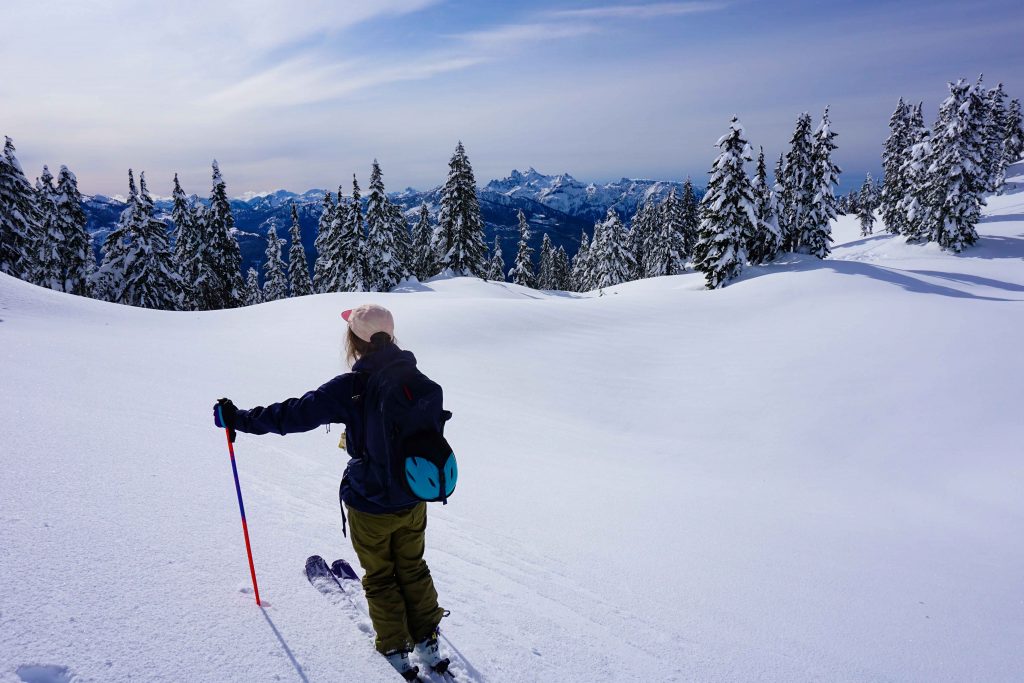
You can either access this terrain by taking the chairlift up and then skiing, touring or boot-packing beyond the boundary lines. This area is known as the side-country or the slack-country. Alternatively, you can make the expedition entirely human powered. This involves hiking up, usually with climbing skins on the bottom of your skis, before transitioning to downhill mode and skiing back down again.
How to get into backcountry skiing
Even to the seasoned resort skier, getting into backcountry skiing can seem like daunting proposition. Take a few turns out of bounds and you suddenly feel very vulnerable – and with good reason. It’s a wild place out there, full of terrain traps, tree wells and avalanche hazards. There are precious few people, and ski patrol won’t be sweeping the area at the end of the day, so it’s up to you to get home safely.
All these risks are very real, but that doesn’t mean you have to be a pro mountaineer to start backcountry skiing. If you have a reasonable level of fitness and are comfortable skiing blue runs, then there’s no reason why you shouldn’t take up backcountry skiing.
But before you leave the resort boundary behind, you need to equip yourself with a little bit of know-how first. You may be a highly experienced skier, and you are probably oh so very eager to play in that pristine powder. However, backcountry skiing is a different kettle of fish to resort skiing. It’s practically a different sport. Because of this, you need to start at the very beginning.
So, here’s how to get into backcountry skiing.
1. Try an intro to backcountry skiing course
First up, you could try an introductory backcountry skiing course. These courses teach you the basics of ski touring, including how to use your equipment and how to plan a safe route. Then you head out into the field to experience it for yourself.
Trying before you buy is a great idea. Backcountry gear is an expensive investment, so it’s good to know that you actually like it before you splash the cash. It’s not for everyone, especially if you’re less-than-confident about your fitness or skiing ability.
2. Take your AST 1
If you’re keen as a backcountry bean, then you absolutely must take your Avalanche Skills Training Level 1 (AST 1). Find a course provider approved by Avalanche Canada or Avalanche Quebec.
During the course you’ll learn how to travel safely in the backcountry. You’ll cover route planning, terrain traps, avalanche risks, companion rescue and snow assessment. You should not attempt to ski in the backcountry until you’ve completed your AST 1.
Top tip for ladies – some companies offer women’s only AST 1 courses, including Altus Mountain Guides in Whistler.
3. Get the gear
A ski touring set-up is different to a resort set-up. Most important are the avalanche safety tools, which encompass an avalanche transceiver, a probe and a shovel. You’ll also need climbing skins and alpine touring bindings.
This equipment is required to do your AST 1. However, you can always rent to begin with. This gives you the chance to build your ski touring set-up gradually. Find out exactly what you’ll need with this Ski Touring Kit List.
4. Find a group of fellow ski tourers
Now you’re equipped with the right knowledge and safety tools to head out into the backcountry. The next step is to find a group of fellow ski tourers (or split boarders) to accompany you.
Do not travel in the backcountry alone. Instead, find some friends who have also taken the AST 1 (at least). These people might have to save your life, so you better be confident that they know what they’re doing.
5. Start simple
Then, start off with something easy. You might even want to skin up some local trails or gentle logging roads first. This gives you the chance to dial down those kick turns and do some beacon practice before heading out into the wilds.
Be sure to stick to simple terrain when you’re starting out. You’ll learn all about this during your AST 1. You can work your way up to bigger backcountry adventures once you’re more adept at identifying avalanche hazards.
If you live in British Columbia, John Baldwin’s book Exploring the Coast Mountains on Skis is a great resource. Each trip is given a difficulty rating and is classed according to the Avalanche Terrain Exposure Scale (ATES).
6. Take a guided tour of the backcountry
If you’d like to experience more of the backcountry in a safe way, you could always take a guided tour. Your guide will be grateful that you’ve got your avalanche skills training under your belt.
You could also ask a more experienced friend to take you out for the day too. However, don’t rely on your friend, just because he or she has been backcountry skiing for longer. Keep communicating with each other and stay involved in the decision-making process. You’ve recently done your AST 1, so all that important safety information will be fresh in your mind. If you’re not happy with something, speak up.
7. Keep learning
Backcountry skiing is one long learning curve. Re-read your AST handbook at the start of every season. Do a companion rescue skills course to refresh your memory. Take the AST 2. Just because you learned what to do in an avalanche situation five years ago, doesn’t mean that you’ll remember what to do if a burial actually occurs. This could be the difference between life and death.
So, no matter who you are, keep educating yourself on avalanche terrain, map reading, first aid, survival skills and even weather forecasts. You don’t know when you might need it.
