Tag Archives: skiing

Snow covered backcountry terrain

My First Time Backcountry Skiing

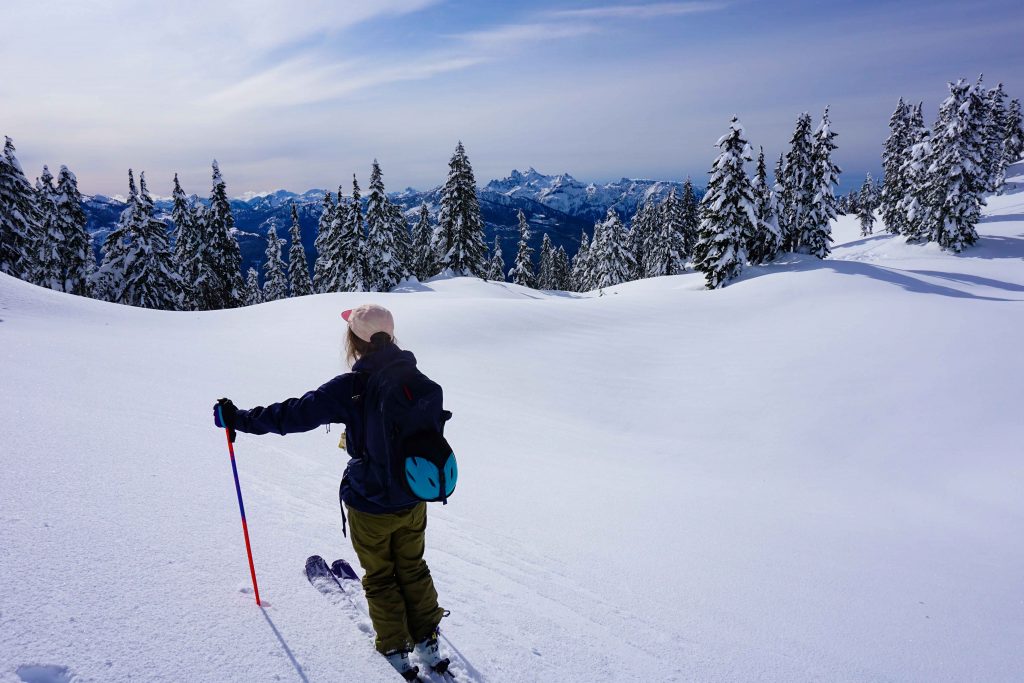
We glide along the ridge like lemmings, each of us chasing the tracks of the person in front. Suddenly, the leader drops down an east-facing aspect. The rest of us follow behind in hot pursuit. Within minutes, I’m full of regret. The gradient is too steep for my ability and I’m overcome with fear. Panic seizes my body, rendering me unable to ski properly. But I don’t say anything – the others are ahead of me and I need to keep up.

Down we go, further and further, my mind a whirl of activity. I thought this line would bring us back into the resort, but it’s nowhere to be seen. But then, I wasn’t entirely sure I’d understood the plan. Everyone else seemed confident about the lay of the land. I reason that they know more than me. I suppress my mounting anxiety and push on, not wanting to be the weak link.

Finally, we regroup. It becomes clear that errors have indeed been made. We don’t know where we are. Below is a seemingly never-ending slope which we think might – might – bring us to a road. To the right is deep gully, a place no backcountry skier wants to be. It seems there is no choice but to transition and skin back up from where we came. I assess the route. It’s steep. We’re tired. And the light is fading. Between four of us, not one person has a head torch.

Survival mode takes over

I stop obsessing over my shoddy ski form and start concentrating on the task at hand. This is a situation we don’t want to be in, and we need to get out of it – fast. I dig deep as we zig zag our way back up the mountainside. I try to stay positive, encouraging the others and laughing about our terrible kick turns. But secretly, all I can think about is the light. It’s January in British Columbia and it’s nearly 3.30pm. The sun is dipping and we don’t have long until darkness falls.

Thankfully, we turned around just in time. We make it back to the ridge and retrace our steps from earlier in the day, knowing this will lead us to safety. After what feels like an eternity, we are back at the car. There were no avalanches or rescue calls. No one was injured. But we are all shaken. Myself especially. This was my first time backcountry skiing, aside from my AST 1 course. I start to question whether it’s a sport I actually want to pursue.

backcountry ski tourer in the distance surrounding by snowy slopes
Beware of bluebird brain

A litany of errors

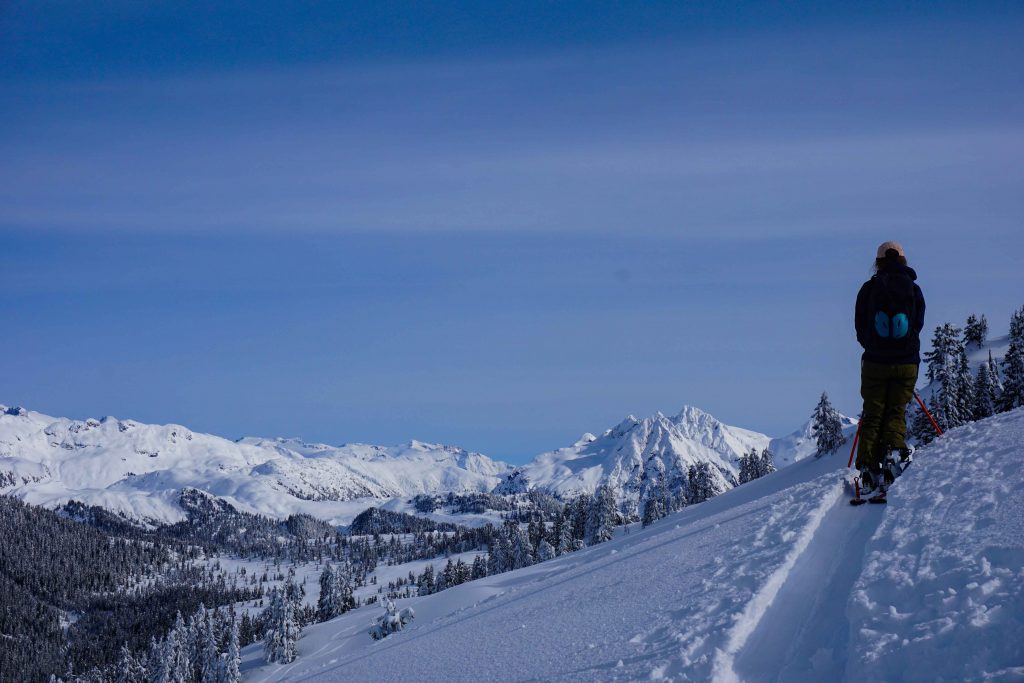
What started as a pleasant bluebird day in the mountains quickly escalated into something much scarier. Perhaps it doesn’t sound like a catastrophe, but it could easily have become one. The reality was that we were lost in a vast mountain range without phone signal. No one else knew where we were. Night was looming and it was about to become very cold. We had put ourselves in a very vulnerable position. It wasn’t an experience I wanted to repeat. Ever.

In the coming days, we discuss where we went wrong. Really, it was a litany of errors that began almost as soon as we arrived. We changed the plan at the last minute. We dropped into a pitch without assessing the slope at the top. And we had grossly misjudged our position, as there were in fact a few gullies in between us and the resort. The biggest blunder of all: we didn’t have a single light source, even though I know full well that this is one of the 10 Essentials of backcountry safety.

An important lesson

A range of emotions followed. Fear. Anger. Confusion. Even embarrassment. How could we have been so stupid? What were we thinking? We were all relatively new to backcountry skiing at that point, but we had done the necessary training. We knew what the rules were. But as uncomfortable as these emotions were, they were entirely necessary. It was the only way to understand where we had erred, both individually and as a group.

After a period of self-reflection, I returned to ski touring once again. I wasn’t ready to hang up my skins just yet. But I learned from the events of that day – an essential practice for any backcountry skier. Now, I have turned the experience into a positive one. I got an insight into how quickly things can go wrong, but I was fortunate enough to avoid the consequences. It was an important lesson, and one that came right at the start of my backcountry career.

As painful as it is to recount, it is a story that should be shared with anyone heading into the backcountry, no matter what the season. It is a tale of caution. One that highlights how unforgiving the mountains can be, and that while you can never eliminate all the risks, there is so much that you can control. You can educate yourself. You can apply your knowledge. You can treat every outing as a chance to grow. If you fail to do this – whether through ignorance or arrogance – then you tread a very fine line. On this occasion, I got away with it. Others might not.

Sunset from Cypress Mountain

7 Ski Hills Near Vancouver

When it comes to skiing or snowboarding near Vancouver, the options are a-plenty. The following seven ski hills are all within easy reach of the city, making for a great day trip.

Cypress Mountain Resort

Distance from downtown Vancouver: 28.4km

Cypress is the biggest of all Vancouver’s local ski hills, with 53 ski runs and 600 skiable acres. The terrain is varied, with something to suit all abilities. On a clear day the views across the Howe Sound are second to none.

  • Pro: Vancouver’s biggest ski and snowboard resort
  • Pro: Hosted the 2010 Winter Olympics
  • Con: Gets very busy, especially at weekends

Grouse Mountain

Distance from downtown Vancouver: 12.8km

Known as the Peak of Vancouver, Grouse Mountain features 33 ski runs and 212 skiable acres. Visit at night to see the city lights twinkling beneath you.

  • Pro: A hub of winter activities for all the family
  • Pro: Easy to access because the parking lot is rarely covered in snow
  • Con: Limited parking and long line-ups for the gondola

Mount Seymour Resort

Distance from downtown Vancouver: 27.6km

Last in the line-up of Vancouver’s local ski hills is Mount Seymour, which has 40 ski runs, three chairlifts and a couple of magic carpets. A family-run operation, Seymour has a laid-back vibe that’s perfect for little ones and beginners.

  • Pro: Family friendly
  • Pro: Terrain park
  • Con: May be too mellow for some

Whistler Blackcomb

Distance from downtown Vancouver: 122km

Perhaps the only resort on this list that needs no introduction. With 32 lifts and a whopping 8,171 acres of terrain, Whistler Blackcomb is an internationally renowned ski resort with good reason. The question is: are you will to pay for it?

  • Pro: Lots of terrain
  • Pro: Something for everyone
  • Con: Expensive lift tickets and often long line-ups at weekends

Sasquatch Mountain Resort

Distance from downtown Vancouver: 130km

Formerly known as Hemlock Valley Resort, Sasquatch Mountain is compact with just three chairlifts and 36 runs. But it sure does pack a punch on a powder day. Just beware of the access road – snow tires with chains are a must.

  • Pro: Good value for money
  • Pro: Not usually very busy
  • Con: Snow chains required for access road

Manning Park Resort

Distance from downtown Vancouver: 218km

Sitting at a high elevation, and located further inland than the coastal mountains, Manning Park often gets some of the best snow around. With only two chairlifts, plus a handle-tow and a T-bar, this place has a quaint charm about it.

  • Pro: Lots of glade skiing
  • Pro: Less expensive than other options
  • Con: No cell phone service – so don’t lose your friends!

Mount Baker

Distance from downtown Vancouver: 143km

Grab your passport, apply for an ESTA and head across the border (assuming it’s open – which as we all know, isn’t a given). You’ll be rewarded with a variety of terrain, accessed via eight chairlifts – two of which are ‘experts only’.

  • Pro: Mid-size mountain with a local’s vibe
  • Pro: Known for breaking the world record of snowfall in a single season
  • Con: Few options for beginners
Ski touring at Round Mountain

How to Get Started Backcountry Skiing

Backcountry skiing is the natural progression for a lot of people wanting to push their skiing to the next level. Resorts can be busy and expensive. Lift lines can be long. And no matter how early you arrive on a powder day, it’s mere minutes before those fresh lines are tracked out.

Not to get too purist about it: there’s always a time and a place for the ski hill! But sometimes you just want something a little more, well, spiritual. A day out in nature. A physical challenge. Oh, and lots of untouched snow all to yourself. You might only have the energy for one lap, but you might just make the best turns of your life. 

If this sounds appealing, then backcountry skiing could be for you.

What is backcountry skiing?

Backcountry skiing refers to any kind of skiing that’s not within the boundary of a ski resort. This means it hasn’t been controlled for avalanches and isn’t covered by ski patrol.

You can either access this terrain by taking the chairlift up and then skiing, touring or boot-packing beyond the boundary lines. This area is known as the side-country or the slack-country. Alternatively, you can make the expedition entirely human powered. This involves hiking up, usually with climbing skins on the bottom of your skis, before transitioning to downhill mode and skiing back down again.

Ski touring in the backcountry
Skinning along a skin track

How to get into backcountry skiing

Even to the seasoned resort skier, getting into backcountry skiing can seem like daunting proposition. Take a few turns out of bounds and you suddenly feel very vulnerable – and with good reason. It’s a wild place out there, full of terrain traps, tree wells and avalanche hazards. There are precious few people, and ski patrol won’t be sweeping the area at the end of the day, so it’s up to you to get home safely.

All these risks are very real, but that doesn’t mean you have to be a pro mountaineer to start backcountry skiing. If you have a reasonable level of fitness and are comfortable skiing blue runs, then there’s no reason why you shouldn’t take up backcountry skiing.

But before you leave the resort boundary behind, you need to equip yourself with a little bit of know-how first. You may be a highly experienced skier, and you are probably oh so very eager to play in that pristine powder. However, backcountry skiing is a different kettle of fish to resort skiing. It’s practically a different sport. Because of this, you need to start at the very beginning.

So, here’s how to get into backcountry skiing.

1. Try an intro to backcountry skiing course

First up, you could try an introductory backcountry skiing course. These courses teach you the basics of ski touring, including how to use your equipment and how to plan a safe route. Then you head out into the field to experience it for yourself.

Trying before you buy is a great idea. Backcountry gear is an expensive investment, so it’s good to know that you actually like it before you splash the cash. It’s not for everyone, especially if you’re less-than-confident about your fitness or skiing ability.

2. Take your AST 1

If you’re keen as a backcountry bean, then you absolutely must take your Avalanche Skills Training Level 1 (AST 1). Find a course provider approved by Avalanche Canada or Avalanche Quebec.

During the course you’ll learn how to travel safely in the backcountry. You’ll cover route planning, terrain traps, avalanche risks, companion rescue and snow assessment. You should not attempt to ski in the backcountry until you’ve completed your AST 1.

Top tip for ladies – some companies offer women’s only AST 1 courses, including Altus Mountain Guides in Whistler.

3. Get the gear

A ski touring set-up is different to a resort set-up. Most important are the avalanche safety tools, which encompass an avalanche transceiver, a probe and a shovel. You’ll also need climbing skins and alpine touring bindings.

This equipment is required to do your AST 1. However, you can always rent to begin with. This gives you the chance to build your ski touring set-up gradually. Find out exactly what you’ll need with this Ski Touring Kit List.

4. Find a group of fellow ski tourers

Now you’re equipped with the right knowledge and safety tools to head out into the backcountry. The next step is to find a group of fellow ski tourers (or split boarders) to accompany you.

Do not travel in the backcountry alone. Instead, find some friends who have also taken the AST 1 (at least). These people might have to save your life, so you better be confident that they know what they’re doing.

Ski touring in the backcountry
In search of simple terrain

5. Start simple

Then, start off with something easy. You might even want to skin up some local trails or gentle logging roads first. This gives you the chance to dial down those kick turns and do some beacon practice before heading out into the wilds.

Be sure to stick to simple terrain when you’re starting out. You’ll learn all about this during your AST 1. You can work your way up to bigger backcountry adventures once you’re more adept at identifying avalanche hazards.

If you live in British Columbia, John Baldwin’s book Exploring the Coast Mountains on Skis is a great resource. Each trip is given a difficulty rating and is classed according to the Avalanche Terrain Exposure Scale (ATES).

6. Take a guided tour of the backcountry

If you’d like to experience more of the backcountry in a safe way, you could always take a guided tour. Your guide will be grateful that you’ve got your avalanche skills training under your belt.

You could also ask a more experienced friend to take you out for the day too. However, don’t rely on your friend, just because he or she has been backcountry skiing for longer. Keep communicating with each other and stay involved in the decision-making process. You’ve recently done your AST 1, so all that important safety information will be fresh in your mind. If you’re not happy with something, speak up.

7. Keep learning

Backcountry skiing is one long learning curve. Re-read your AST handbook at the start of every season. Do a companion rescue skills course to refresh your memory. Take the AST 2. Just because you learned what to do in an avalanche situation five years ago, doesn’t mean that you’ll remember what to do if a burial actually occurs. This could be the difference between life and death.

So, no matter who you are, keep educating yourself on avalanche terrain, map reading, first aid, survival skills and even weather forecasts. You don’t know when you might need it.