Tag Archives: Sunshine Coast

Fairview Bay Hut

Hiking from Saltery Bay to Fairview Bay Hut

The hike from Saltery Bay to Fairview Bay Hut is a 14km round-trip that weaves through the forest and along the coastline. The trailhead is easy to access, making it ideal for anyone wanting to experience a short section of the Sunshine Coast Trail.

Saltery Bay to Fairview Bay hike – quick facts

  • Distance: 14km round trip
  • Rating: Intermediate
  • When to hike it: Any time of year
  • Time needed: Approximately 5 hours
  • Start/end: Near the Saltery Bay ferry terminal on the northern Sunshine Coast, British Columbia
  • Camping/huts: The hut at Fairview Bay is free to stay in. If it’s full, you can always camp outside and make use of the facilities.
  • Water: There are a couple of creeks along the way, as well as one near the hut. However, they can dry up in the later summer months.
  • Dogs: Are permitted and can easily navigate the terrain, but cannot stay inside the huts.
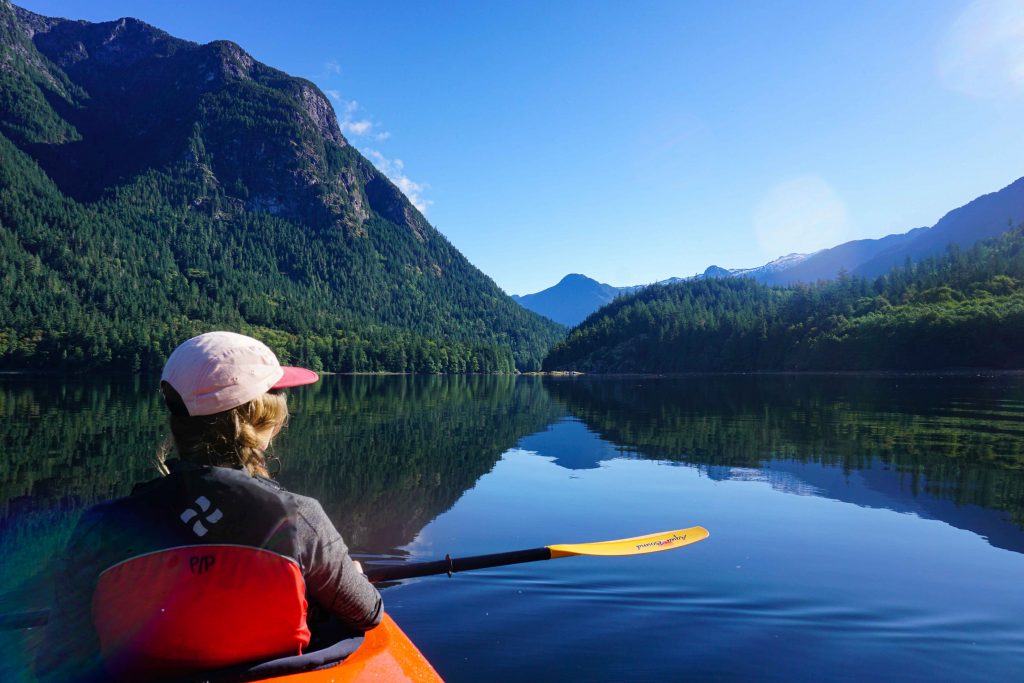
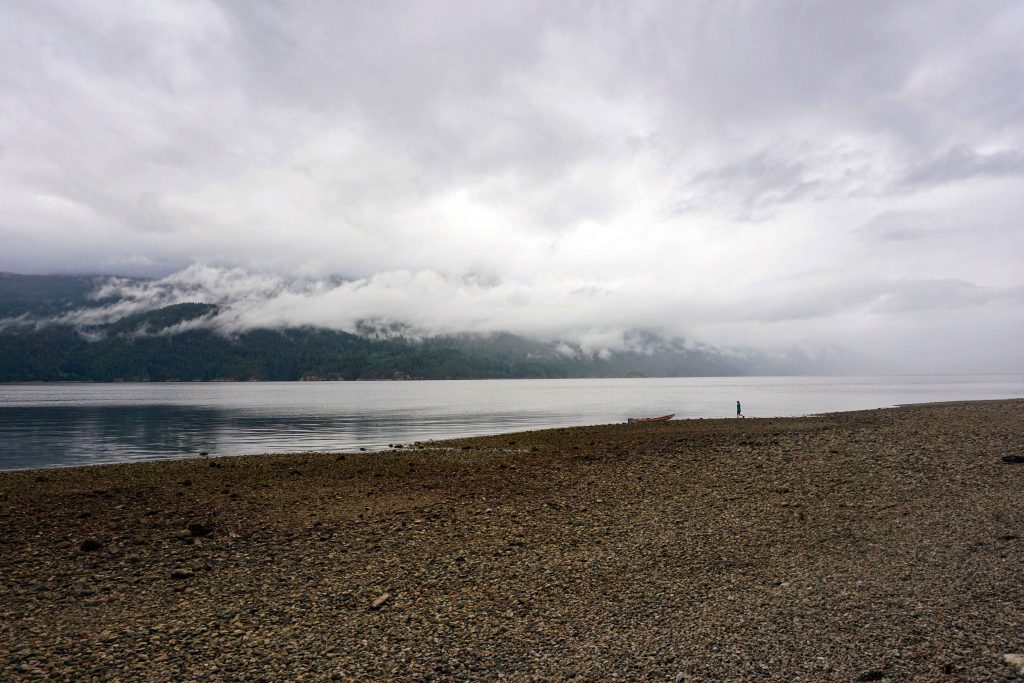
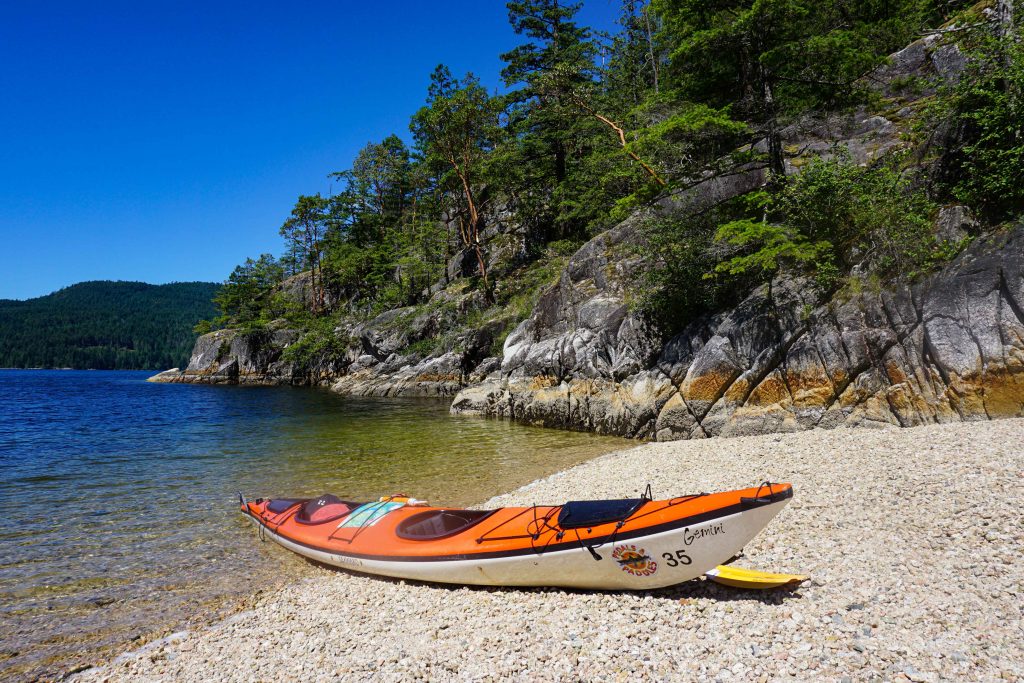
  • Marine access: You can also kayak or canoe into Fairview Bay Hut, which is the only hut on the SCT with marine access.
  • Longer hike: You can make this into a longer hike by continuing onto Rainy Day Lake and looping back round to Saltery Bay (approx. 18km).
Map of part of the Sunshine Coast Trail
There’s a map at the start of the trail

Hiking a section of the Sunshine Coast Trail

The Sunshine Coast Trail (SCT) is a 180km point-to-point hike that stretches the length of the northern Sunshine Coast. It takes around eight days to do the whole thing. If you don’t have that kind of time (or endurance!) then you can always hike a shorter section, either as a day hike or as a multi-day hike.

There are various access points along the trail. Saltery Bay is one of the most user-friendly trailheads, as it’s about a two minute drive from the ferry terminal. You don’t need a 4×4 or high clearance vehicle and there’s ample parking. You can do it as an out and back hike, or you can continue up to Rainy Day Lake and make it into a loop (which increases the distance to about 18km). Both options can be done as a day hike, or you can stop and camp at the huts – the choice is entirely yours.

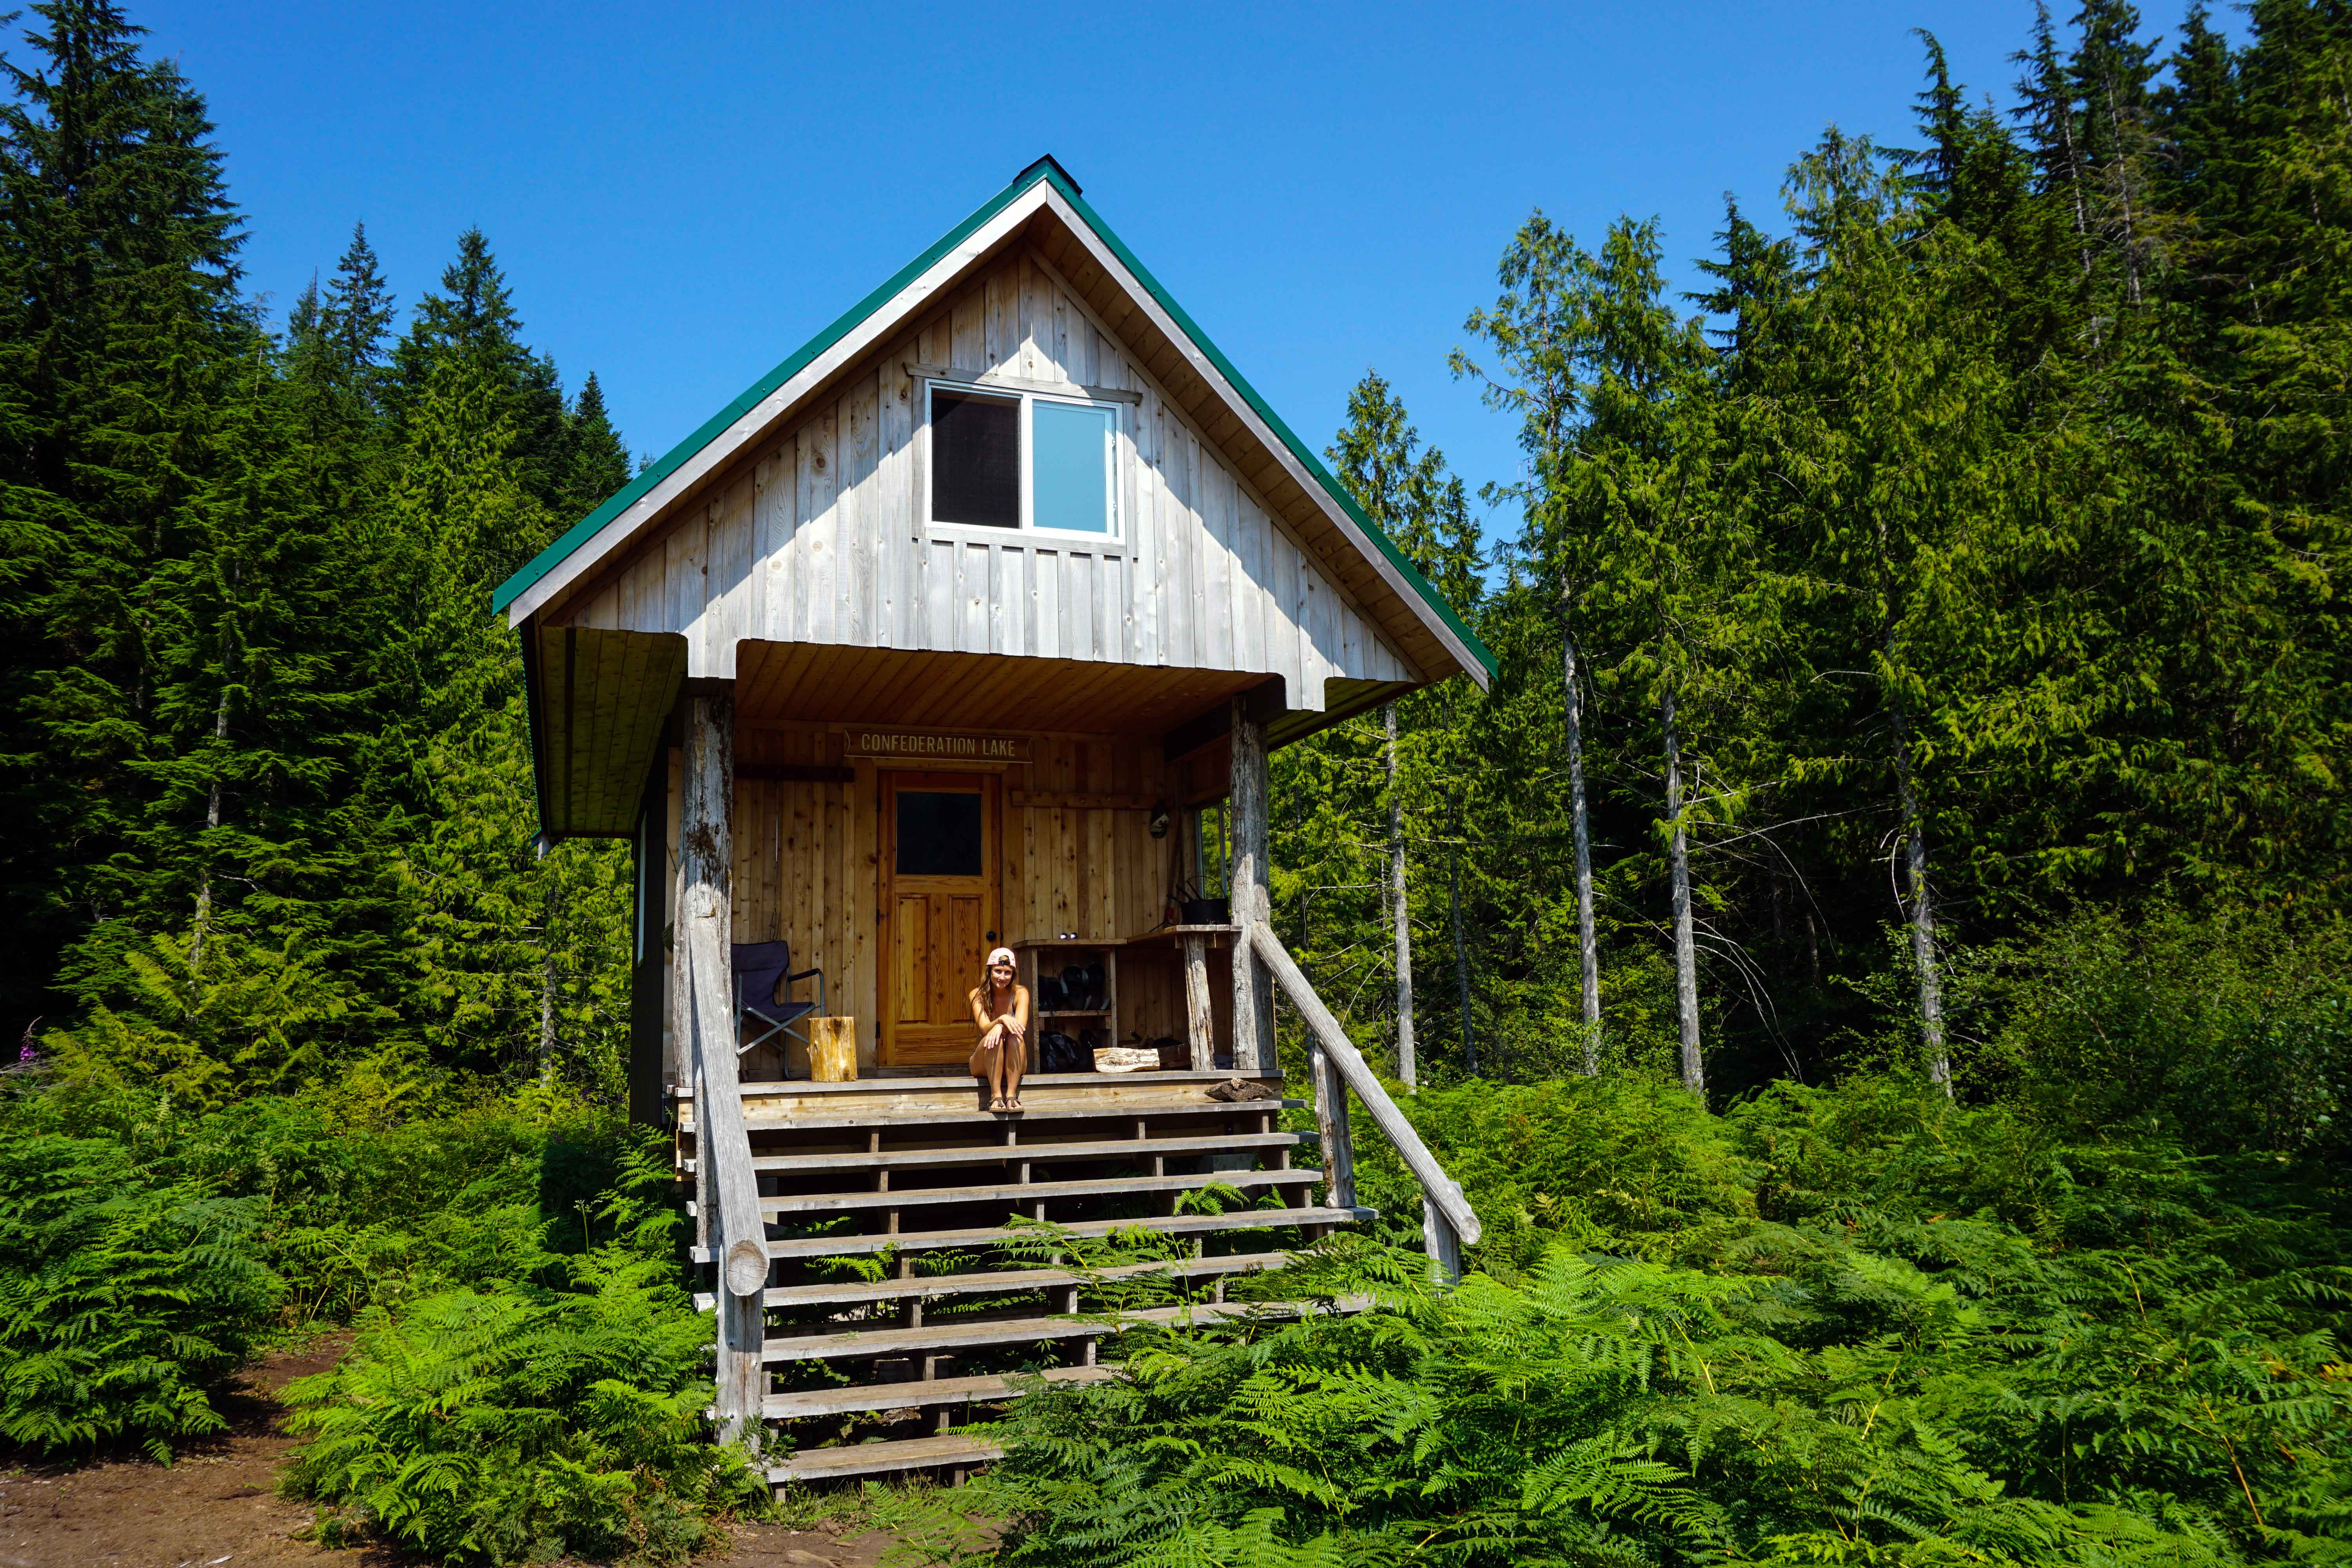
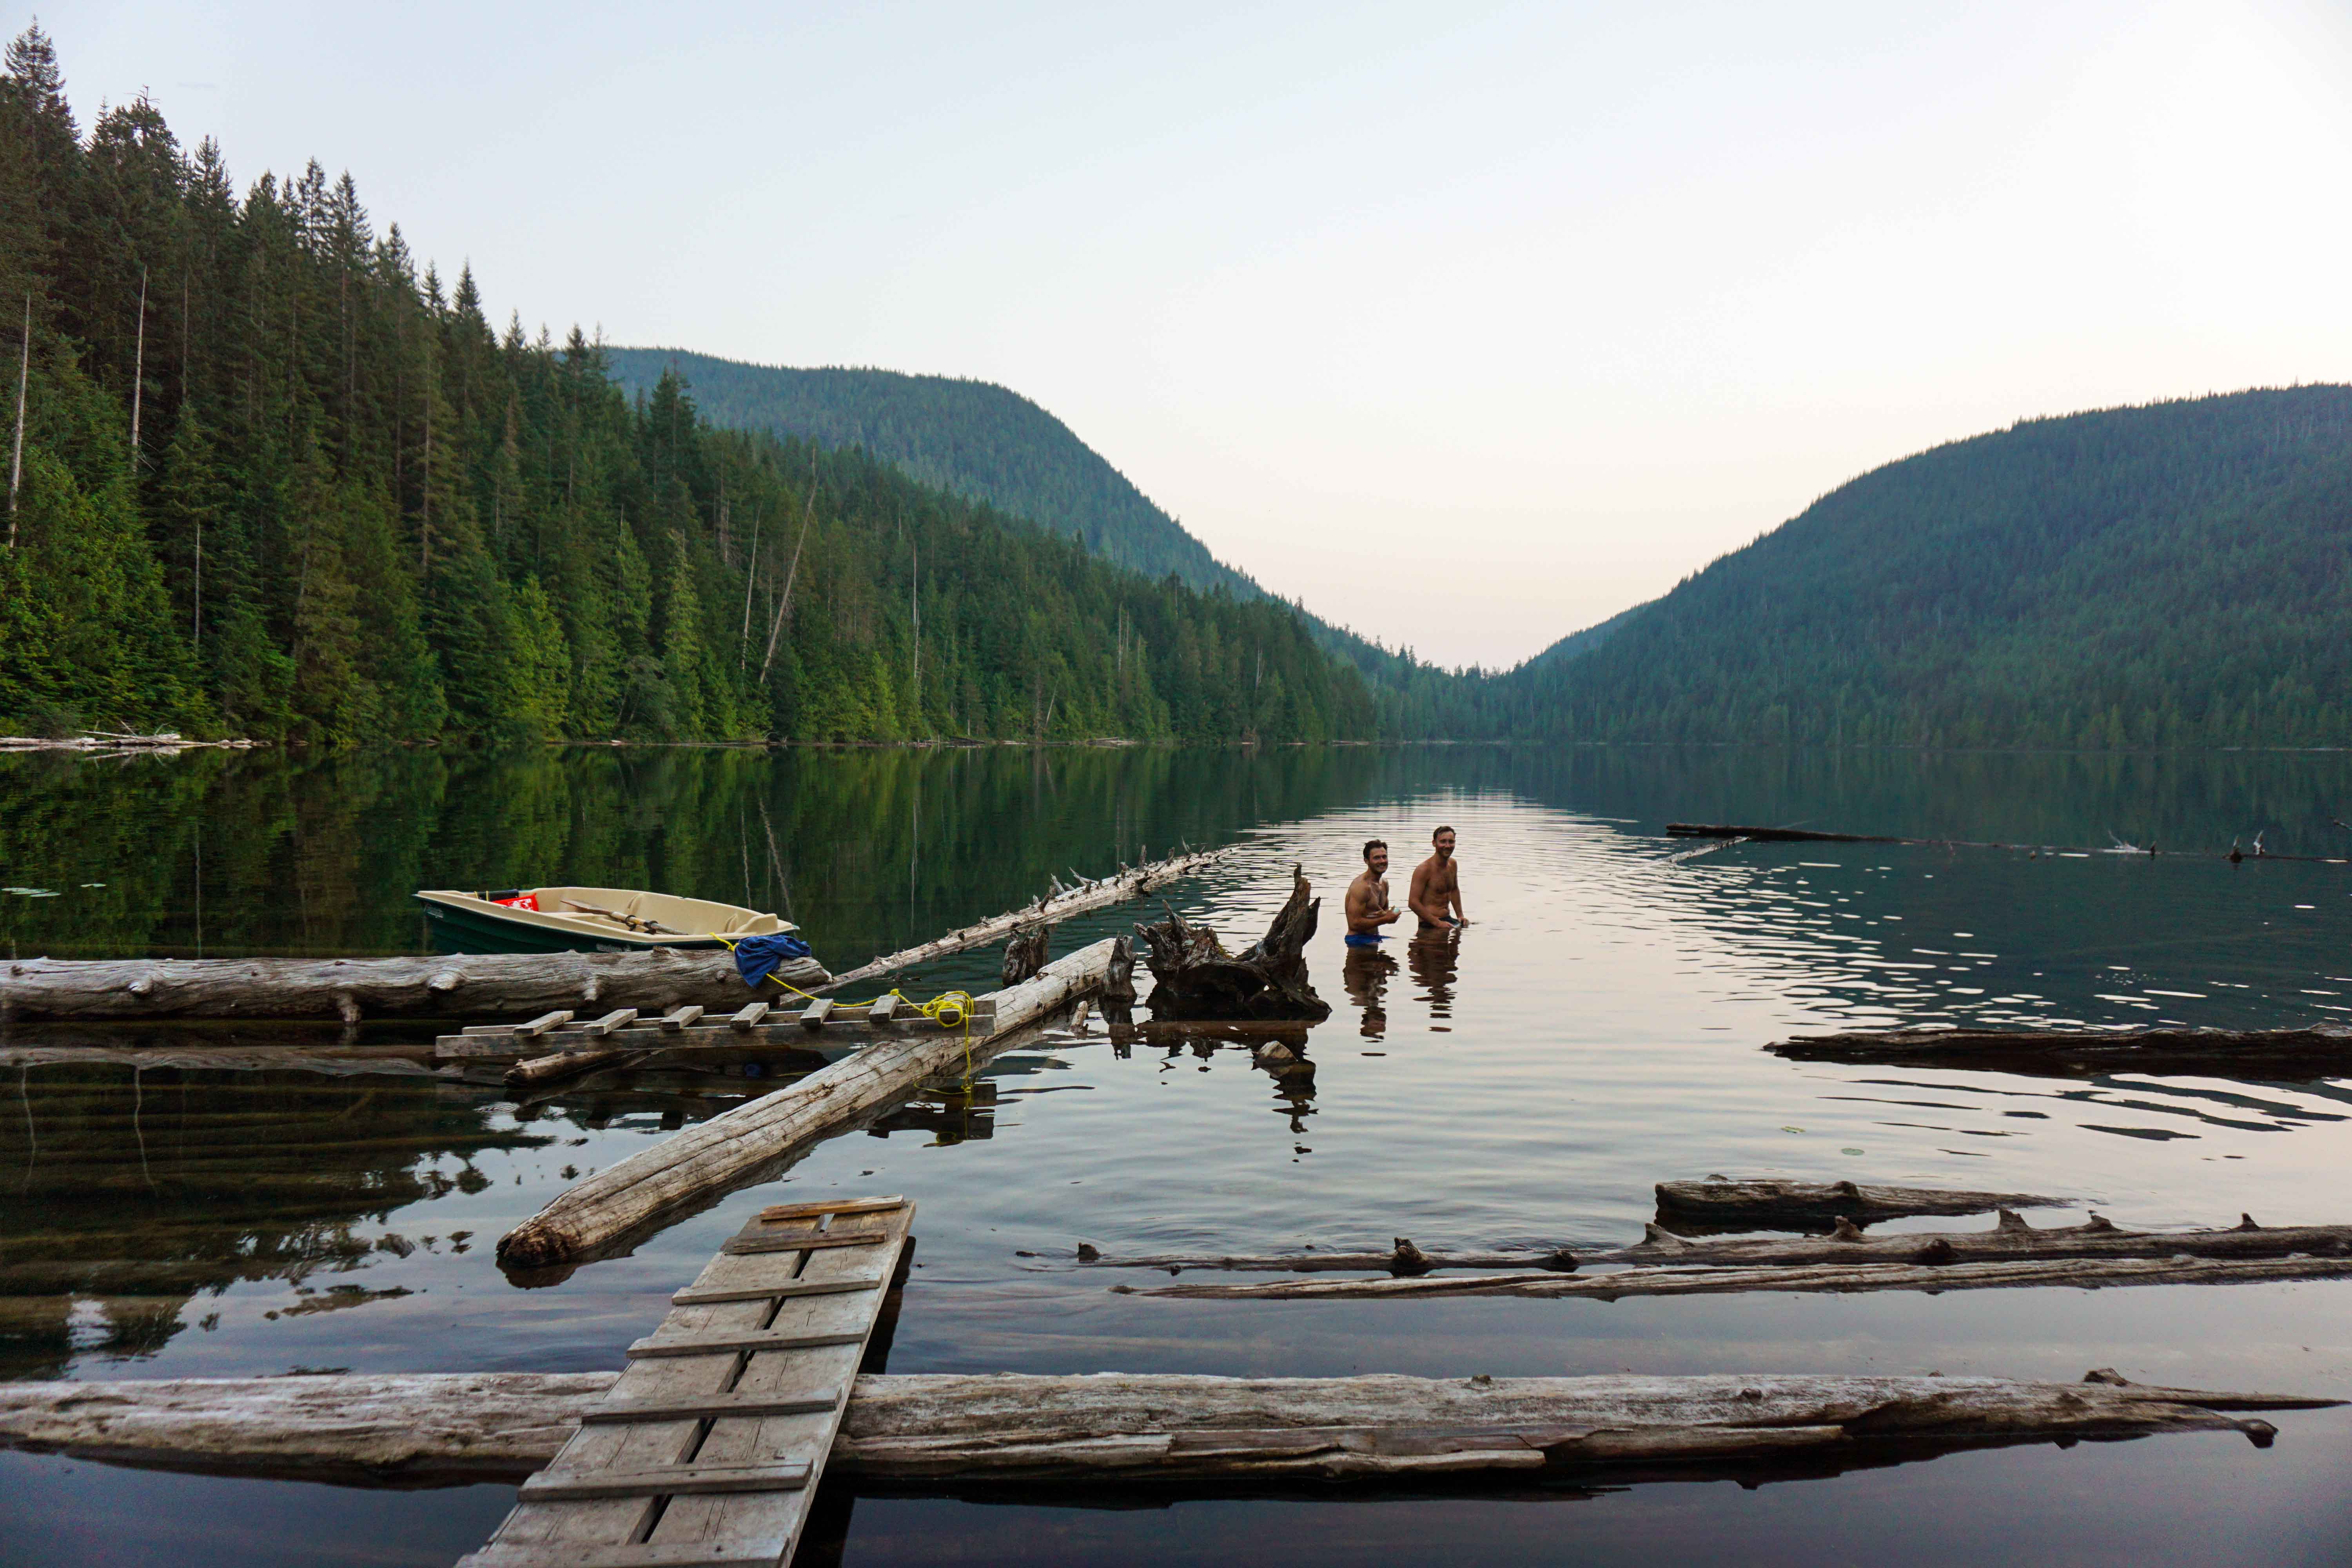
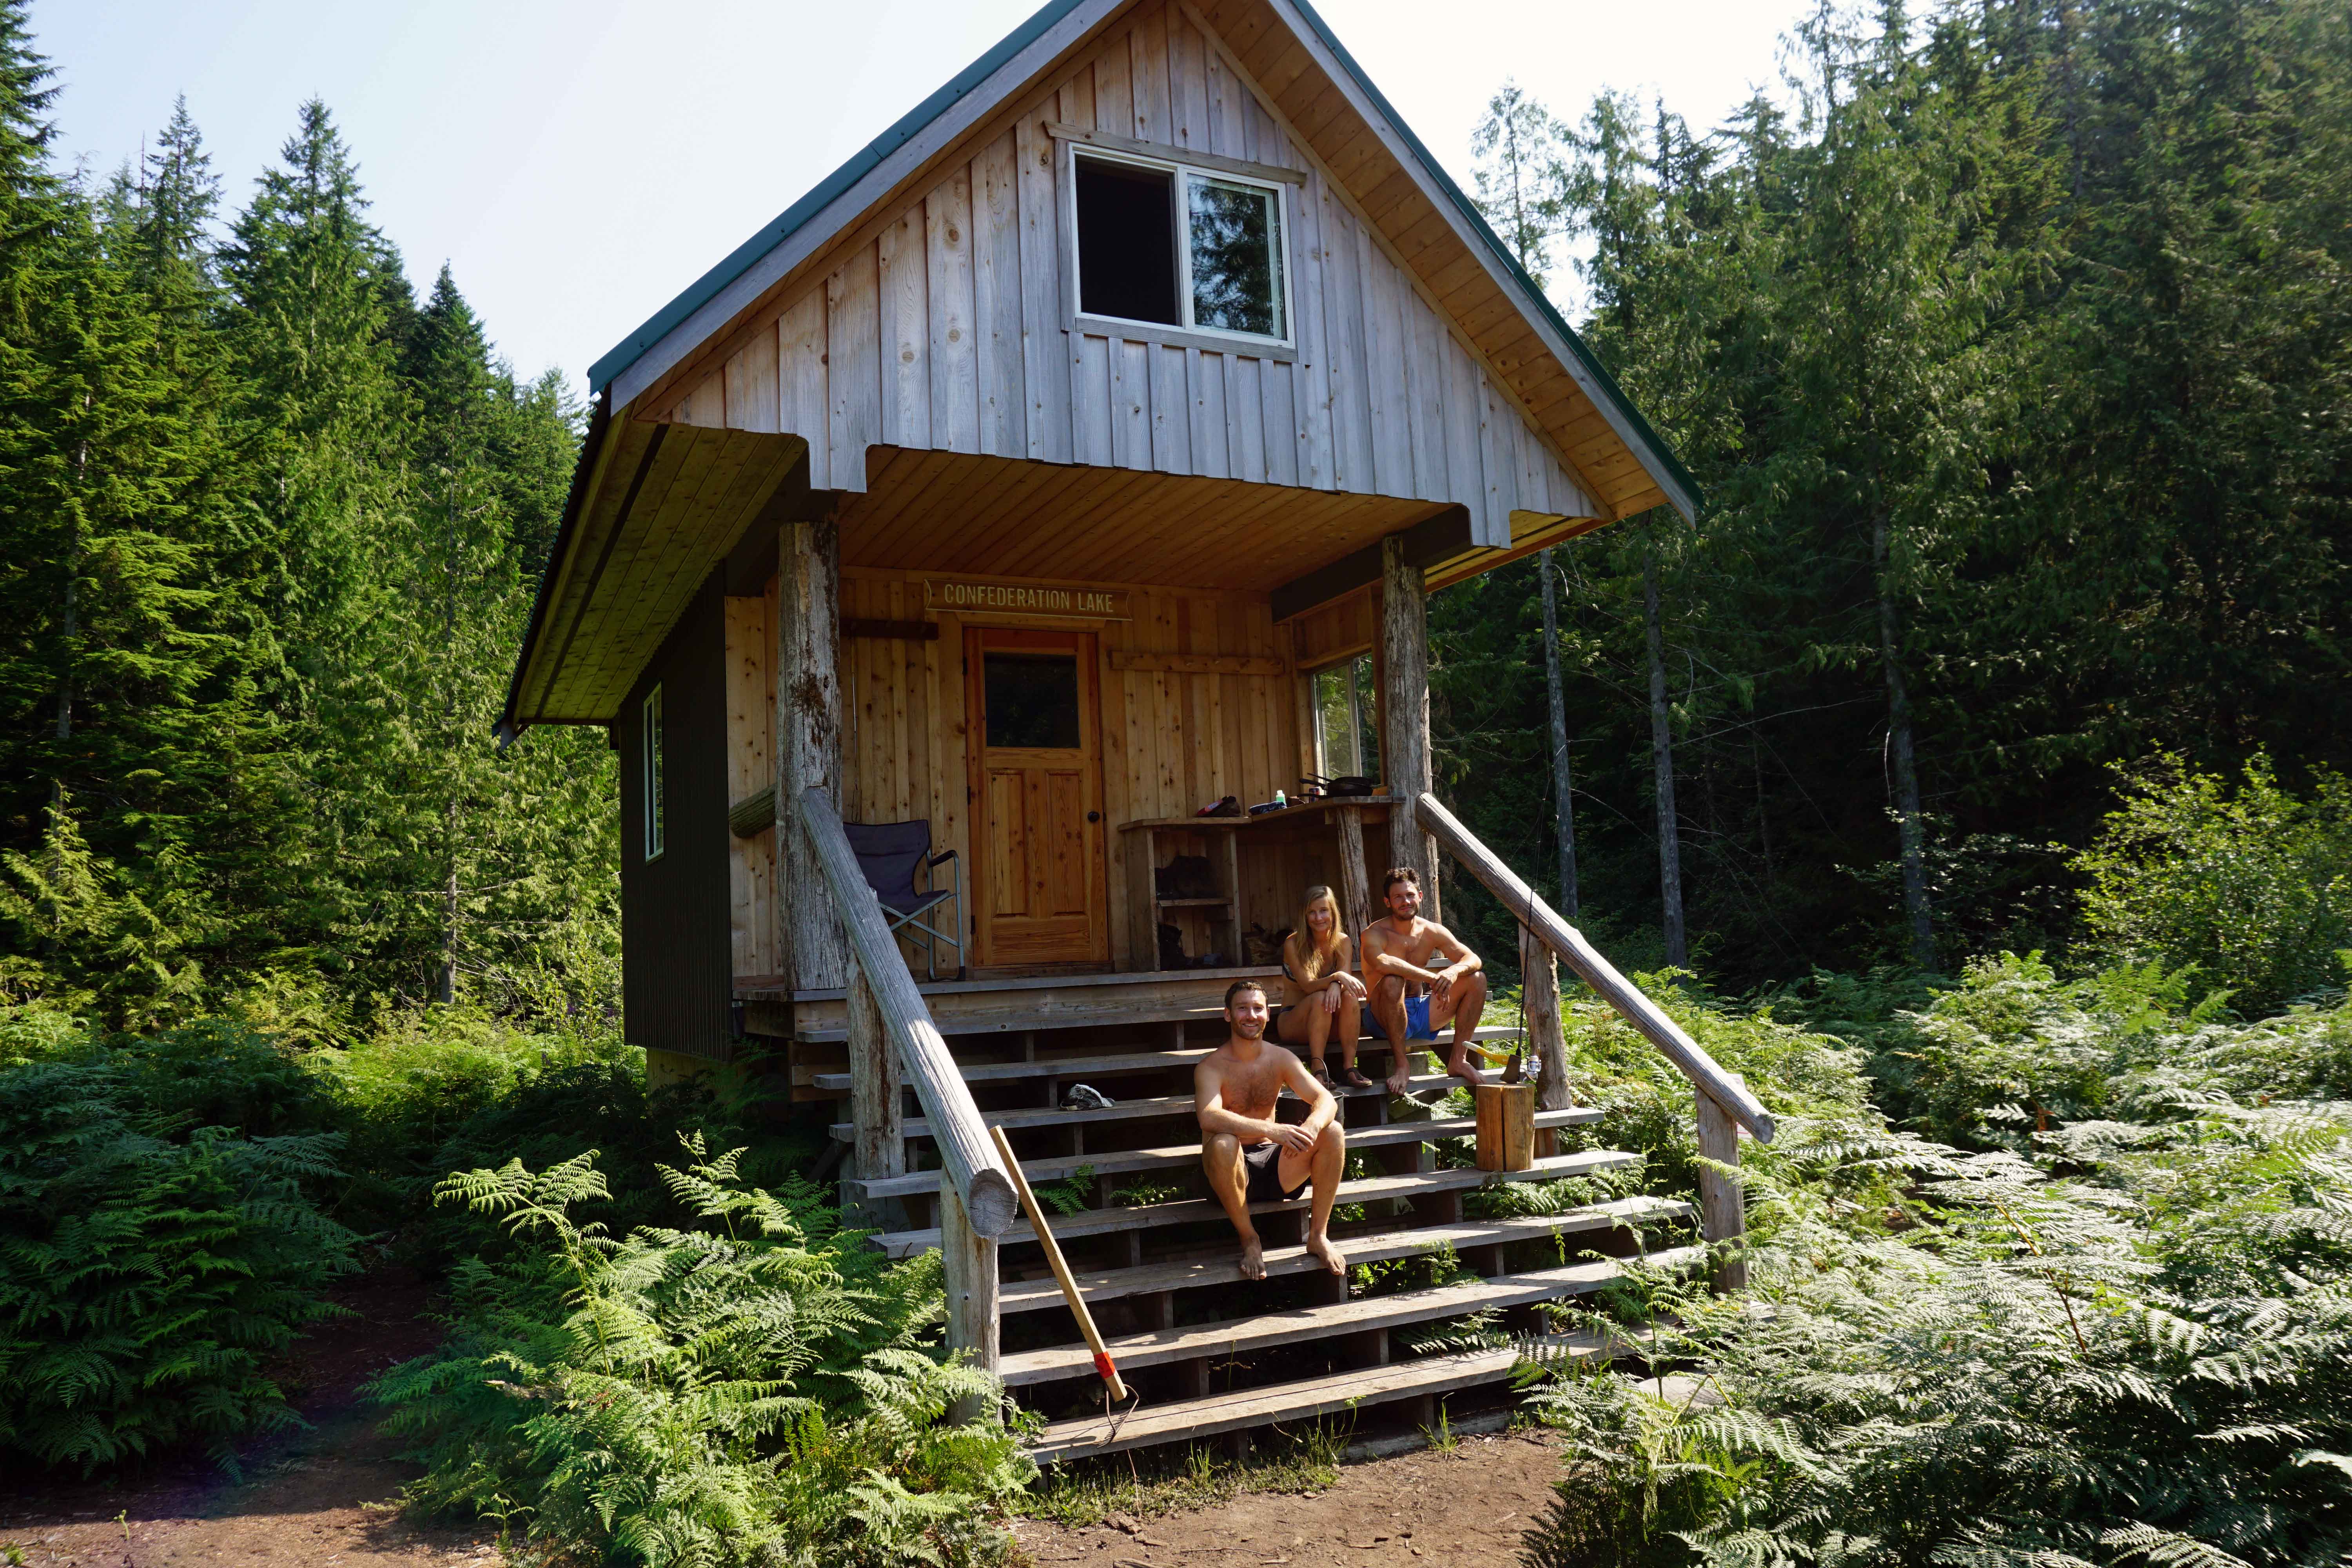
[Note: the hike from Inland Lake to Confederation Lake is another good option for those wanting either a day hike or an overnight hike, especially if you don’t want to tackle any forest service roads].

If you’re thinking about hiking this section of the Sunshine Coast Trail, then here’s what you need to know.

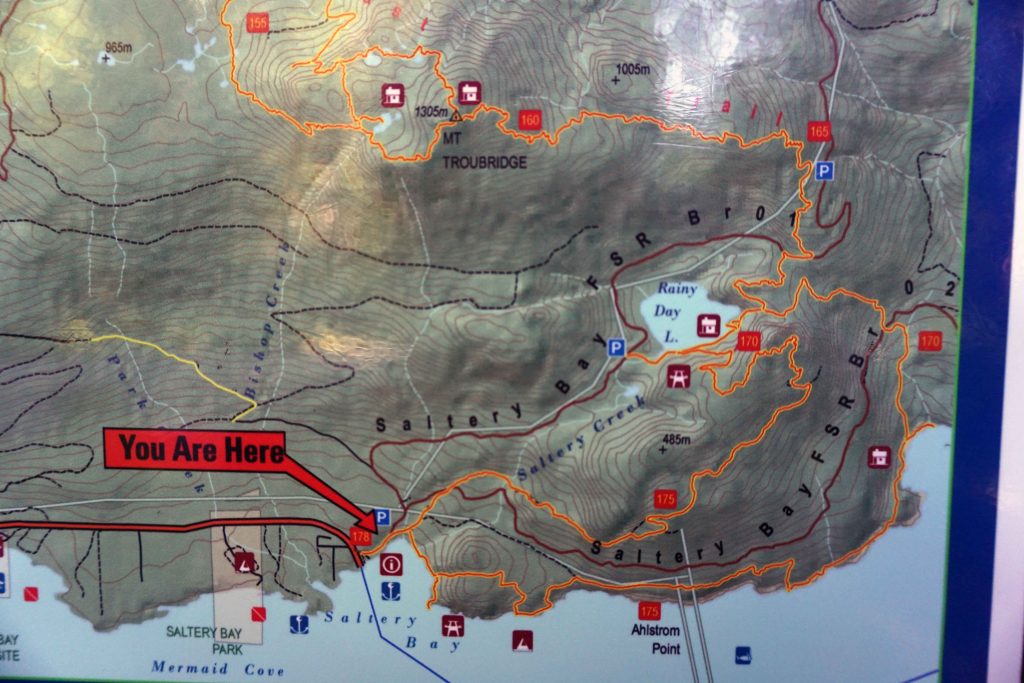
Parking and trailhead

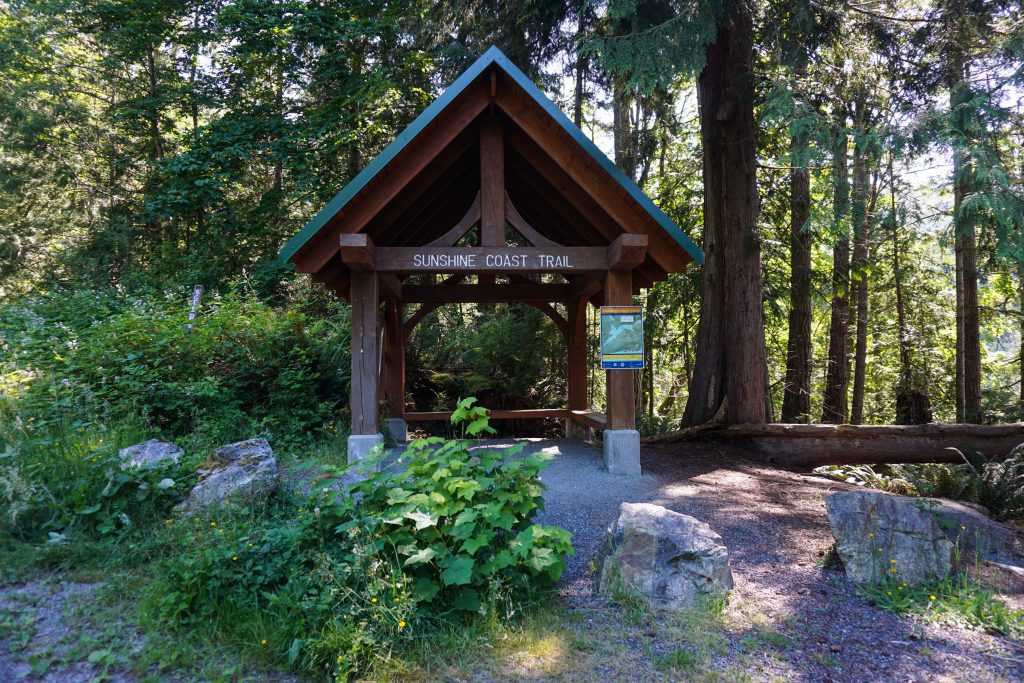
You begin and end the hike at the Saltery Bay trailhead, which is the southern terminus of the Sunshine Coast Trail. Parking is located on Rainy Day Lake Road. There’s both free parking and paid parking. The trailhead is just minutes from the Saltery Bay ferry terminal. There’s a wooden kiosk marking the start of the Sunshine Coast Trail, along with a map and signs pointing to Fairview Bay Hut.

Sunshine Coast Trail
The kiosk marks the southern terminus of the Sunshine Coast Trail
Sunshine Coast Trail
Stay right towards Fairview Bay Hut, or go left to hike straight to Rainy Day Lake

The route

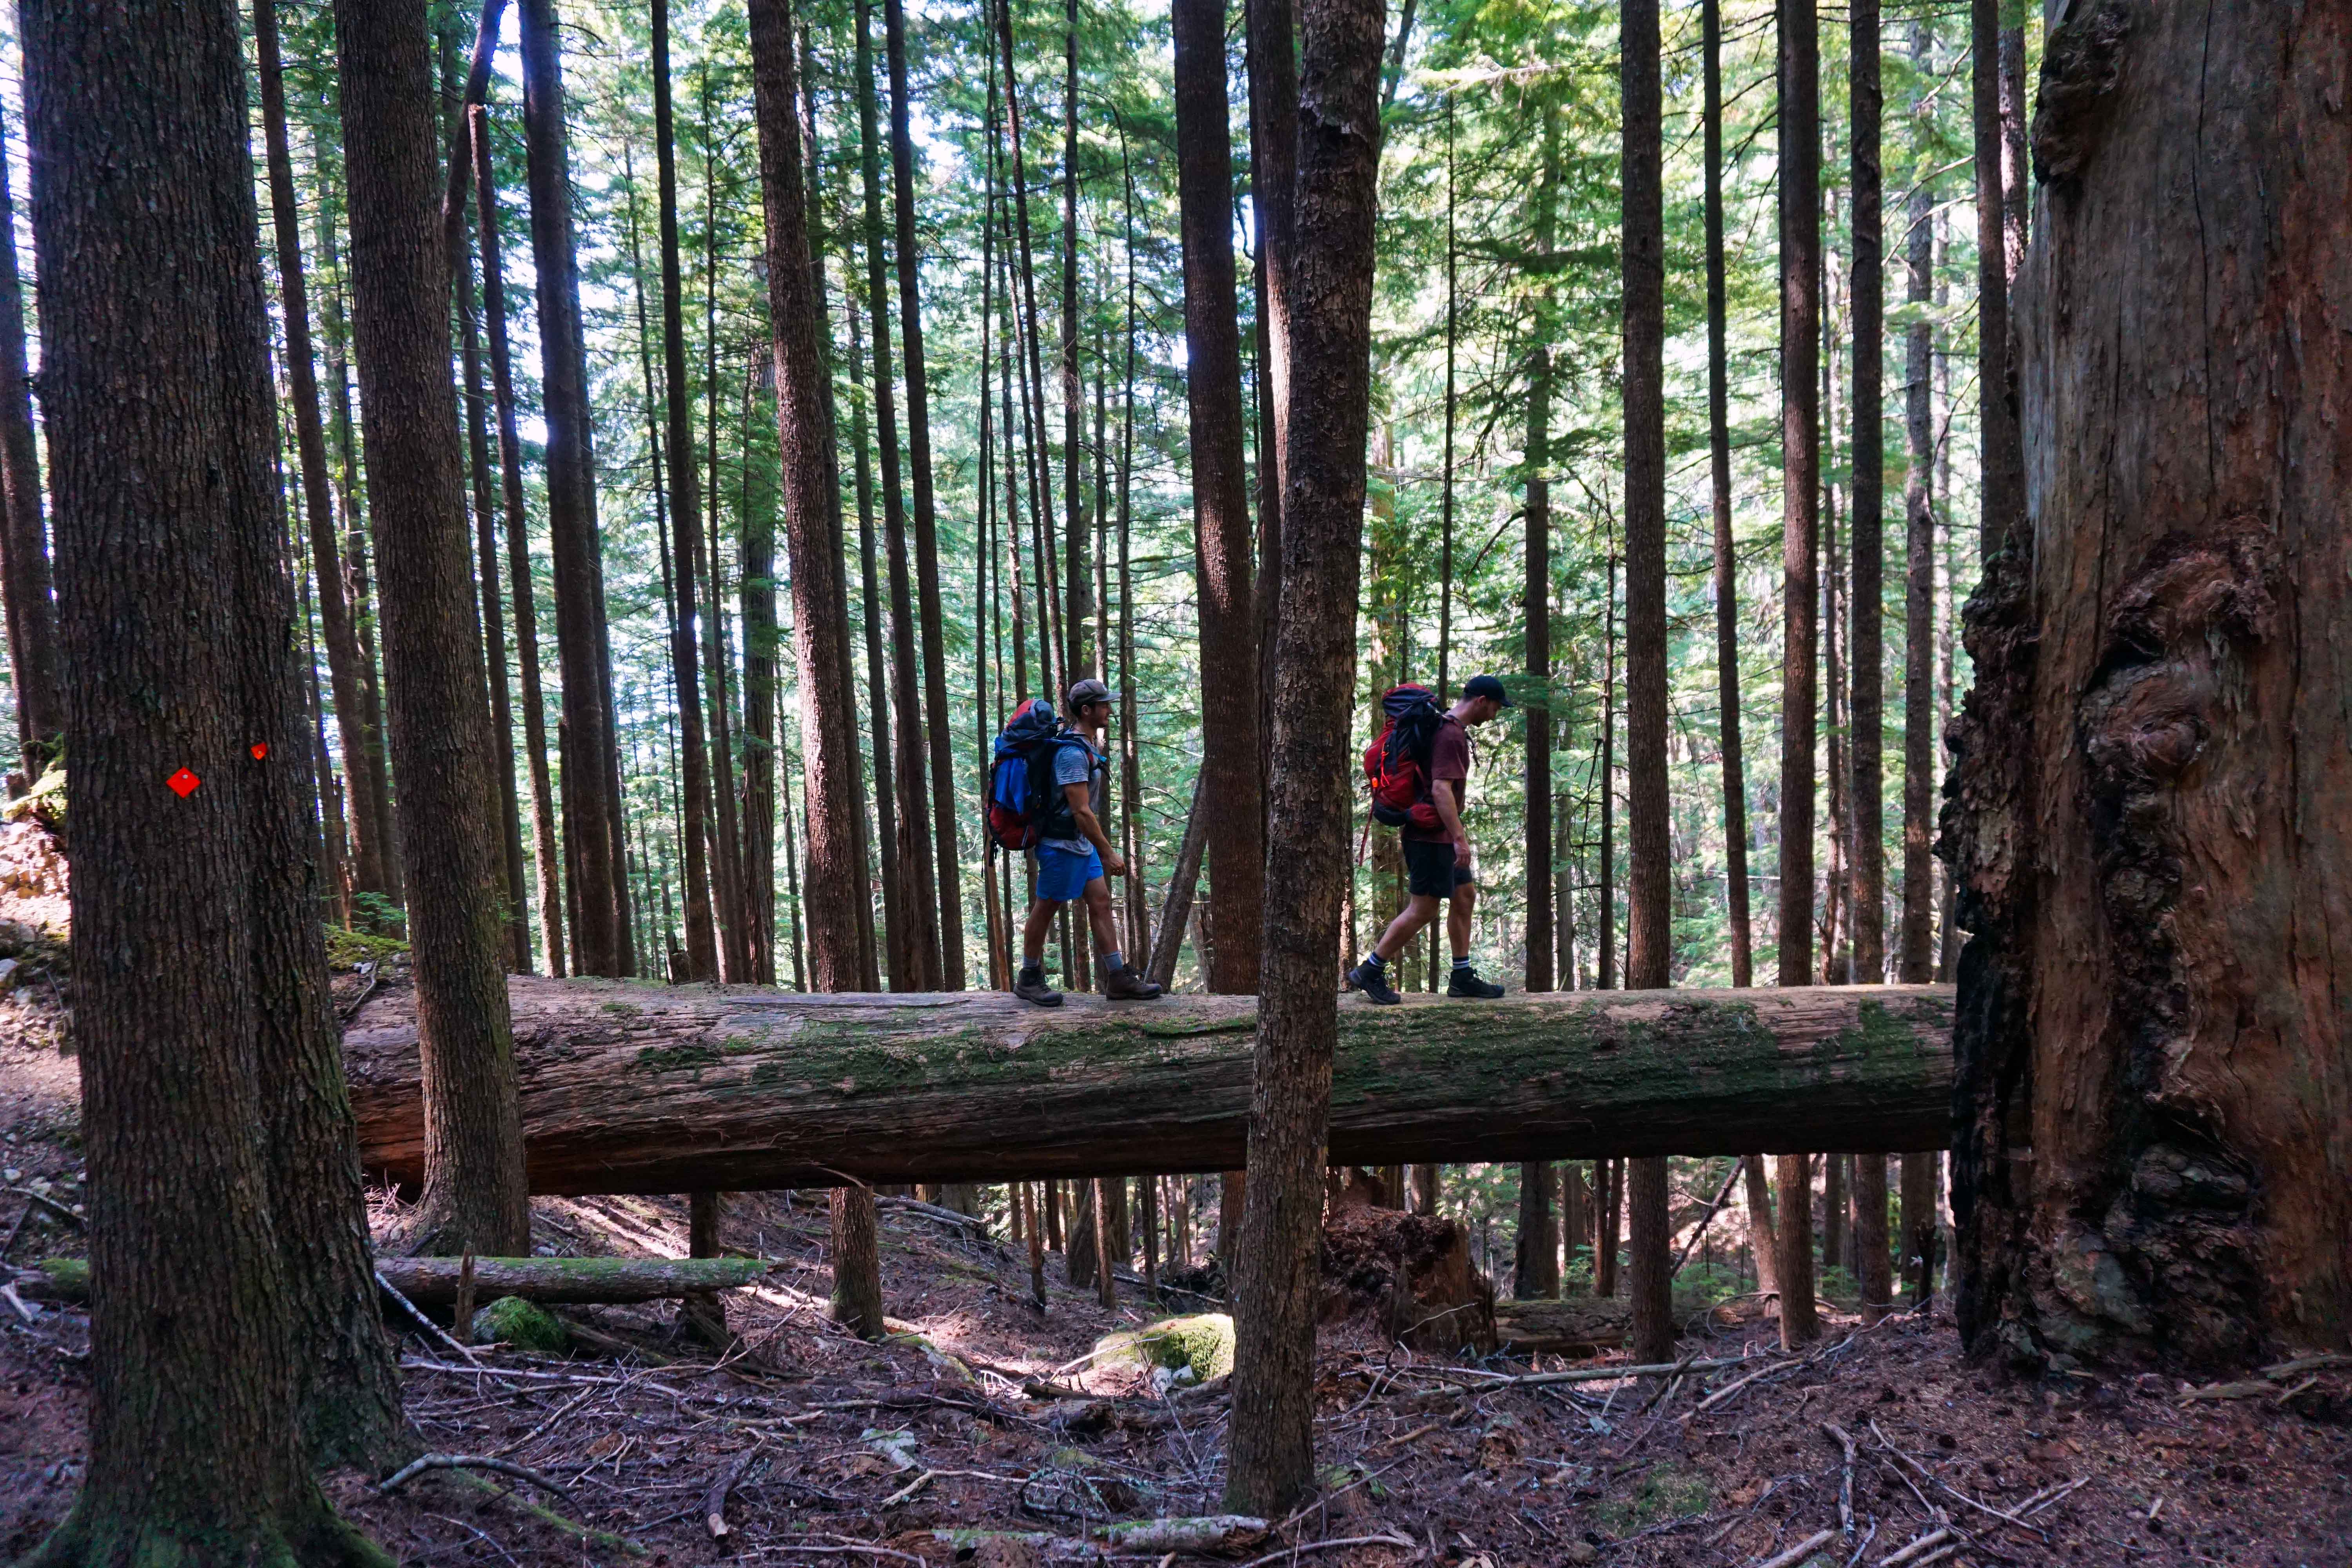
The trail starts on a gravel path that heads towards sea, giving you a good view across the wharf. You then enter the forest and quickly reach a sign that reads ‘escalator’. As you might guess, the trail then heads sharply uphill, ascending through short switchbacks. Don’t be deterred – this is by the far the longest stretch of ascent you’ll have to endure!

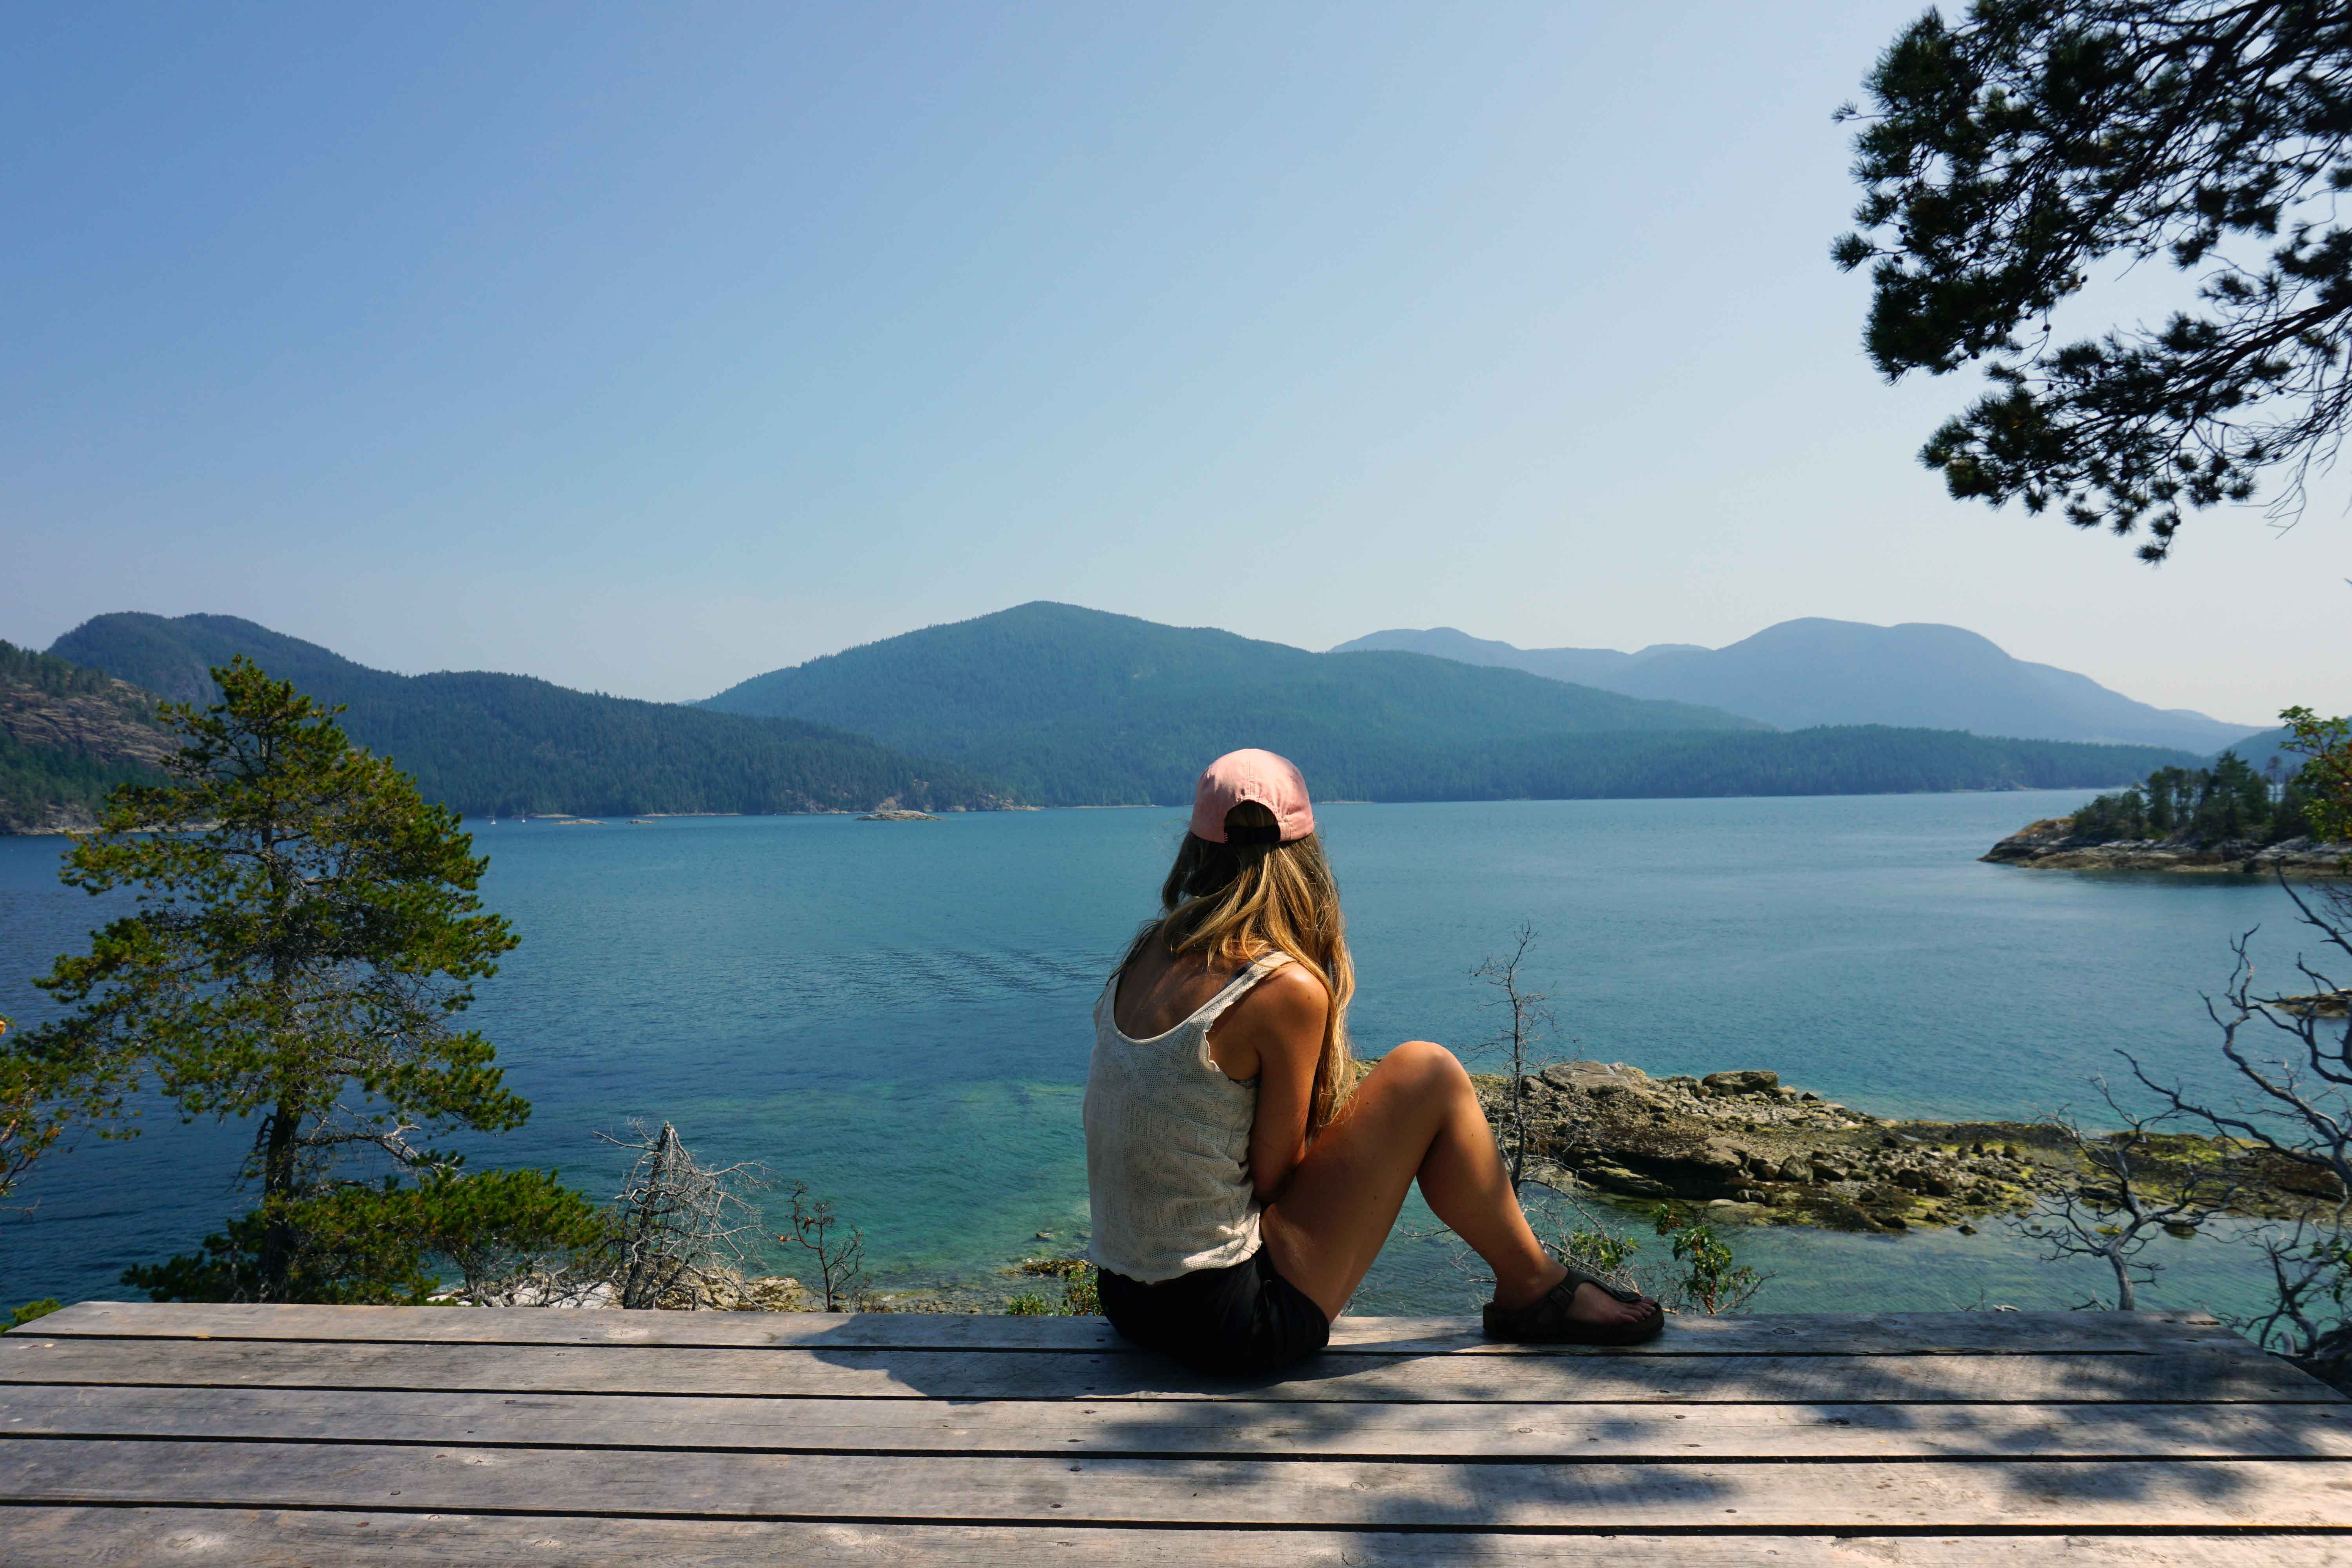
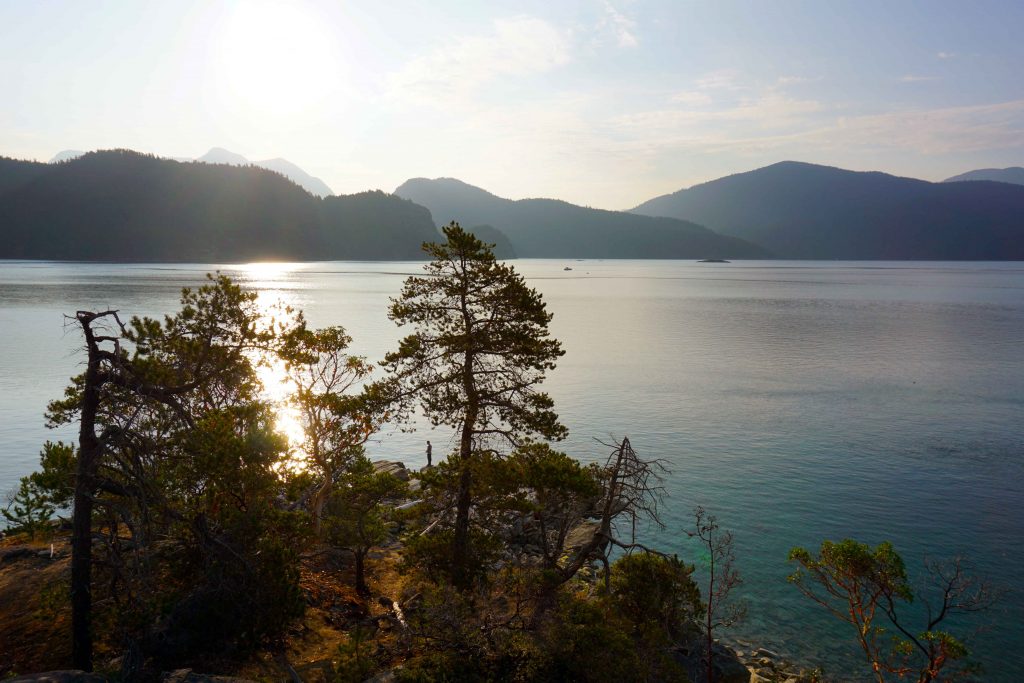
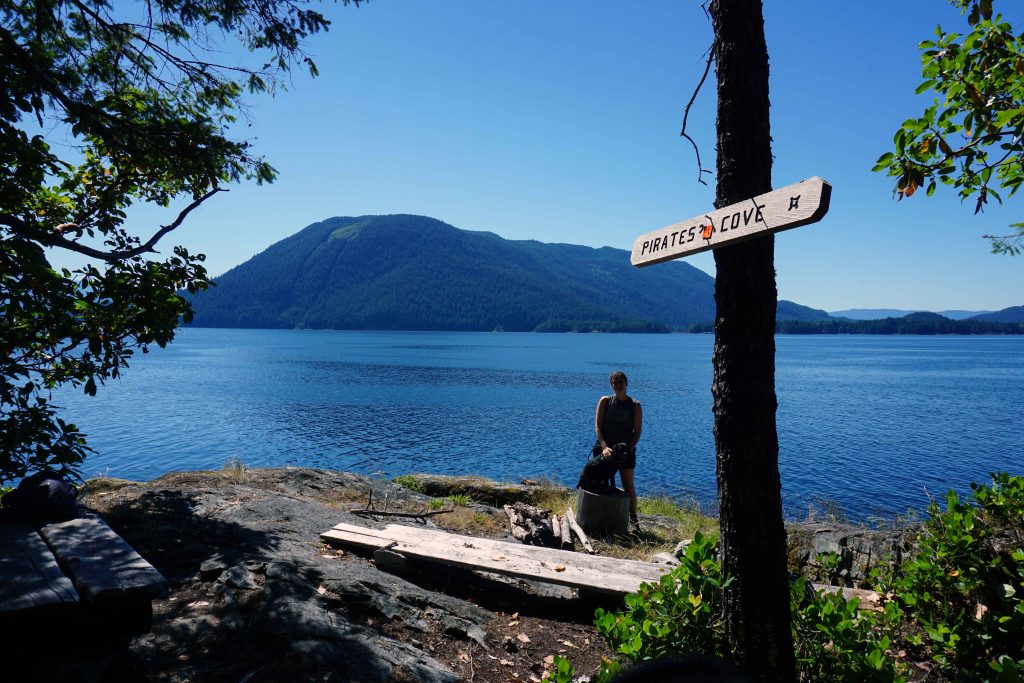
Once you’ve reached the top of the escalator, the trail meanders through the forest and back towards the coast. Before long you’ll reach Pirate’s Cove, a rocky bluff with views across the ocean. From here you follow the coastline for a while, which is strewn with arbutus trees and sun-scorched tufts of grass.

Pirate's Cove on the Sunshine Coast Trail
Pirate’s Cove
Sunshine Coast Trail
Following the coastline to Fairview Bay

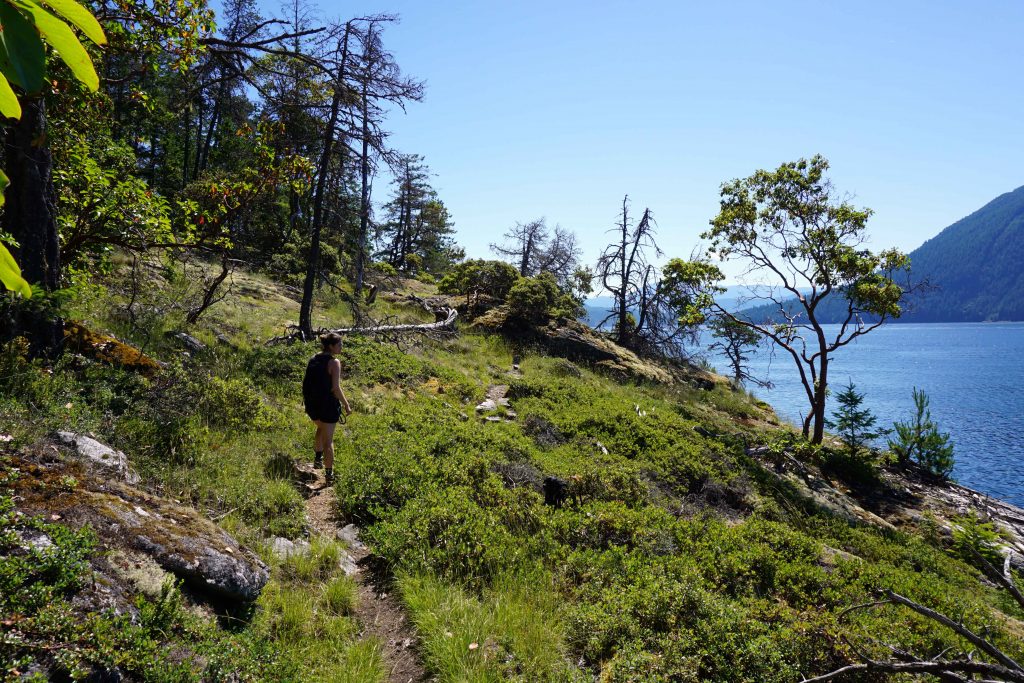
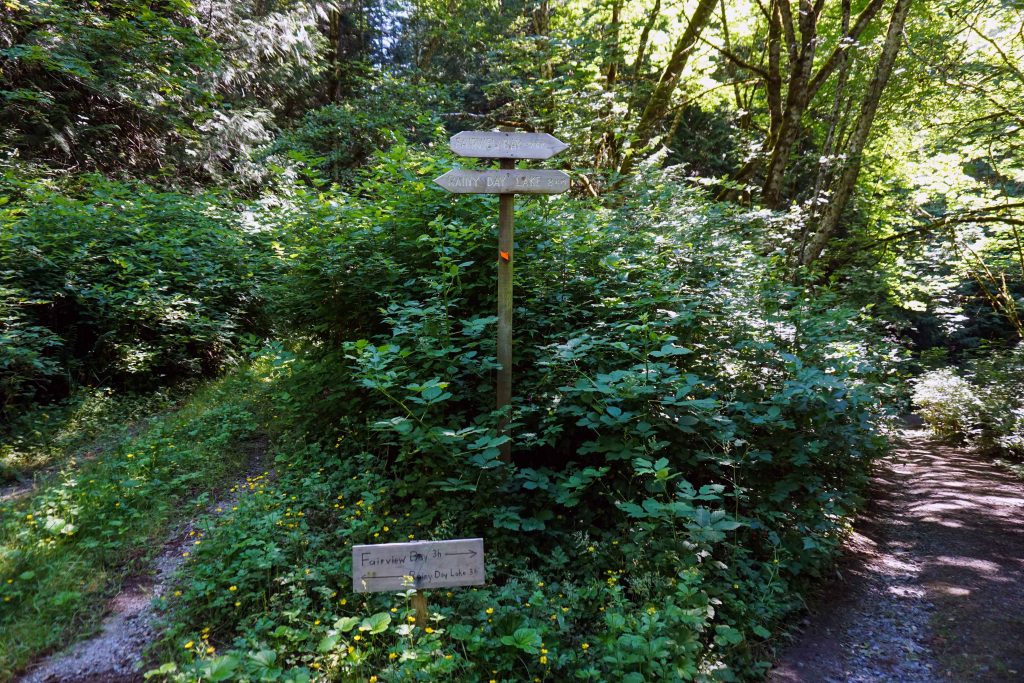
Although you aren’t scaling any mountains, the trail has enough ups and downs to keep the heart rate pumping. You’ll return to the forest, and after a short ascent will come out onto a powerline trail. It’s covered with grass and gradually ascends to a pylon. You re-enter the forest shortly after the pylon, where a sign indicates that you’re one hour from Fairview Bay Hut.

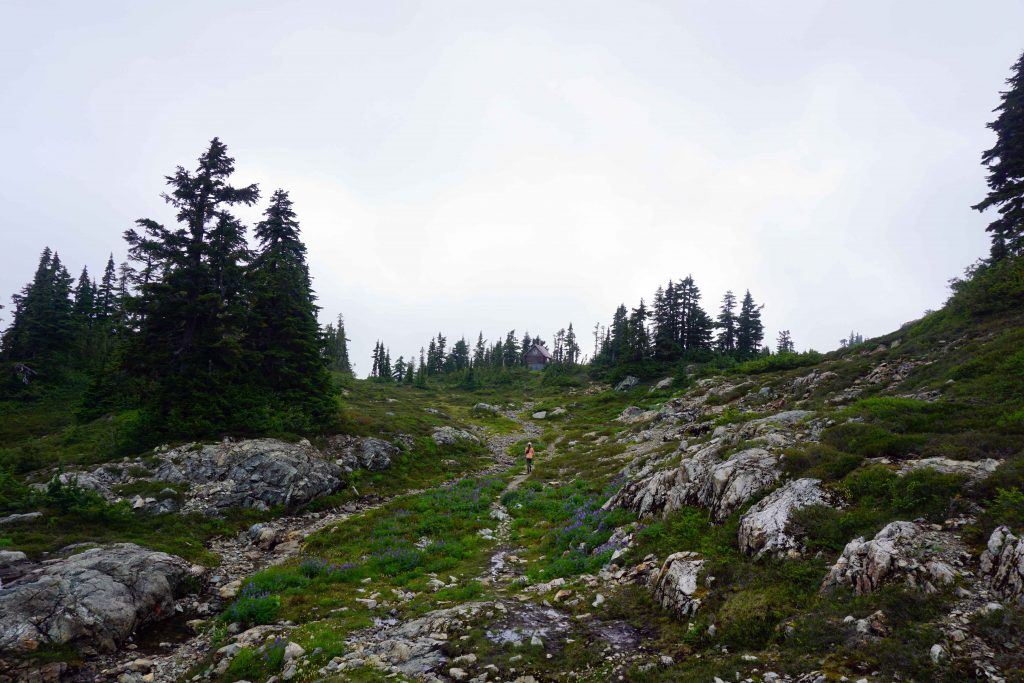
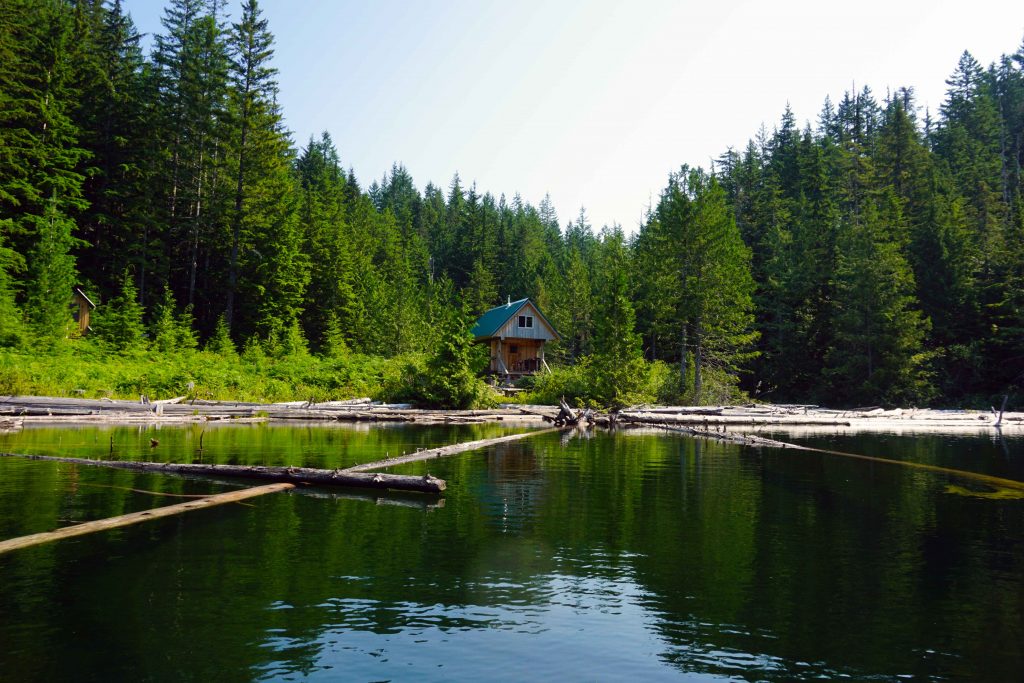
From here the trail is much the same, undulating up and down through the forest, occasionally bringing you out onto the coastline. Half an hour before the hut is another rocky bluff called Ahlstrom Point. Finally, you cross a small wooden bridge across a creek, after which the hut appears in front of you.

There are orange markers for the length of the trail, as well as signs indicating how many kilometers you’ve travelled. Navigation is very easy and it’s unlikely you’ll get lost on this section of the trail.
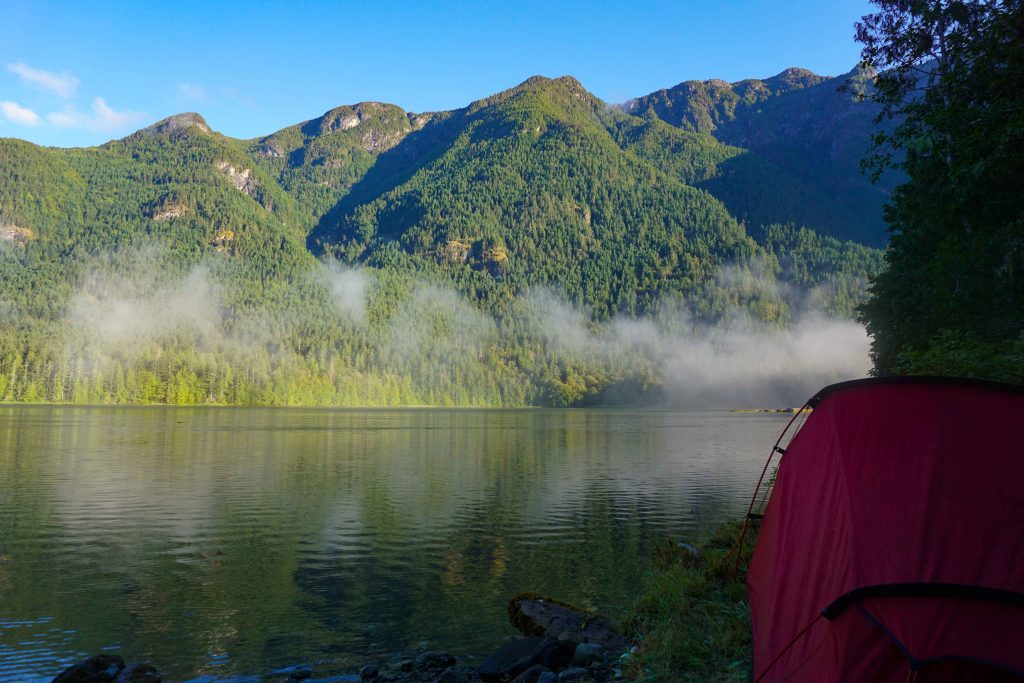
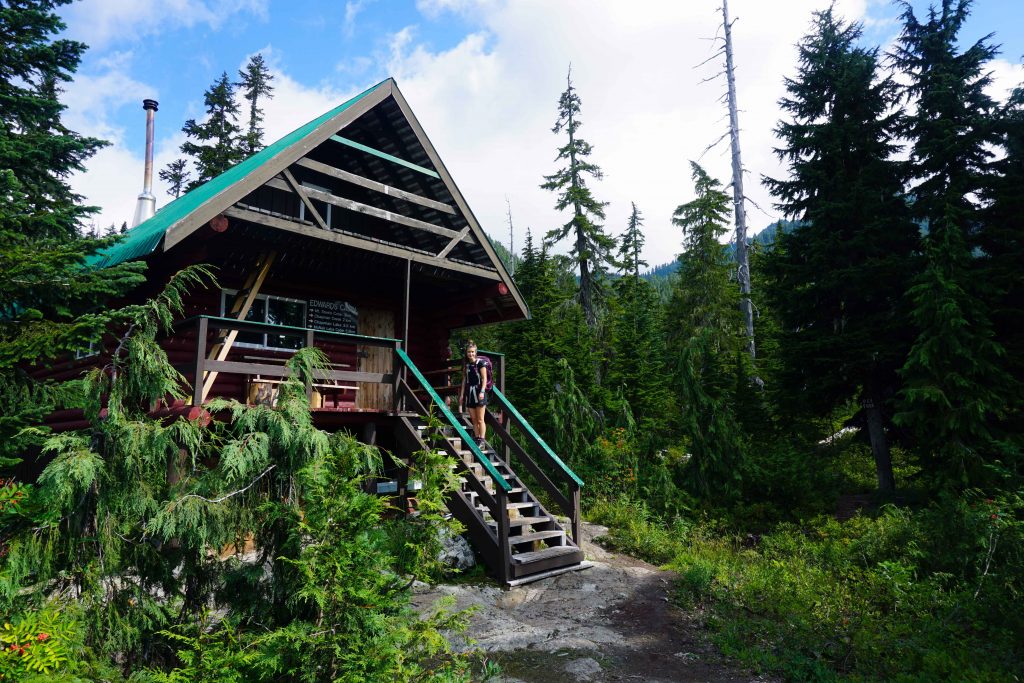
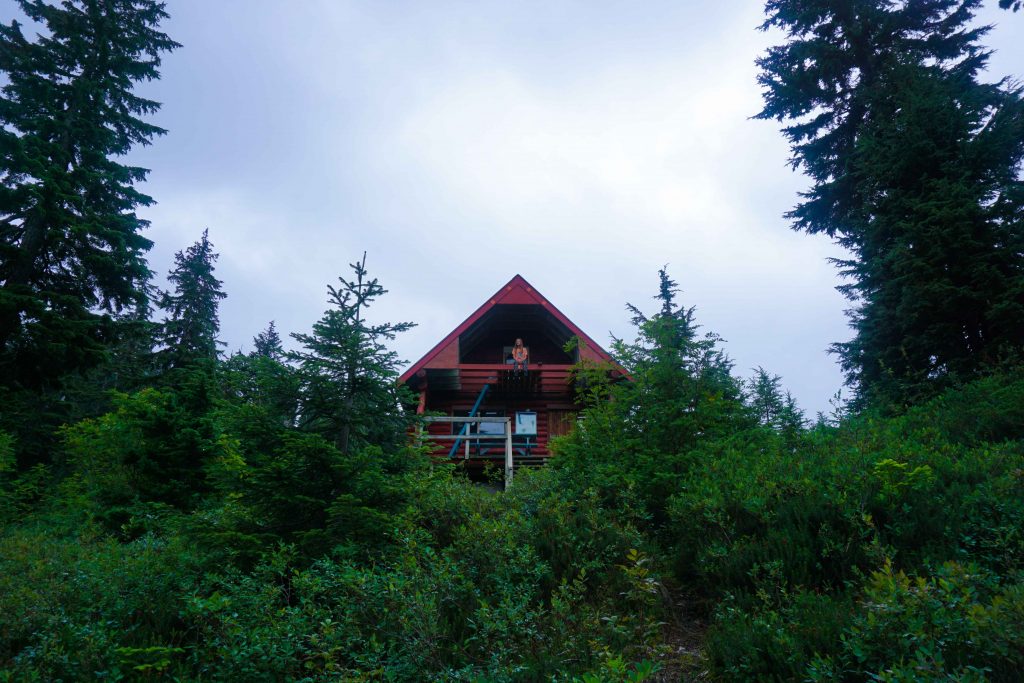
Fairview Bay Hut

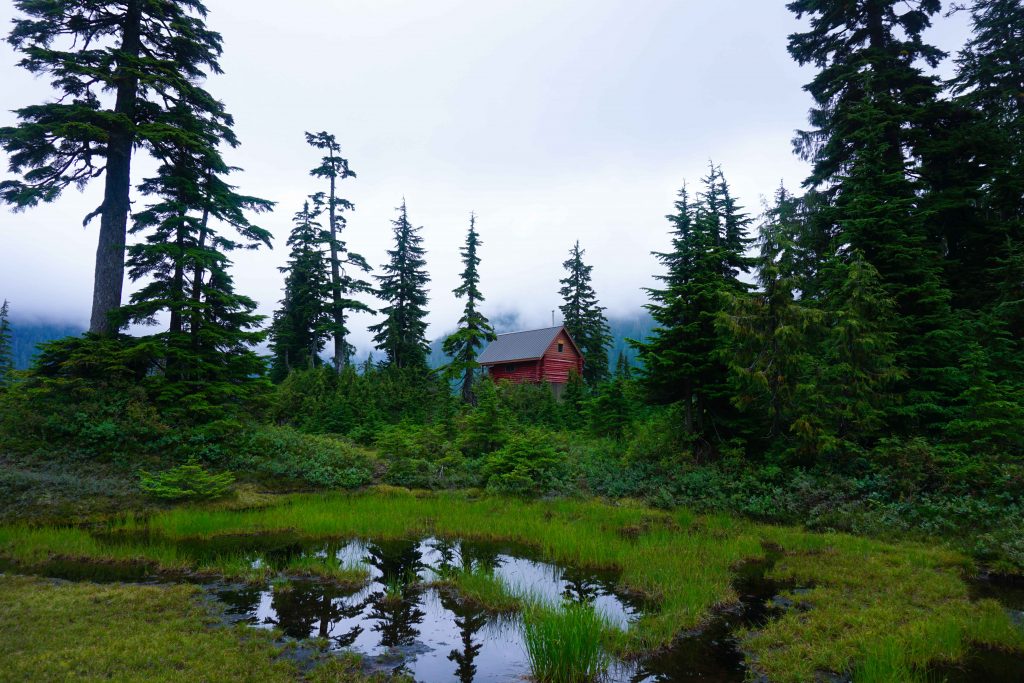
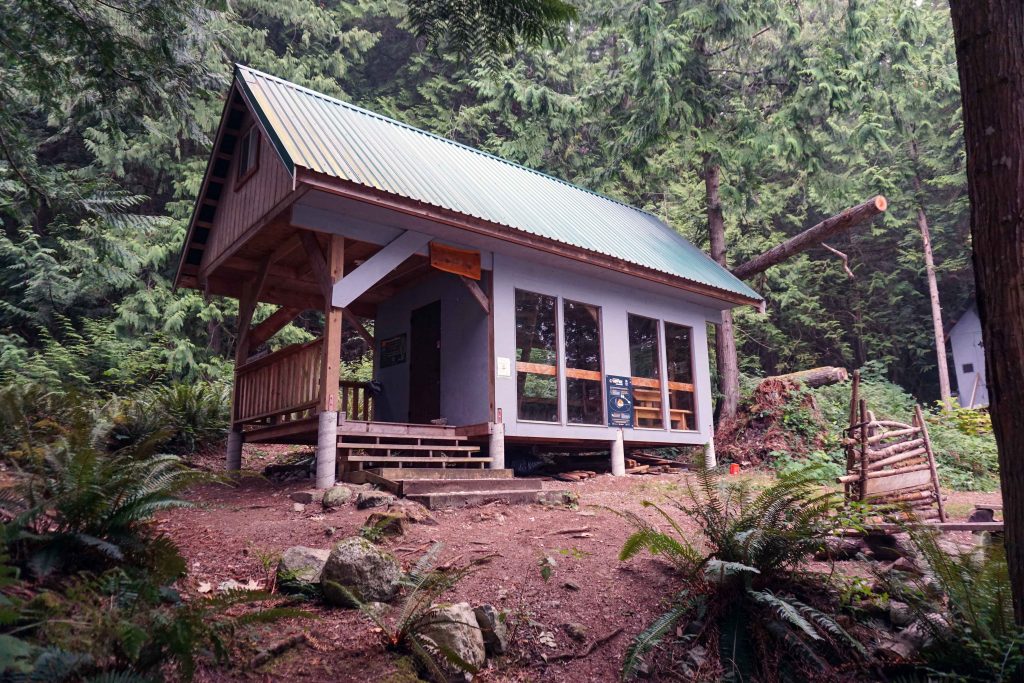
The huts on the Sunshine Coast Trail are free to use and are maintained by a team of volunteers called the Powell River Parks and Wilderness Society (PAWS). These are rustic backcountry huts and have few facilities.

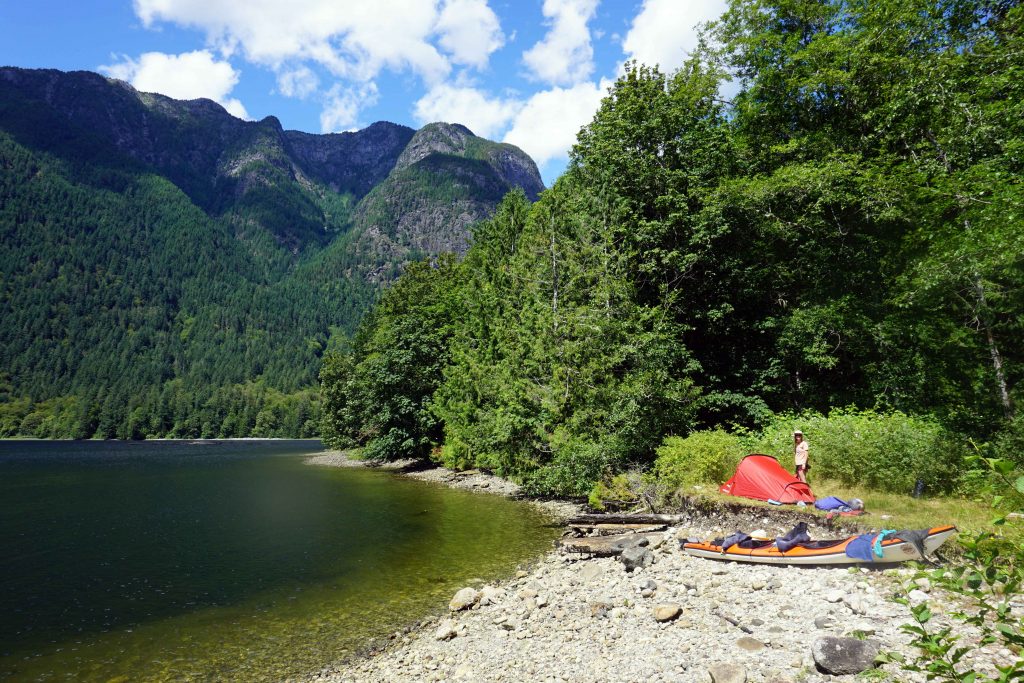
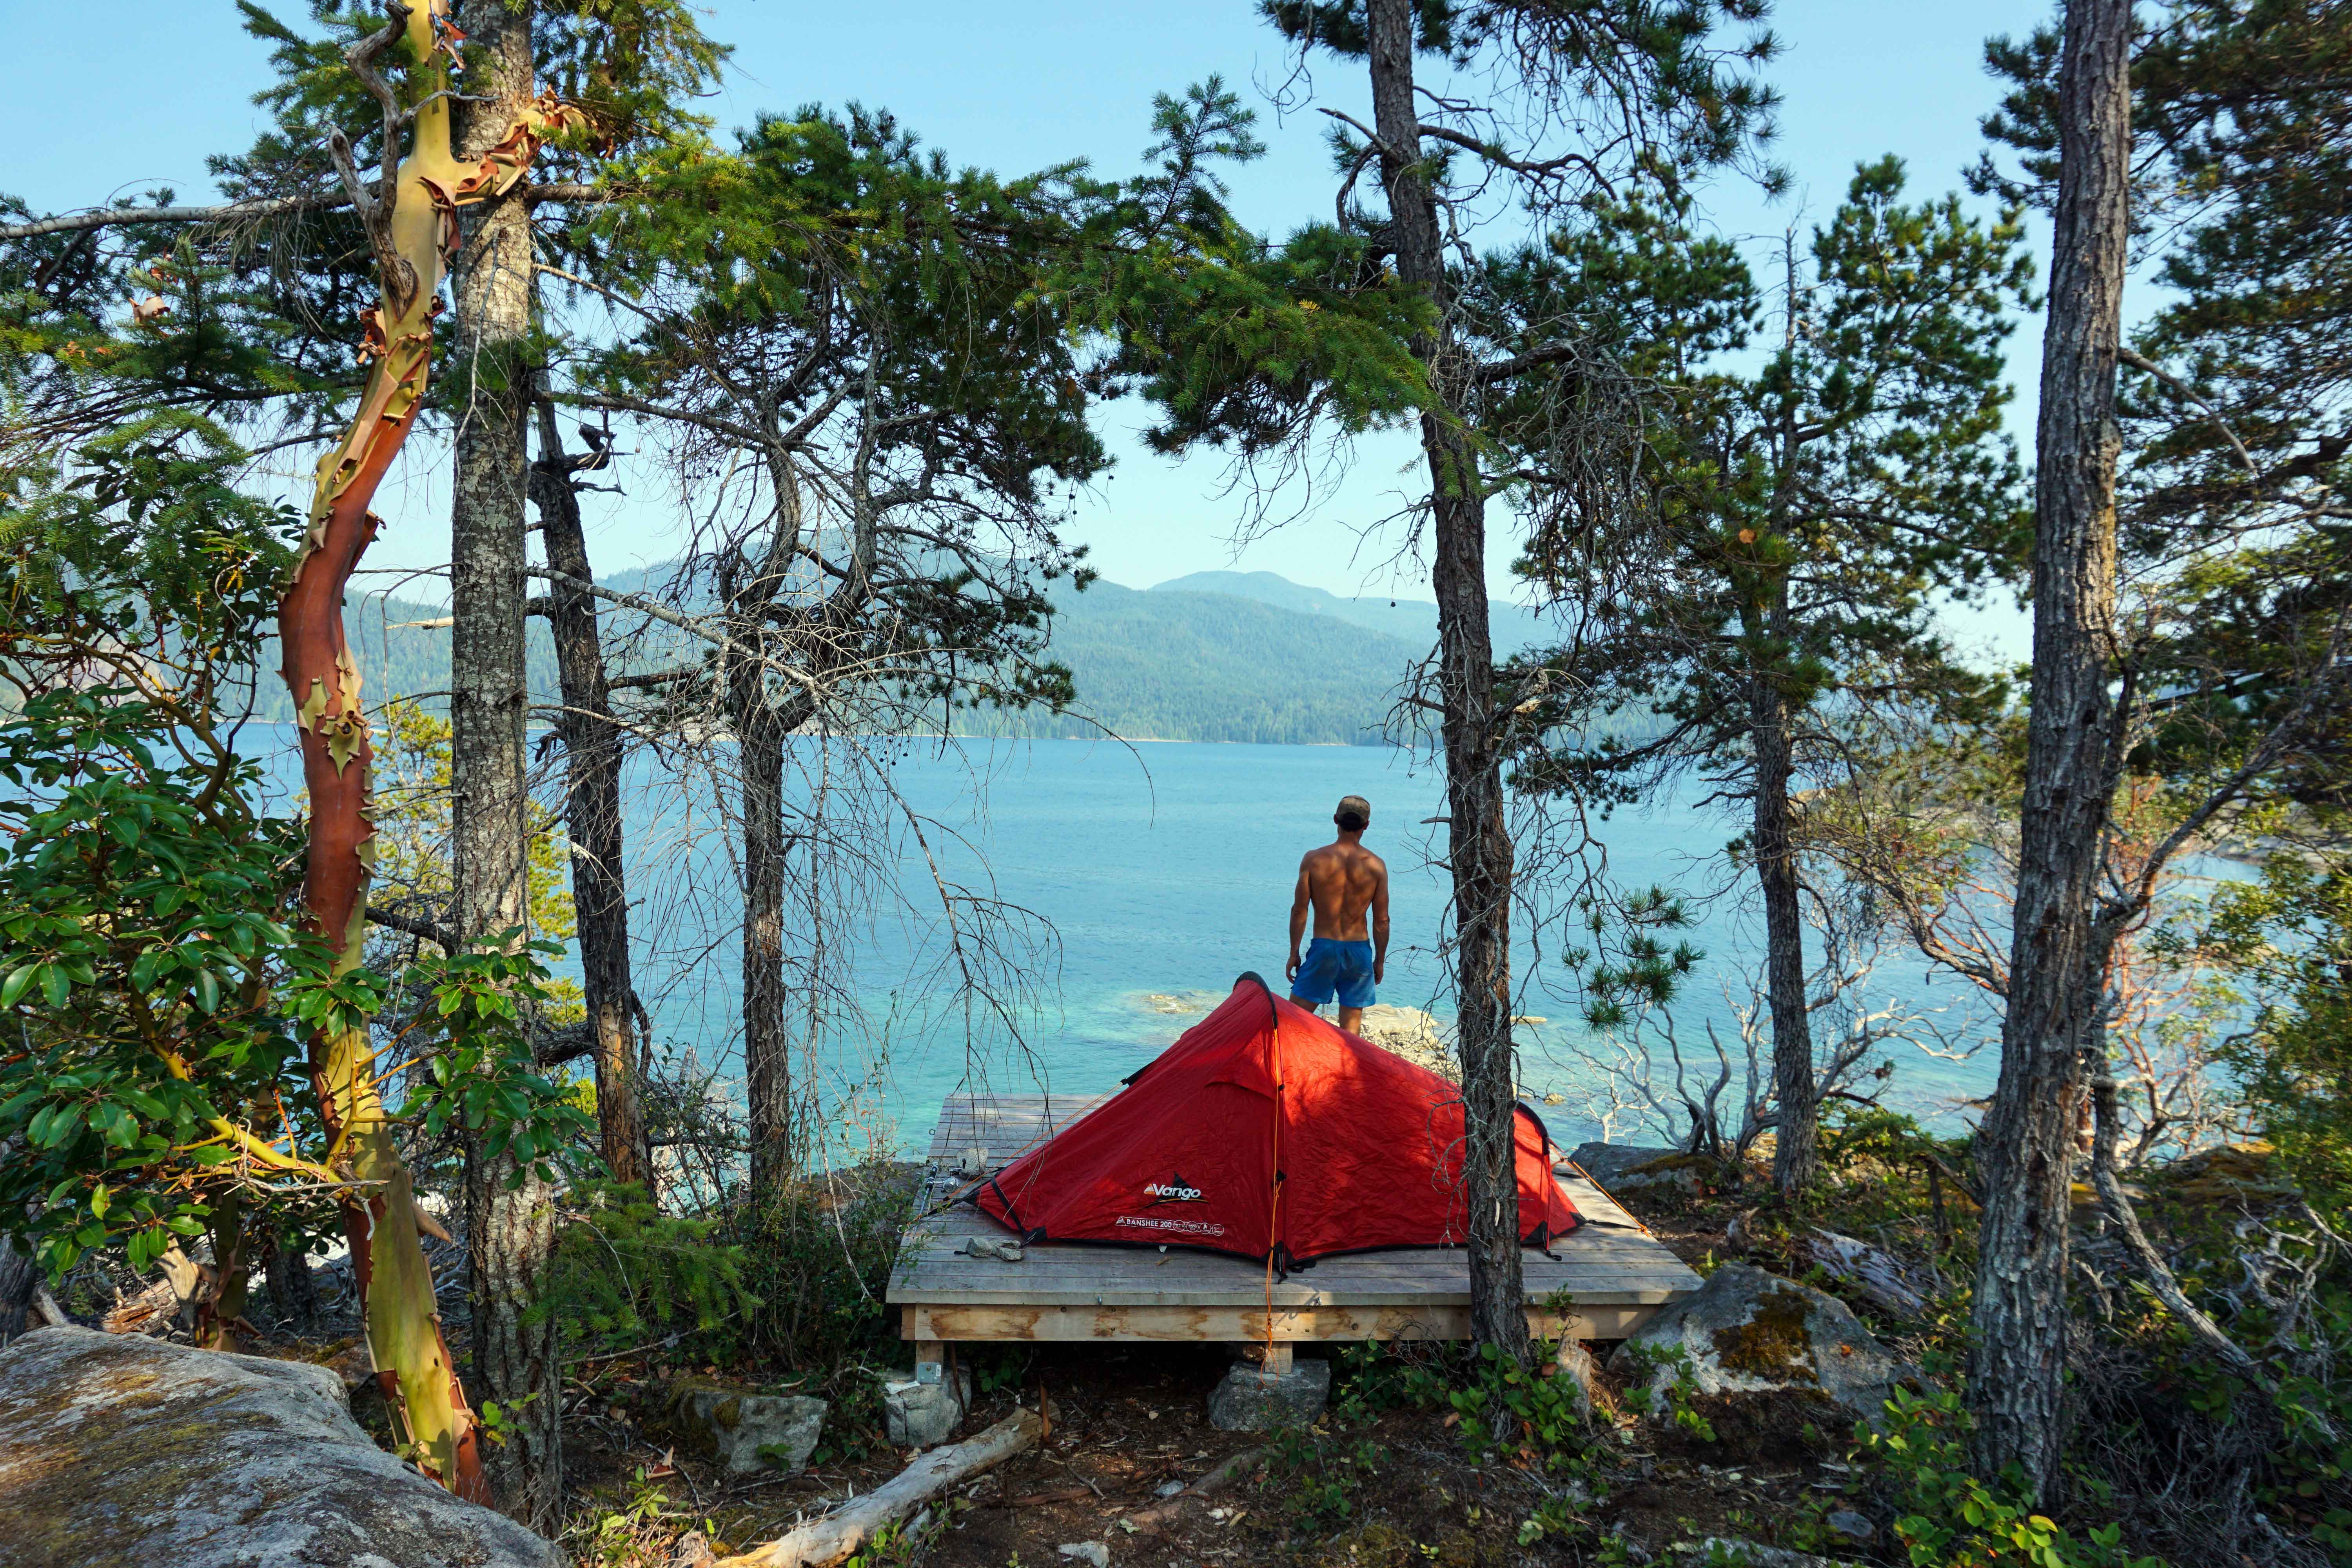
The Fairview Bay Hut is particularly pleasant, as it has windows across one side, allowing you to enjoy the view no matter what the weather. There are a couple of benches and tables downstairs. The sleeping quarters are upstairs. If you want to stay the night, you’ll need to bring your own sleeping mat and sleeping bag. The huts can get full, so it’s always wise to bring a tent along, just in case.

Fairview Bay Hut on the Sunshine Coast Trail

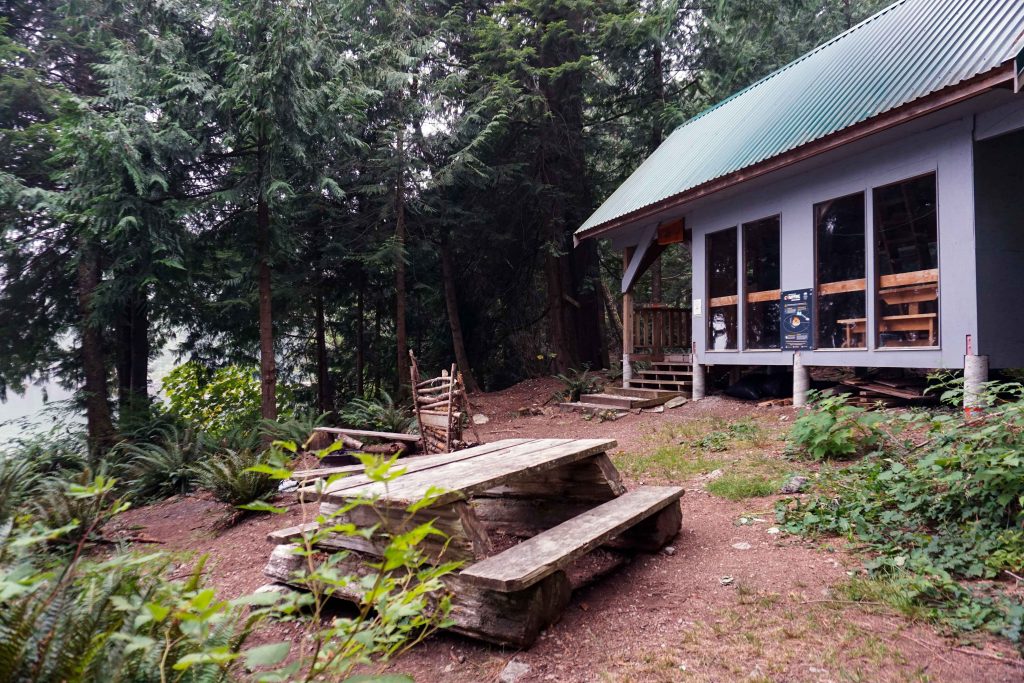
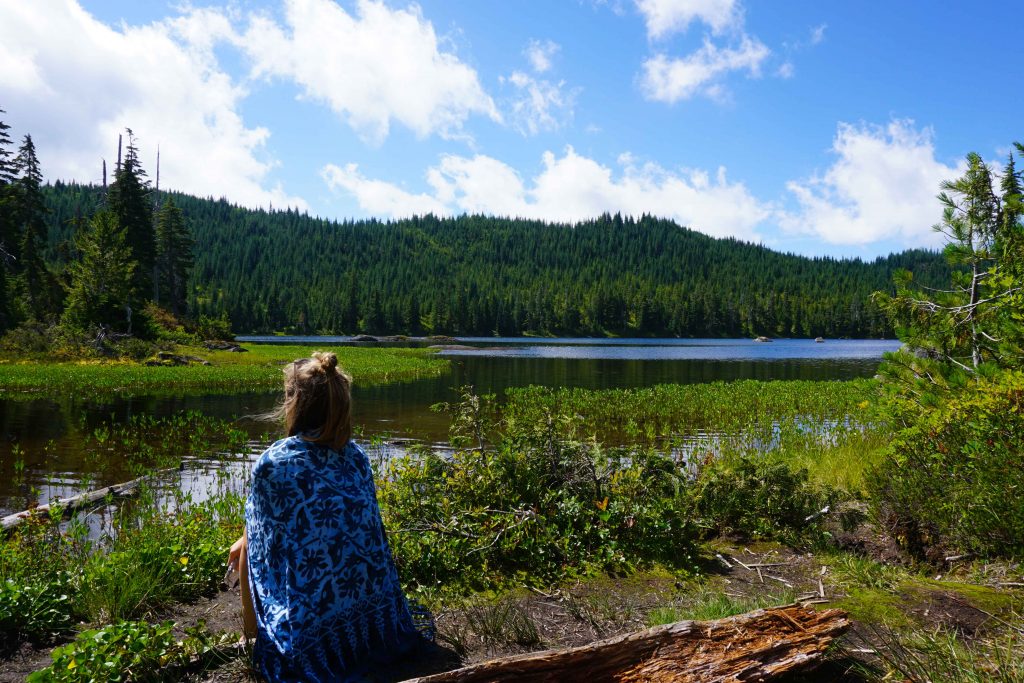
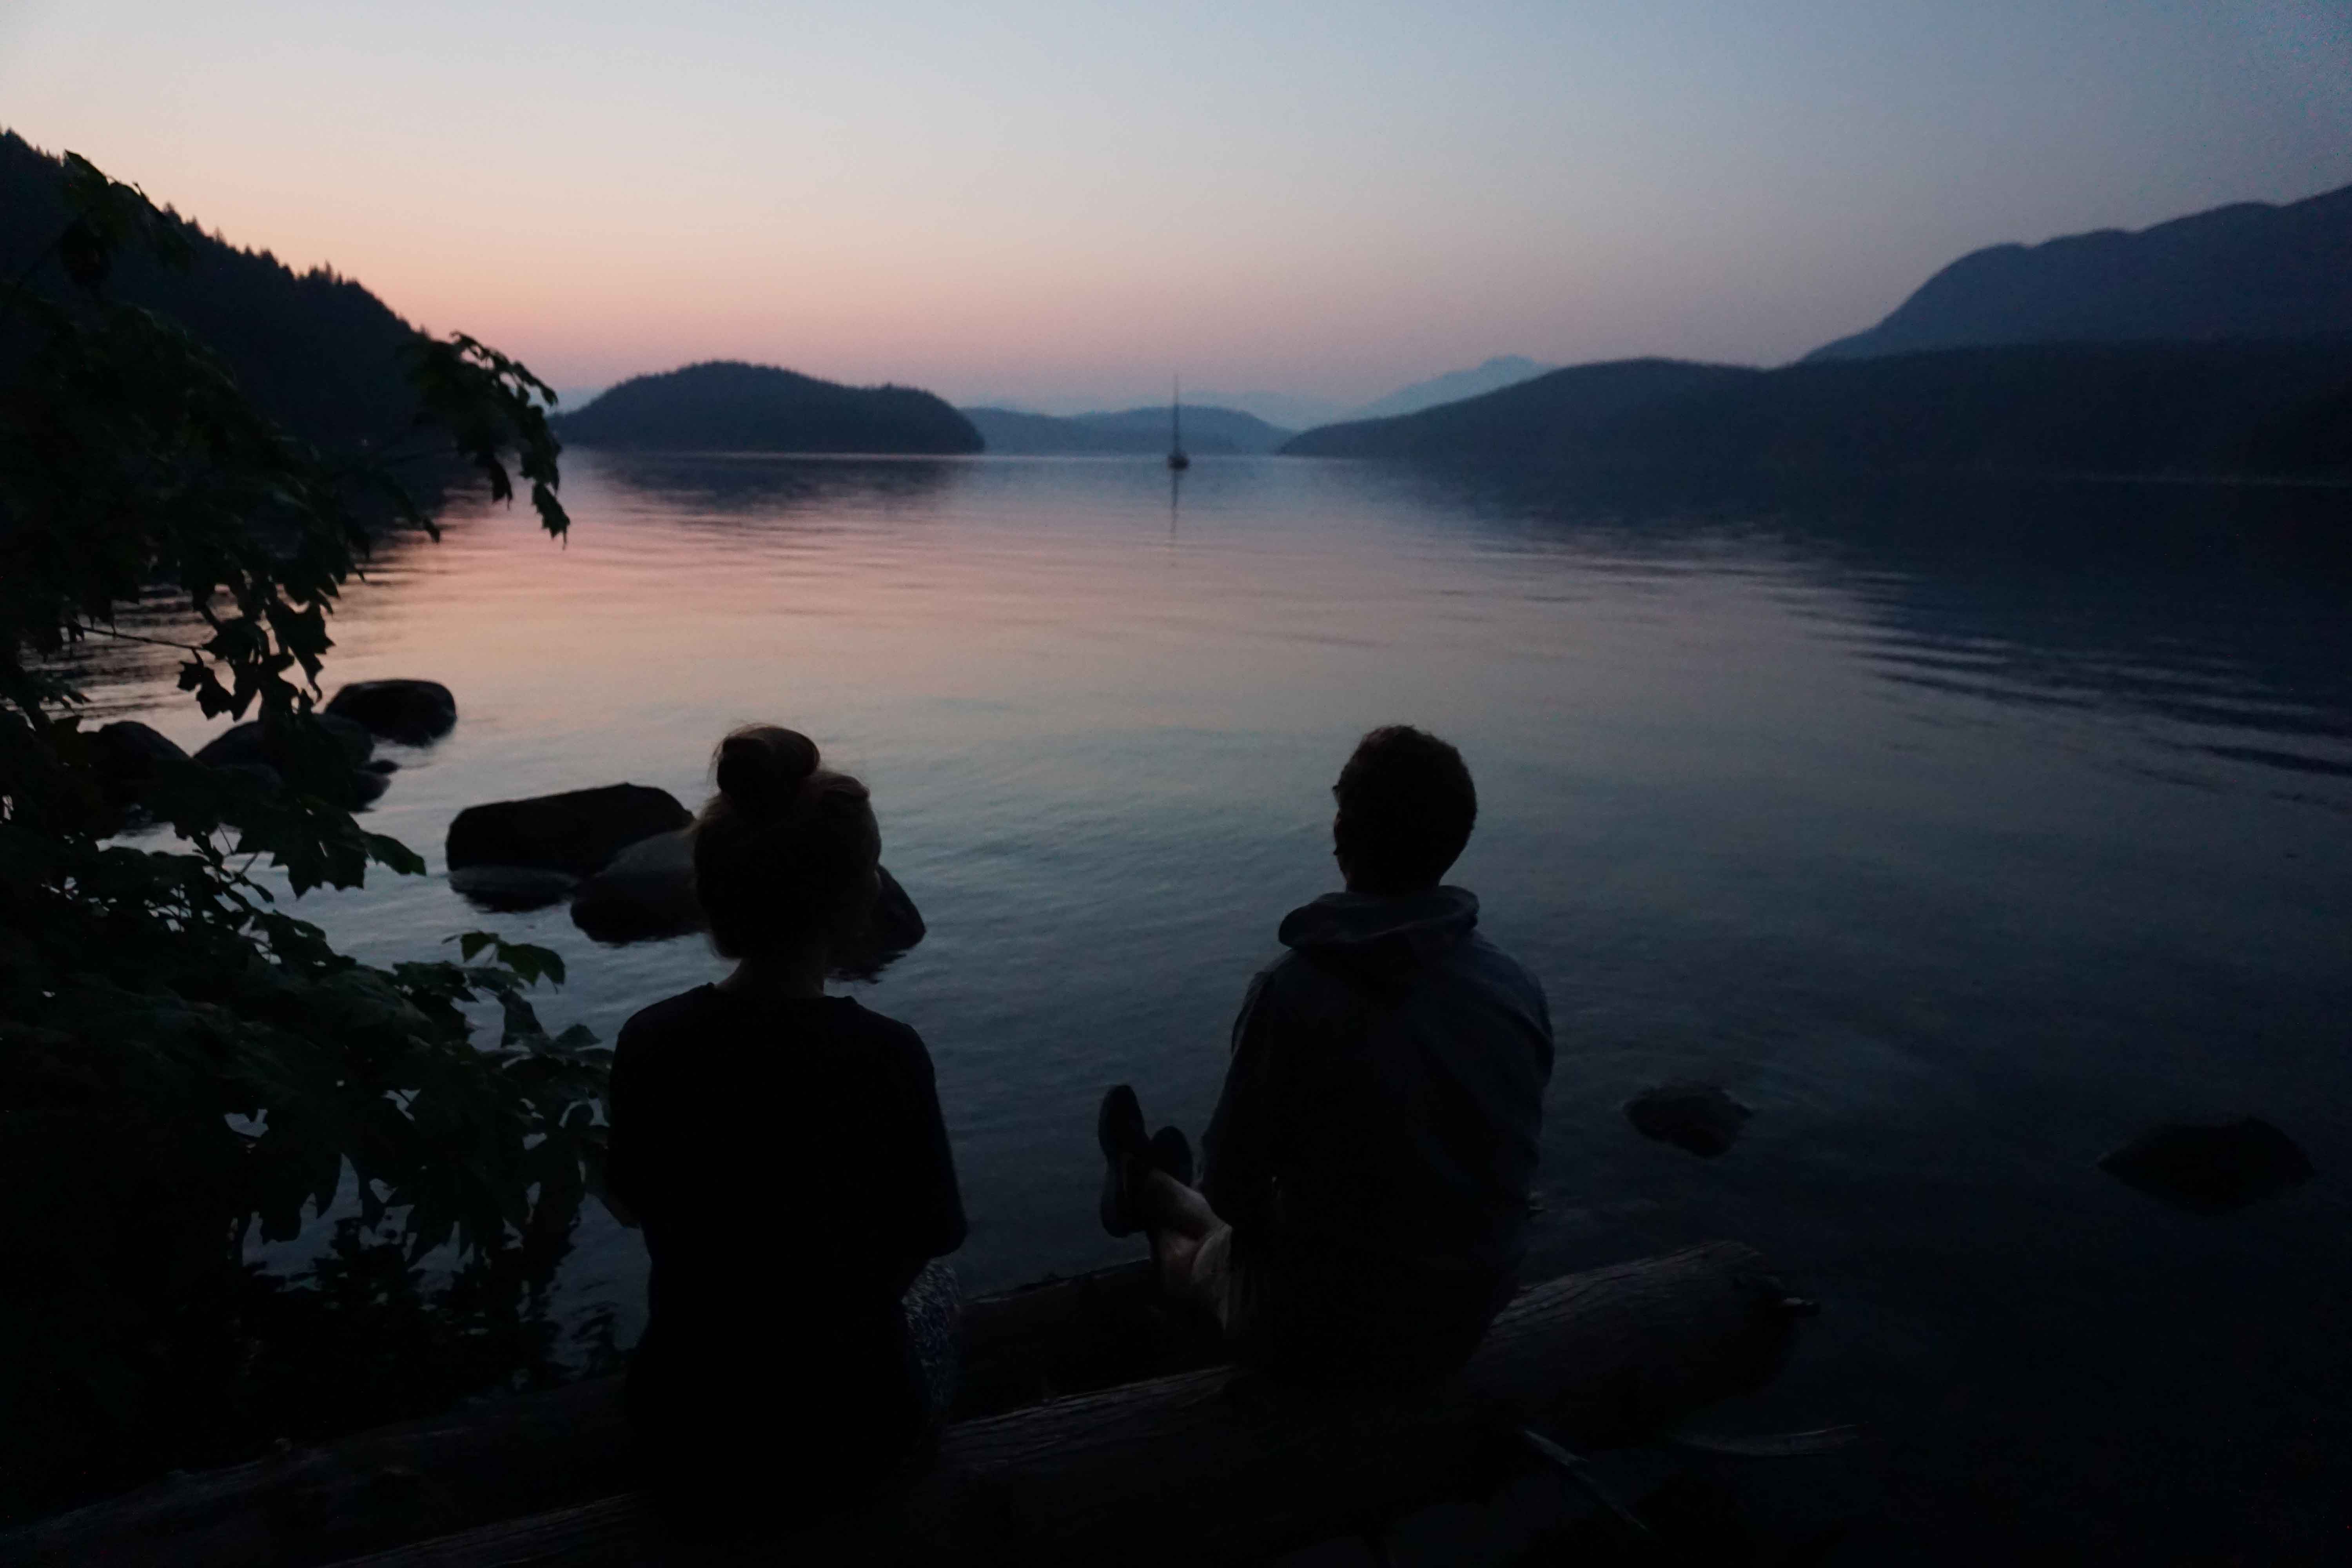
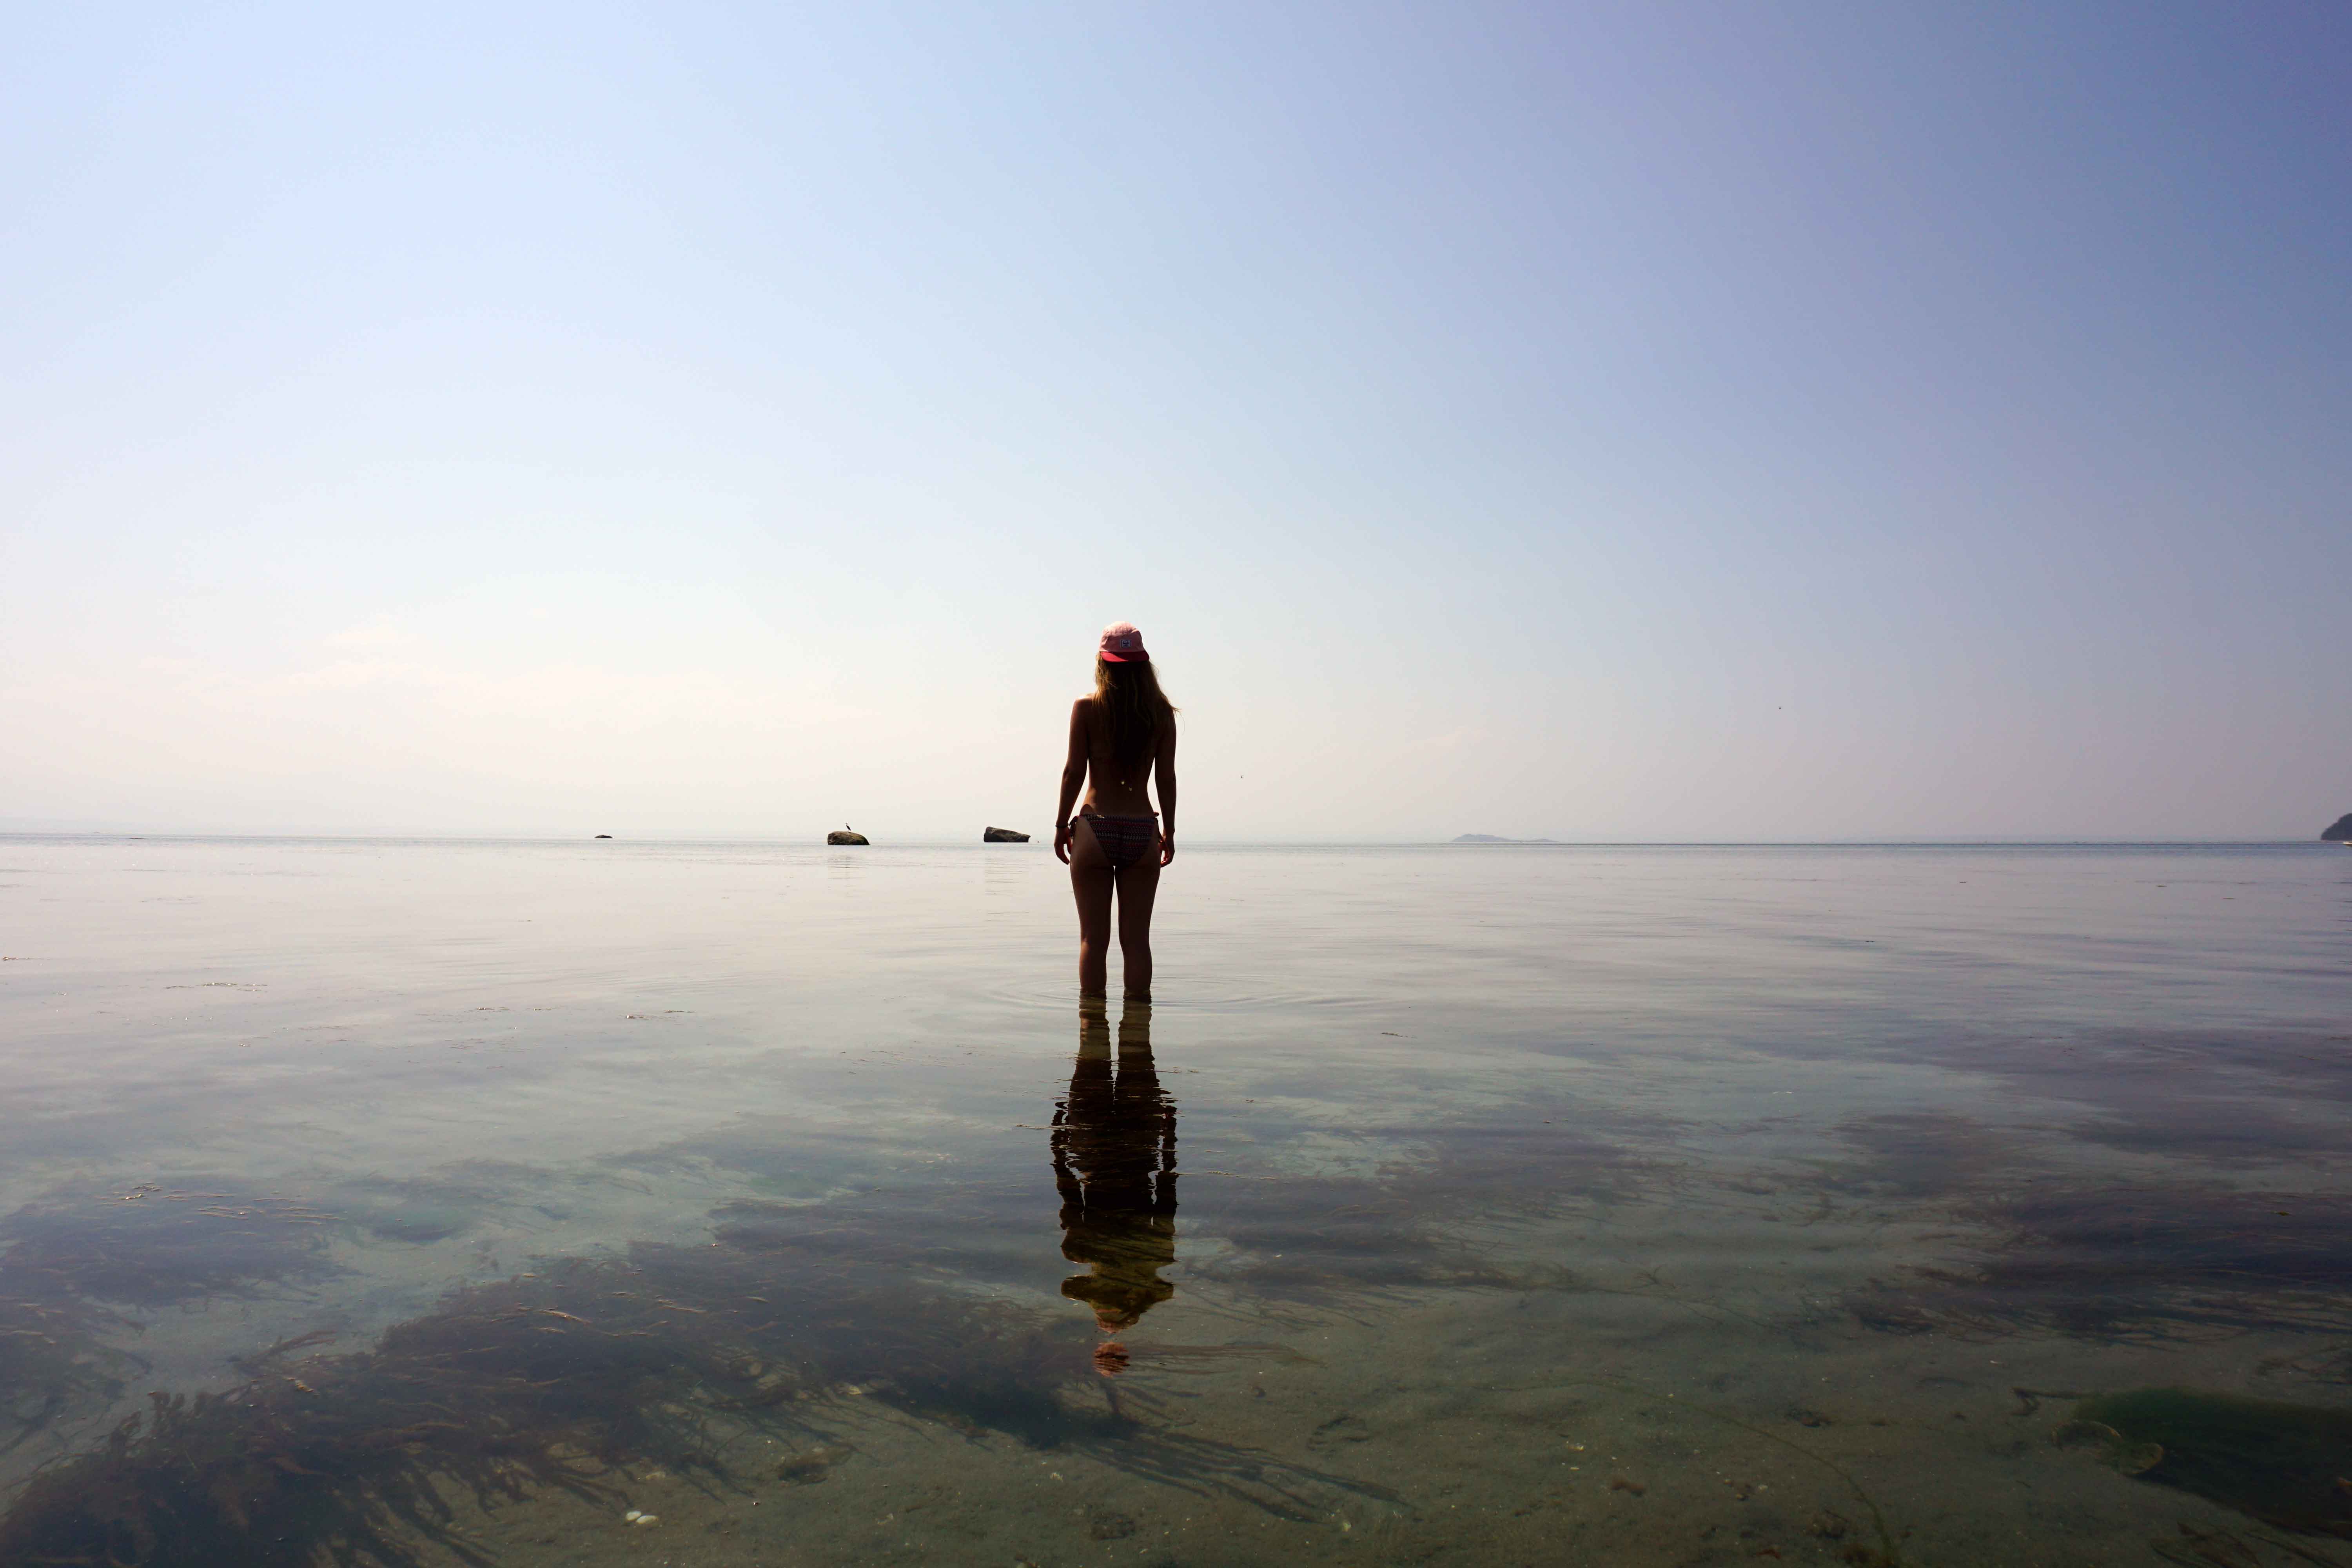
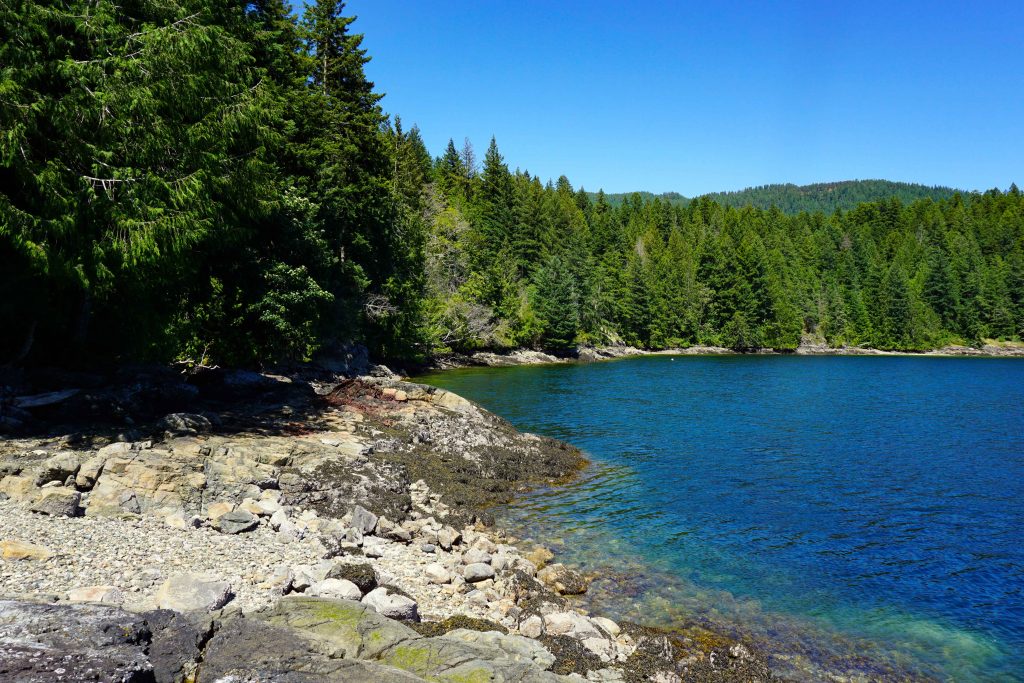
The other bonus of Fairview Bay Hut is that it’s in a prime seaside location. You’re just steps from the beach. When the weather’s hot, the water is the perfect temperature for a dip. The view across the ocean and the dense forest is incredibly beautiful, and you’ll likely see seals and eagles (and maybe whales if you’re really lucky!)

Fairview Bay on the Sunshine Coast Trail
The perfect spot for a dunk on a hot day

The return journey

If you are only hiking to Fairview Bay Hut, then you’ll need to return the same way you came.

Time and distance

It’s 7km from the Saltery Bay trailhead to Fairview Bay Hut. This makes a round trip of 14km. Due to the undulating nature of the trail, the outbound journey and the return journey take about the same amount of time. It took me 2.5 hours each way, going at a relaxed to moderate pace, with a few stops along the way to take photos and admire the view.

The Sunshine Coast Trail website suggests this hike will take two hours each way, which may be optimistic for some.

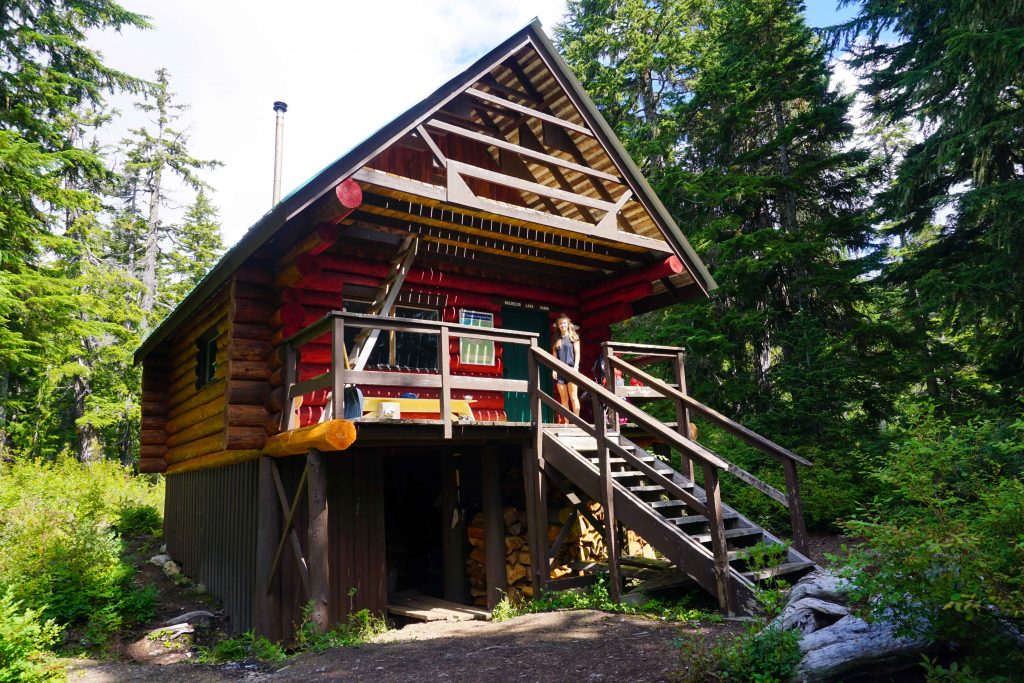
Make it into a loop by hiking to Rainy Day Lake Hut

If you’d like to see more of the Sunshine Coast Trail – or you just like hiking in a loop – then you can continue on to Rainy Day Lake Hut. However, you need to be aware that this will increase the distance and the amount of elevation gain.

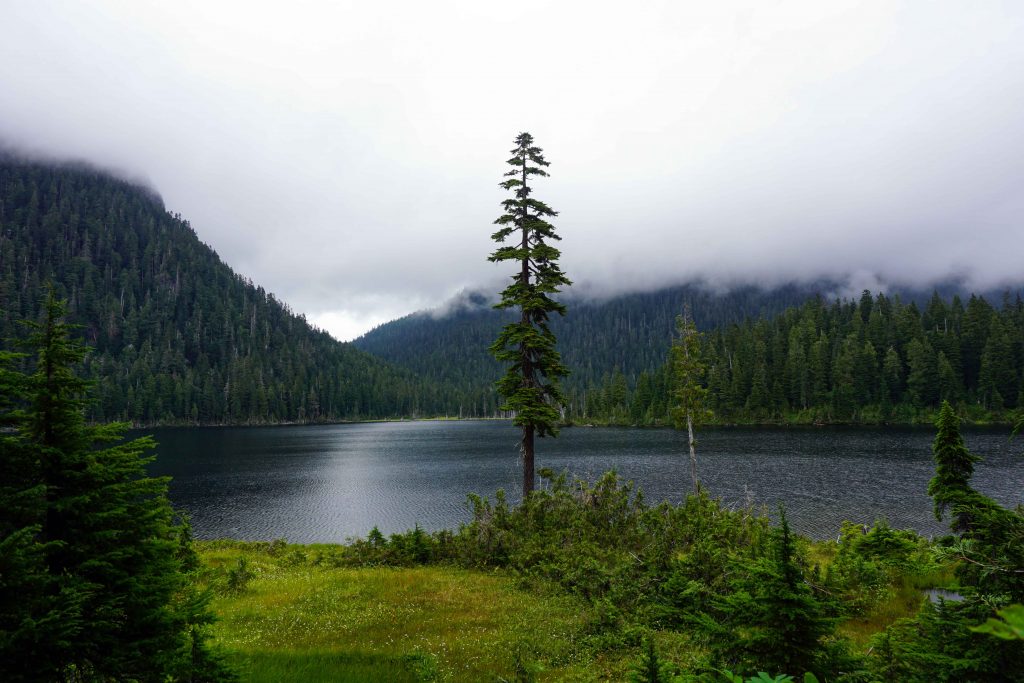
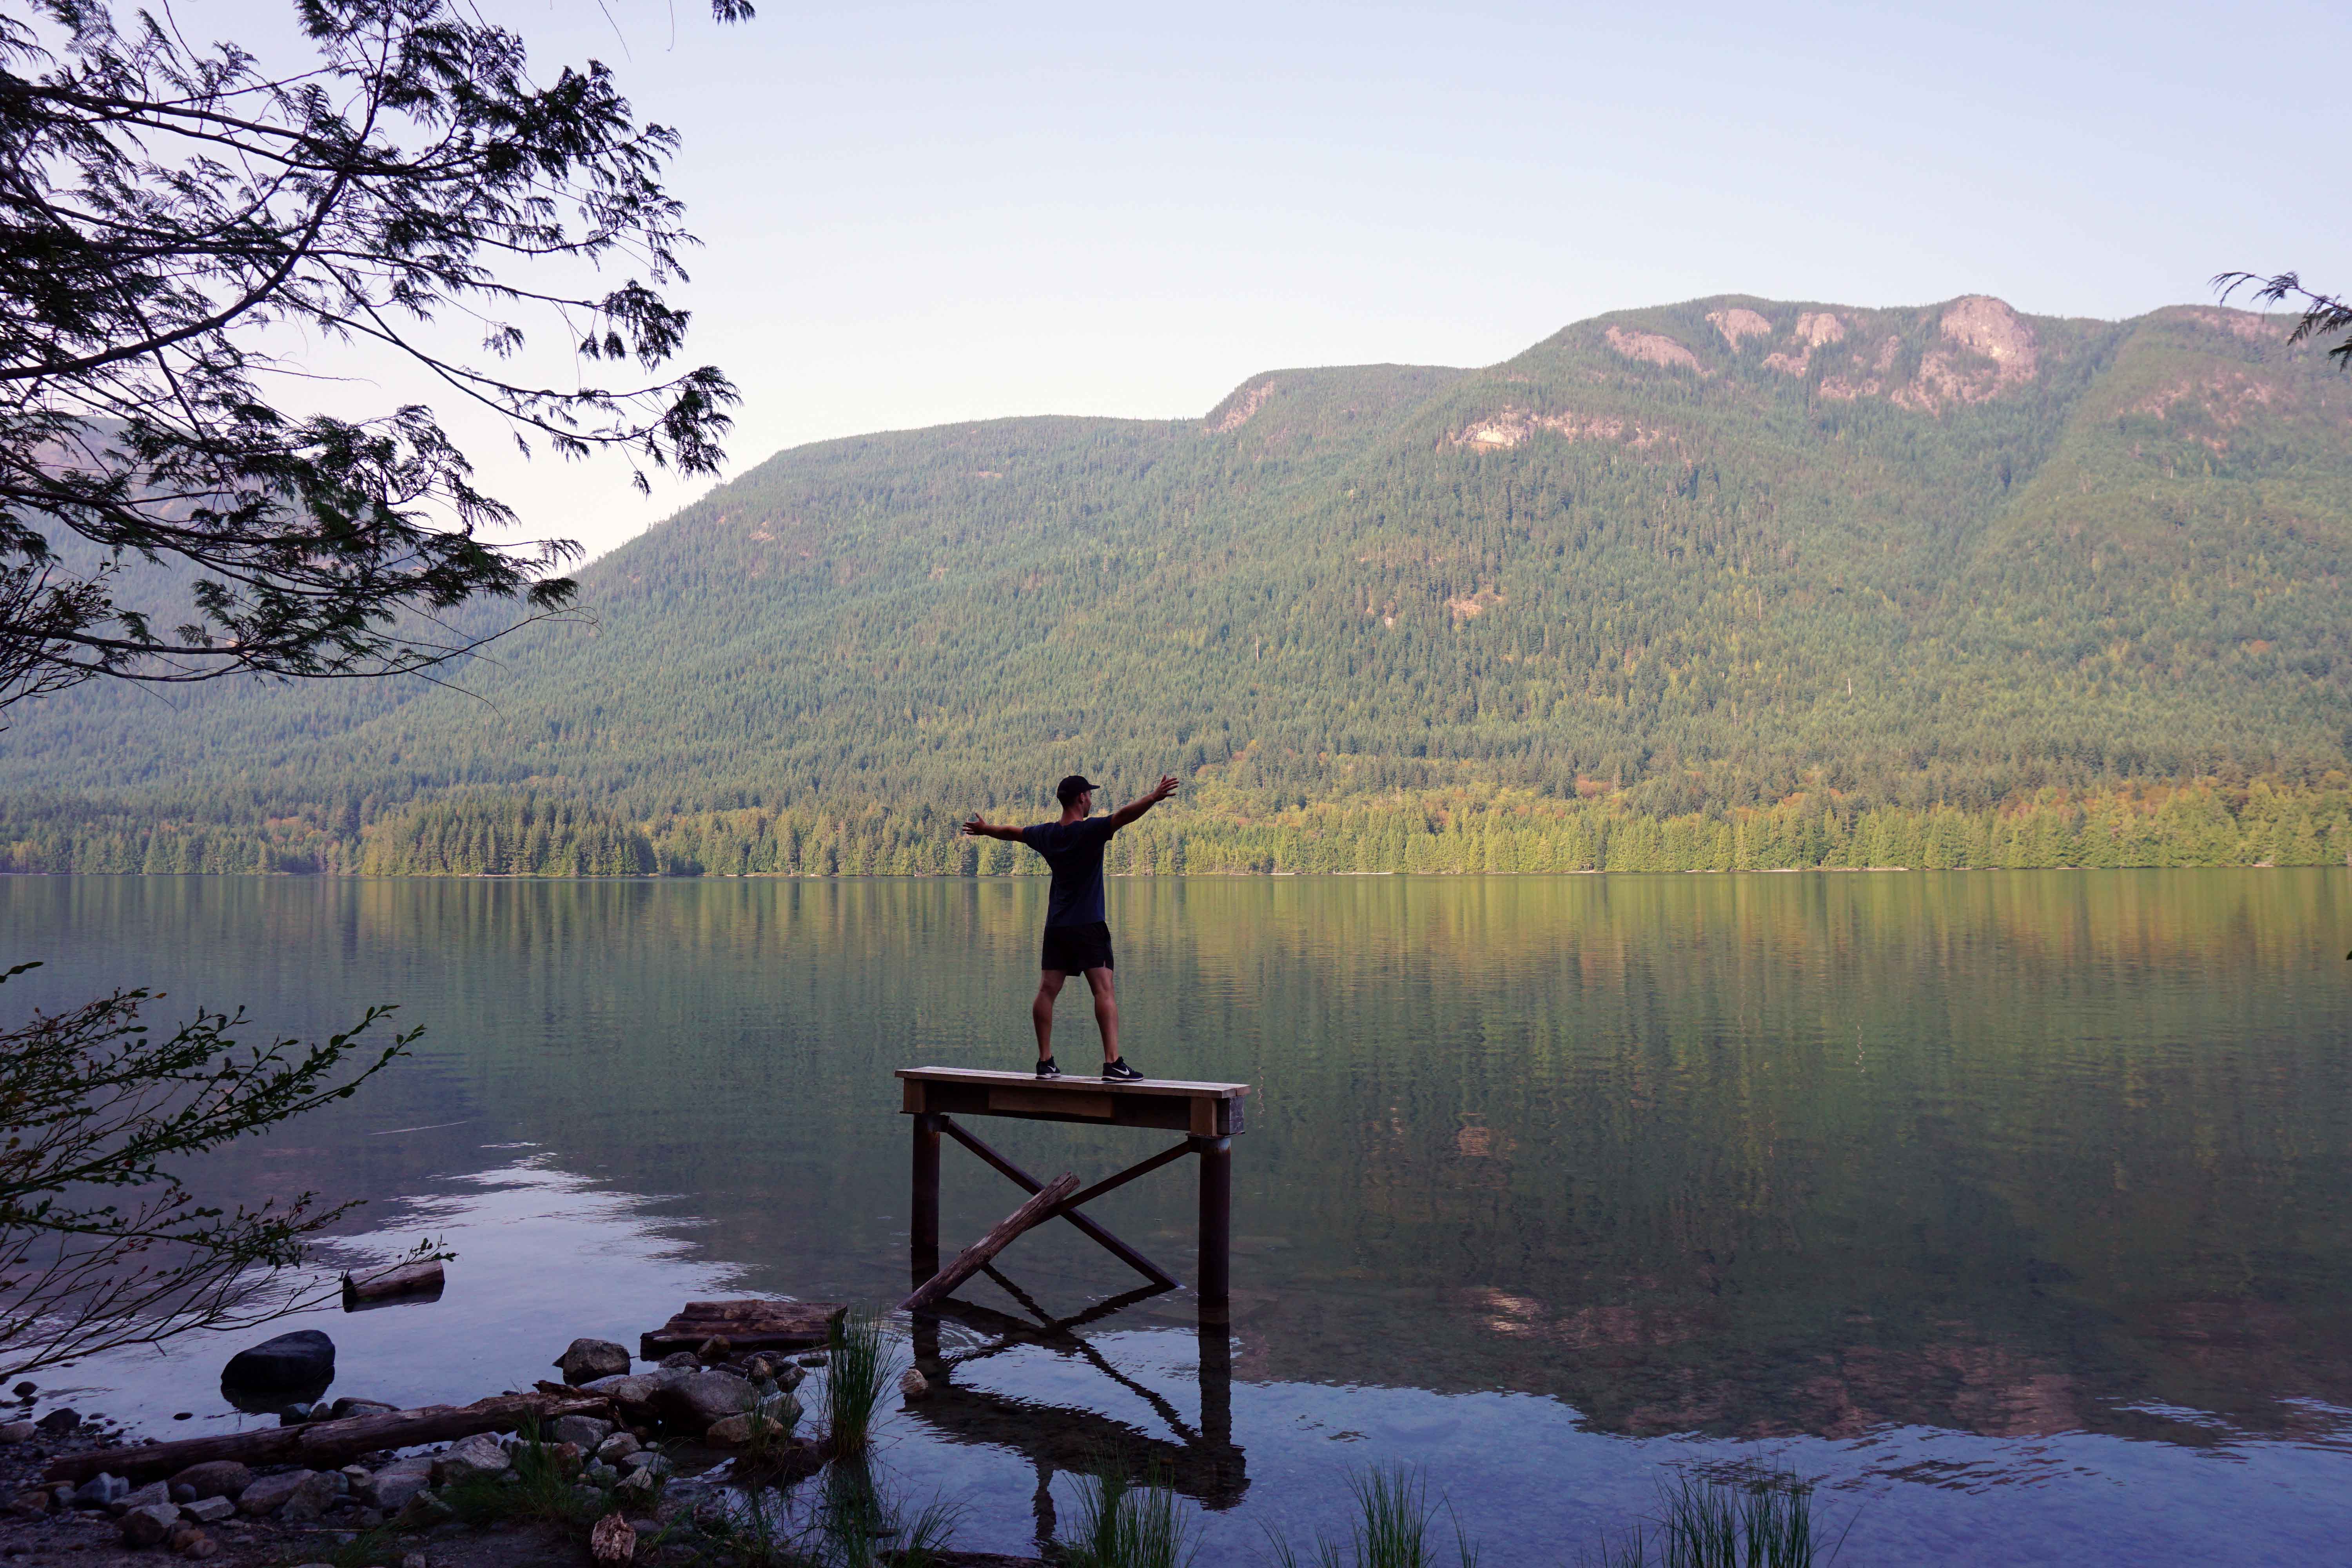
From Fairview Bay Hut, you continue to follow the Sunshine Coast Trail northbound. You quickly begin to ascend. It’s quite steep and continues for a couple of kilometers, making it quite the cardiovascular workout. It’s only around 3km to Rainy Day Lake from Fairview Bay, but you’ll be glad to get there. The hut has a similar set up to Fairview Bay Hut, only the downstairs isn’t enclosed by walls. It’s perched high on a rocky outcrop called Hailstone Bluff. It’s just a short hop down to the lake, which has a pontoon and is a great place to go for a swim.

[Note: you can actually drive to Rainy Day Lake. See the Sunshine Coast Trail website for more details].

To return to the parking lot, you need to continue around the shore of the lake for a short distance. You’ll come across a signpost pointing you back to Saltery Bay, with the trail cutting left back into the forest. It’s about 8km from Rainy Day Lake to Saltery Bay. Keep following the orange markers. You’ll ascend some more up to a viewpoint where you can see across the Jervis Inlet. There’s then a long descent, after which you’ll reach a road that brings you back to Saltery Bay.

Navigation on this section of the trail is sometimes confusing, particularly as there are a couple of spurs and it’s not always obvious which direction to take. There’s also little phone signal.

You can do this loop as a long day hike. Or, you can turn it into a multi-day hike, staying at either (or both) huts.

Kayaking the Sechelt Inlet

Kayaking the Sechelt Inlet

There are nine free marine access campgrounds dotted along the Sechelt Inlet and surrounding waterways, making for a great backcountry kayaking trip just a couple of hours from Vancouver.

A paddler’s paradise

The Sechelt Inlet is a prime paddling destination. The waters are fairly calm thanks to the geography of the landscape, so you’re unlikely to encounter big waves, as is often the case with sea kayaking. Wildlife watchers will be treated to sightings of bald eagles, seals and porpoises, along with a variety of marine life such as starfish and crabs. The deep blue sea gives way to treelined mountains where no roads go, making for a true backcountry experience in the wilderness.

To top it all off, there are no less than nine rustic campgrounds in the area, most of which are found on quiet, secluded beaches. They’re also completely free of charge. This means you can load up the kayak and explore at your leisure, paddling between campgrounds until your heart’s content. The first campground is just an hour from the recommended launch point, so it doesn’t matter if you have one night or one month to spare – there’s both big and small adventures to be had here.

If you’ve never done a multi-day kayak trip before, check out my blog post Kayak Camping 101 – Top Tips for Overnight Kayak Trips.

Kayaking the Sechelt Inlet
Mornings at Tzoonie Beach

What you need to know before you go

If you’re planning an overnight kayaking expedition along the Sechelt Inlet, then here’s what you need to know before you go.

When to go

The ideal time to kayak the Sechelt Inlet is between May and early September.

Getting there

The most southerly part of the Sechelt Inlet is found near the town of Sechelt on the Sunshine Coast. From Vancouver, take a ferry from Horseshoe Bay to Langdale. Head west along Highway 101 until you reach Sechelt. You will probably want to launch further up the inlet, so head north on Sechelt Inlet Road until you reach your desired destination (see below).

If you’re coming from the mainland then ferry reservations are highly recommended. Or you could always cycle, which is what I did!

If you have your own kayak/canoe

If you already have your own sea-faring vessel, then you can launch at the public beach in Tuwanek. You could also launch at Porpoise Bay Provincial Park, or the very southerly end of the Sechelt Inlet where there’s a boat ramp, but you’ll have a longer paddle to the campgrounds.

If you don’t have your own kayak/canoe

If you don’t have a sea kayak or canoe to hand, then don’t worry: you can rent one from Paddles and Pedals near Tuwanek. This is a family-run operation and they are used to catering for overnight trips.

Kayaking the Sechelt Inlet
Paddling from Tuwanek in the evening

The route

The beauty of the Sechelt Inlet is that you can choose your own route, depending on how much time and paddle power you have. There are campgrounds on both the easterly shore (which is probably where you’ll launch) and the westerly shore (meaning you’ll have to cross the inlet to reach them). There are also additional campgrounds along the Salmon Inlet and the Narrows Inlet.

The campgrounds appear in the following order, going from south to north:

  1. Piper Point (western shore)
  2. Tuwanek Beach (eastern shore)
  3. Skaiakos Beach (western shore)
  4. Oyster Beach (eastern shore)
  5. 9 Mile Beach (eastern shore)
  6. Halfway Beach (western shore)
  7. Kunechin Point (where the Sechelt Inlet meets the Salmon Inlet)
  8. Thornhill Beach (Salmon Inlet)
  9. Tzoonie Beach (Narrows Inlet)
Kayaking the Sechelt Inlet
9 Mile Beach

My two night itinerary

I had two nights so launched from Peddles and Paddles at 5pm on a Friday evening and headed straight for 9 Mile Beach. I confess that I was in a double kayak with my partner, who is a strong kayaker. The journey took us just over an hour, but this won’t be true for everyone. 9 Mile Beach is a long, stony beach which gives way to a dense forest. It was cloudy when we visited, but the sunsets are supposed to be excellent. Campsites can be found both on the beach and further back in the forest. There’s an outhouse and a large creek, although water collected for drinking must be boiled and treated first.

Kayaking the Sechelt Inlet
Camp at 9 Mile Beach

In the morning, we packed up and paddled all the way to Tzoonie Beach. The going was much harder at this end of the inlet. The winds picked up and the sea became quite choppy. It took us around three hours to get there, but I was glad we made the effort. The area is incredibly beautiful and has a remote, peaceful atmosphere. There’s an outhouse, a bear cache and a creek in the forest – it’s not all that easy to find, but it is there!

Kayaking the Sechelt Inlet
Things got a little bit choppier

On Sunday we packed up early to make the most of the calm seas. The winds are known to blow up the Sechelt Inlet in a northerly direction, particularly in the afternoons. We didn’t want to be caught going against a headwind. Thankfully the sea was like a mill-pond and we made good time. We knew we were safe when we reached Tuwanek Beach, so we stopped there for lunch and a swim before returning the kayak to Peddles and Paddles. Tuwanek Beach is a picture-perfect beach, complete with lapping clear waters and arbutus trees.

Tuwanek Beach while kayaking the Sechelt Inlet
Tuwanek Beach

Facilities at the campgrounds

The campgrounds are rustic, so you won’t find any filtered water or flushing toilets. I’ve outlined what facilities you can expect to find at each one, as it’s not consistent across the board. They are all free of charge and are marine access only, so you cannot reach them in a car.

Piper Point

  • Beach
  • Space for two to three tents
  • One pit toilet
  • One fire ring and fires permitted below high tide line
  • A creek

Tuwanek Beach

  • Beach
  • Space for four to five tents
  • One pit toilet
  • One fire pit
  • A creek

Skaiakos Beach

  • Zero facilities, but camping is permitted

Oyster Beach

  • Beach
  • Space for three to four tents
  • One pit toilet
  • One fire pit
  • Two creeks (one large, one small)

9 Mile Beach

  • Large beach
  • Space for 10+ tents
  • One pit toilet
  • Two fire rings
  • A creek

Halfway Beach

  • Beach
  • Space for 10 to 15 tents
  • One pit toilet
  • One fire ring
  • A creek

Kunechin Point

  • No beach
  • Two tent pads located on a stony outcrop, with space for four more tents located around the point at Kunechin Bay
  • One pit toilet
  • Campfires are not permitted on the point
  • No water source
  • Susceptible to strong winds coming down from the Salmon Inlet

Thornhill Beach

  • No beach
  • Space for two tents
  • One pit toilet
  • A creek
  • Hard to reach due to strong winds coming down from the Salmon Inlet

Tzoonie Beach

  • Stony beach
  • Space for up to 10 tents
  • One pit toilet
  • One fire ring
  • A bear cache
  • A creek, although it’s hard to find
Kayaking the Sechelt Inlet
Camp at Tzoonie Beach

Drinking water

Water collected from the creeks and streams must be boiled and/or treated before consumption.

Safety

Kayaking comes with its own set of dangers, especially sea kayaking. Always wear a life jacket and know what to do in the event of a capsize. Paddling close to the coastline is always a good idea, especially if it’s windy. The water tends to be calmer in the mornings and evenings.

It’s not recommended that you venture to Thornhill Beach unless you are an experienced kayaker, as the winds can be very strong down the Salmon Inlet. Also, don’t paddle past the entrance to the Narrows Inlet. If you do, you’ll end up in the Skookumchuk Narrows, which has a series of powerful rapids and whirlpools.

Did You Like This Post? Save it for Later!

Hiking in Tetrahedron Provincial Park

If you love a backcountry cabin, then Tetrahedron Provincial Park is for you. With four maintained huts to choose from and a network of hiking trails to explore, it makes for a perfect weekend adventure.

Tetrahedron Provincial Park is located on the Sunshine Coast, near Sechelt. In winter it’s a haven for backcountry skiers, who skin up to Mount Steele and Panther Peak in search of fresh lines. Come the warmer months, hikers hit the trails – although not in any great numbers, it seems. When we visited on a sunny Friday evening in August, ours was the only car in the parking lot.

The hiking here isn’t difficult, if you don’t want it to be. You gain a significant amount of elevation when you drive up the logging road to the trailhead. From then on, you can weave your way along undulating trails, past subalpine lakes and boggy wetlands. If you prefer more of an ascent, the hike to Mount Steele is available and is around 8kms (one way) to the summit.

Chapman Lake

There are four backcountry cabins in the park, making this an ideal opportunity to stay overnight. While the cabins are rustic, they are brilliantly maintained by volunteers at the Tetrahedron Outdoor Club. Each has a stove stocked with firewood, a sink and grey water bucket (but no running water), a dining table and benches, an outhouse and a range of survival equipment. Even comfy sleeping pads are provided.

You cannot reserve these cabins – they are first come, first serve. You have to be prepared to share. The upstairs sleeping quarters are cosy, so you might want to take some ear plugs. In theory, the only other items you need are your sleeping bag, cooking equipment, water, toilet roll and dishwashing soap. I always recommend taking a tent, just in case the cabins are full. And you must pack out what you pack in – including food waste.

The hiking route

The great thing about hiking in Tetrahedron Provincial Park is that there are numerous options open to you. I wanted to see as much as possible in 48 hours, so devised a loop that incorporated all four cabins.

From the parking lot, we hiked the 4.5kms to Edwards Lake cabin. The first section is along an old logging trail, which if truth be told, isn’t very inspirational. Then, all of a sudden, you’re deep within the forest. The bushes are teeming with berries in August (and bears!) The terrain is easy-going, so it doesn’t take long until you skirt the edges of Edwards Lake. The cabin itself is a little further along the trail.

Backcountry cabin in the forest
Edwards Lake cabin

We stayed the night at Edwards Lake cabin, which we had entirely to ourselves. In the morning, we left our big packs behind and put together a day hiking bag. We then headed over to McNair Lake cabin, which is 5kms (one way). The trail rolls up and down, over roots and creeks – some with questionable bridges. As you get closer to Chapman’s Lake, the ground gets wet and boggy. McNair Lake cabin appears shortly afterwards.

Backcountry cabin in the forest
McNair Lake cabin

At this point we still hadn’t seen another human being since entering the park. In fact, we didn’t see anyone else until later that afternoon, when we came across a big group heading to Mount Steele. Walking alone to McNair Cabin was almost eerie, and strange for a Saturday in mid-summer. In Tetrahedron, it feels like you don’t have to go far to achieve a sense of isolation and remoteness.

After eating lunch, we retraced our footsteps almost to Edwards Lake cabin. But instead of turning left to the cabin, we continued upwards to Mount Steele cabin, which from this point is 3km one way. It’s a steep climb, so it’s much easier without a fully loaded backpack. From Mount Steele cabin, it’s a short hike up to the summit. We then returned to Edward’s Lake cabin for a second night, and this time we were joined by a local couple.

Alpine landscape with cabin
Walking up towards Mount Steele cabin

In the morning, we packed up all our belongings and returned almost to the parking lot. However, when we got to Victor’s Landing, we took a left turn towards Bachelor Lake cabin. There’s also a stone arrow on the floor to point you in the right direction. This is not a well-trodden path and is overgrown, so you need to follow your nose. You skirt the edge of the valley before descending down into the forest.

Backcountry cabin in the forest
Bachelor Lake cabin

Apparently, Bachelor Lake cabin is the party cabin. We didn’t find any hungover souls, but we did have lunch and a sunbathe by the lake. We then returned to the parking lot via the normal summer trail – just follow the orange trail markers. And there you have it! Two days, four cabins and a few kms under our belts.

Woman sits in front of lake
Bachelor Lake

Of course, you don’t have to follow this route. You can pick and choose which cabins or lakes you want to go to. Some might prefer the out and back to Mount Steele. This seemed to be the preferred destination for the hikers we did meet. Others may opt for the loop from the parking lot to Edwards Lake, returning via Bachelor Lake. For solitude, I suspect McNair Lake cabin is the best bet. It’s entirely up to you.

Know before you go

The road to the parking lot is steep and extremely rough. We just about managed it in a Honda Odyssey – but only just. If you do not have a 4WD with good clearance, do not attempt to make it to the upper parking lot. If you visit in winter, 4WD and snow chains are essential.

The cabins are maintained by volunteers from the Tetrahedron Outdoor Club. If you’re staying, they ask for a donation of $15 per person, per night, or $25 per family, per night. Fees are payable to the Tetrahedron Outdoor Club can be paid online. If you want to send a cheque, there are pre-addressed envelopes in the cabins.

There is no running water in the cabins. In the summer, you can refill at the creeks and the lakes. Water should be boiled or treated. Swimming is prohibited in the lakes and streams within the park because it’s a watershed.

In the summer months the park is bursting with berries. Where you find berries, you inevitably find bears (we saw two). So, be bear aware!

Man holds bowl of berries
Freshly picked berries covered in chocolate

There is little-to-no cell reception in the park.

Conditions are very different in winter. The lakes may be frozen and avalanche hazards exist.

Kayaks landed on East Curme Island

Kayaking in Desolation Sound

We’ve been paddling for two and a half hours. My arms are heavy. My nose prickles under the midday sun, and I quietly wonder how much further we’ve got left.

We’ve already navigated our double kayak through the quiet waters of the Okeover Inlet and now Desolation Sound Marine Park stretches ahead of us. There are more than 6,350 acres of shoreline and water here, and now the winds have picked up, it’s become much choppier.

As waves break against the kayak and soak my lap, I become increasingly fearful of capsizing. To distract myself, I keep my eyes fixed on the view. We’re encased by layer upon layer of tree-clad mountains, each with their own hue. It’s quintessentially Canadian, and it’s nothing short of stunning.

But here’s the thing about sea kayaking – you don’t move very fast. The view can remain the same for hour upon hour, and after a while, your eyes start to play tricks on you.

And that’s when I saw it. Or did I?

A black fin, poking through the water.

“Orca!” I yell.

“Walker?” my boyfriend politely enquires, pandering to my habit of pointing out every man, bird or beast in the vicinity.

“Fin!” I shout. Apparently, I can only muster one word at a time when I’m excited.

“No”, he replies, “no chance!”

And then it breaches. And so does a second. It’s a mother and her calf.

“Whales!” I squeal. Now he believes me.

We immediately stop paddling and sit in silence, hardly breathing, worried that even a whisper will prompt them to dive under. They swim past us, just 30 metres away, gliding through the water in perfect unison.

Then they are gone, back to the watery depths. The entire episode lasts less than a minute, but the memory will stay with me for a lifetime. It’s only the second time I’ve ever seen an orca in the wild, and it’s my first sighting from a kayak.

We were later told by the folks at Powell River Sea Kayak, from whom we had rented our sea-going vessels, that we were incredibly fortunate to have seen orcas. Although they’re not unheard of in Desolation Sound, it’s by no means an everyday occurrence.

After waiting another five minutes to make absolutely certain they wouldn’t resurface nearby, we continued on our way. By now the fatigue had miraculously vanished, only to be replaced by frenzied chatter, toothy grins and a rapid paddling pace.

Kayaking with seals

The seals on their rocky perch

We made short work of the remainder of the journey and soon reached our destination: the Curmes Islands.

If we thought the day couldn’t get any better, we were wrong. This tiny cluster of islands is more akin to the Mediterranean than the Pacific Northwest. Warm azure waters lap gently against rocky outcrops, scraggly trees sprout from scorched earth, and the vast seascape is punctuated by countless uninhabited islands.

Those wishing to spend the night here must purchase a backcountry permit in advance, and due to the delicate nature of the ecosystem, are asked only to camp on the tent pads provided.

Consequently, the next 30 minutes are spent running around like breathless maniacs, deciding precisely which spot would be the best. Despite being warned the Curmes Islands would be busy, there are few other people here, and the choice is ours. In reality, the exercise is futile, as the view from each wooden platform is jaw-dropping.

Woman looks out over Desolation Sound Marine Park

A wooden tent pad on East Curme Island

Once camp is finally set up and the kayak has been hauled above the tideline (which was much, much higher than anticipated), the activity is suddenly over. Now there’s nothing left to do but indulge in our Robinson Crusoe fantasies. The rest of the day is spent swimming, fishing and just sitting and watching.

I follow the exploits of the nearby seals whose rocky perch becomes increasingly smaller as the tide rises, only to disappear completely – much to their annoyance. I watch the sail boats motor lazily on by. And I track the progress of the blistering hot sun, until it finally dips below the horizon, causing reds and purples to bleed like ink across the sky.

Days later, when I’m back in Vancouver, the presenter of the TV show I’m watching poses the question – ‘who gets to live in paradise?’

I did, I think. Just for a night.

View of Confederation Lake hut from the lake

Hiking from Inland Lake to Confederation Lake

Spanning 180 kilometres, 14 backcountry huts (with another in the pipeline) and beautiful yet varied terrain, the Sunshine Coast Trail (SCT) is one heck of a hiking experience.

The history of the Sunshine Coast Trail

The idea was conceived in 1992 by two gents called Eagle Walz and Scott Glaspey. Their motivation was to save the area’s remaining old growth forests. They believed that if more people could access this section of B.C’s backcountry, the more chance there was of saving it from the talons of the logging industry.

A year later a group of volunteers known as the Powell River Parks and Wilderness Society (PRPAWS) was formed. They worked for eight years to create a hiking trail that spans the length of the northern Sunshine Coast, from Sarah Point in Desolation Sound, to Saltery Bay. The rest, they say, is history.

Nowadays the group continues to maintain the SCT, including both the trail itself and the huts. That means that any information shared here may well be out of date in years to come. But as it stands today, the SCT’s claim to fame is that it’s the longest free hut-to-hut hiking trail in North America. No fees, no reservations, and if you want, no tents necessary. Pretty good, right?

My brief encounter with the Sunshine Coast Trail

While planning a trip to the northern Sunshine Coast, I invariably stumbled upon a bounty of information about this epic hut-to-hut trail. Unfortunately, I didn’t have time to do the whole thing. After all, I was only going to be on the Sunshine Coast for five nights, and I had a lot of other activities on the agenda.

But not wanting to bypass it completely, I settled on the notion of doing an overnight hike. We only had one car between us, and a 2WD at that, so it would have to be a there-and-back hike with an easily accessible trailhead. After scouring the internet for information with little success, I contacted the good people at Tourism Powell River and asked for their recommendations.

After approximately one hour (I’m not kidding), a lovely lady called Tracey replied to my email with the following suggestions –

  • Park on Malaspina Road and hike north to Manzanita Hut
  • Park at Saltery Bay and hike into Fairview Bay Hut
  • Park at Inland Lake and hike into Confederation Lake
  • Park on Malaspina Road and hike south to Rievely Pond Hut

In the end, I plumped for option 3 – Inland Lake to Confederation Hut.

Inland Lake to Confederation Hut

After spending a night at the Inland Lake campground, we drove our car all of 20 metres to the day-use car park, filled our water receptacles at the pump, and set off into the unknown. Actually, that’s not entirely true, as the first couple of kilometres skirt the edge of Inland Lake. Seeing as we’d done the 13km loop around the lake the previous day, we sort of knew the way.

Shortly after the totem pole, a sign pointing right directs you to Confederation Lake. It’s uphill from there. Yep, there’s no two ways about it – this section of the Sunshine Coast Trail is steep. If you’ve got an overnight pack on, and it’s 30°c outside (which is was), then it’s pretty hard work.

Two men walk along a fallen tree

The Valley of Fatigue

Even so, the beautiful old growth forests provide a robust shelter from the sun, not to mention something awe-inspiring to look at as you heave yourself through the Valley of Fatigue – yes, that’s it’s given name! As you reach the shores of the lake, a sign informs you that it’s another agonizing 2km to the hut. From here the trail becomes more technical and begins to undulate.

At this point, with mounting anticipation and increasingly sore and sweaty bodies, we began to speculate on our chosen destination. What would the hut be like? How many other people would be there? Would the lake be nice to swim in? Wouldn’t it be good if there was a boat?

And then we arrived.

Expectations were exceeded. There was even a bloody boat. The Valley of Fatigue was forgiven.

Confederation Hut

As it turns out, there was just one other resident of Confederation Hut that night – a Slovenian called Mike. He had hiked all the way from Sarah Point and dutifully told us that Confederation Hut was the best hut he’d stayed in on the Sunshine Coast Trail to date. So nice, in fact, that he’d decided to stay an extra night.

A gorgeous wooden edifice with a green tin roof to boot, this is THE spot for anyone harbouring Swiss Family Robinson fantasies. Downstairs is equipped with a wood dining table and benches, a wood pellet burner, and a food preparation area. The sleeping quarters are upstairs in the rafters, with a few blankets and mats for anyone in need. Further sleeping spots are available underneath the hut itself.

Woman sits in front of Confederation Lake hut

Cabin porn

Once a thorough inspection had been completed and our spots staked out upstairs, we did what any hot-blooded human would have done – stripped off and threw ourselves in the lake. We quickly realised this was no freeze-your-wotsits off alpine lake. You could luxuriate in this all day.

Our swim was swiftly followed by a lap in the rowing boat, complete with life jackets and all. How this boat got here and by whose hand we don’t know, but at the time it felt like a gift from on high. As we sat in the middle of the lake, encased by forest, with snow-peaked mountains in the distance and the secluded cabin in the foreground, it was easy to see why our new friend Mike was reluctant to leave.

Two men swim in Confederation Lake hut

Cooling down after a hot hike

After dinner we took the short jaunt to the viewpoint at the disconcertingly named Vomit Vista. Never fear, it’s an easy walk, and there were no bodily fluids in sight. After that it was to bed, where we found the hut to be relatively cool and, thanks to the fly screens, bug free. If only my fellow companions didn’t snore, I would have had a much better night’s sleep.

The following day we forced ourselves to leave this beautiful spot, with the return journey taking about half the time of the previous day’s hike. As I scrambled down the hillside, my thoughts turned to Mike and the delights he would be experiencing as he worked his way to Tin Hat Mountain.

That’s the only problem with doing a short section of the Sunshine Coast Trail – it whets your appetite, and all of a sudden you want to take a week off work and walk the whole darn 180km.

I know that I, for one, will be back.

Man fishes at sunrise on East Curme Island

Road Tripping on the Northern Sunshine Coast

The northern Sunshine Coast has everything you could ask for – whether you want to hurl yourself down mountain bike trails at Duck Lake or relax on Savary Island’s white sandy beaches, there’s something for everyone.

After spending five fun-filled days there, some friends asked if I would share my itinerary with them. I thought I’d share it here too, just in case anyone is planning a trip to this spectacular corner of the world. However, a word of warning – we crammed as many activities as possible into the little time we had. For a more chilled approach, you may want to pick and choose or spend longer at each destination.

Happy travels!

Day 1 – Inland Lake Provincial Park

Firstly, we had to get to the southern Sunshine Coast, so we drove from Vancouver to Horseshoe Bay, where we boarded the ferry bound for Langdale. Reservations are highly recommended in the summer months. We then continued from Langdale to the second ferry at Earl’s Cove, the cost of which is included in your ticket. You can’t reserve this ferry, so it’s a case of turning up and hoping for the best.

When we arrived at Saltery Bay we headed to Inland Lake Provincial Park, where I’d made an online reservation for the campsite. At the time of writing, it’s $18 per party, per night.

We had planned to mountain bike at Duck Lake first, and you can rent bikes at Suncoast Cycles if you need. However, we were a little behind schedule, so we bypassed this and went straight to the campsite.

After pitching our tents, we set off to explore the 13km walkway around the lake. There were three of us and we only had two bikes, so we took it in turns to run/cycle around, stopping at frequent intervals for a swim. The water’s lovely and warm and there are some small beaches to relax on.

Man stands on wooden platform in lake

Inland Lake

Day 2 – Confederation Lake

The next day we packed up our hiking bags, moved the car all of 20m to the day-use parking lot at Inland Provincial Park, and hiked up to Confederation Lake. We retraced our steps from the previous day, going around the lake for about 2km, after which there’s a sign pointing uphill to Confederation Lake.

The steep climb takes you through an old growth forest and eventually pops out on the shores of Confederation Lake. Being part of the Sunshine Coast Trail (SCT), there’s a free wooden hut that you can stay in, or you can pitch a tent. If you don’t want to stay the night, this is still a worthwhile (and do-able) day hike – not only for the exercise, but also for the gorgeous destination!

We spent the rest of the day swimming in the lake, which like Inland Lake, is balmy during the summer months. There’s an old rowing boat you can take for a spin, and we tried fishing for trout but with no success. The Vomit Vista viewpoint is just another 800m further on if you can manage it and offers lovely views of the mountains.

For a more in-depth description of the hike, read about my brief encounter with the SCT.

Three friends sit outside a wood cabin

My Swiss Family Robinson

Day 3 – Okeover Inlet

After a relaxing morning swimming and fishing at Confederation Lake, we packed up our bags and headed back down the hill to the car. We got onto Highway 101 and drove to Dinner Rock campsite near Lund. This is a free campsite by the ocean, and while it looked perfectly nice, someone advised us that a large group had been causing all sorts of noise issues and we might be better off at Okeover Arm Provincial Park instead.

Feeling that we were in need of a good night’s sleep, we duly took his advice and rocked up at the Okeover Arm Provincial Park campground. I’d not made a reservation but there was plenty of space. The park warden came around later to collect our fees, which at the time of writing is $18 per party, per night.

We spent the rest of the evening pottering around the campsite. There are some little beaches down by the inlet, all full of oyster shells. It’s an absolutely stunning spot to watch the sunset – on a warm summer’s day the sky becomes a colour palette of reds, and the surrounding mountains each turn a different shade of purple.

Couple look across sea inlet at sunset

Okeover Inlet

Day 4 – Savary Island

In the morning we drove into Lund, which is a pretty little fishing village. We parked the car in the upper hotel car park and paid at the hotel reception desk. I’d pre-booked a Lund Water Taxi to take us to Savary Island, which at the time of writing is $22 per person, $3 per bike, plus tax. We hadn’t had breakfast, so headed to the incredibly popular Nancy’s Bakery for one of her famous cinnamon bun rolls.

It takes just 15 minutes to get to Savary Island, but when you step off the boat, you feel like you’ve been magically transported to a Thai island. Think dusty unpaved roads, long stretches of white sandy beaches, and a seriously laid-back vibe that will make you reluctant to return to the mainland.

We already had two bikes, so hired a third at Savary Bike Rentals, which is a short (uphill) walk from the dock. This is definitely the best way to get around the island, although the terrain is not suitable for thin-wheeled road bikes. Cycling can also be something of a hazard, as I spent more time ogling at all the beautiful wood cabins than watching where I was going.

As you do a loop around the island, there are various little galleries and shops you can stop at. We stumbled upon one family-run business selling lemonade and ice coffees from their kitchen. After placing our order, we were duly ushered onto the deck to relax in deckchairs overlooking the ocean.

Above all else, Savary Island is known for its vast beaches and warm waters. In fact, you’ll find the warmest waters here north of Mexico. So of course, beach hopping was the main activity of the day. The tide was out (and the tides here are huge) so we couldn’t really swim, only paddle. We did discover that low-tide is also excellent for clam-picking, but alas, we weren’t equipped.

We finished off our bike tour at Riggers, the only pub on the island. It was then back to Lund where we indulged in dinner at the Boardwalk Restaurant before heading back to our camp at Okeover Arm Provincial Park.

Woman stands in sea up to her ankles

Savary Island

Day 5 – Desolation Sound

We were conveniently placed the next day for the short journey to Powell River Sea Kayak at Okeover Inlet. I’d reserved some kayaks for two days, so we got the paperwork sorted, loaded up the kayaks and launched shortly after 10am. There’s a parking lot where we left our car.

The waters along the Inlet were very calm, although things did get a little choppier as we reached the open ocean of Desolation Sound. After about 3 hours of paddling a mother orca and her calf swam past. They must have been about 30m away, which was incredible.

Read more about my experience kayaking with orcas in Desolation Sound.

Shortly after we reached the Curmes Islands and decided to occupy a couple of camping pads on East Curme Island. If you want to stay the night, you need to buy a backcountry camping permit in advance, which is $5 per person. There are tent pads and outhouses here, but nothing else. If you run out of water, you can paddle over to Unwin Lake and refill from the freshwater stream.

This is an incredibly beautiful spot overlooking Desolation Sound and we all wished we could stay for longer. In fact, the folks at Powell River Sea Kayak were surprised we had paddled so far just for a night, as most people set up base here and then explore the surrounding area for a few days. Even so, it was well worth it!

Tent pad on East Curme Island

Home for the night on East Curme Island

Day 6 – Back to Vancouver

Then it was time to go home. We kayaked back in windy conditions, hopped in the car and made the long journey back to Vancouver. You can buy your return ferry ticket at Saltery Bay.

We were all pretty exhausted, but at the same time we were chuffed to have had such an amazing road trip. It’s incredible what you can pack into such a short space of time, and it’s certainly opened my eyes to the delights of the northern Sunshine Coast. I’ll definitely be back, and am particularly keen to explore the Sunshine Coast Trail and Desolation Sound in more detail.

‘Til next time!

Did you like this post? Save it for later!