Tag Archives: kayaking

Kayak camping on the Sechelt Inlet

Kayak Camping 101: Tips for Overnight Kayak Trips

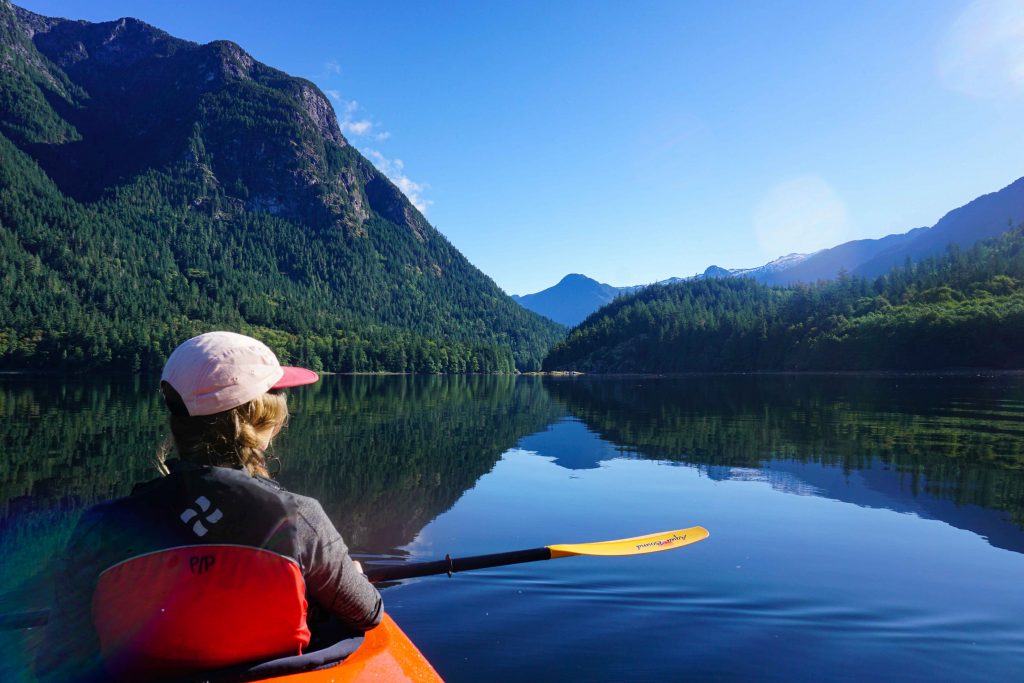
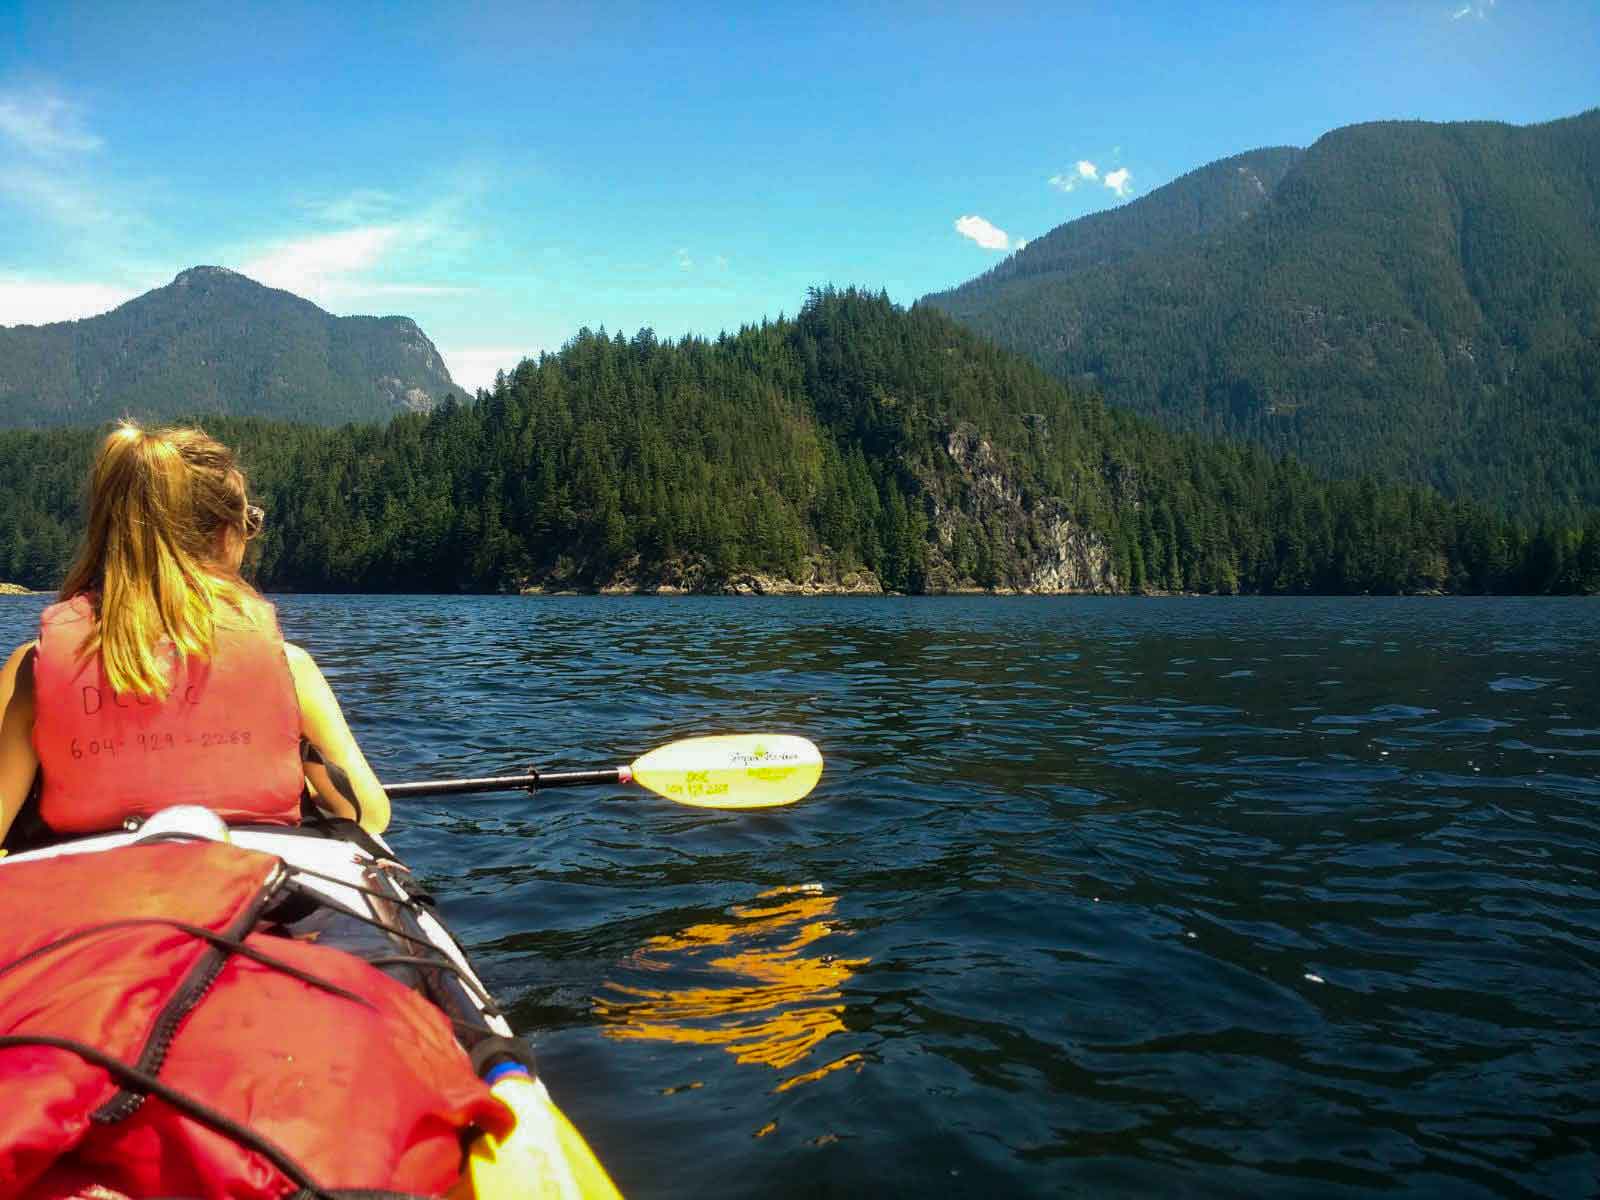
Multi-day kayaking trips open up a new world of opportunities, allowing you to reach more remote locations – some of which may be marine access only. If you’re hoping to undertake an overnight kayak trip, but you’re not sure where to start, then this guide is for you.

Note: this blog deals with sea kayaking only. Kayaking on rivers, white water and other waterways is a little different.

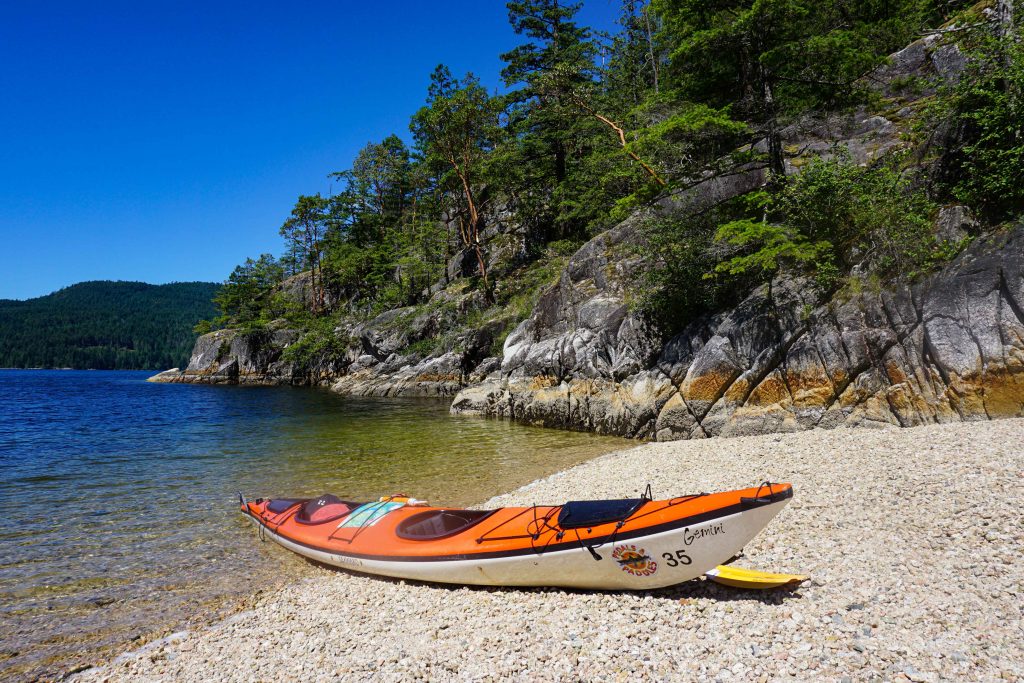
Tip #1: Get a sea kayak

There are lots of different types of sea faring vessels out there. If you’re headed for saltwater, then the best option is a sit-in sea kayak, also known as a touring kayak or ocean kayak. You can get single, double and even triple seaters.

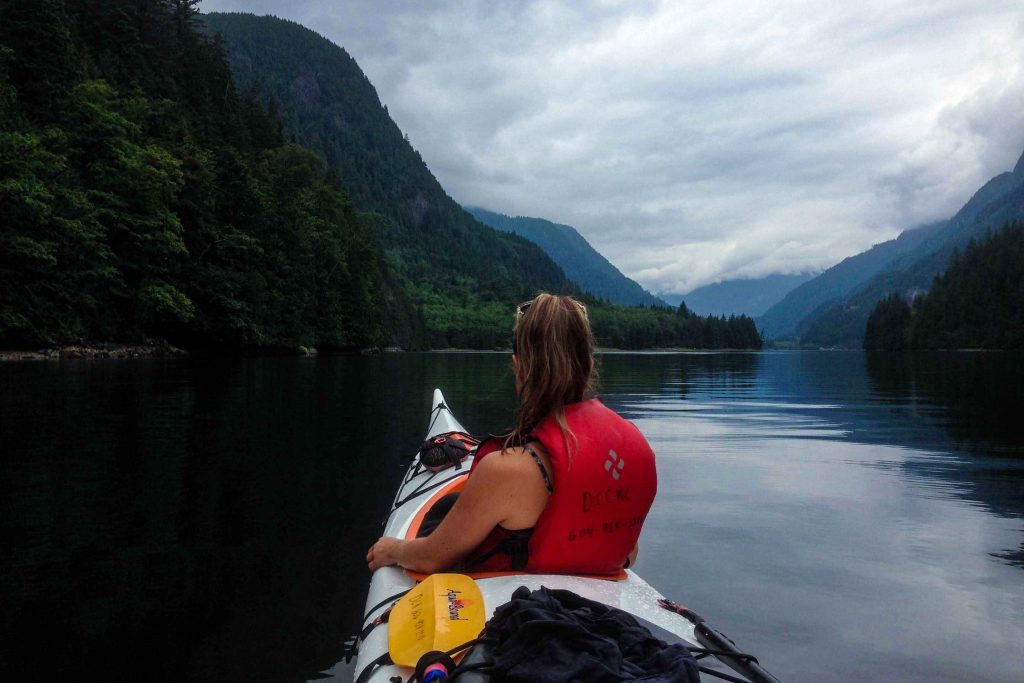
Tip #2: Plan a safe route

For your maiden voyage, choose a route with safe waters. Avoid large open water crossings and areas where winds are known to pick up, such as valleys. Start with one night at a time as you build your confidence, and only venture out in calm weather. Always leave a trip plan before you depart.

If you live near Vancouver, then kayaking the Indian Arm is a good beginner option, as is kayaking the Sechelt Inlet. Alternatively, you could hire a guide who will ensure your safety while you learn the ropes.

Tip #3: Know what to do in the event of a capsize

There is always the risk that your kayak will capsize. Be sure that you know what to do, should this happen. Some outfitters won’t actually allow you to rent a kayak, unless you can demonstrate a capsize situation and/or have a kayak training certificate.

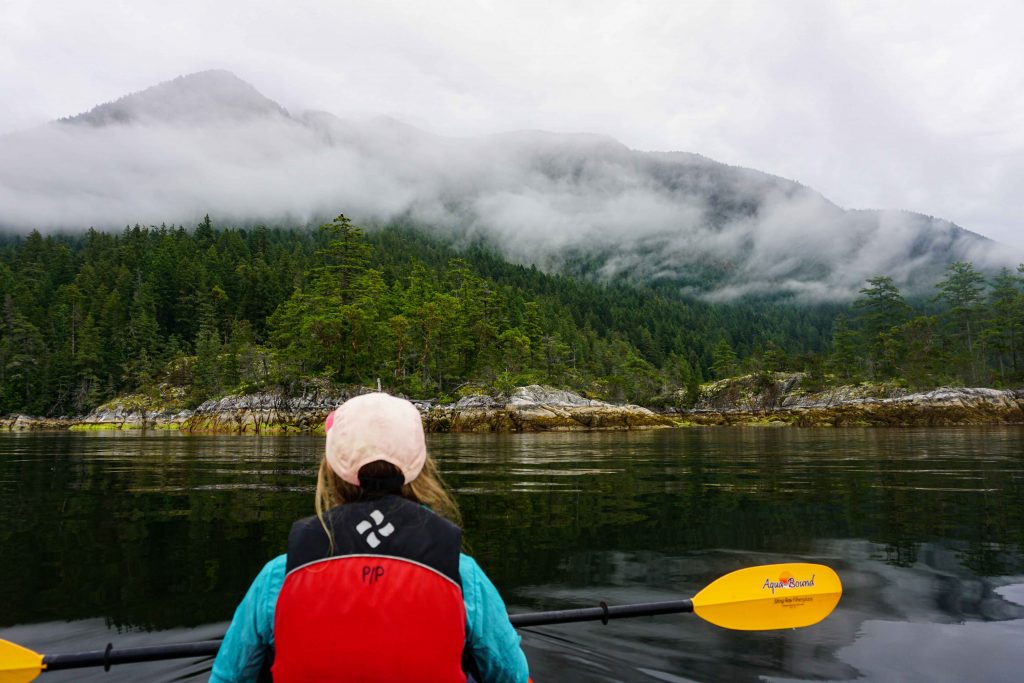
Tip #4: Check the conditions and tide times

When you’re sea kayaking, you’re at the mercy of both the tide and the weather conditions. Both factors can have a significant impact on when you do (and do not) want to be out on the water. Check the tide times and conditions in advance, and plan your days around that information. Often, winds pick up in the afternoon, making the water much calmer in the mornings and evenings.

Tip #5: Pack like you would for a backcountry hiking trip

Sea kayaks usually have a hatch in the front and the back (or bow and stern, to use the proper terminology). Some double kayaks also have a hatch in the middle. When combined, these provide a surprising amount of storage space. Even so, it is better to pare back on non-essential items, as the extra weight will require extra effort when paddling. All kayaks also have a maximum carrying capacity which you don’t want to exceed.

Packing for a multi-day kayak trip requires exactly the same approach as packing for an overnight hike. Lightweight camping gear is ideal. The only exception to this rule is that you can carry more water while kayaking than while hiking.

A basic packing list might include:

  • Tent
  • Sleeping bag
  • Sleeping mat
  • Stove, fuel and lighter
  • Cookware and utensils
  • Water and food
  • Water purification tablets
  • Headlamp
  • Multi-tool
  • Toilet paper and trowel
  • Sunscreen
  • Spare set of clothes, including warm and waterproof clothes
  • Satellite communication device
  • First aid kit

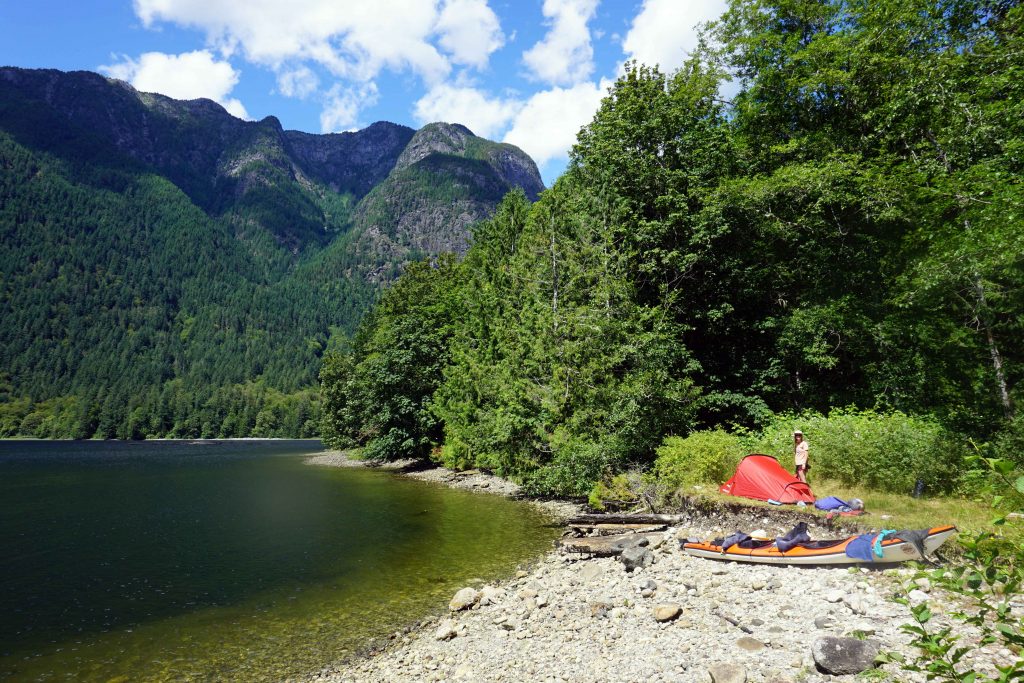
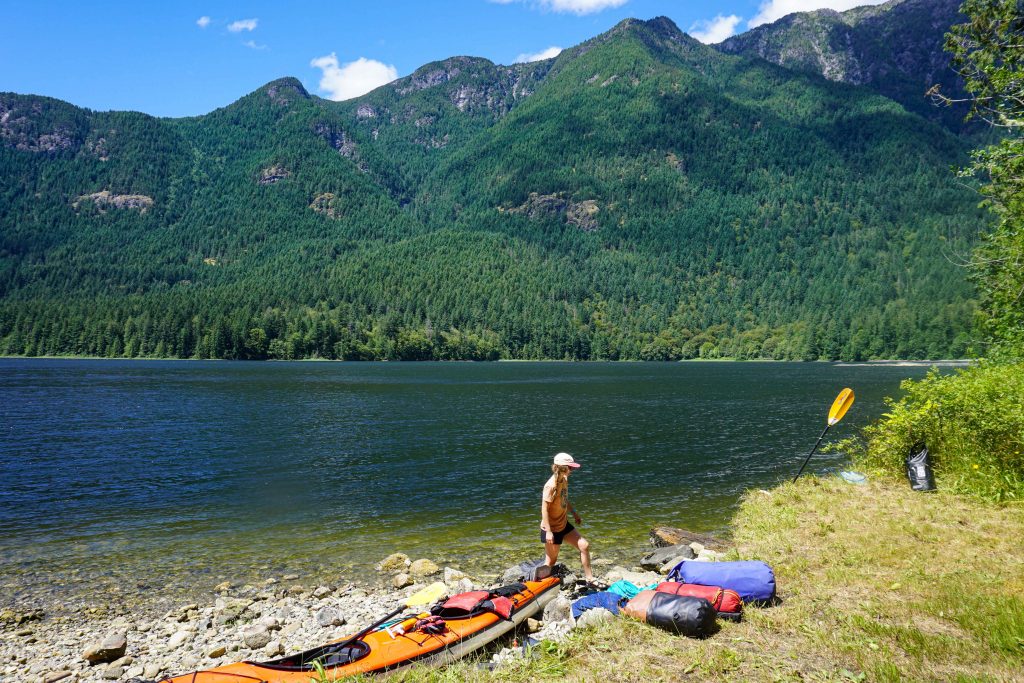
The advantage of kayaking is that you can pack your kayak on the shore before launching. Any non-essential items that don’t fit in the kayak can be left behind (provided that doesn’t mean littering, of course!)

Tip #6: Use dry bags

Although the hatches on sea kayaks are usually sealed, they do get damp inside. Because of this, you should keep most of your gear in dry bags. This is particularly important for anything you really don’t want to get wet, like your clothes, sleeping bag and electronics.

Kayak camping on the Sechelt Inlet
Pack gear in dry bags

Tip #7: Float the kayak while you load/unload

It seems like an obvious thing to say, but an empty kayak is a lot lighter than a fully loaded kayak. With this in mind, it makes sense to float the kayak in the water, while you load and unload. This is easier than carrying a heavily laden kayak to the water’s edge. If there’s at least two of you, one person can hold the kayak while the other one packs.

Most sea kayaks are made from fiberglass, meaning you don’t want to drag them along the ground.

Tip #8: Think about weight distribution

The way in which you load a kayak can make a huge difference in terms of efficiency and manoeuvrability. Heavy items such as water should be stored low down and as centrally as possible (such as in the central hatch of a double kayak). For everything else, try to keep the weight distribution even between the bow/stern and port/starboard.

Also remember is that the first things into the kayak are the last to be unpacked. So, pack gear you’ll only need at camp in the farthest reaches of the bow/stern hatches. Anything you might need to access frequently should be packed last.

Tip #9: Pack a deck bag

It is very difficult to reach into the hatches while you’re paddling. Rather than risk a capsize, keep items such as snacks, a water bottle, sunscreen, sunglasses and camera close to hand. Some kayaks have a day hatch for this very purpose. If not, place them all in a small dry bag. This can be clipped onto the deck lines (which are elasticated lines in front of the cockpit).

Don’t store these items in the cockpit (where you sit) because if you capsize, they’ll be lost to the watery depths. It will also impede your ability to exit the kayak.

Tip #10: Carry and use safety equipment

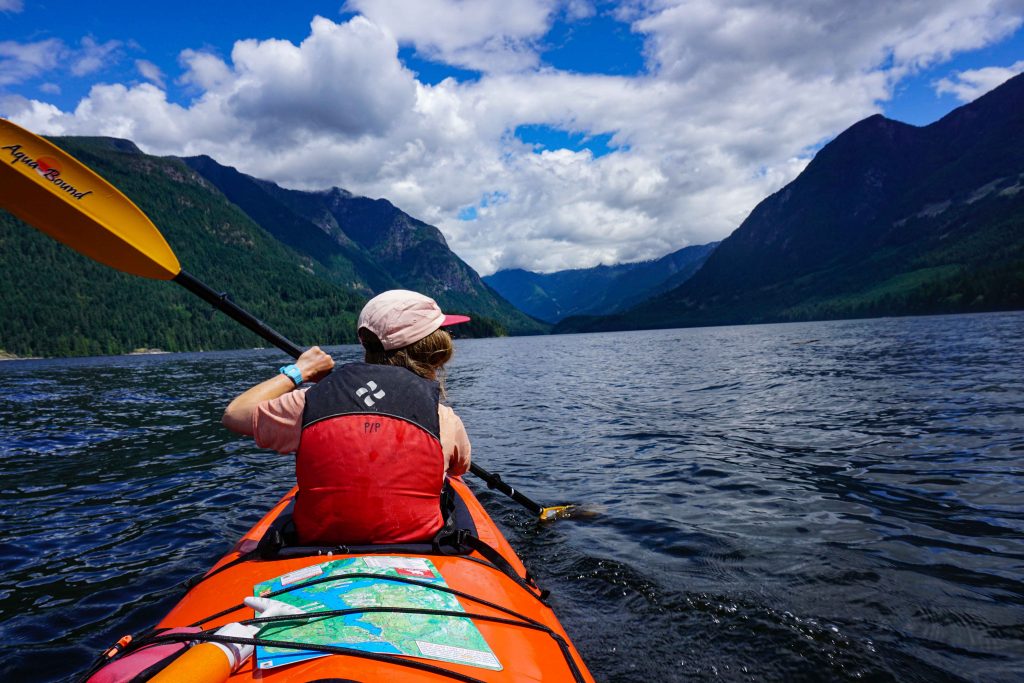
You should always wear a life jacket while sea kayaking. Also carry a water bilge/bailer and sponge, spare paddle, whistle and throw rope. Keep a waterproof map of the area tucked under the deck lines.

Kayak camping on the Sechelt Inlet
Tuck a waterproof map under the deck lines, along with a bilge pump and throw rope

Tip #11: Adjust your position

Sea kayaks typically have foot pegs attached to adjustable straps. When you sit in the kayak, play around with the straps until your legs are stretched out but with a slight bend in them (like a frog). This allows you to brace your legs against the sides, putting you in a better paddling position. You can also adjust the paddle and the drip ring to your liking.

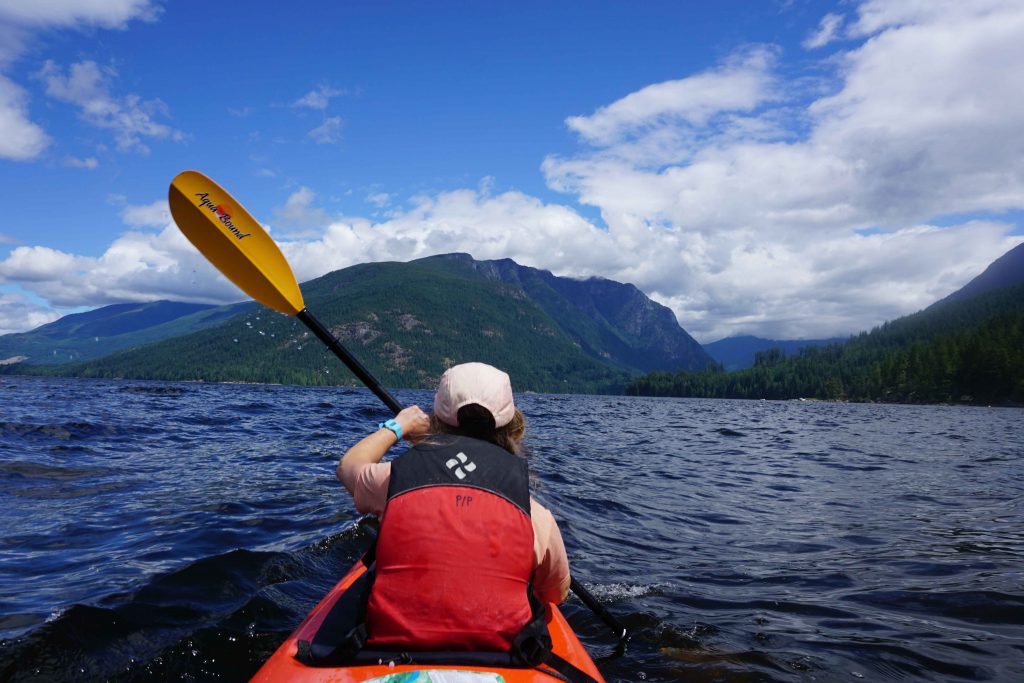
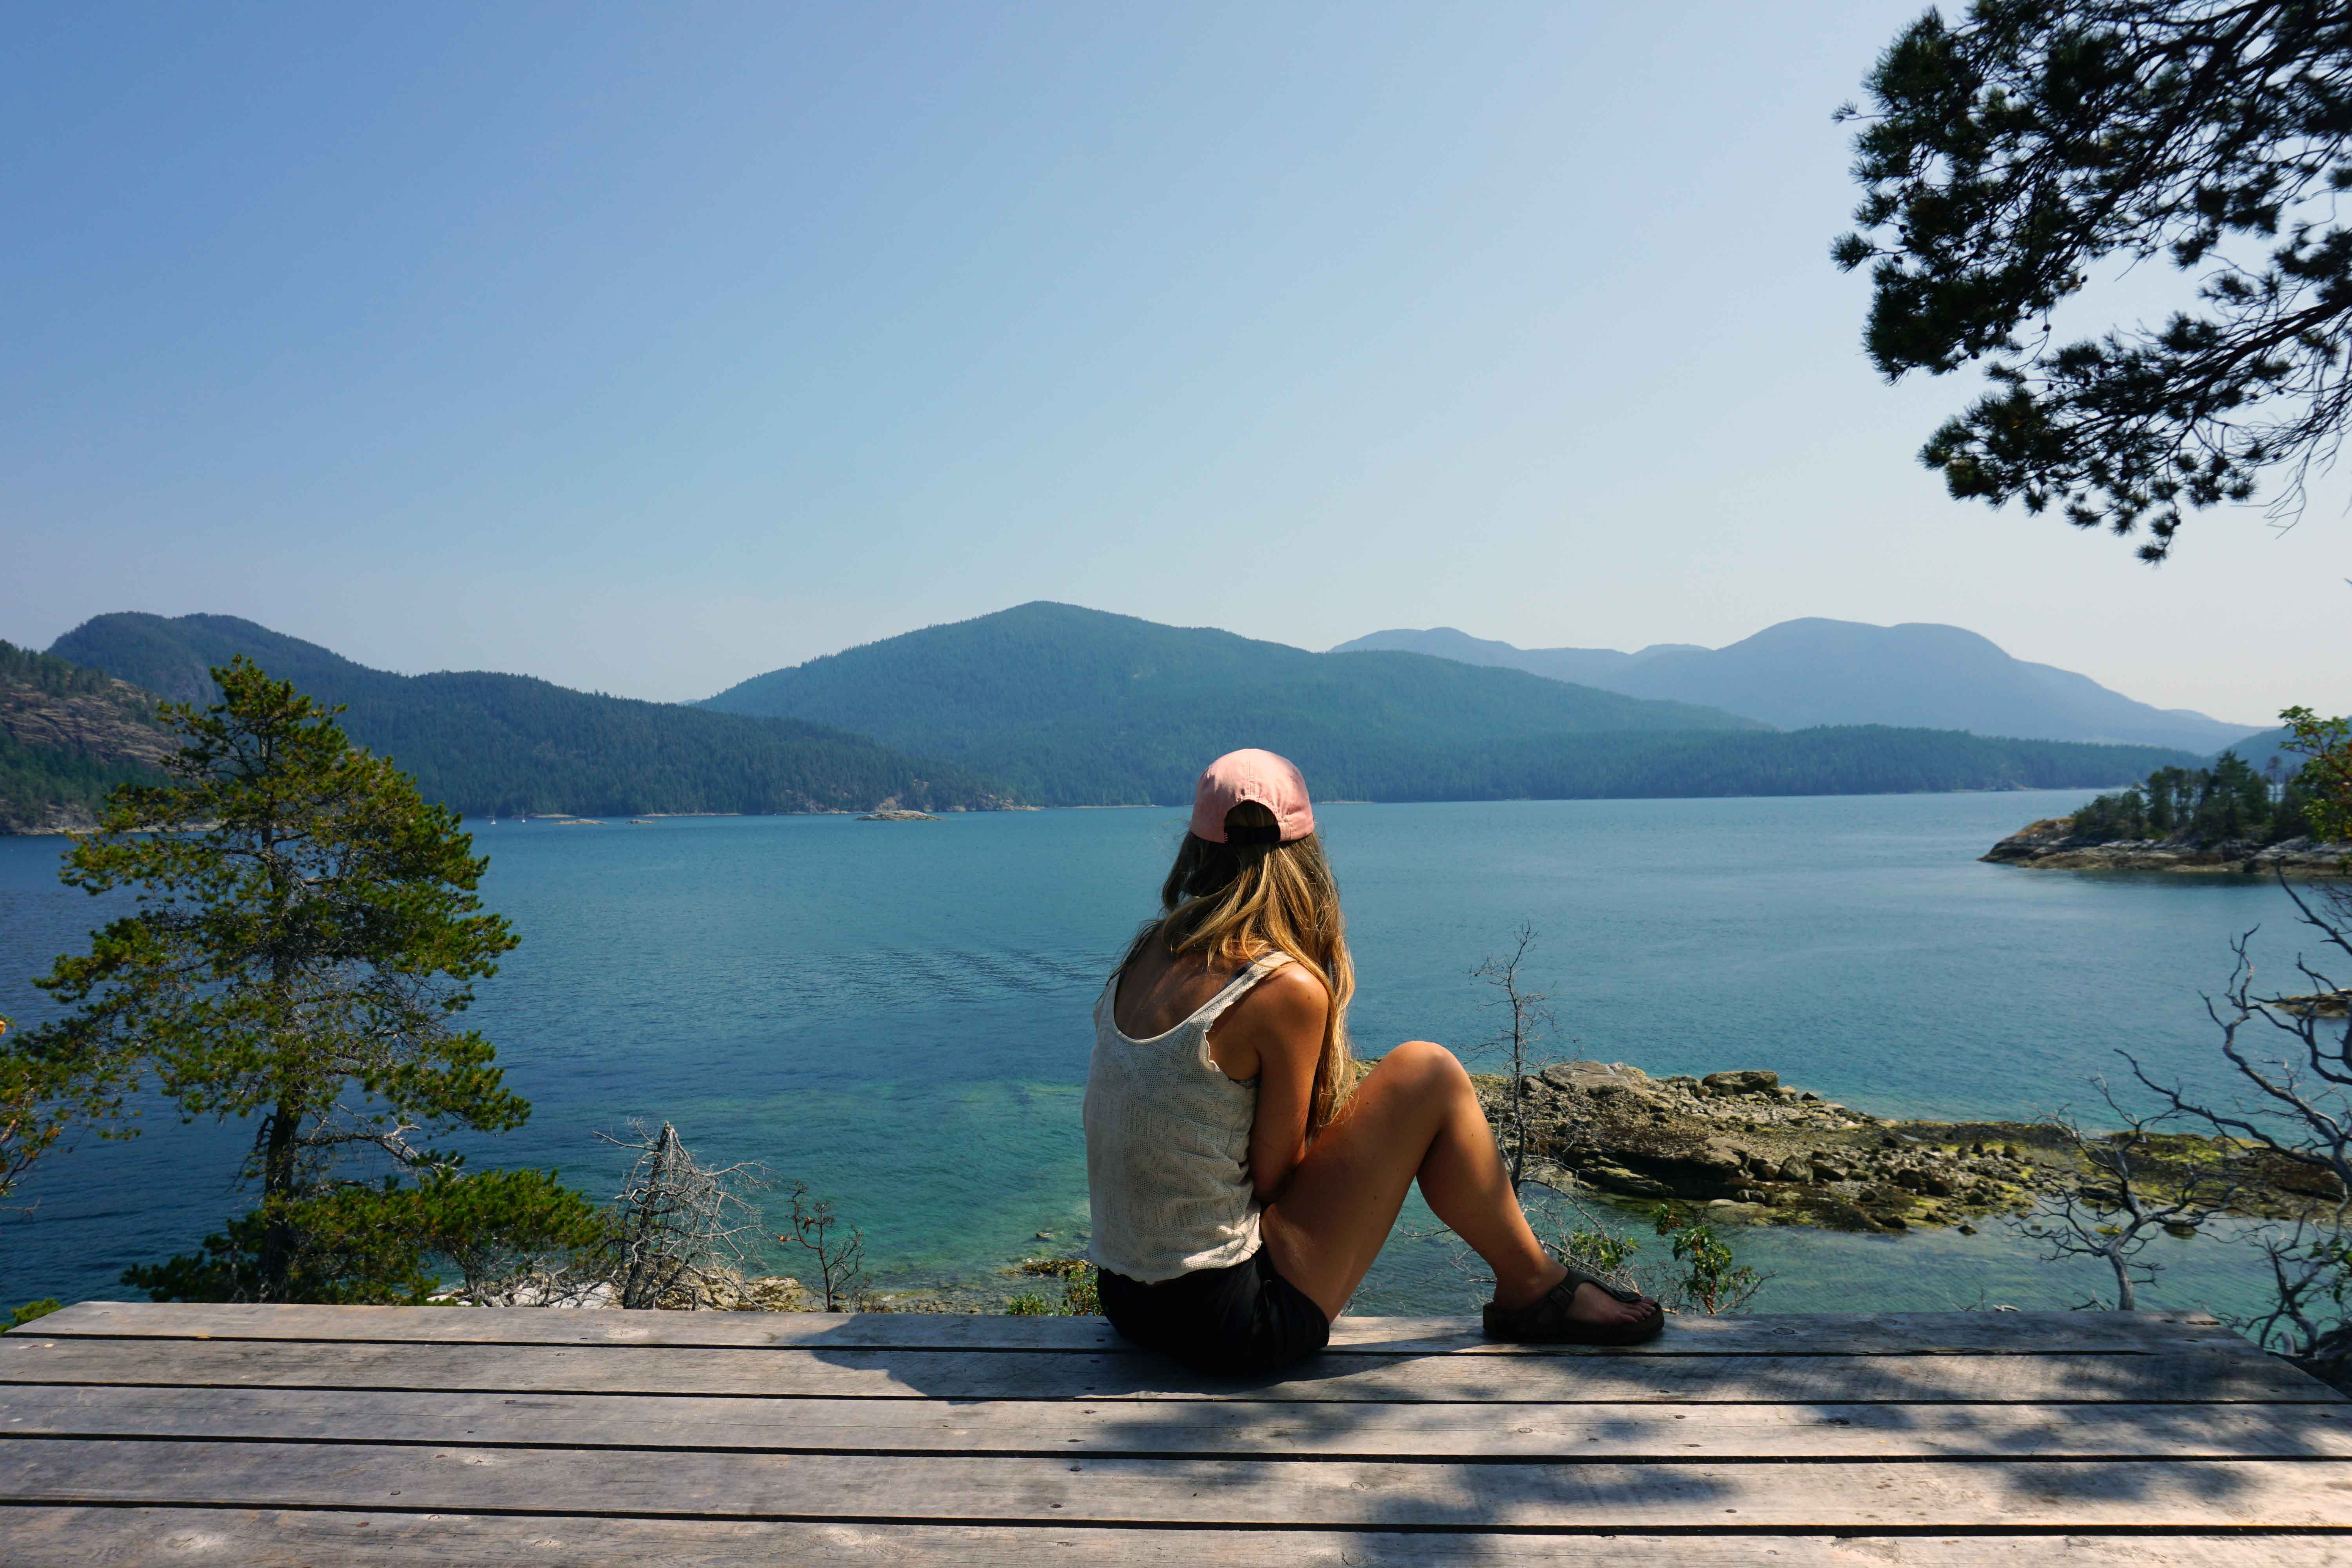
Tip #12: Be ready for weather exposure

When you’re out on the water, you’re fully exposed to the elements. Sun, rain, wind, saltwater: it’ll get you. Be prepared for this by applying lots of sunscreen and wearing a brimmed hat. Wind breakers, waterproof jackets and special kayaking gloves are also useful pieces of equipment.

Tip #13: Consider using a spray skirt

A spray skirt is something you wear around your waist. When you sit in the kayak, you then wrap it around the edges of the cockpit, sealing you in. Spray skirts are not 100% waterproof – a big wave will cause water to soak through. But they do a great job of keeping spray off the lower half of your body, which in turn can help to keep you warm and relatively dry.

If you use a spray skirt, make sure you know how to remove it, in the event of a capsize. Always keep the handle of the skirt exposed (and in front of you) for easy access.

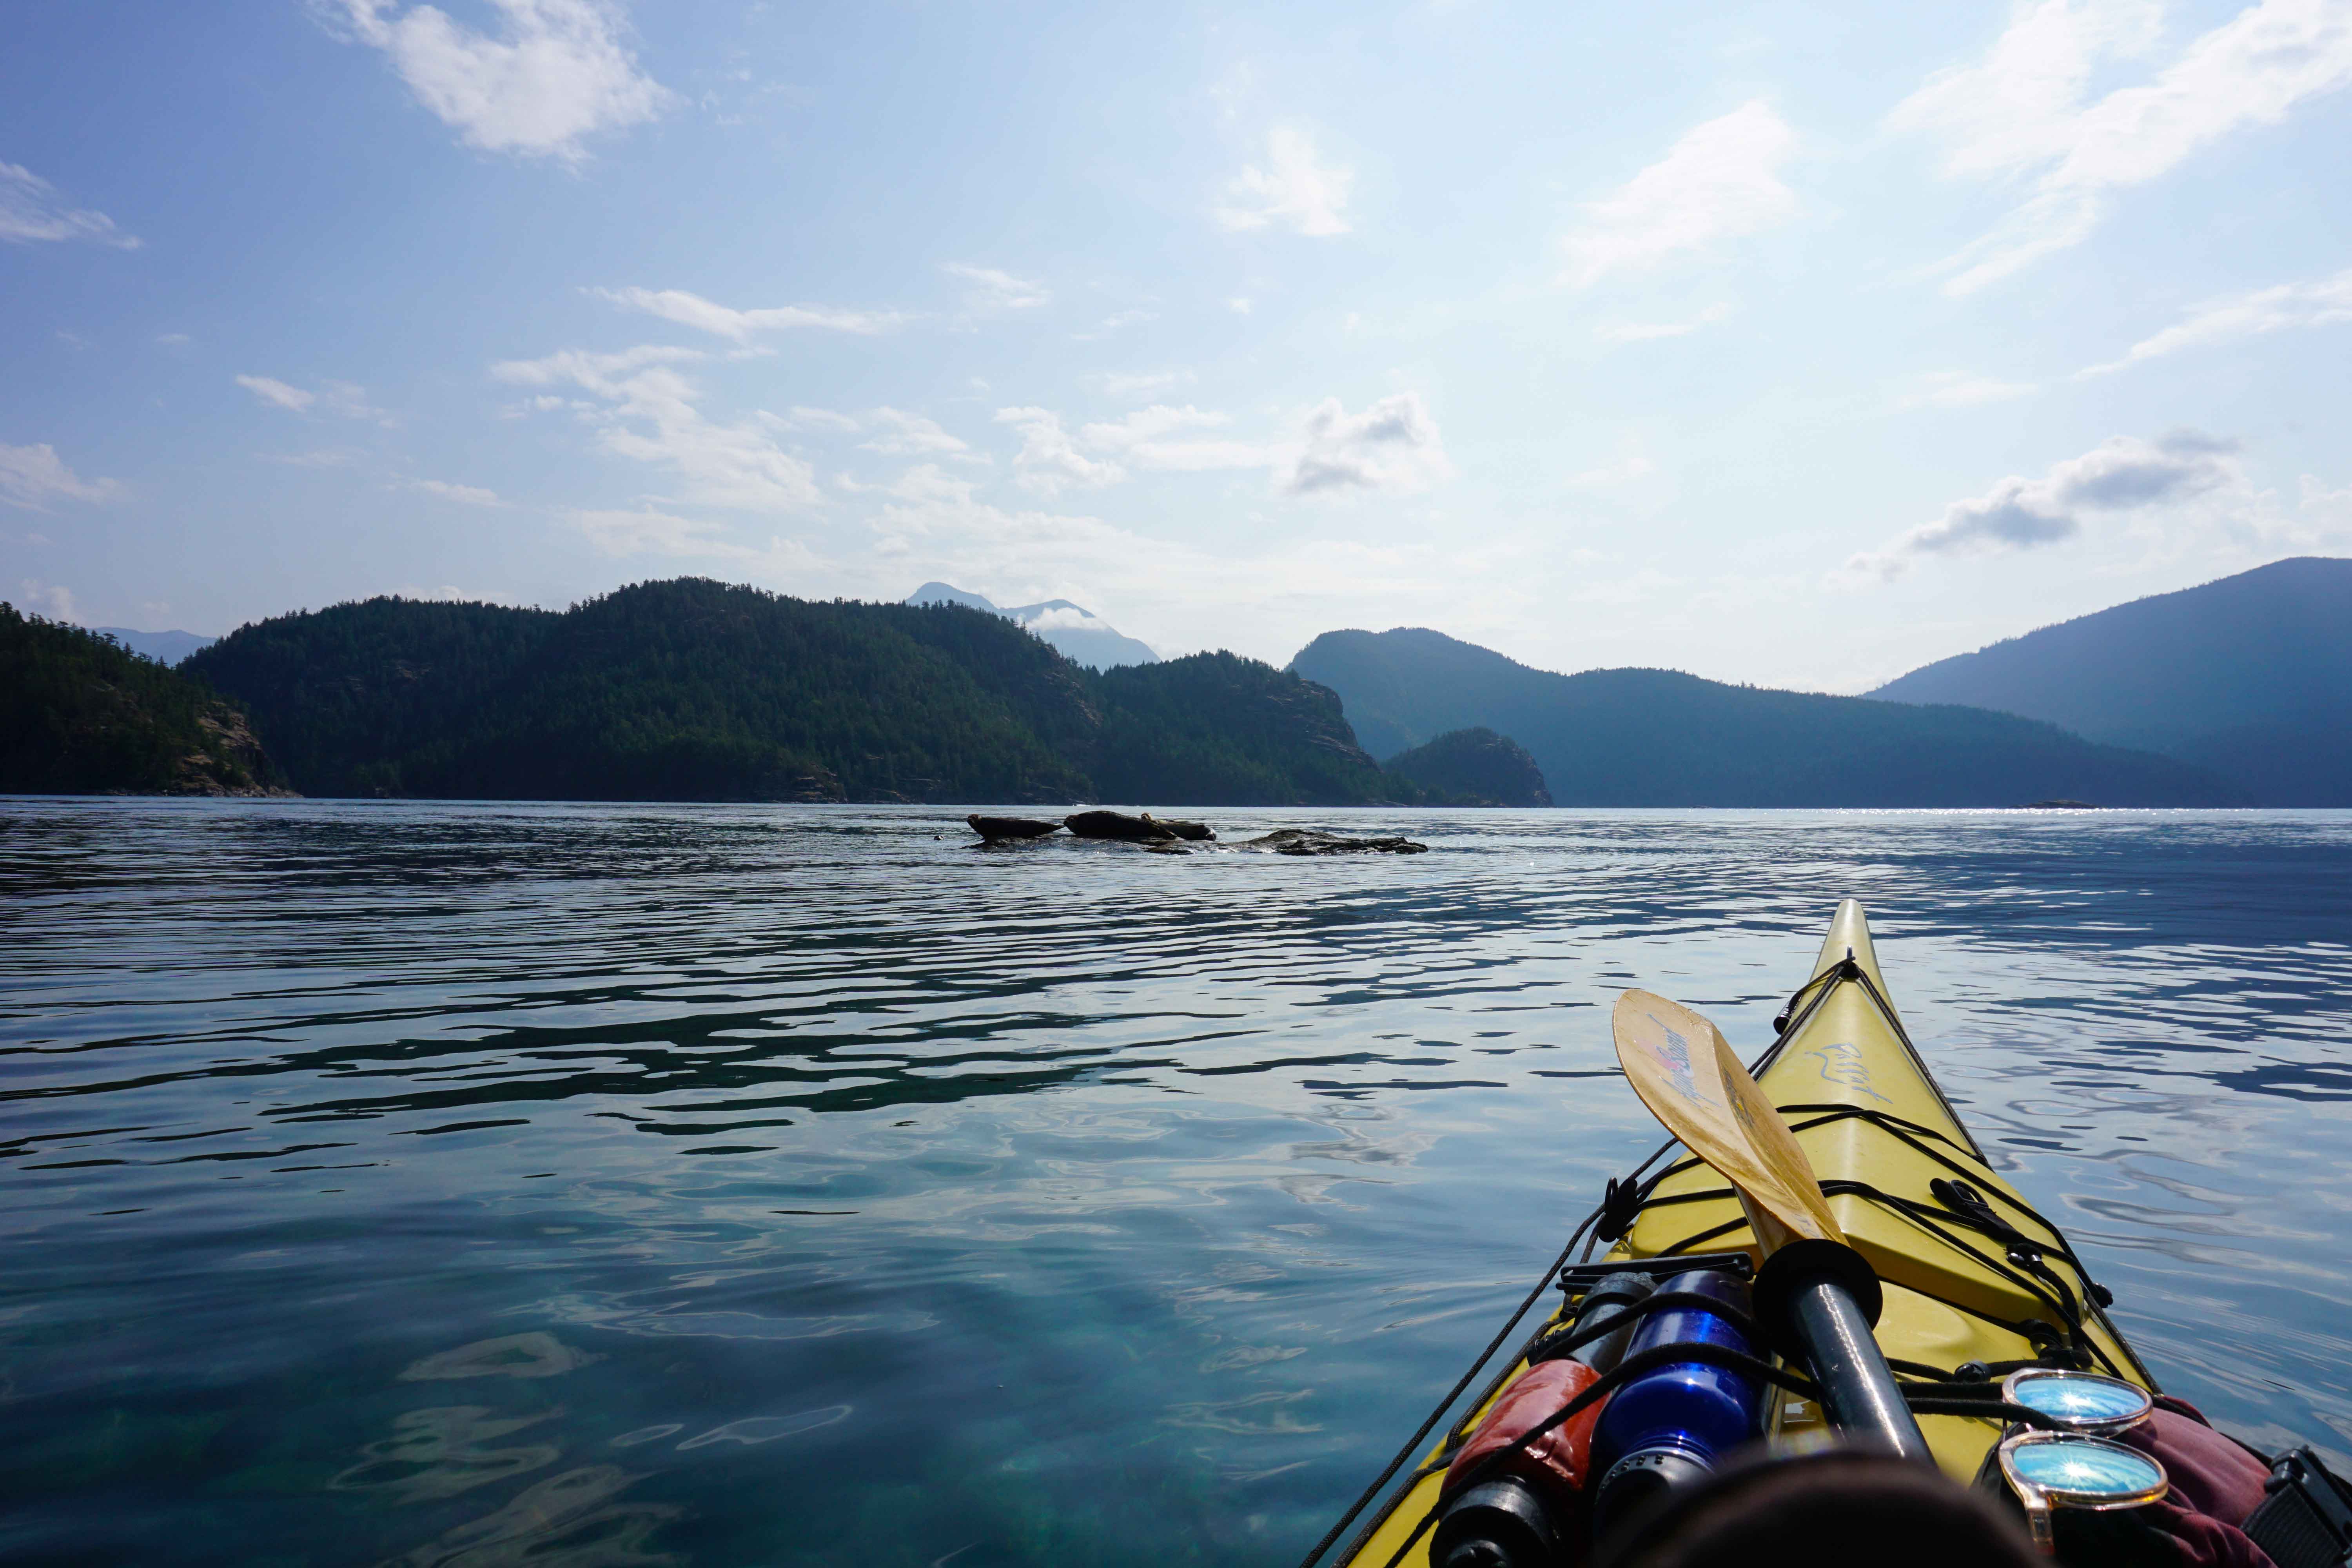
Tip #14: Stay close to shore

Paddling close to shore is almost always the safest option when sea kayaking. The currents are not as strong and you’re often better protected from the wind. Just don’t get so close that you scrape the bottom of the kayak or chip the paddle on rocks.

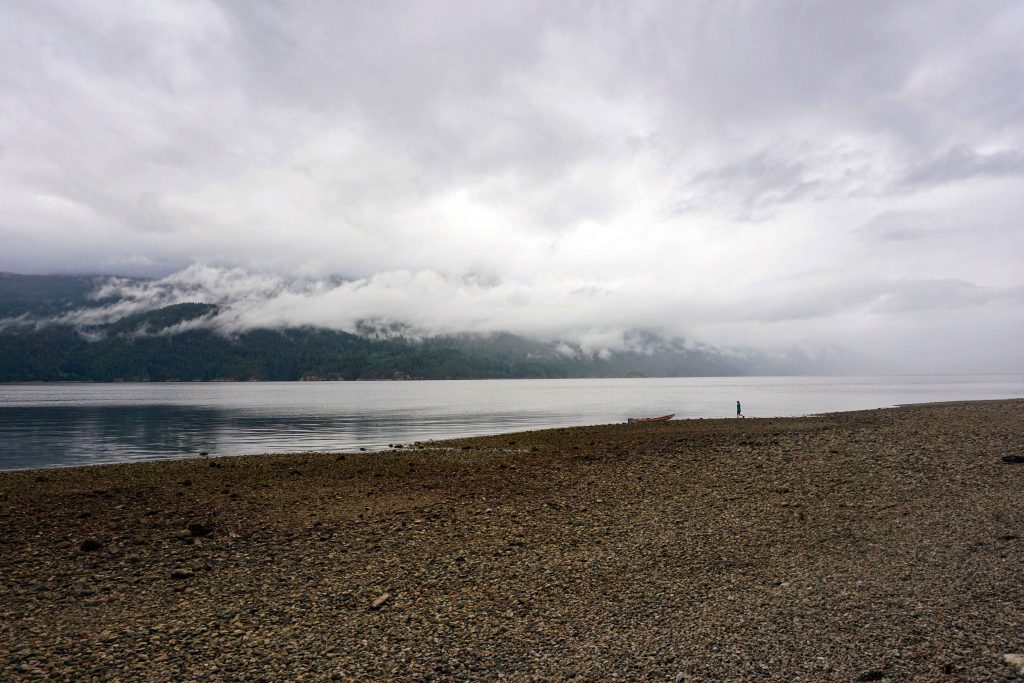
Tip #15: Store your kayak safely

Once you reach your destination, be sure to carry your kayak above the tideline. Otherwise, it will float away in the night, leaving you stranded. If possible, cover the cockpits with the spray skirts and turn the kayak upside down.

Tip #16: And finally…

Those in a single kayak (or in the back of a two/three person kayak) will have foot pedals to steer the rudder. Don’t forget to pull the rudder up when you’re approaching shallow water! And if there’s more than one person in the kayak, try to paddle in unison.

Kayaking the Sechelt Inlet

Kayaking the Sechelt Inlet

There are nine free marine access campgrounds dotted along the Sechelt Inlet and surrounding waterways, making for a great backcountry kayaking trip just a couple of hours from Vancouver.

A paddler’s paradise

The Sechelt Inlet is a prime paddling destination. The waters are fairly calm thanks to the geography of the landscape, so you’re unlikely to encounter big waves, as is often the case with sea kayaking. Wildlife watchers will be treated to sightings of bald eagles, seals and porpoises, along with a variety of marine life such as starfish and crabs. The deep blue sea gives way to treelined mountains where no roads go, making for a true backcountry experience in the wilderness.

To top it all off, there are no less than nine rustic campgrounds in the area, most of which are found on quiet, secluded beaches. They’re also completely free of charge. This means you can load up the kayak and explore at your leisure, paddling between campgrounds until your heart’s content. The first campground is just an hour from the recommended launch point, so it doesn’t matter if you have one night or one month to spare – there’s both big and small adventures to be had here.

If you’ve never done a multi-day kayak trip before, check out my blog post Kayak Camping 101 – Top Tips for Overnight Kayak Trips.

Kayaking the Sechelt Inlet
Mornings at Tzoonie Beach

What you need to know before you go

If you’re planning an overnight kayaking expedition along the Sechelt Inlet, then here’s what you need to know before you go.

When to go

The ideal time to kayak the Sechelt Inlet is between May and early September.

Getting there

The most southerly part of the Sechelt Inlet is found near the town of Sechelt on the Sunshine Coast. From Vancouver, take a ferry from Horseshoe Bay to Langdale. Head west along Highway 101 until you reach Sechelt. You will probably want to launch further up the inlet, so head north on Sechelt Inlet Road until you reach your desired destination (see below).

If you’re coming from the mainland then ferry reservations are highly recommended. Or you could always cycle, which is what I did!

If you have your own kayak/canoe

If you already have your own sea-faring vessel, then you can launch at the public beach in Tuwanek. You could also launch at Porpoise Bay Provincial Park, or the very southerly end of the Sechelt Inlet where there’s a boat ramp, but you’ll have a longer paddle to the campgrounds.

If you don’t have your own kayak/canoe

If you don’t have a sea kayak or canoe to hand, then don’t worry: you can rent one from Paddles and Pedals near Tuwanek. This is a family-run operation and they are used to catering for overnight trips.

Kayaking the Sechelt Inlet
Paddling from Tuwanek in the evening

The route

The beauty of the Sechelt Inlet is that you can choose your own route, depending on how much time and paddle power you have. There are campgrounds on both the easterly shore (which is probably where you’ll launch) and the westerly shore (meaning you’ll have to cross the inlet to reach them). There are also additional campgrounds along the Salmon Inlet and the Narrows Inlet.

The campgrounds appear in the following order, going from south to north:

  1. Piper Point (western shore)
  2. Tuwanek Beach (eastern shore)
  3. Skaiakos Beach (western shore)
  4. Oyster Beach (eastern shore)
  5. 9 Mile Beach (eastern shore)
  6. Halfway Beach (western shore)
  7. Kunechin Point (where the Sechelt Inlet meets the Salmon Inlet)
  8. Thornhill Beach (Salmon Inlet)
  9. Tzoonie Beach (Narrows Inlet)
Kayaking the Sechelt Inlet
9 Mile Beach

My two night itinerary

I had two nights so launched from Peddles and Paddles at 5pm on a Friday evening and headed straight for 9 Mile Beach. I confess that I was in a double kayak with my partner, who is a strong kayaker. The journey took us just over an hour, but this won’t be true for everyone. 9 Mile Beach is a long, stony beach which gives way to a dense forest. It was cloudy when we visited, but the sunsets are supposed to be excellent. Campsites can be found both on the beach and further back in the forest. There’s an outhouse and a large creek, although water collected for drinking must be boiled and treated first.

Kayaking the Sechelt Inlet
Camp at 9 Mile Beach

In the morning, we packed up and paddled all the way to Tzoonie Beach. The going was much harder at this end of the inlet. The winds picked up and the sea became quite choppy. It took us around three hours to get there, but I was glad we made the effort. The area is incredibly beautiful and has a remote, peaceful atmosphere. There’s an outhouse, a bear cache and a creek in the forest – it’s not all that easy to find, but it is there!

Kayaking the Sechelt Inlet
Things got a little bit choppier

On Sunday we packed up early to make the most of the calm seas. The winds are known to blow up the Sechelt Inlet in a northerly direction, particularly in the afternoons. We didn’t want to be caught going against a headwind. Thankfully the sea was like a mill-pond and we made good time. We knew we were safe when we reached Tuwanek Beach, so we stopped there for lunch and a swim before returning the kayak to Peddles and Paddles. Tuwanek Beach is a picture-perfect beach, complete with lapping clear waters and arbutus trees.

Tuwanek Beach while kayaking the Sechelt Inlet
Tuwanek Beach

Facilities at the campgrounds

The campgrounds are rustic, so you won’t find any filtered water or flushing toilets. I’ve outlined what facilities you can expect to find at each one, as it’s not consistent across the board. They are all free of charge and are marine access only, so you cannot reach them in a car.

Piper Point

  • Beach
  • Space for two to three tents
  • One pit toilet
  • One fire ring and fires permitted below high tide line
  • A creek

Tuwanek Beach

  • Beach
  • Space for four to five tents
  • One pit toilet
  • One fire pit
  • A creek

Skaiakos Beach

  • Zero facilities, but camping is permitted

Oyster Beach

  • Beach
  • Space for three to four tents
  • One pit toilet
  • One fire pit
  • Two creeks (one large, one small)

9 Mile Beach

  • Large beach
  • Space for 10+ tents
  • One pit toilet
  • Two fire rings
  • A creek

Halfway Beach

  • Beach
  • Space for 10 to 15 tents
  • One pit toilet
  • One fire ring
  • A creek

Kunechin Point

  • No beach
  • Two tent pads located on a stony outcrop, with space for four more tents located around the point at Kunechin Bay
  • One pit toilet
  • Campfires are not permitted on the point
  • No water source
  • Susceptible to strong winds coming down from the Salmon Inlet

Thornhill Beach

  • No beach
  • Space for two tents
  • One pit toilet
  • A creek
  • Hard to reach due to strong winds coming down from the Salmon Inlet

Tzoonie Beach

  • Stony beach
  • Space for up to 10 tents
  • One pit toilet
  • One fire ring
  • A bear cache
  • A creek, although it’s hard to find
Kayaking the Sechelt Inlet
Camp at Tzoonie Beach

Drinking water

Water collected from the creeks and streams must be boiled and/or treated before consumption.

Safety

Kayaking comes with its own set of dangers, especially sea kayaking. Always wear a life jacket and know what to do in the event of a capsize. Paddling close to the coastline is always a good idea, especially if it’s windy. The water tends to be calmer in the mornings and evenings.

It’s not recommended that you venture to Thornhill Beach unless you are an experienced kayaker, as the winds can be very strong down the Salmon Inlet. Also, don’t paddle past the entrance to the Narrows Inlet. If you do, you’ll end up in the Skookumchuk Narrows, which has a series of powerful rapids and whirlpools.

Did You Like This Post? Save it for Later!

Kayaks landed on East Curme Island

Kayaking in Desolation Sound

We’ve been paddling for two and a half hours. My arms are heavy. My nose prickles under the midday sun, and I quietly wonder how much further we’ve got left.

We’ve already navigated our double kayak through the quiet waters of the Okeover Inlet and now Desolation Sound Marine Park stretches ahead of us. There are more than 6,350 acres of shoreline and water here, and now the winds have picked up, it’s become much choppier.

As waves break against the kayak and soak my lap, I become increasingly fearful of capsizing. To distract myself, I keep my eyes fixed on the view. We’re encased by layer upon layer of tree-clad mountains, each with their own hue. It’s quintessentially Canadian, and it’s nothing short of stunning.

But here’s the thing about sea kayaking – you don’t move very fast. The view can remain the same for hour upon hour, and after a while, your eyes start to play tricks on you.

And that’s when I saw it. Or did I?

A black fin, poking through the water.

“Orca!” I yell.

“Walker?” my boyfriend politely enquires, pandering to my habit of pointing out every man, bird or beast in the vicinity.

“Fin!” I shout. Apparently, I can only muster one word at a time when I’m excited.

“No”, he replies, “no chance!”

And then it breaches. And so does a second. It’s a mother and her calf.

“Whales!” I squeal. Now he believes me.

We immediately stop paddling and sit in silence, hardly breathing, worried that even a whisper will prompt them to dive under. They swim past us, just 30 metres away, gliding through the water in perfect unison.

Then they are gone, back to the watery depths. The entire episode lasts less than a minute, but the memory will stay with me for a lifetime. It’s only the second time I’ve ever seen an orca in the wild, and it’s my first sighting from a kayak.

We were later told by the folks at Powell River Sea Kayak, from whom we had rented our sea-going vessels, that we were incredibly fortunate to have seen orcas. Although they’re not unheard of in Desolation Sound, it’s by no means an everyday occurrence.

After waiting another five minutes to make absolutely certain they wouldn’t resurface nearby, we continued on our way. By now the fatigue had miraculously vanished, only to be replaced by frenzied chatter, toothy grins and a rapid paddling pace.

Kayaking with seals

The seals on their rocky perch

We made short work of the remainder of the journey and soon reached our destination: the Curmes Islands.

If we thought the day couldn’t get any better, we were wrong. This tiny cluster of islands is more akin to the Mediterranean than the Pacific Northwest. Warm azure waters lap gently against rocky outcrops, scraggly trees sprout from scorched earth, and the vast seascape is punctuated by countless uninhabited islands.

Those wishing to spend the night here must purchase a backcountry permit in advance, and due to the delicate nature of the ecosystem, are asked only to camp on the tent pads provided.

Consequently, the next 30 minutes are spent running around like breathless maniacs, deciding precisely which spot would be the best. Despite being warned the Curmes Islands would be busy, there are few other people here, and the choice is ours. In reality, the exercise is futile, as the view from each wooden platform is jaw-dropping.

Woman looks out over Desolation Sound Marine Park

A wooden tent pad on East Curme Island

Once camp is finally set up and the kayak has been hauled above the tideline (which was much, much higher than anticipated), the activity is suddenly over. Now there’s nothing left to do but indulge in our Robinson Crusoe fantasies. The rest of the day is spent swimming, fishing and just sitting and watching.

I follow the exploits of the nearby seals whose rocky perch becomes increasingly smaller as the tide rises, only to disappear completely – much to their annoyance. I watch the sail boats motor lazily on by. And I track the progress of the blistering hot sun, until it finally dips below the horizon, causing reds and purples to bleed like ink across the sky.

Days later, when I’m back in Vancouver, the presenter of the TV show I’m watching poses the question – ‘who gets to live in paradise?’

I did, I think. Just for a night.

Kayaking up a fjord

Overnight Kayak Trip Up the Indian Arm

Just a 30-minute drive from Downtown Vancouver is the southerly most reach of the Indian Arm, an 18km-long fjord lined with snow-capped peaks, beautiful waterfalls and three different (and entirely free) campsites. This makes it the perfect location for an overnight kayaking trip, especially for first-timers or those who don’t want to stray too far from the city.

What you’ll need

If this is one expedition that you’re keen to try, then the first port of call is, of course, to find yourself a sea-going vessel. If you don’t own one yourself, or you don’t have a friend you can tap up, there are plenty of kayak rentals to be found around Vancouver. Mountain Equipment Co-op is one option, as is Deep Cove Canoe and Kayak.

The latter is certainly the more expensive choice, but it’s also the most convenient. You’ll find this small but extremely busy outfit at the end of the Indian Arm, making it the ideal spot from which to launch. They’ll provide you with a life jacket, some safety equipment and a brief explanation as to what to do, should you capsize. After that, you’re on your own.

While you won’t want to carry too heavy a load (it’s more work, after all), it’s useful to know that the kayaks provided by Deep Cove Canoe and Kayak are surprisingly spacious. The double kayaks boast three separate storage compartments, which although watertight, can get a little damp. Packing your belongings (or at least your clothes) in a dry bag is therefore a good idea.

Seeing as the campsites are free, you don’t need to bring cash. But you will need to bring everything else, as there are no showers, food supplies or potable water at any point along the way. But be sure to pack out what you pack in, as there isn’t a garbage collection service. Oh, and campfires are absolutely prohibited year-round, so leave the firewood at home.

The outbound journey

Once you’re afloat on the water, be ready to develop neck ache as you ogle at the jaw-dropping real estate that immediately greets you on the western shore. In fact, human habitation can be found the length of the Indian Arm. You might think this disappointing (or even comforting), but it’s also somewhat deceptive, as you’re actually within touching distance of BC backcountry.

With Mount Seymour Provincial Park on one side and Say Nuth Kaw Yum Provincial Park on the other, you’re encased by dense forest and towering mountains. As you glide past, keep an eye out for bald eagles soaring up above and black bears roaming through the trees. In the water itself you can expect seals, sea otters and a variety of fish, including salmon.

Woman sits on top tower

Spying for sea otters

After about 45 minutes of paddling you’ll stumble upon a smattering of tiny islands, the first of which is Jug Island, followed by Raccoon Island, and finally Twin Islands. You can stop at any of these for a rest and a swim, and camping is permitted at the most northerly of the Twin Islands, making it the closest campsite to Deep Cove.

If you choose to continue along the Indian Arm then you’ll pass two gothic looking buildings on the eastern shore. These are the Buntzen Lake Power Houses, which were originally built in the 1900s. They are still owned by BC Hydro so you can’t land here, but it’s fun to paddle past and peer into the eerie edifices.

From here the shoreline becomes less populated, and you finally feel like you’re entering the wilderness. Unfortunately if you visit during a warm weekend, then your dreams of peace and solitude will likely be shattered by the numerous sailing boats, power boats and revelers who also enjoy these waters.

Even so, no one can detract from the beauty of your surroundings. Of particular note is Silver Falls on the western shore. Partially hidden behind the foliage, this waterfall plunges down into the ocean with incredible force. But unless you’re an experienced paddler, be sure not to get too close, as the currents at the foot of the falls can be tricky to navigate.

A little further on is the second campsite, known to some as Berg’s Landing and to others as Bishop Creek. Located opposite Croker Island, there aren’t any camping platforms, but you’ll find large grassy areas to pitch a tent. This site is certainly quieter than its neighbour at Granite Falls, but there are more bear sightings here, so be bear aware.

As you round the corner of Croker Island, the most northerly point of Indian Arm finally comes into view. Here you’ll see the Wigwam Inn, which is privately owned by the Royal Vancouver Yacht Club. In the distant reaches is the estuary, where the Indian River meets the sea. And then there’s Granite Falls, which for many is their desired resting place for the night.

Kayaking on the sea

Kayaking up the Indian Arm

Camping on the Indian Arm

As the name suggests, Granite Falls is a torrent of water that cascades down over a huge slab of granite. It’s a spectacular sight, and there’s a great little plunge pool at the base which makes for a very refreshing swim on a hot day. As far as facilities go, there are a few tent pads, as well as more rustic set-ups beyond the outhouses.

If you plan on camping here, land your kayak on the beach by the lighthouse and pull it above the tideline. Then go bag yourself a spot, preferably not too close to the waterfall, or the wind could carry the spray straight to your door. If you find the campsite to be full or too busy for your liking (which does happen!) you can always retreat back to Berg’s Landing.

Woman stands in front of water cascading down granite rockface

Granite Falls

The return journey

When you’re ready to return to civilisation, take note that strong headwinds can rip through the valley, making it hard going on the way home. This is particularly true during warmer weather thanks to a phenomenon known as anabatic winds, although storms are also a risk during winter. Typically, it takes paddlers between three and five hours one way.

Conditions are generally calmer during the morning, and the tide times can also make a huge difference to the amount of manpower needed to get from A to B. That’s why no matter where you’re kayaking in the world, be sure to plan your trip according to the conditions and the tides. And always take life jackets, rope for towing and a bilge pump.

Kayaking in Vancouver

If you’re still a little nervous about the prospect of venturing across the ocean for an overnight kayak trip, you can always try a guided tour first, or ask a professional for advice. With the right planning and knowledge, it is a great experience and one you’re sure not to forget in a hurry – in spite of the blistered hands!

Did You Like This Post? Save it For Later!

Man fishes at sunrise on East Curme Island

Road Tripping on the Northern Sunshine Coast

The northern Sunshine Coast has everything you could ask for – whether you want to hurl yourself down mountain bike trails at Duck Lake or relax on Savary Island’s white sandy beaches, there’s something for everyone.

After spending five fun-filled days there, some friends asked if I would share my itinerary with them. I thought I’d share it here too, just in case anyone is planning a trip to this spectacular corner of the world. However, a word of warning – we crammed as many activities as possible into the little time we had. For a more chilled approach, you may want to pick and choose or spend longer at each destination.

Happy travels!

Day 1 – Inland Lake Provincial Park

Firstly, we had to get to the southern Sunshine Coast, so we drove from Vancouver to Horseshoe Bay, where we boarded the ferry bound for Langdale. Reservations are highly recommended in the summer months. We then continued from Langdale to the second ferry at Earl’s Cove, the cost of which is included in your ticket. You can’t reserve this ferry, so it’s a case of turning up and hoping for the best.

When we arrived at Saltery Bay we headed to Inland Lake Provincial Park, where I’d made an online reservation for the campsite. At the time of writing, it’s $18 per party, per night.

We had planned to mountain bike at Duck Lake first, and you can rent bikes at Suncoast Cycles if you need. However, we were a little behind schedule, so we bypassed this and went straight to the campsite.

After pitching our tents, we set off to explore the 13km walkway around the lake. There were three of us and we only had two bikes, so we took it in turns to run/cycle around, stopping at frequent intervals for a swim. The water’s lovely and warm and there are some small beaches to relax on.

Man stands on wooden platform in lake

Inland Lake

Day 2 – Confederation Lake

The next day we packed up our hiking bags, moved the car all of 20m to the day-use parking lot at Inland Provincial Park, and hiked up to Confederation Lake. We retraced our steps from the previous day, going around the lake for about 2km, after which there’s a sign pointing uphill to Confederation Lake.

The steep climb takes you through an old growth forest and eventually pops out on the shores of Confederation Lake. Being part of the Sunshine Coast Trail (SCT), there’s a free wooden hut that you can stay in, or you can pitch a tent. If you don’t want to stay the night, this is still a worthwhile (and do-able) day hike – not only for the exercise, but also for the gorgeous destination!

We spent the rest of the day swimming in the lake, which like Inland Lake, is balmy during the summer months. There’s an old rowing boat you can take for a spin, and we tried fishing for trout but with no success. The Vomit Vista viewpoint is just another 800m further on if you can manage it and offers lovely views of the mountains.

For a more in-depth description of the hike, read about my brief encounter with the SCT.

Three friends sit outside a wood cabin

My Swiss Family Robinson

Day 3 – Okeover Inlet

After a relaxing morning swimming and fishing at Confederation Lake, we packed up our bags and headed back down the hill to the car. We got onto Highway 101 and drove to Dinner Rock campsite near Lund. This is a free campsite by the ocean, and while it looked perfectly nice, someone advised us that a large group had been causing all sorts of noise issues and we might be better off at Okeover Arm Provincial Park instead.

Feeling that we were in need of a good night’s sleep, we duly took his advice and rocked up at the Okeover Arm Provincial Park campground. I’d not made a reservation but there was plenty of space. The park warden came around later to collect our fees, which at the time of writing is $18 per party, per night.

We spent the rest of the evening pottering around the campsite. There are some little beaches down by the inlet, all full of oyster shells. It’s an absolutely stunning spot to watch the sunset – on a warm summer’s day the sky becomes a colour palette of reds, and the surrounding mountains each turn a different shade of purple.

Couple look across sea inlet at sunset

Okeover Inlet

Day 4 – Savary Island

In the morning we drove into Lund, which is a pretty little fishing village. We parked the car in the upper hotel car park and paid at the hotel reception desk. I’d pre-booked a Lund Water Taxi to take us to Savary Island, which at the time of writing is $22 per person, $3 per bike, plus tax. We hadn’t had breakfast, so headed to the incredibly popular Nancy’s Bakery for one of her famous cinnamon bun rolls.

It takes just 15 minutes to get to Savary Island, but when you step off the boat, you feel like you’ve been magically transported to a Thai island. Think dusty unpaved roads, long stretches of white sandy beaches, and a seriously laid-back vibe that will make you reluctant to return to the mainland.

We already had two bikes, so hired a third at Savary Bike Rentals, which is a short (uphill) walk from the dock. This is definitely the best way to get around the island, although the terrain is not suitable for thin-wheeled road bikes. Cycling can also be something of a hazard, as I spent more time ogling at all the beautiful wood cabins than watching where I was going.

As you do a loop around the island, there are various little galleries and shops you can stop at. We stumbled upon one family-run business selling lemonade and ice coffees from their kitchen. After placing our order, we were duly ushered onto the deck to relax in deckchairs overlooking the ocean.

Above all else, Savary Island is known for its vast beaches and warm waters. In fact, you’ll find the warmest waters here north of Mexico. So of course, beach hopping was the main activity of the day. The tide was out (and the tides here are huge) so we couldn’t really swim, only paddle. We did discover that low-tide is also excellent for clam-picking, but alas, we weren’t equipped.

We finished off our bike tour at Riggers, the only pub on the island. It was then back to Lund where we indulged in dinner at the Boardwalk Restaurant before heading back to our camp at Okeover Arm Provincial Park.

Woman stands in sea up to her ankles

Savary Island

Day 5 – Desolation Sound

We were conveniently placed the next day for the short journey to Powell River Sea Kayak at Okeover Inlet. I’d reserved some kayaks for two days, so we got the paperwork sorted, loaded up the kayaks and launched shortly after 10am. There’s a parking lot where we left our car.

The waters along the Inlet were very calm, although things did get a little choppier as we reached the open ocean of Desolation Sound. After about 3 hours of paddling a mother orca and her calf swam past. They must have been about 30m away, which was incredible.

Read more about my experience kayaking with orcas in Desolation Sound.

Shortly after we reached the Curmes Islands and decided to occupy a couple of camping pads on East Curme Island. If you want to stay the night, you need to buy a backcountry camping permit in advance, which is $5 per person. There are tent pads and outhouses here, but nothing else. If you run out of water, you can paddle over to Unwin Lake and refill from the freshwater stream.

This is an incredibly beautiful spot overlooking Desolation Sound and we all wished we could stay for longer. In fact, the folks at Powell River Sea Kayak were surprised we had paddled so far just for a night, as most people set up base here and then explore the surrounding area for a few days. Even so, it was well worth it!

Tent pad on East Curme Island

Home for the night on East Curme Island

Day 6 – Back to Vancouver

Then it was time to go home. We kayaked back in windy conditions, hopped in the car and made the long journey back to Vancouver. You can buy your return ferry ticket at Saltery Bay.

We were all pretty exhausted, but at the same time we were chuffed to have had such an amazing road trip. It’s incredible what you can pack into such a short space of time, and it’s certainly opened my eyes to the delights of the northern Sunshine Coast. I’ll definitely be back, and am particularly keen to explore the Sunshine Coast Trail and Desolation Sound in more detail.

‘Til next time!

Did you like this post? Save it for later!