Camping in snowy conditions presents its own set of challenges – but it can be done with the right know-how. Here’s how to make your snowy camping trip a success.
Match your sleeping gear to the conditions
As with any other type of camping, you’ll need a tent, a sleeping bag and a sleeping mat. When it comes to winter camping, you need to make sure these items are equipped to deal with the conditions.
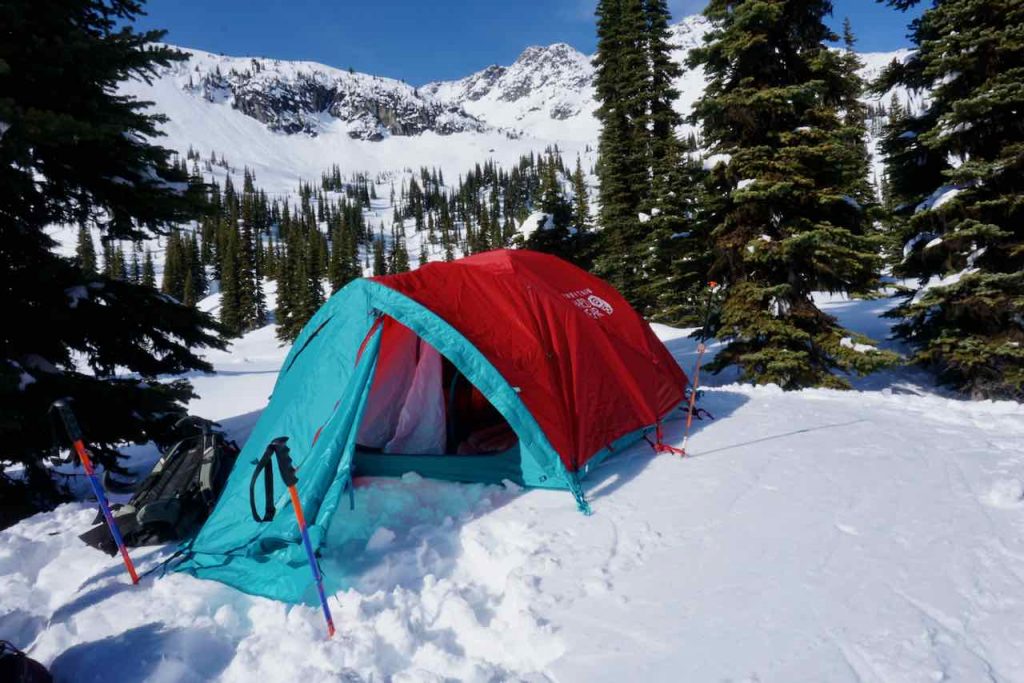
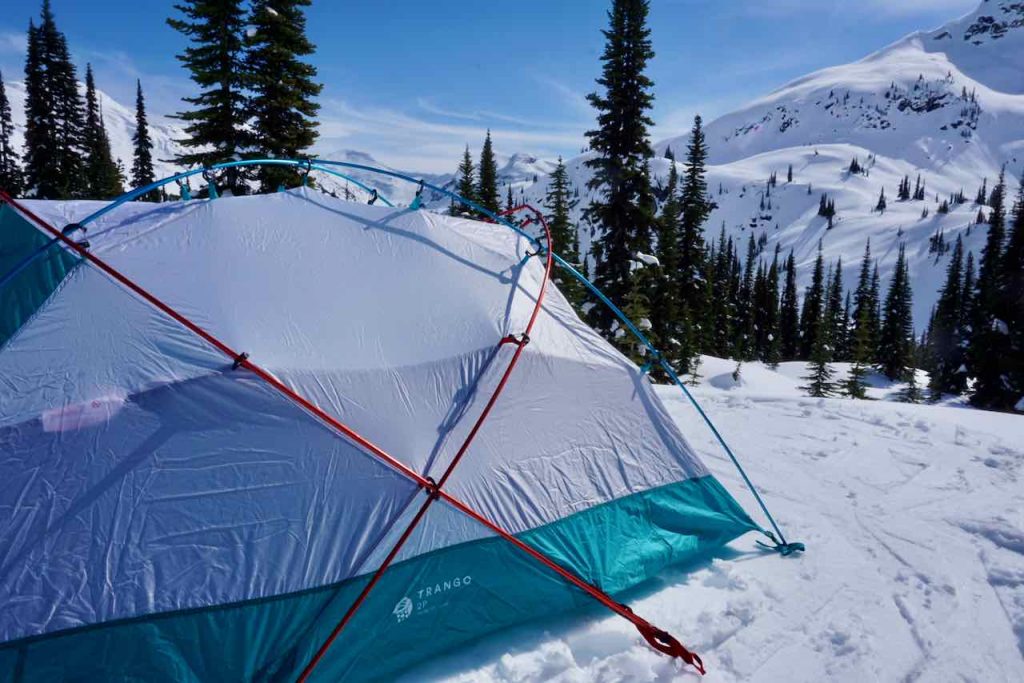
If you’re camping in mild weather and you won’t encounter much wind or snow, then a three-season tent will suffice. This is especially true if you’re camping below the treeline. Otherwise, you’ll want a four-season tent. These can handle high winds and snow loading thanks to their shape, strong poles and robust fabrics.
Sleeping bags are given temperature ratings. Your sleeping bag needs to fall well within the range of the temperatures you’ll likely experience. Like a tent, this probably means getting a four-season sleeping bag, or a three-season sleeping bag if it’s not too cold. You can also use a sleeping bag liner to up the warmth by a few degrees.
Inflatable sleeping pads are given an R-value. This denotes how well the pad’s insulation resists the transfer of heat. Camping on snow requires an R-value of 4.5 and up. Anything lower and you’ll find the cold seeps up from the ground beneath you. Placing a closed-cell foam mat under your sleeping pad, or using two sleeping pads, adds greater insulation.
Select a good site for your tent
When you reach your desired destination, take some time to find a suitable site to pitch your tent. You want somewhere that’s:
Flat
Not too exposed to the wind
Not underneath dead or decaying trees/branches
Not underneath tree branches that are heavily loaded with snow – tree bombs are a risk!
Not in an avalanche path
Pack down the snow
Pack down the snow your tent is going to sit on. The best way to do this is to stomp on it while wearing your skis, snowshoes or boots. Compact snow is more comfortable to sleep on. It also insulates heat better than loose snow.
Spread your weight evenly while you’re inside the tent. If you kneel on the floorspace of your tent – or lean on an elbow – then you’ll create a divot in the snow beneath you.
Stamp on the snow to create a hard snow pack under/around your tent
Pitch the lowest part of your tent towards the wind
If you’re in an exposed location, pitch your tent so the opening is downwind. Otherwise, when you open the zip, the wind could rush in and create a balloon. Ideally, you want the lowest and narrowest part of your tent towards the wind.
Use snow stakes
Ordinary tent stakes don’t work in snow, which is why you need to use special snow stakes. If you don’t have any, you can always bury the stake in the snow. Or you can use something to weigh down the guy lines, such as a nearby rock, log, or stuff sacks filled with snow.
Build a snow wall
For extra wind protection, build a snow wall around your tent, or at least in the direction of the prevailing winds. You’ll want a shovel to do this as it needs to be about the height of your tent. The idea is that the wind gets trapped behind the wall, rather than blasting directly into your tent.
Digging two to three feet of snow out of your tent’s vestibule space is another trick, as the cold air settles at the bottom. This has an added benefit because you can dangle your legs into the space, allowing you to sit up comfortably in the tent. If you do this, you can use the discarded snow to build a wall!
You can also pile snow on top of the snow skirt, if your tent has one. However, this can reduce ventilation inside the tent.
Create a camp kitchen
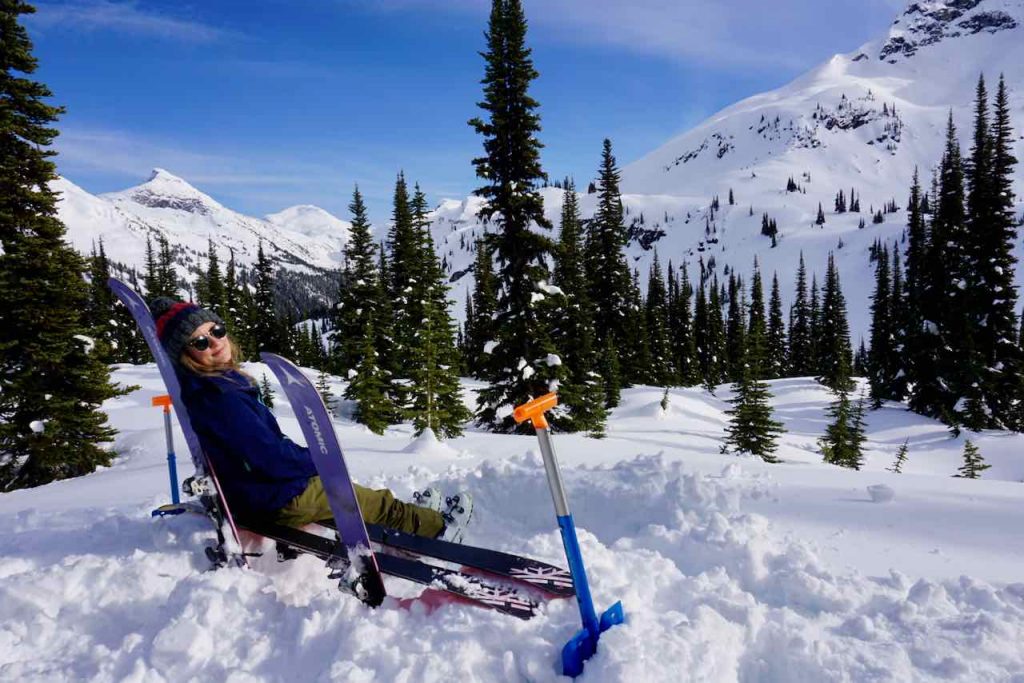
The great thing about snow is that you can use it to build tables, benches and cooking stations. Get your shovel ready to create the camp kitchen of your dreams. It’s easier to dig away the snow, leaving a perfectly formed table or bench in situ. Just remember to sit on something waterproof – and preferably insulated – to prevent your bum from getting cold and wet. A foam mat is a good example.
Consider taking camping chairs if the snow isn’t deep enough to create a camp kitchen, or you aren’t worried about travelling lightly.
A bench made of skis and snow
Use a liquid fuel stove
Butane and isobutane canisters don’t work well in cold temperatures. Instead, use a liquid fuel stove. These run on white fuel and perform much better in freezing conditions.
Melt snow for your water
Unless you take enough water for your entire trip, you’ll have to melt snow for your drinking water. Melting a big chunk of snow takes a surprisingly long time and produces a surprisingly small amount of water. Prepare for this in terms of the amount of fuel you take, and the amount of time you allocate to the task.
Get everyone in your group to pee in the same place so you don’t inadvertently collect yellow snow for drinking water.
Also remember that water can freeze in frigid conditions. Store your water inside your tent, and turn any water bottles upside (with the lid securely fasted, of course!) This is because water freezes from the top down.
Sleep with your gear in the tent, or in your sleeping bag
Bring all your gear inside the tent, aside from anything with sharp edges, such as skis, snowshoes and crampons. You really don’t want to tear the tent while camping in snow. Spread everything else out on the floor space around you. This provides more insulation from the cold ground beneath you.
Also sleep with your clothes, electronics and ski boot liners (if relevant) inside your sleeping bag. Again, this provides more insultation. It also ensures they’re nice and toasty in the morning. As for electronics, the cold zaps their power, so keeping them warm preserves the battery.
Wear layers
Wear lots of layers. Steer clear of cotton because it has poor moisture-wicking abilities, meaning it will make you very cold if it gets wet. Instead opt for clothes made out of synthetic materials, down and merino wool. Use midweight base layers, topped with warm mid layers, and a puffy down jacket. A waterproof jacket can be worn over the top to protect you again wind and snow. You’ll want a similar layering system on the bottom, with fleece long johns and waterproof pants. Finish the look with a warm hat and sunglasses/goggles.
Pay close attention to your hands and feet – they are much more likely to suffer. Keep your feet dry by using waterproof hiking boots and gaiters (if hiking/snowshoeing). Take a few pairs of socks and gloves so you can swap them out if they get damp. Hand and toe warmers can also be life savers.
Stay warm
Along with wearing layers, there are some other things you can do to keep yourself warm.
Keep active but don’t sweat. Sweat is designed to cool you down, which you don’t want in a snowy environment. Pitching your tent and creating a camp kitchen will keep the blood pumping. If you start to get chilly, do some star jumps or jog on the spot.
Remove any wet or damp clothes as soon as you arrive at your camp. Also, put your warm layers on immediately, even if you don’t feel particularly cold. You’ll soon cool down, and it’s better to trap the warm air inside your clothes while you can.
As mentioned above, the right sleep systems can go a long way in keeping you warm while winter camping. Get into your sleeping bag while you have an elevated body temperature. Sleeping bags work by trapping the warm air radiating from your body, so try doing some gentle exercises before bedding down for the night.
Pop a hot water bottle or hand warmers into your sleeping bag. Nalgene bottles work especially well as hot water bottles, and can also be used as drinking receptacles during the daytime. Slip a sock over the bottle if it’s too hot to handle. Be sure to do the lid up tightly – any leakages could scald you, and will also leave your sleeping bag sopping wet.
Eat regularly and stay hydrated. Hunger and dehydration make it hard to maintain your body temperature. Hot meals that are quick to prepare and easy to wash up are ideal.
Finally, pee when you need to (see below to find out why!)
Pee when you need to
When you need to pee, your body uses energy keeping the urine in your bladder warm – energy which could have been used keeping the rest of your body warm. So, pee when you need to. Don’t hold it in, as it’ll actually make you colder. Pee before you get into your sleeping bag. If you don’t want to get up in the night and shuffle outside into the cold, try peeing into a bottle. Ladies, there are contraptions available to help you achieve this, such as the Shewee.
Pack it out
In the absence of a toilet, you’ll be forced to do your business outside. There’s no point in burying your poop and toilet paper because it’ll just be exposed when the snow melts. That’s why Leave No Trace principles stipulate that you have to pack it out with you in snowy conditions.
Bring entertainment
If you’re camping in snow, then it’s probably winter. And in winter, the days are short and the nights are long. Getting into bed when it’s dark can mean a very early night indeed. If you’re not keen on sleeping at 4pm, remember to bring some entertainment. This could be a pack of cards, a book, a kindle, some podcasts or a journal.
The core area of Cathedral Lakes Provincial Park has two backcountry camping areas, stunning hikes and azure lakes chock full of trout. Even better, you can get a lift straight to the campground – if you’re willing to pay for it!
If you’re planning a trip to Cathedral Lakes Provincial Park, then here’s what you need to know.
Cathedral Lakes Provincial Park
Cathedral Lakes Provincial Park
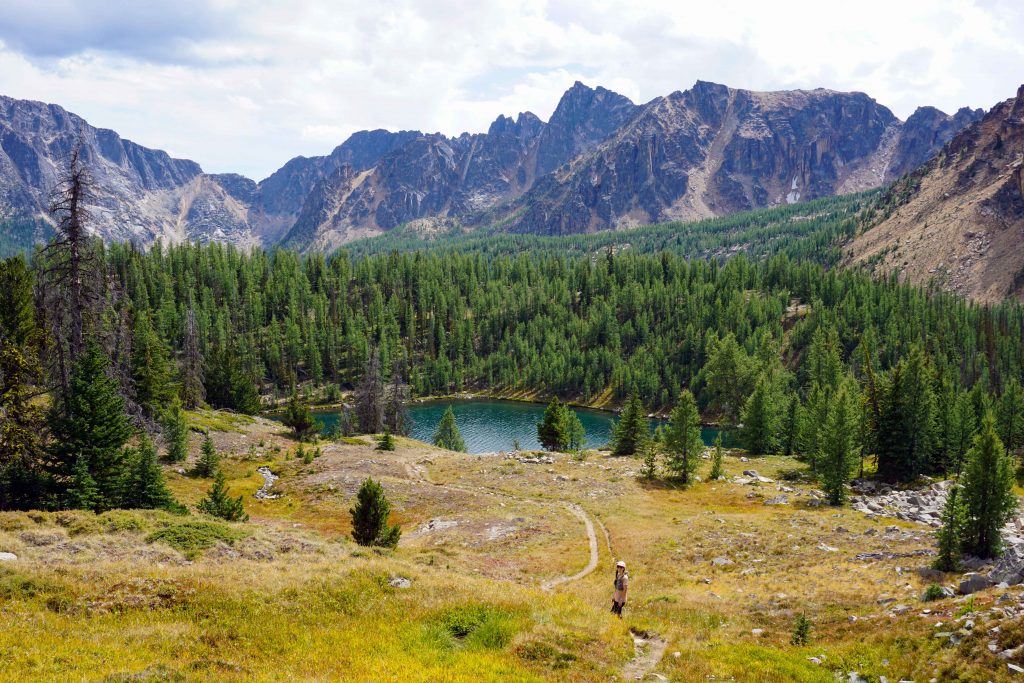
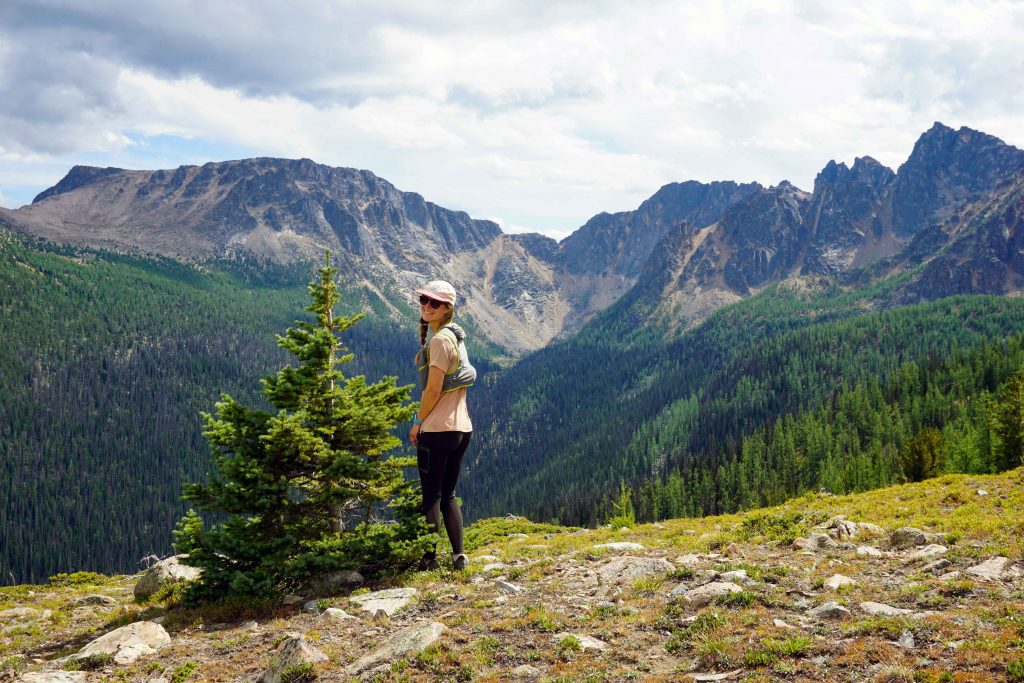
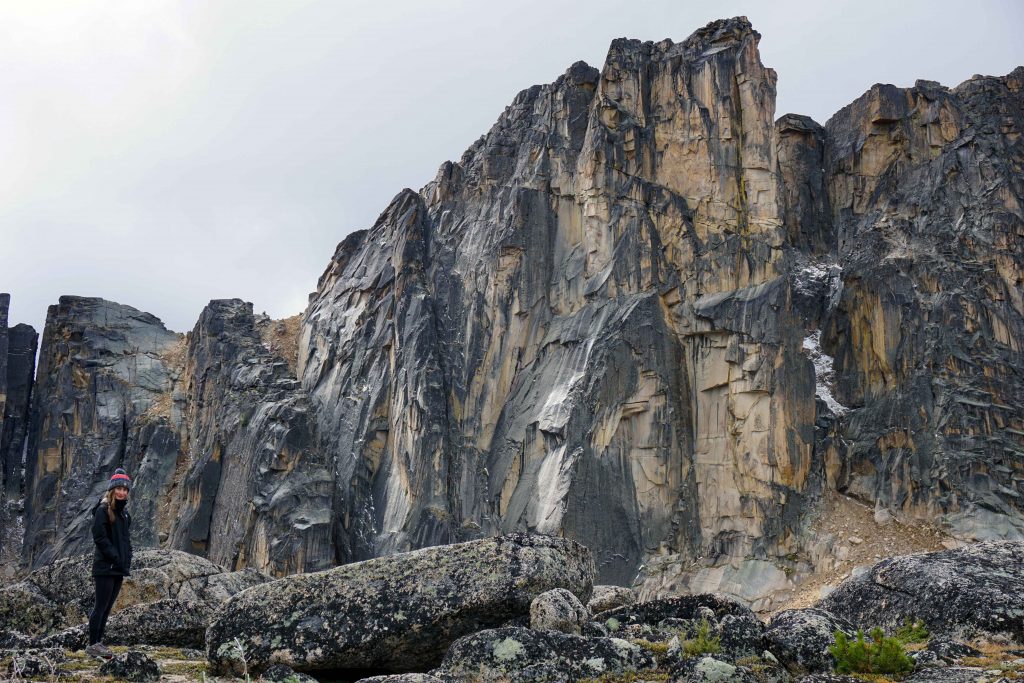
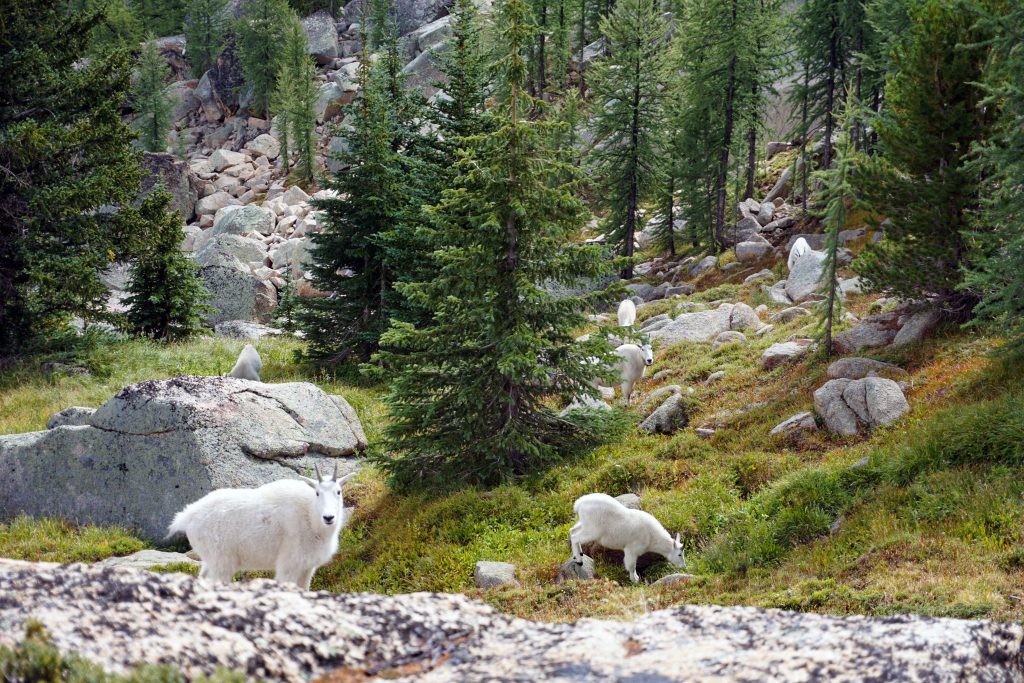
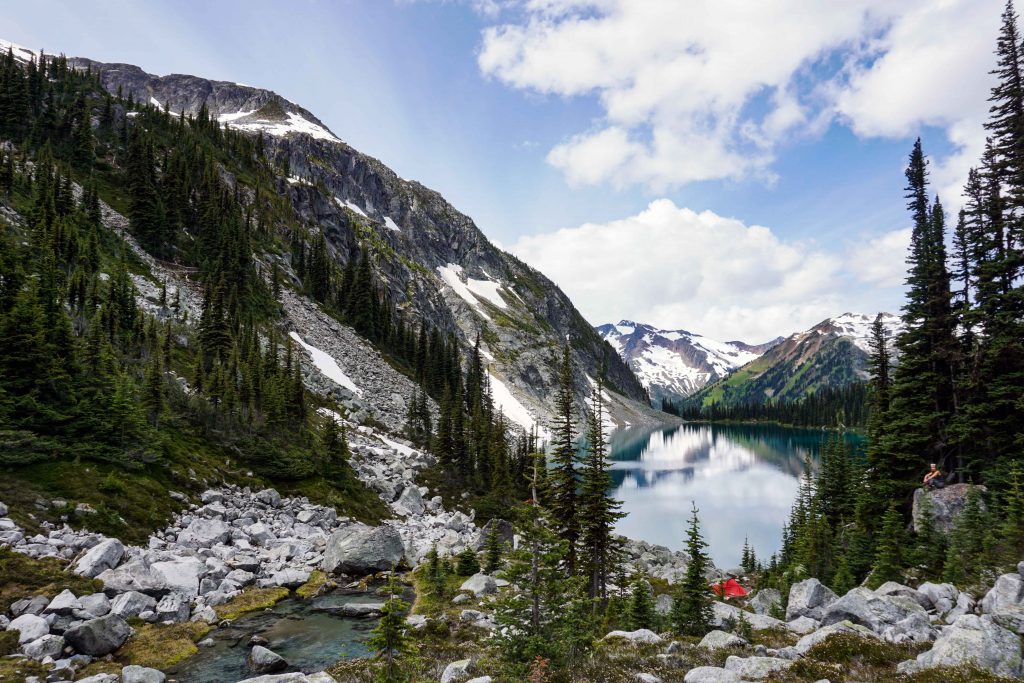
Drive east from Vancouver and the dense, wet forest eventually gives way to the desert-like Okanagan Valley. Cathedral Lakes sits just at this interchange, making it feel as though two geological worlds have collided. The impact is remarkable. The core area of Cathedral Lakes is like a checklist of everything you could want from a backcountry camping trip. Crystal clear lakes? Check. Towering mountains with unique rock formations? Yep. Wildlife viewing opportunities? For sure. In fact, the lakes are known for their trout fishing, while the park is also home to mountain goats, bighorn sheep, deer and bears.
The core area
You’ll notice that I keep mentioning the ‘core’ area. If you look at the BC Parks map, you’ll see that the park extends from the Ashnola River down to the US border. In the middle – starting at around 2,000 metres up – is the core area. Hunting is prohibited here, and it’s also where most of the good stuff is. By good stuff, I mean the campgrounds, the lakes, and some top-notch hiking trails. Oddly for a backcountry camping trip, there’s also a privately owned lodge called Cathedral Lakes Lodge. It owns the only road leading in to the core area, as well as a patch of land on which the lodge is built.
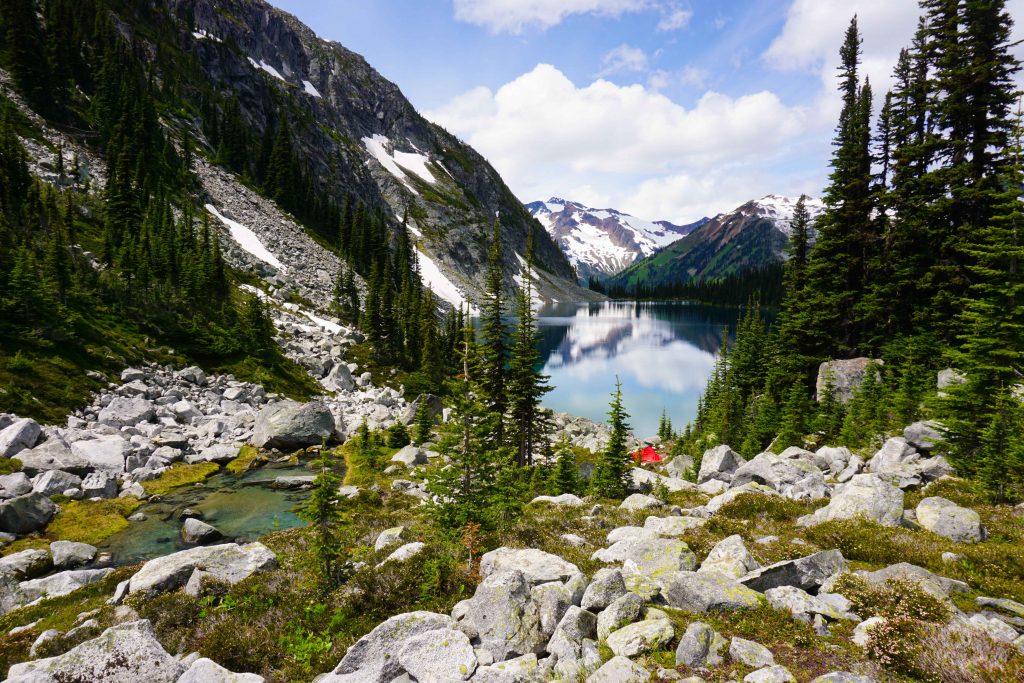
Ladyslipper Lake is in the core area of Cathedral Lakes Provincial Park
Cathedral Lakes Lodge
However, you don’t have to stay at the lodge. The campgrounds are operated by BC Parks, so you can either ignore the lodge or make use of some of their facilities (like buying food and drinks). It does have a very tempting hot tub/sauna set up, but unfortunately, this is reserved for guests. It’s quite strange to have civilisation nearby, including Wi-Fi and beer on tap. But it doesn’t necessarily detract from the experience, especially if you camp at Lake of the Woods. You can also pay the lodge to drive you into the core area, saving yourself a 16km hike. This is highly unusual for a backcountry camping trip, but it’s a welcome luxury!
Getting to the core area
But as with most things ‘luxurious’, getting the shuttle isn’t cheap. At the time of writing, a return trip for an adult is $150 plus tax. If that’s too spenny then you can hike in (for free!) I’ve not done the hike, but it’s said to be a strenuous, all-day excursion. The most direct hiking trail into the core area is the Lakeview Trail, which is 16km long and has 1,357m of vertical climbing. The other options are the Wall Creek Trail (20km) or the Ewart Creek Trail (28km, making it by far the longest route). We chose the shuttle this time, but I’d be willing to give the hike a go on the next occasion…or at least get the shuttle up and hike down!
If you take the shuttle
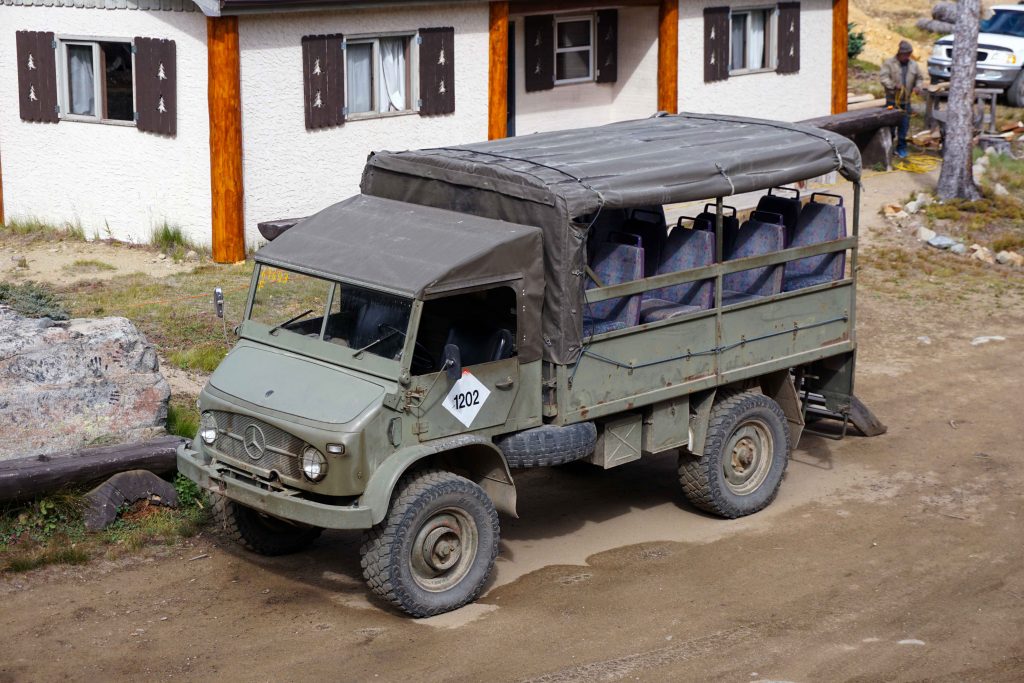
If you take the shuttle, you can expect a white-knuckle ride in either an ancient safari-style Mercedes or a decrepit Suburban. It takes about an hour along a bumpy, steep 4×4 road. If you’re in the open-sided vehicle, bear in mind that the road is dusty, so I advise sitting close to the front and wearing sunglasses and a mask/buff. Each person can bring two large items (such as a backpack and a cooler) and one small item (such as a day pack). Again, this makes for a strange backcountry camping trip, as you can take quite a lot of luggage which you don’t have to carry very far. If you prefer camping with a cooler full of beers, then this will be music to your ears.
The shuttle
Booking the shuttle
You can book the shuttle online on the Cathedral Lakes Lodge website. You can choose a one-way trip or a return trip. You start at ‘base camp’, which is the parking lot. This is a secure parking lot which remains locked, other than to allow vehicles in and out for the shuttle. This was a bonus for me as I had my mountain bike in the back of my car. The shuttle only operates during summer and autumn, with lodge operations shutting down around the beginning of October. Be wary of booking the shuttle until you know your plans: they don’t do refunds. Due to wildfires in the area, I did ask to change the dates of my trip and was given a credit.
When to visit
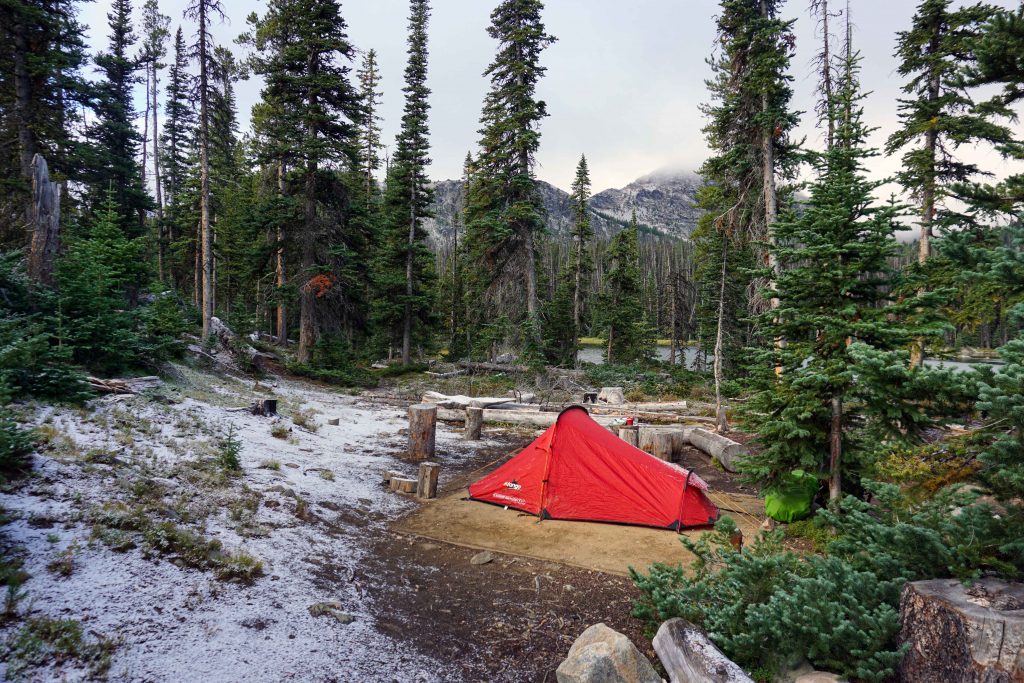
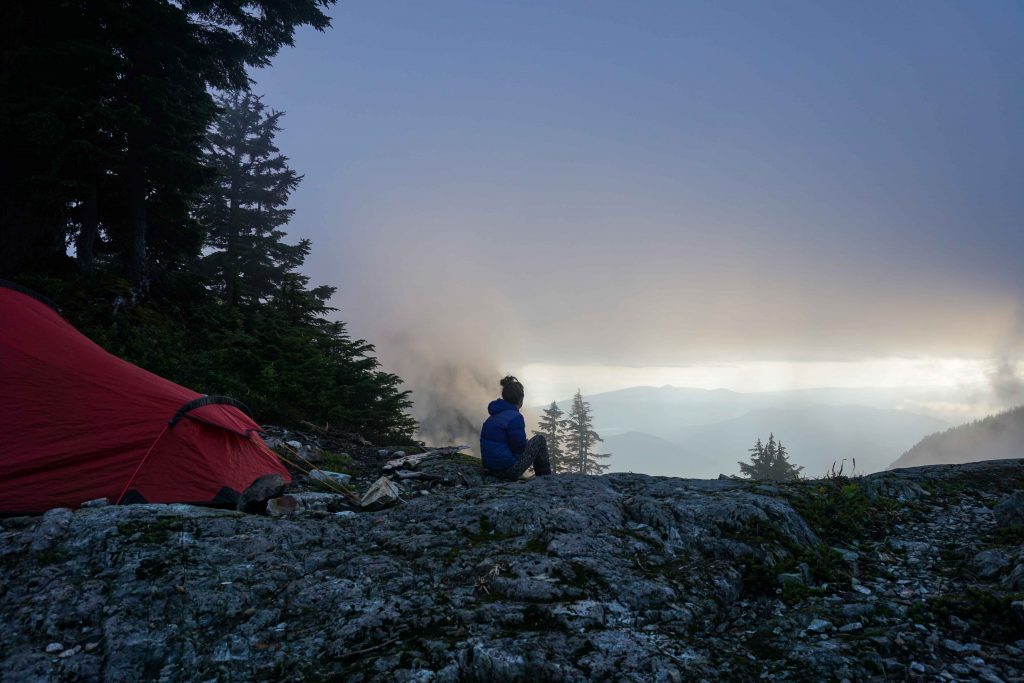
Seeing as the core area sits at 2,000m plus, the hiking season is limited from summer to early autumn. It snowed when I was there – and it was only 1 September. My jaw dropped when the ranger came around the previous evening to tell us there’d be a high of 4°c the following day. Thankfully, I never leave home without a down jacket. Still, we didn’t really feel prepared for such cold temperatures after a blistering hot summer. So, be warned! Pack warm clothes, gloves and a hat. The weather ‘at the top’ (i.e. in the core area) can be quite different to the weather in the parking lot.
Snow in August
The BC Parks website says that the campgrounds can get very full at weekends during the summer. The campsites are first-come, first-serve. To avoid the crowds, it’s better to visit during the week if you can. This is what I did and it was extremely quiet. On our second night we were the only ones at our campground. Of course, that may have been due to the fact that it snowed. If you’re willing to brave even chillier temperatures, then there are a lot of larches in the core area which turn golden during early autumn (think late September/early October).
The campgrounds
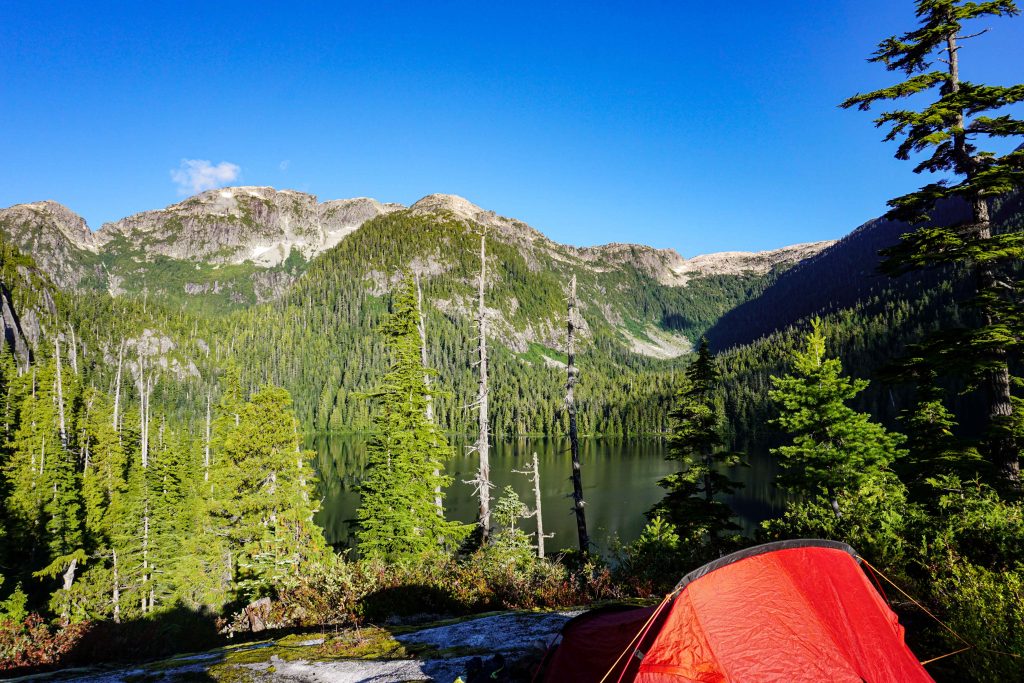
There are three backcountry campgrounds in Cathedral Lakes Provincial Park, but Pyramid Lake campground has been closed due to spruce pine beetle. Sadly, this has affected lots of trees in the park. That leaves Quiniscoe Lake and Lake of the Woods campgrounds. Quiniscoe Lake campground is closest to the lodge, so if you get the shuttle up, then you barely have to walk a few steps to find a pitch. It has bear caches and campfires are allowed. Firewood can be purchased from the park operator. Lake of the Woods is about a 15 minute walk from the shuttle drop-off, but there are no caches (only pulleys) and campfires are prohibited.
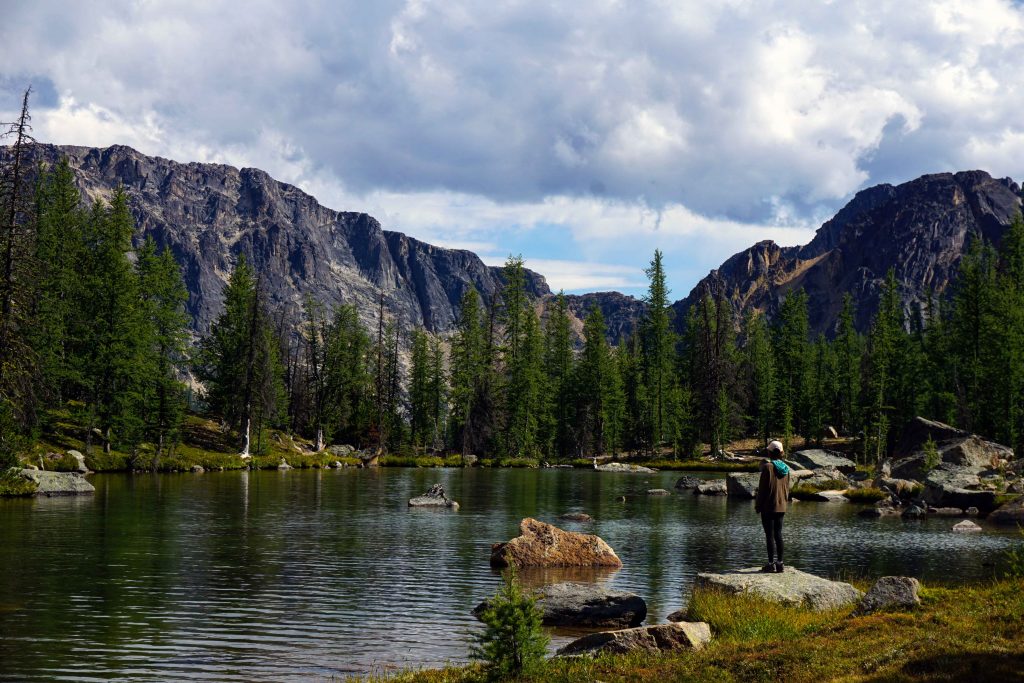
Lake of the Woods, Cathedral Lakes Provincial Park
Seeing as there was a fire ban, we opted for Lake of the Woods campground as we wanted to be further from the lodge. Personally, I think Lake of the Woods campground is prettier than Quiniscoe, with full frontal views of the mountains. But it is perhaps more exposed with greater wind chill. There are outhouses in the campgrounds which the rangers keep stocked with toilet paper. You’re asked not to pee on the ground because it attracts the mountain goats. There’s a lot of information about this in the park.
Don’t pee on the ground – the goats are attracted by the salt
Paying your fees
The backcountry campgrounds aren’t free, however. It costs $10 per night, per adult, or $5 per night, per child (between six and 15 years of age). You can either buy your permit in advance via Discover Camping. Or, you can take cash with you. There is a ranger station near the lodge, and when the ranger is on duty, he/she will do the rounds in the evening. Otherwise, there are envelopes at the information kiosk near the lodge which you can fill out and post in the adjacent letterbox. The campgrounds aren’t reservable, so paying in advance doesn’t necessarily secure you a spot.
The hiking and fishing
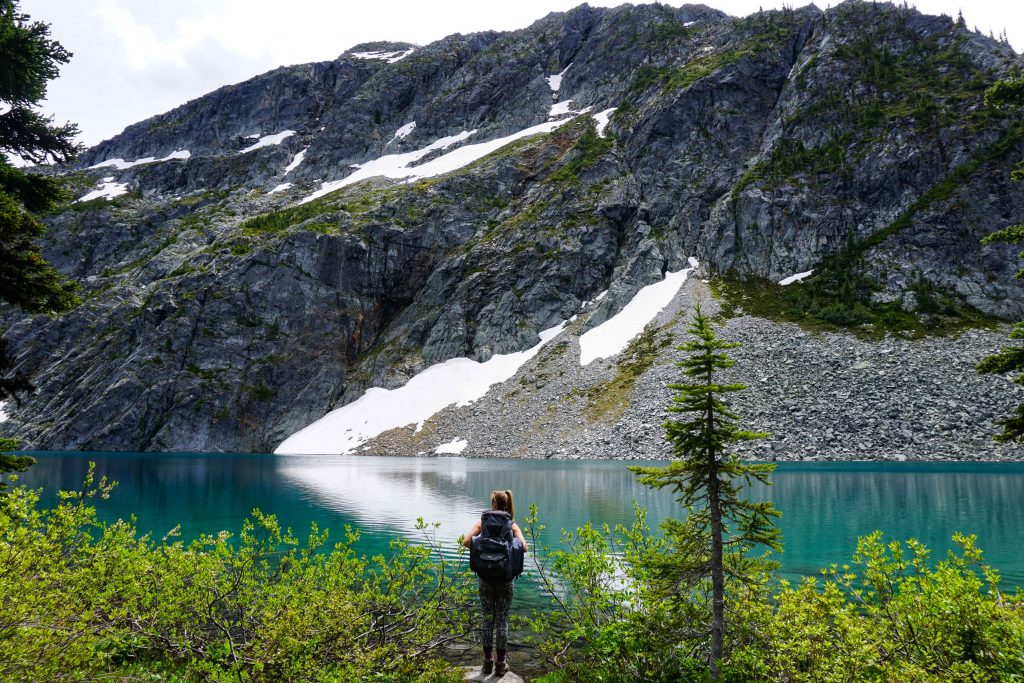
Most people who make the journey to Cathedral Lakes have one of two things on their mind: hiking or fishing.
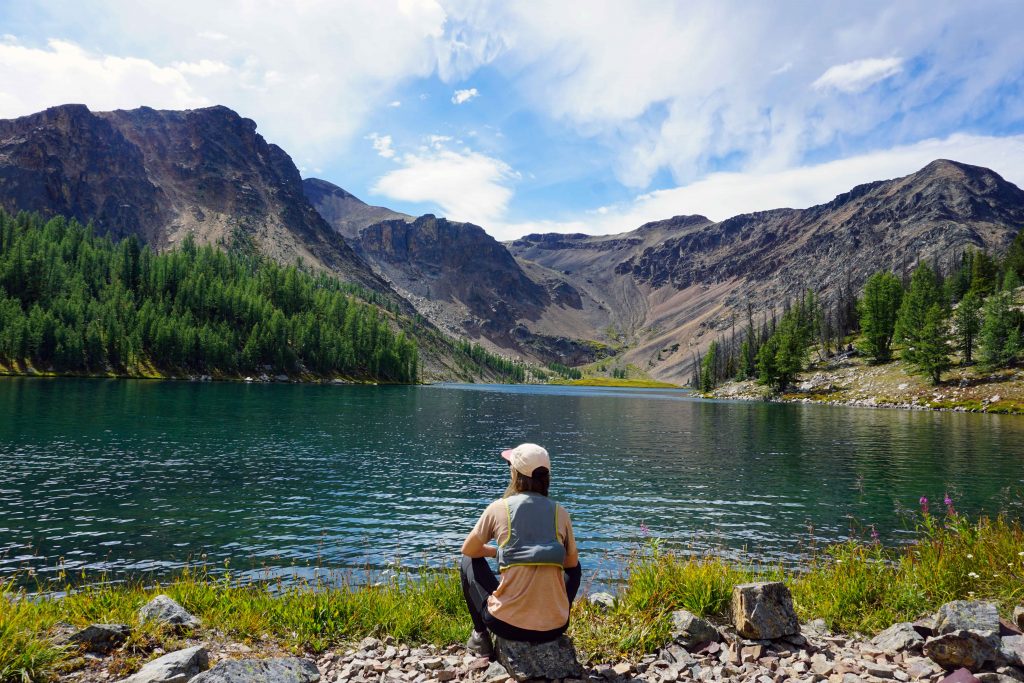
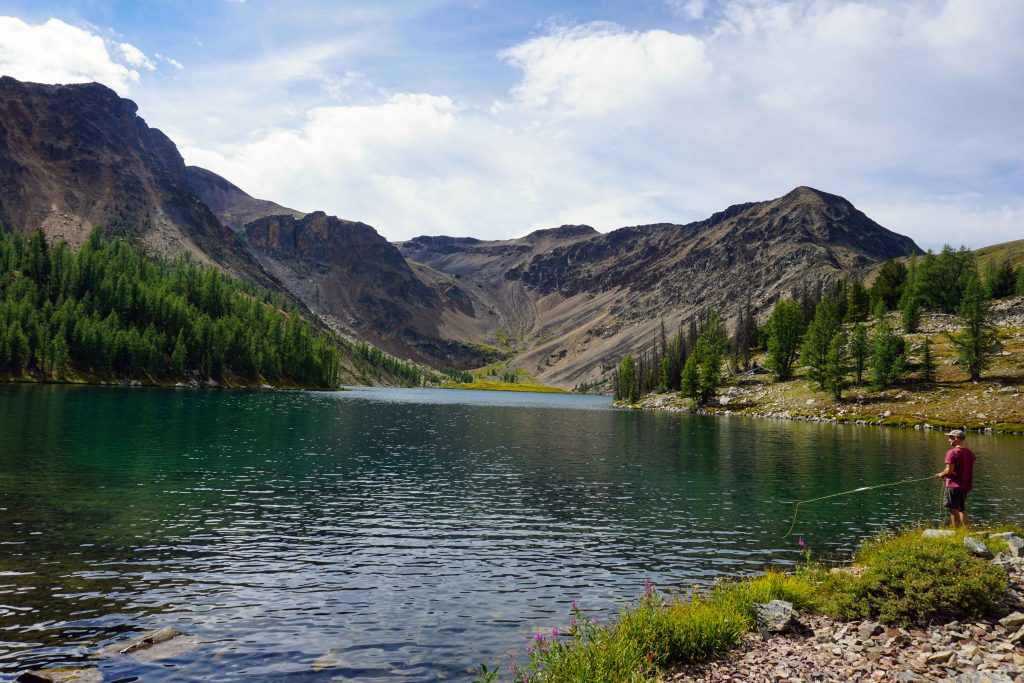
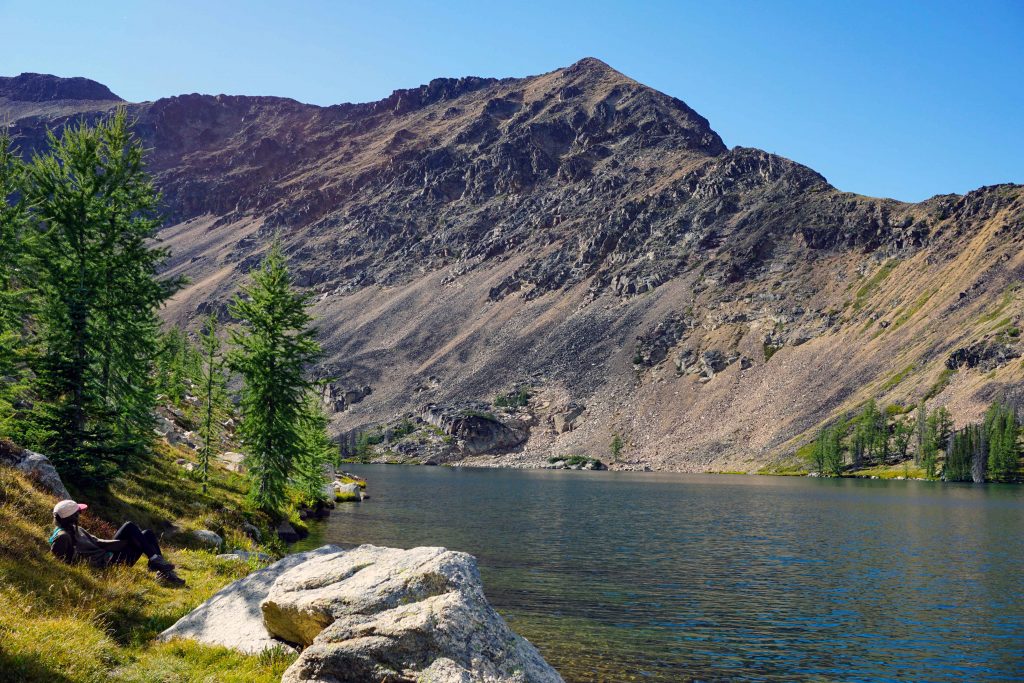
There are seven lakes in the core area. Although they haven’t been stocked for decades, they have healthy populations of both cutthroat and rainbow trout. We found Ladyslipper Lake to be especially plentiful. Remember to buy a freshwater licence if you plan to fish.
Fishing at Ladyslipper Lake, Cathedral Lakes Provincial Park
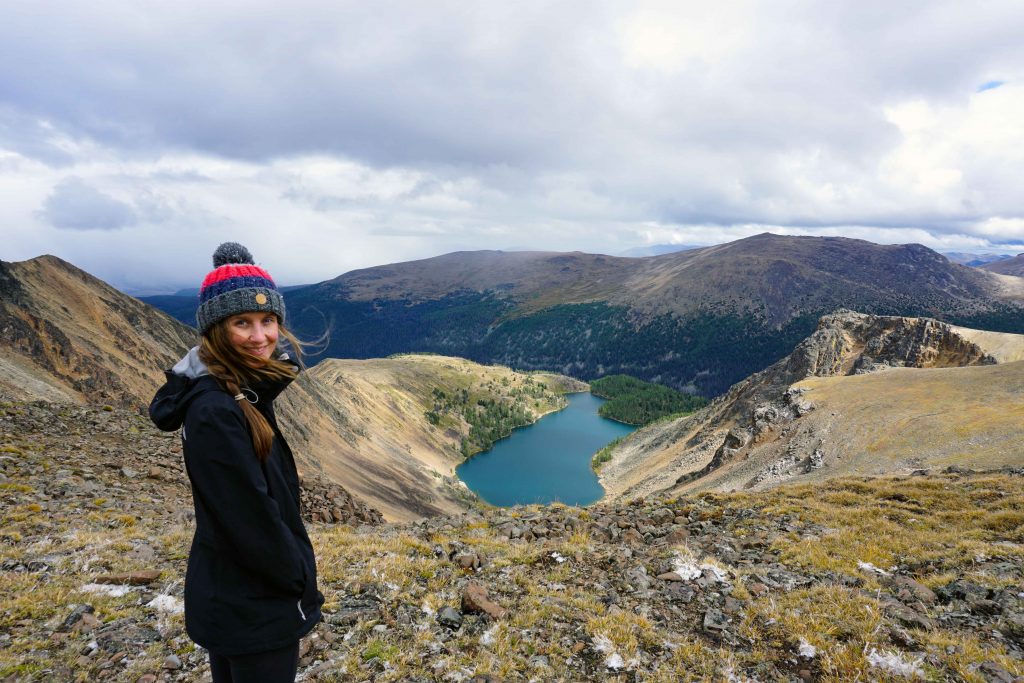
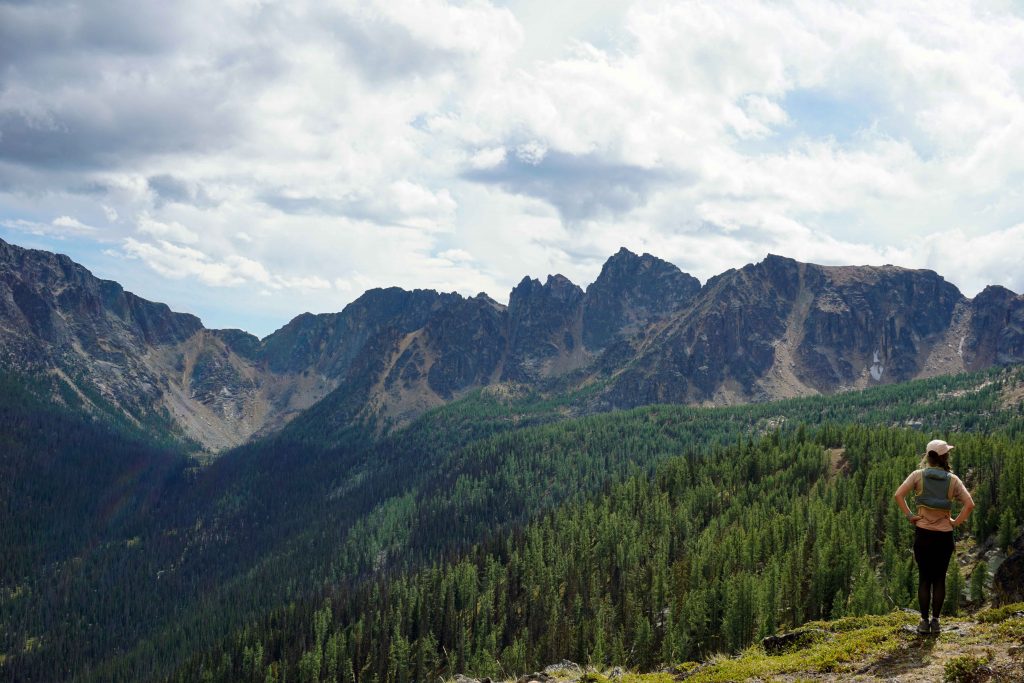
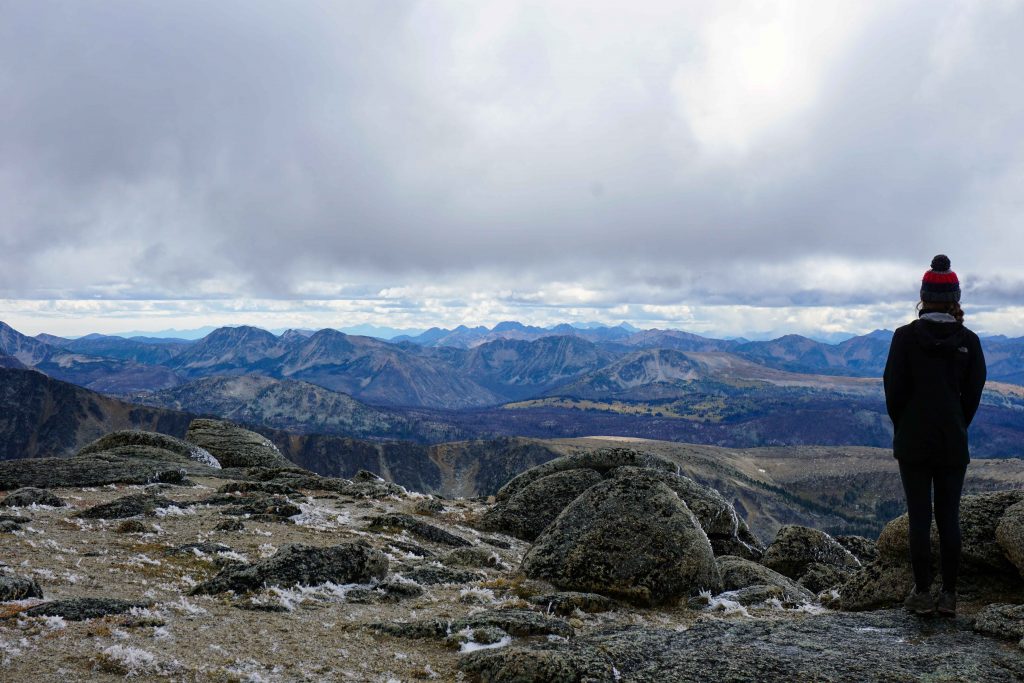
The information kiosk near the ranger station has a map of the core area, along with a description of all the hiking trails. The options range from easy loops of the lakes to full day hikes. The Rim Trail is the most popular and with good reason. The route follows a ridgeline in a sort of horseshoe shape, providing 360-degree views of the Cascade Mountains and the Okanagan Mountain Range. The rock formations are like nothing I’ve seen in Canada, and looking down on the lakes from above is really spectacular.
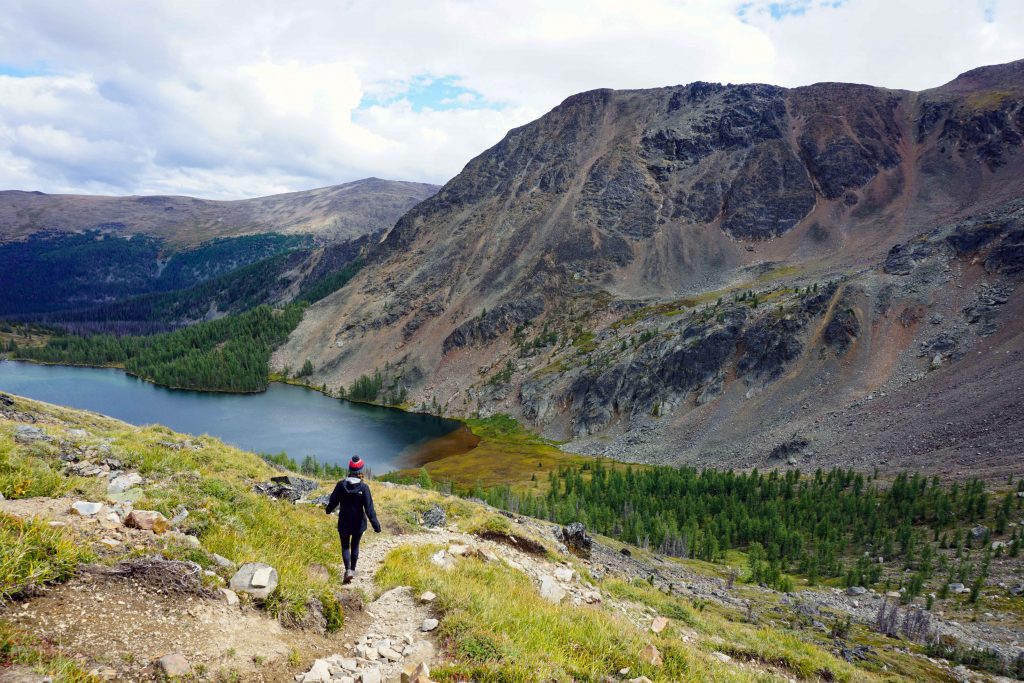
Unique rock formations in Cathedral Lakes Provincial ParkLooking down on Glacier Lake
Two-night itinerary
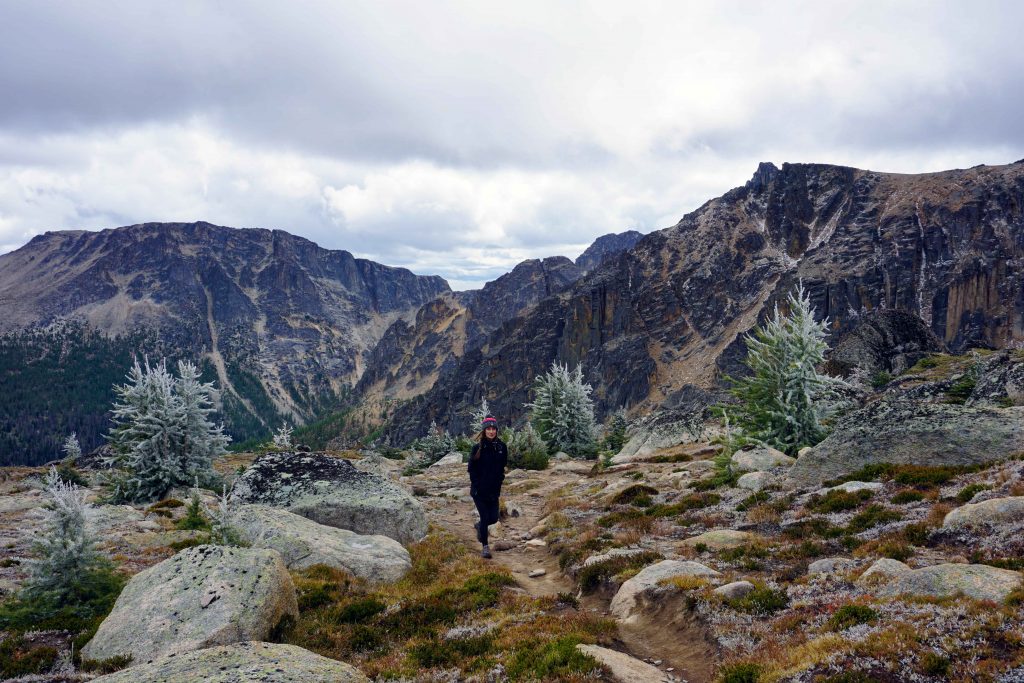
We spent two nights up at Cathedral Lakes. We took the 10am shuttle and arrived at the lodge about an hour later. After carrying our things to Lake of the Woods campground, we set up camp and had some lunch. We knew we wanted to go to Ladyslipper Lake that day but we weren’t sure of the way. So we walked back to look at the map at Quiniscoe Lake, retraced our steps to Lake of the Woods and continued on to Ladyslipper Lake. It’s not a long hike, but there is a steep uphill section. Soon the trail heads downhill and the turquoise blue of Ladyslipper Lake appeared before us. The sun was shining, so we spent a relaxing afternoon fishing and sunbathing by the lake before heading back to camp.
Hiking towards Ladyslipper LakeRelaxing at Ladyslipper Lake
That evening the wind really picked up and the temperature dropped dramatically. That was when the ranger came round and informed us that it would be seriously cold and wet the following day. We got into bed early because it was so cold and didn’t resurface until late the next morning. At this point we weren’t too sure what to do. It had snowed in the night and there was a lot of cloud coverage. Also, we hadn’t really banked on hiking in adverse weather conditions. At about 11am we decided to go for it, and thank goodness we did! The clouds dispersed and we were treated to some really amazing views.
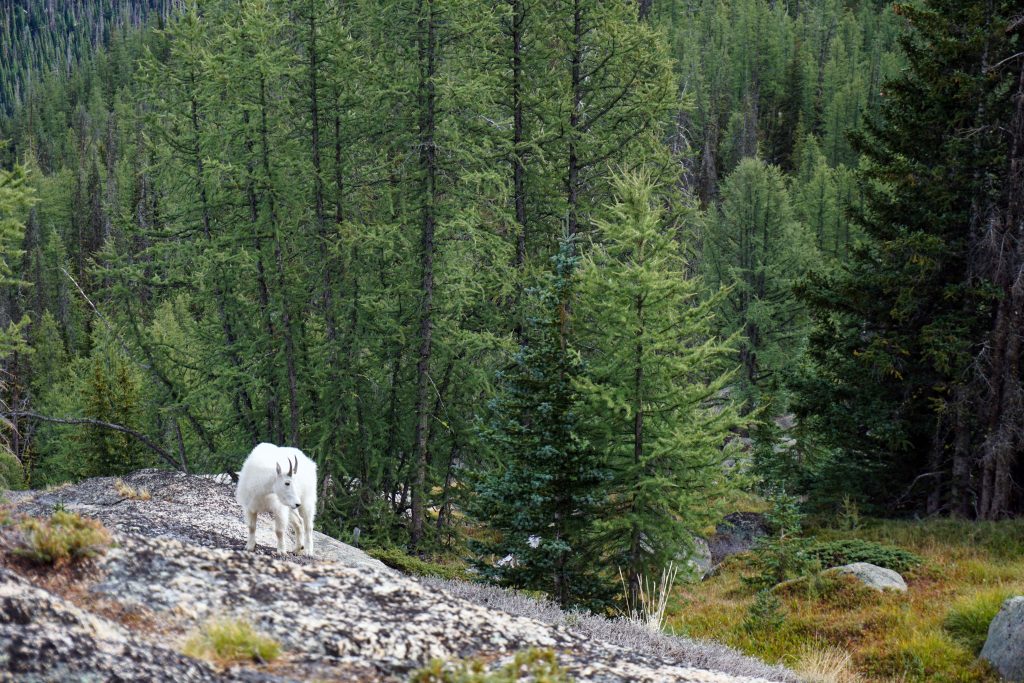
This was our only full day and had planned to do the Rim Trail. We retraced our steps from the day before, skirting Lake of the Woods and heading up to Ladyslipper Lake. After the little inlet the trail heads uphill towards Stone City. It was on Ladyslipper Trail that we were lucky enough to see a herd of mountain goats chilling out and munching on grass. They began moving along the trail in the direction we were headed, so we waited a while to give them some space. We then carried on up to Stone City, stopping to admire the amazing rockfaces along the way.
The mountain goats of Cathedral Lakes Provincial ParkHiking up to Stone City
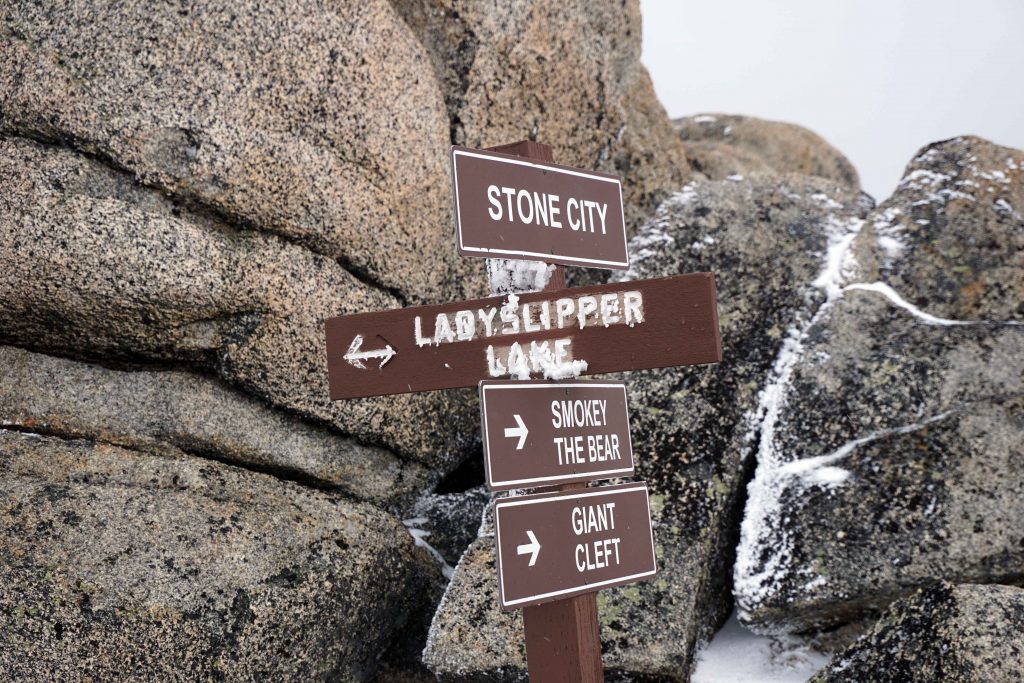
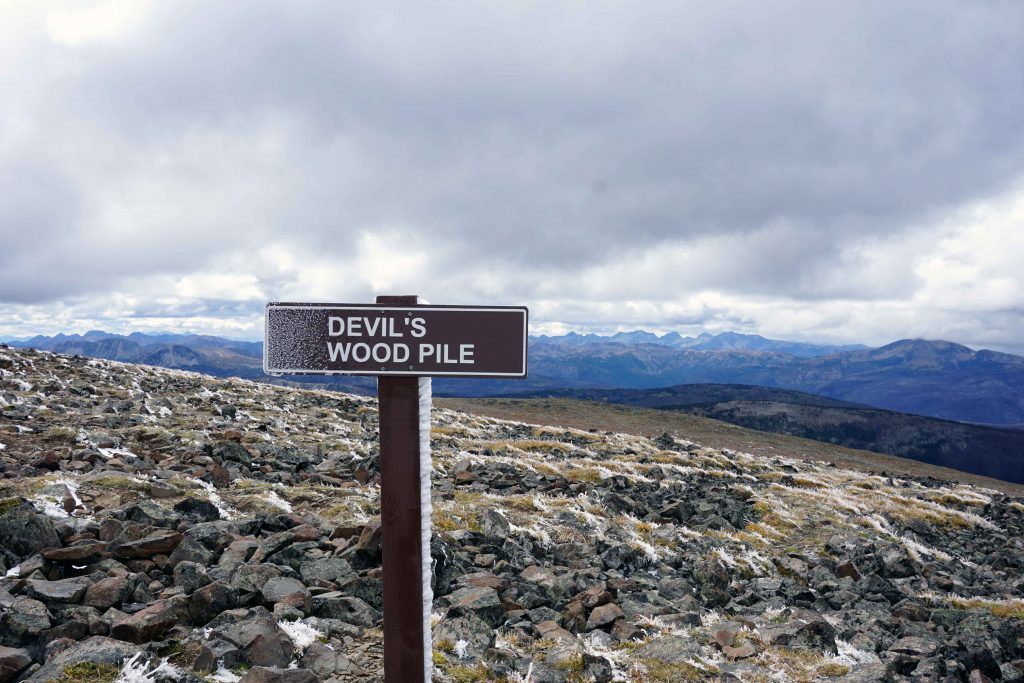
Once at Stone City you can take a detour to Smokey the Bear and the Giant Cleft, after which you have to return the way you came to get back to Stone City. From there, we carried on to Devil’s Woodpile. This section of the hike is where the real money shots are. The scenery is amazing and the views extend for miles in every direction.
The trails are signpostedAdmiring the views from the Rim TrailDevil’s Woodpile, Cathedral Lakes Provincial Park
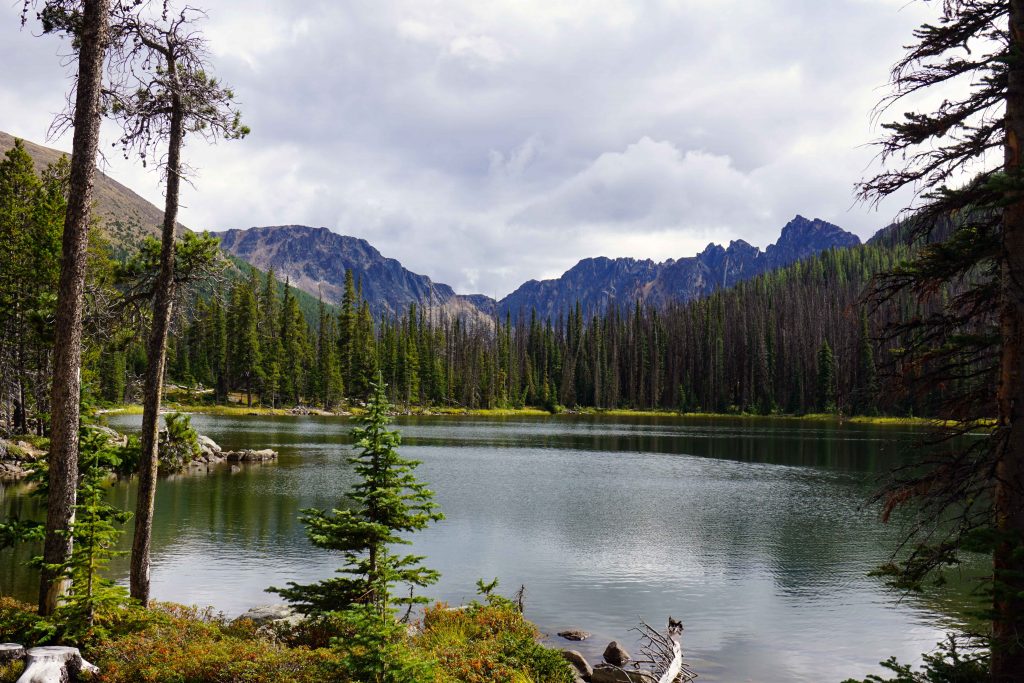
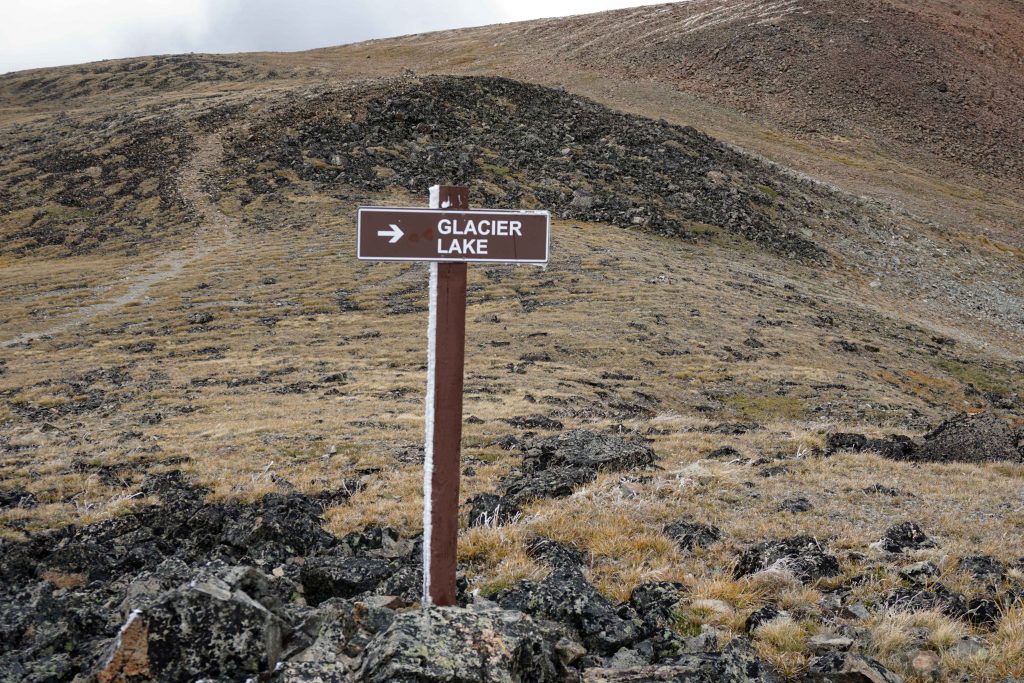
I’d have loved to have stayed up there all day, but it was so windy and cold! We’d also started later than intended, so after Devil’s Woodpile we chose to take a right hand turn down to Glacier Lake. However, you can carry on along the ridgeline to Quiniscoe Mountain and Red Mountain. At Glacier Lake, we took the left-hand spur that leads to Quiniscoe Lake. We then returned to camp at Lake of the Woods for the evening.
Head down towards Glacier Lake, or continue along the Rim TrailHiking down to Glacier Lake
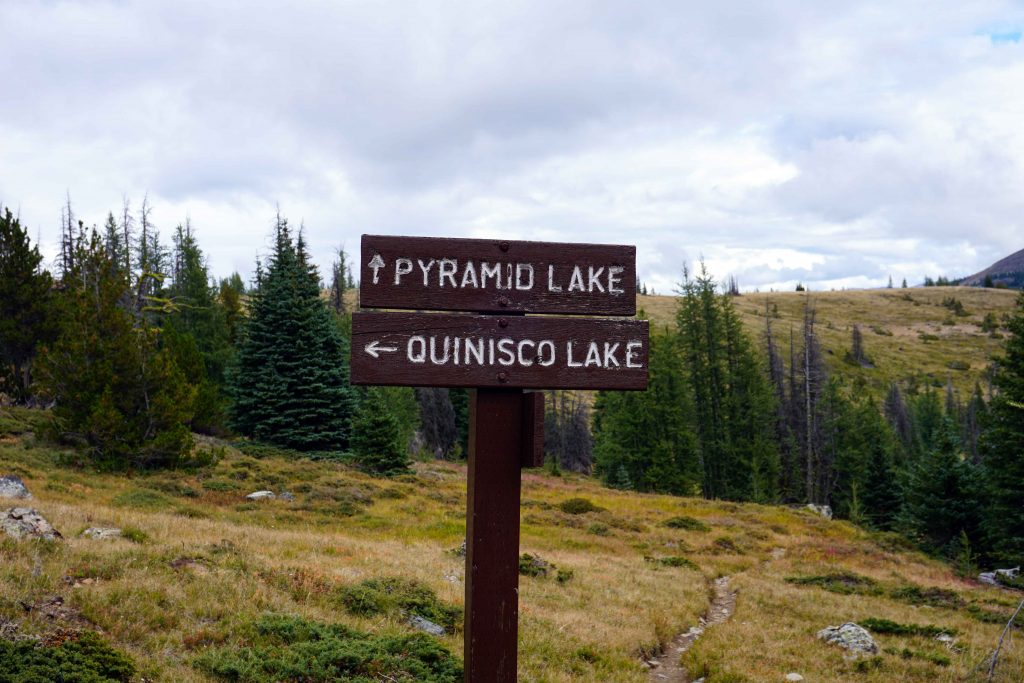
The following day, we had breakfast and strolled up to Pyramid Lake with our coffees. Then we packed up our camp and dropped our bags at the shuttle pick-up. Finally we hiked the loop around Quiniscoe Lake before heading back down to our car.
Getting to Cathedral Lakes Provincial Park
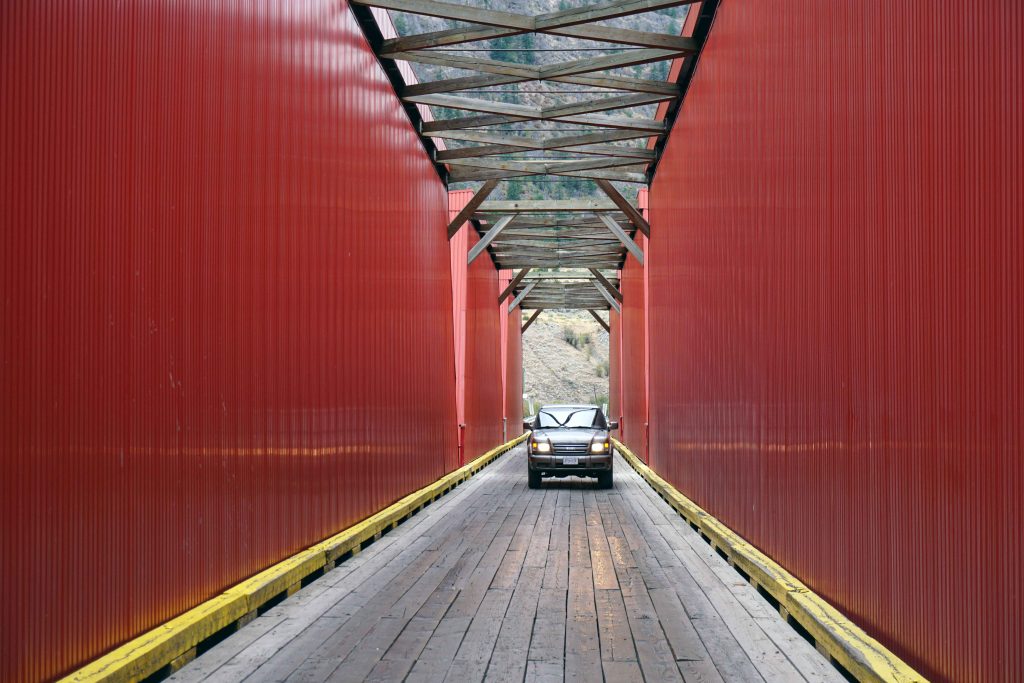
From Vancouver, take Highway 1 eastbound and merge onto Highway 3. Drive past Manning Provincial Park towards Keremeos. Around three miles before you reach Keremeos, you’ll see a sign for ‘Cathedral Lakes Lodge’. Turn off the highway here and follow the Ashnola Forest Service Road. You’ll go over a red bridge and pass a couple of recreation sites along the way. The road turns to gravel but keep going. If you’re taking the shuttle, continue along this road for about 13 miles (20.8km). Eventually you’ll see a bridge with a big gate on your left hand side. Wait here until the gate opens, which will be about 15 minutes before your departure time. Continue along the road a little further for the Lakeview Trailhead.
The red bridge
Camping nearby
If you’re on an early shuttle and you don’t want to get up at the crack of sparrow’s fart, you can always camp nearby. That’s what we did, spending the night Horeshoe Canyon Recreation Site. There are quite a few campsites down the Ashnola Forest Service Road, with other options including Red Bridge Recreation Site, Ashnola River Recreation Site, Lakeview Trailhead campground and Buckhorn campground.
Other information
Hopefully this blog post tells you everything you need to know about backcountry camping in Cathedral Lakes Provincial Parks. A few other bits of information I haven’t touched on yet:
Phone service is limited but you might be able to get signal near the ranger station
Swimming is allowed in the lakes but the water is very cold
There are no garbage facilities – you must pack out when you pack in
The hiking trails are well-marked and easy to follow
There isn’t an information kiosk at Lake of the Woods campground, so take a photo of the map at Quiniscoe Lake for reference
Cathedral Lakes is a really stunning area and allows easy access into the backcountry wilderness thanks to the shuttle service. It’s a trip that I thoroughly recommend!
When I return from a backcountry camping trip, I have next to no waste. I aspire to lead a waste-free lifestyle as best as possible and it makes sense to carry this ethos into the backcountry. After all, I love spending time in pristine wilderness, so why would I ruin it by generating a load of trash?
Zero-wasting a backcountry camping trip also makes practical sense. You have to pack out what you pack in. So if you’ve got a ton of rubbish, then you have to carry this around until you find a bin. That’s kind of annoying (although it goes without saying that it’s better than littering…)
I’d like to inspire others to reduce their impact too, which is why I’ve shared a few tips below.
Food – make your own and store in reusable containers
Shop-bought food almost inevitably comes wrapped in some kind of plastic. Snack wrappers, cling film and dehydrated meal pouches are the main culprits. To avoid this, make your own food and store it in reusable receptables. Beeswax wraps, silicone resealable bags and old plastic bags are great options. Maybe it’s not as quick and easy as grabbing a camp meal from your local shop, but it’s better for the planet’s health (and yours too, I might add).
For breakfast, I eat oats and dehydrated banana chips. I keep these in an old flour bag which I’ve been reusing for about three years.
Snacks and sandwiches I keep in beeswax wraps and nut milk bags. Take a look at my Best Hiking Snacks for inspiration.
For dinner, I make my own dehydrated camping meals. I store the mixture in small plastic bags which I wash and re-use. Find out how to make your own DIY Dehydrated Camping Meals.
The above solutions aren’t always plastic-free. I don’t use paper bags because they tear easily. Also, I don’t want my food to get wet and mouldy. My focus is on finding sustainable solutions – ones that can be used time and time again.
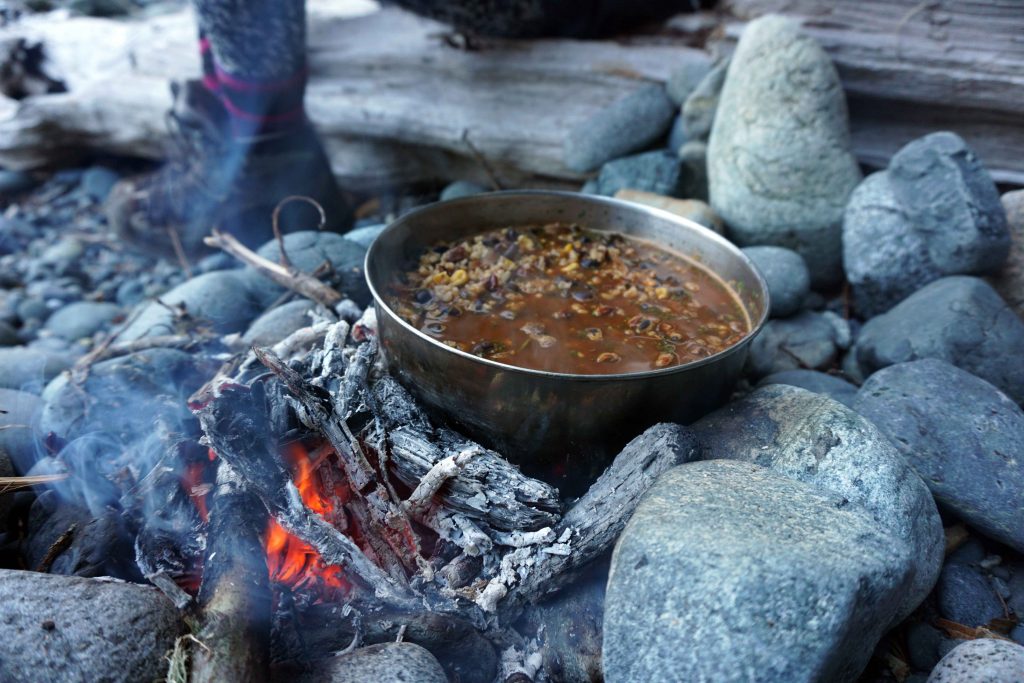
One of my homemade dehydrated camping meals
Buying food – head to dispensaries or bulk sections of the supermarket
When buying food for your backcountry camping trips, you can avoid a lot of plastic by buying from dispensaries and the bulk section of supermarkets. Again, this does take a little bit more effort, but it’s worth it. Take your own containers, be it old bags or nut milk bags.
Water – use a reservoir with a water filter
I use a 1.5 litre water reservoir – I don’t buy single-use water bottles. If you’re heading out for more than a day, then you need to check whether the water sources are safe to drink from. If not, boil the water before consumption and/or get a water filter. This creates less waste than using water purification tablets.
Stainless-steel bottles are also great for the environment because they last a lifetime and don’t leach plastics. However, they’re heavy and don’t usually have much capacity.
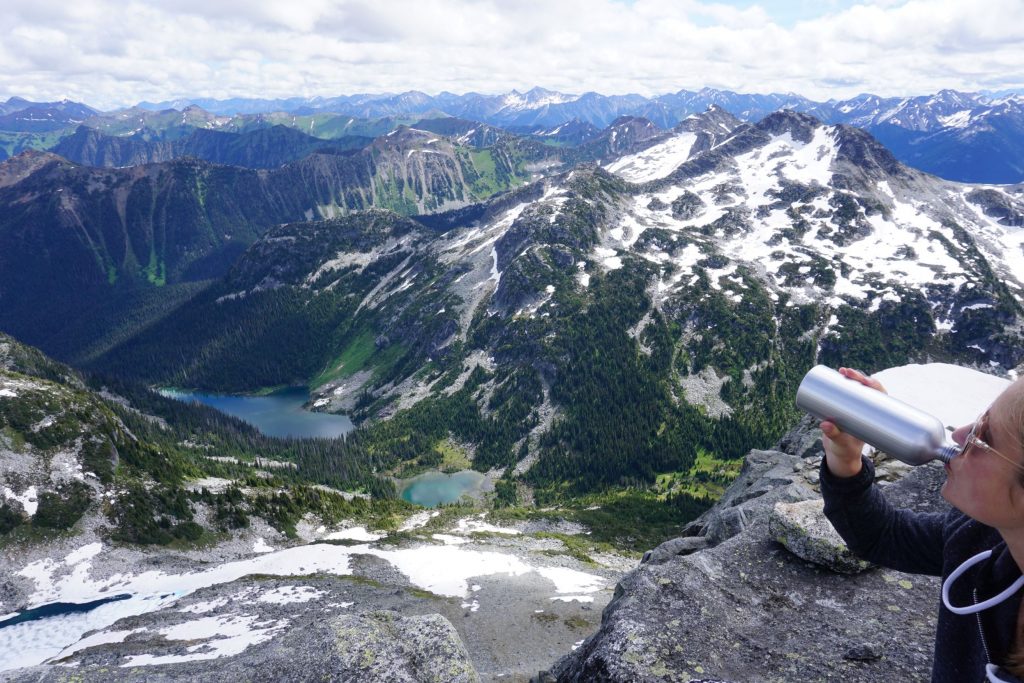
No single-use bottles here!
Fuel – use matches and recycle canisters
Fuel is a tricky one because it’s inherently wasteful. Making a campfire means that you avoid having to use gas canisters, but comes with its own set of environmental problems. Also, fires aren’t always allowed. If you do make a fire, use matches instead of a lighter. Matches break down, whereas lighters inevitably got lost or thrown out.
I’ve started using a liquid fuel stove because the fuel lasts much longer and can be refilled. If you use gas canisters, then you can buy a tool that safely pierces them, like this one from Jetboil. This allows you to toss them in the recycling bin. You might also be able to take them to a local recycling depot.
Toileting – natural toilet paper is OK!
When going to the toilet in the backcountry, you should dig a cathole, do your business into it and then cover it back up.
With regards to toilet paper, Leave No Trace Canada states:
“Use toilet paper sparingly and use only plain, white, non-perfumed brands. Toilet paper must be disposed of properly! It should either placed in a bag and packed out or be thoroughly buried in a cathole. Natural toilet paper has been used by many campers for years. When done correctly, this method is as sanitary as regular toilet paper, but without the impact problems. Popular types of natural toilet paper include stones, vegetation and snow. Obviously, some experimentation is necessary to make this practice work for you, but it is worth a try!”
In short, use non-perfumed toilet paper and bury it in the cathole, or pack it out. Or, to really make it zero-waste, use natural toilet paper. Moss works particularly well in my experience!
Hygiene – go natural
If you’re in the backcountry, then how clean do you really need to be? Honestly, you can wait until you get home to shower. You don’t need to bathe yourself in wet wipes. (FYI: biodegradable wet wipes are a lie – they take a VERY long time to break down).
If possible, I’ll have a dunk in the ocean or a lake, river or stream (assuming swimming is allowed). When it’s cold, I’ve been known to heat some water, strip off and have an ‘intimate’ wash. If I’m feeling really gross, I’ll use a teeny amount of biodegradable soap, although any grey water has to be disposed of at least 200m from alpine lakes and streams. If you use soap sparingly then a little bottle can last years, after which it can be refilled at a dispensary.
Off for a saltwater bath
I use a bamboo toothbrush and I get my toothpaste from a dispensary which I decant into a little tin for backcountry camping. I often make my own deodorant using this recipe, which I spoon into a little travel-sized container. Or I’ll use Attitude Super Leaves deodorant.
For feminine hygiene, I use a Diva Cup, ensuring I never have to throw away tampons or sanitary pads again. I’ve written a whole blog on this topic titled How to Handle Your Period in the Backcountry.
Gear – buy once, buy well and reuse
When it comes to gear, the best philosophy is to buy once and buy well. If you get quality goods, then they’re much more likely to last. (I know this is expensive, which is why I’ve written a blog post on How to Buy Good Outdoor Gear on the Cheap). Also be sure to look after your stuff. Dry out your tent when you get home, for example, and don’t store your sleeping bag in its stuff-sack. These practices promote longevity.
As for all the other bits and bobs, go for items that are reusable. Rather than a single use plastic spoon, take a spork or stainless-steel cutlery. I take a fork and spoon from my cutlery draw at home and use the knife on my multi-tool. I use a stainless-steel bowl as a pan, which I eat directly out of. (Side note: I actually got the bowl from a thrift store – outdoor gear doesn’t have to be fancy!) My water reservoir stores all my water, but I also have an insulated flask for hot drinks. I make tea with tea leaves, which I keep in a little pouch (and which can be refilled at places like David’s Tea or other dispensaries).
Electronics – opt for rechargeable
For electronics, opt for items that are rechargeable. That way, you’re not gunning through a load of batteries. I use the Petzl Bindi headlamp which can be recharged. Solar battery banks can help your electronics stay topped up with juice.
Dogs – a note on poo bags
I love dogs! But what I don’t love is abandoned poo bags littered along the trails. Sadly, this is something I encounter A LOT. So I just thought I’d use this opportunity to say that poo bags aren’t biodegradable, even if they say they are. OK, they might break down eventually, but it’ll take years and years. If your dog poops, either bag it up and pack it out with you. Or dig a hole and bury it, like you would with human waste.
Getting to the trailhead – try cycling, public transport or car-sharing
Even if you stick to the above advice, one thing will undo all your good work: driving to the trailhead. For most of us, this will be the biggest source of carbon emissions when backcountry camping. It was only when my car broke down that I started to cycle to the trailheads near my home. It’s amazing what you can reach without a vehicle. If this is a step too far, consider public transport or car-sharing instead.
What have I missed? If you have any other zero-waste backcountry camping tips then I’d love to hear them!
Backcountry camping is one big learning curve. Unless you grew up in an outdoorsy family, it’s very likely that you’ll make mistakes the first time you sleep in the wilds. The next time you go, you’ll be a little bit better at it. Eventually, you’ll stride along the trails with the confidence of a seasoned hiking veteran.
Until you reach that point, please remember that making mistakes isn’t something to be ashamed of. Not everyone was raised to knowing how to poop in the woods or rustle up a fire from a few pinecones. Yet that doesn’t mean you can’t learn. People often scoff at beginners, but they forget that everyone has to start somewhere.
Mistakes can, however, be problematic when it comes to safety. The backcountry is, by its very definition, a wilderness. Getting by on a wing and a prayer isn’t recommended. For your own well-being – and that of the natural habitat around you – it’s best that you try to minimise any errors. Get advice, do research and read up on best practice. It could just save your bacon.
To help you on your way, I’ve outlined 12 common mistakes that rookie backcountry campers make – and how you can avoid them.
Mistake #1: wearing the wrong clothes and footwear
The garments that make up your everyday wardrobe won’t generally be suitable for hiking into the backcountry for an overnight camp. This is a mistake I made on my first wild camping expedition to Dartmoor National Park in the UK. It was February, so I wore jeans, a cotton T-shirt, a huge jumper, a bottle hat and a heavy coat that I’d normally use for horse-riding. I was sweating within seconds.
Ideally, you want to wear lightweight clothes that wick away sweat. These should be made of wool or synthetic fibres. Don’t wear cotton or denim. You should also adopt the three-layer system of a baselayer, a mid-layer and an outer layer. You won’t necessarily need to wear all three layers at once if it’s warm outside, but you should pack them in case of bad weather. Remember the mantra ‘be bold, start cold’. In other words, don’t overdress when you begin your hike. You’ll warm up very quickly. You can add layers when you stop at camp for the evening.
On your feet, you need hiking boots or trail running shoes at a minimum. Trainers with a poor tread (and other footwear, like flip flops) increase the risk of slips and trips. Be sure to get hiking boots that fit your feet properly (this in itself is a common problem for new hikers). Too big and your feet will slide around. Too small and your toenails will fall off. Either way, you’ll get blisters, which are so incredibly painful when you’re hiking with a heavy pack. Stores that specialise in outdoor gear can help you choose the right footwear. It’s also wise to take a blister kit, such as Compeed or 2nd Skin, just in case.
Do:
Wear proper hiking boots
Wear clothes made of wool or synthetic materials
Get a lightweight waterproof rain jacket
Use a three-layer system
Pack extra clothes for the evening
Pack a blister kit
Try to wear your hiking boots in before you go
Don’t:
Wear cotton or denim
Wear trainers, sandals or flip flops
Wear so many clothes that you overheat
Take too many clothes with you – you only really need one outfit for hiking in, plus some extra layers for sleeping in
People often wrongly assume that backcountry camping is much like car camping. Actually, they’re two entirely different beasts, and as such require a completely different set of gear. Your normal camping tent will likely be far too bulky to carry, as will your kitchen pots and pans. Instead, you’ll want stuff that’s lightweight and efficient. That means a lightweight tent, a lightweight sleeping mat, a lightweight sleeping bag, a lightweight stove and lightweight cooking utensils. Oh, and you’ll need a hiking backpack to put it all in, preferably one that fits your frame.
Lots of stores and online retailers sell goods that are specifically designed for backcountry camping. The amount of choice can be seriously overwhelming for the uninitiated. Staff at outdoor shops can advise you further, and kit reviews on outdoor blogs are another useful source of information. Unfortunately, all this new gear comes with a considerable price tag. However, there are ways to buy good gear on the cheap. Alternatively, you can always borrow from outdoorsy friends or rent items.
At a bare minimum, you’ll need to take a sleeping system, a cooking system and the 10 Essentials. You need to tailor some of this gear to the conditions that you’ll encounter. A sleeping bag that’s rated for +5°c won’t keep you warm in a cold alpine setting. Check what season each item is suited to and be sure that it corresponds to the conditions you’ll likely experience on your hike.
Do:
Invest in (or borrow) lightweight backcountry camping gear
Get a proper hiking backpack and make sure it’s fitted to your body shape
Carry the 10 Essentials
Take back-up items like matches and batteries for a headtorch
Don’t:
Use gear designed only for car camping
Use gear that is inappropriate for the season
Bankrupt yourself getting all the best gear (unless you the funds of course!) Build it up slowly or buy second-hand
Mistake #3: not testing out gear beforehand
This is a classic rookie error, and one that I’ve made before. After purchasing a new stove, I didn’t check how to use it until I was camped on top of a snowy mountain in February. There was a seriously hairy moment when I thought I was going to burn the warming hut down.
So, please learn from my faux pas: if you do invest in new gear, then know how to use it, before you set off. Once you’re out on the trail, it may be too late to read the instruction manual or search for online tutorials. It may even be broken or faulty, in which case, you really want to know about it before you need it ‘for real’.
Even if your gear’s not new, you should still check that everything’s in good working order after each expedition. Or, that items you’ve used have been replaced, like band-aids in a first aid kit.
Do:
Test all your gear at home before you leave
Know how to use everything
Put up your tent at home
Attend to any kit that needs to be recharged, fixed or replaced
Don’t:
Assume you’ll be able to figure it out on the trail
Wait to use something for the first time on the trail
Mistake #4: carrying too much stuff
If you’ve read Wild by Cheryl Strayed, you’ll know that she begins hiking the Pacific Crest Trail with a ludicrously heavy backpack that she affectionately names ‘Monster’. Two weeks in, bruised and blistered by its weight, she meets a man who scrutinises the contents of her pack. He ruthlessly discards the items she doesn’t truly need – a foldable saw and a 12-pack of condoms included.
This is an important lesson that almost all backcountry hikers go through. You will inevitably take too much stuff on your first outing and your pack will be unnecessarily heavy. However, you’ll learn what works with time. The all-important backcountry camping gear will also help, as it’s lightweight by design.
In the absence of an all-knowing friend who can advise you of such things, you will have to police yourself on this matter. Remember that you must carry everything on your back. Not only that, but you’ll have to carry this pack for some distance, probably over difficult terrain that requires you to step up, over and down uneven objects (like rocks, roots, stairs and boulders). Select everything you take very carefully and only pack things you actually need.
Having said that, don’t pare back on the essential items. I’ve heard of people trying to lighten their load by not taking a sleeping bag, only to freeze during the nighttime at a high elevation camp. There’s definitely something to be said for cutting down on clutter, but don’t forgo the things that will keep you alive.
Do:
Research what you need to take backcountry camping
Cut back on luxury/non-essential items
Consider lightweight alternatives, such as taking a Kindle rather than a book
Save weight where possible – some people even saw off the end of their toothbrush to shave a couple of grams from their load
Share the load with a hiking buddy if possible, such as divvying up the tent
Don’t:
Leave essential items at home
Take heavy (or really any) things you don’t need
Forget that a heavy backpack can get very uncomfortable, very quickly
Mistake #5: not taking enough food and water
Food and water are your life source, especially when you’re exerting yourself on the trail with a heavy pack strapped to your back. You really don’t want to run out of either. Like pretty much every mistake on this list, this is something I’ve done personally. In an attempt to travel lightly, I didn’t take enough food on an overnight hike, meaning I had nothing to eat on the final day. I made it down the mountain feeling a little dizzy, went to the nearest restaurant and quickly inhaled a two-course meal.
Thankfully, I only had to make it through one day without food. Any longer and you start running into problems. So, always take more food that you think you need. I know I just waxed lyrical about cutting back on non-essential items, but I think you’ll agree that food and water are absolutely necessary. You’ll learn how much food you need as you go along. In any event, you should always take extra, just in case something goes wrong and you’re on the trail for longer than expected. However, don’t take stuff like tins which are both bulky and heavy. Instead, consider taking dehydrated meals and snacks such as nuts, chocolate and raisins.
As for water, this is a tricky one. Water is VERY heavy. But you need to take on enough fluids, and you may need extra for cooking with. Ideally, you’ll fill up with water as you go along, filtering and purifying as needed. You must check you can do this before you set off for your hike. Research whether there are any creeks, streams, rivers or lakes along your route, and whether they’ll likely be flowing (sometimes they can dry up in warm weather). If there isn’t a reliable water source, you’ll need to take enough water to last for the duration of the hike.
If you’re new to backcountry camping, then I recommend choosing a route that has a reliable water source for your first few outings. This will make your life easier as you’ll have one less thing to worry about.
Do:
Take more food than you think you’ll need
Learn from each hike as to the amount of food you tend to eat
Research water sources along your route
Eat ‘backpacking food’ that’s high in energy but is easy to carry, like dehydrated food
Treat or boil water before drinking
Refill your water receptacles whenever you can
Use water bladders instead of heavy water bottles (unless it’s very cold)
Don’t
Scrimp on food and water
Take food that is heavy, such as canned goods
Drink water that is untreated
Mistake #6: not drinking or eating enough
While we’re on the subject, another common mistake is to carry enough food and water, but to fail to consume it. People often say they don’t feel thirsty or hungry while hiking. Or they’re tempted to miss meals to make up time or because they’re just too tired to bother. However, you need to keep your body fuelled and hydrated properly. Else, you’ll start to feel unwell, making things much harder than they need to be.
Drink more water if you’re not peeing frequently or have a headache
Eat more food if you feel hungry, faint or low on energy
Make time to do all of the above
Don’t
Skip meals
Forget that you can get dehydrated, even if it’s cold outside
Mistake #7: choosing a route that’s too difficult
As a newbie, it makes sense to start with something easy while you learn the ropes. Hiking a 10km trail is one thing. Hiking a 10km trail with a heavily laden backpack on is quite another. It also requires a certain type of fitness. It’s a cardiovascular workout, but it also requires a lot of strength. After all, your shoulders, back and hips must bear the weight of your pack. In turn, this can take its toll on your legs, feet, glutes and core. This fitness can take a while to build, so it’s best to ease yourself into it.
The difficulty of a hike is dictated by the distance, the amount of elevation gain and the altitude. So, while you may be drawn to a 5km hike, it may be less appealing if there’s 1,000m of elevation gain (in other words, you’ll be walking uphill a lot). You might have your heart set on an epic multi-day hike, but I recommend doing some easier practice runs first, rather than jumping in at the deep end.
There are lots of ways to research hikes. Websites/apps such as All Trails and Trailforks are useful. There are also lots of location-based sites, such as Vancouver Trails. Hiking forums and blogs are additional resources you can use. Be sure to choose a route that allows backcountry camping and has favourable conditions (see mistake number 8 below!) Depending on where you live, it’s probably wise to wait until summer or early autumn to venture on your inaugural backcountry camping trip. This means longer daylight hours, easier trail conditions and (hopefully) better weather.
Do:
Choose an easy hike for your first outing
Take the distance, elevation gain and altitude into account
Build yourself up to longer, more difficult hikes
Train by going on day hikes with a heavy pack
Select a hike that is easy to navigate
Don’t
Be hard on yourself if you find it difficult
Forget that it takes time to build muscle and endurance
Camp illegally
Give up!
Mistake #8: not checking the trail conditions and weather
Imagine it’s a glorious spring day in May. It’s been hot for several days, the ski hill’s been shut for a month and you decide to hike to a lake in the backcountry. It’s seriously hot in the city, so you wear shorts and sling a couple of layers in your pack, along with your camping gear. You envisage swimming in the lake and basking in the sunshine. Ten minutes in, you’re trudging through snow, which is still knee-deep. It’s a white-out, snow is tumbling over the top of your boots and you’re shivering with cold. You’re slipping every other step and there’s no way you’re reaching that alpine lake – which is probably still frozen anyway. After nearly sliding to your death over a cliff, you accept you weren’t prepared for these conditions and return home defeated.
A true story. Not my story, but someone I know. It was a scary lesson which, thankfully, didn’t end in disaster.
Here’s the thing: conditions on the trail can be very different to the conditions you see when you look out your window. Having moved to Canada from the UK, this is still something that I have to remind myself of. Rain might be falling as snow, clouds might be obscuring the sunshine, rivers might have caused creeks to swell to impassable rivers, and storms might have caused trees to blow down. Then there’s the snow. Snow can persist at high elevations until very late into the summer (or even all year round). Even if the temperatures are soaring, you may still need micro-spikes up on those mountains.
Always research the trail conditions before you travel. There’s no single source that will tell you exactly what’s going on out there. Hiking forums, blogs and social media can all be useful. Check recent weather reports. And if a trail report provides a recommended hiking season, then consider this as well-informed guidance.
Also check the weather forecast for your trip. If you’re not prepared to hike/camp in rain, snow or extreme heat, there’s no shame in postponing your backcountry camping trip until another day. Mountain forecast, snow forecast, the BBC and Environment Canada are all useful resources.
Do:
Check the trail conditions before you leave home
Check the weather before you leave
Adapt your clothes and gear to the expected conditions/weather
Pack your gear in waterproof stuff sacks and put a rain cover over your bag, if it’s going to be wet
Don’t:
Forget that the conditions can be very different to what you see out of the window
Hike into the backcountry if you’re unprepared for the conditions/weather
Be afraid to postpone your trip if you need
Let your stuff get wet, especially your sleeping bag and camp clothes
Mistake #9: getting lost
Actually, everyone gets lost from time to time. The trick is to prevent this from happening as best as possible. Before you go, research your route in detail and take down as much information as you can. Sometimes, written directions are incredibly helpful. Resources such as All Trails, Trail Forks, blogs, books and hiking websites should hold the information you need.
While on the trail, keep your eyes peeled for waymarkers. These vary depending on where you are. In North America, there are little orange markers attached to trees and logs. Alternatively, orange paint may be sprayed on rocks and boulders, or flagging tape tied to bushes. In the UK (where trees are scant) there are often little stone cairns to guide you.
In certain situations, there won’t be any signposts and route-finding skills are necessary. This means getting a map and compass and knowing how to use them. Or, you can download a map to your phone using apps such as Gaia.
If you do get lost, then it’s important to know what to do. This is often the difference between an inexperienced hiker and someone who’s used to spending time in the backcountry. Stop, stay calm and look around for waymarkers. Backtrack to the last marker you saw and try to rejoin the trail. If you are truly, impossibly lost, then stop and make camp. After all, you’ve got all your overnight stuff with you. You should then call the police and request a search and rescue. It pays to have a satellite device for this purpose, such as an InReach, SPOT or Somewear Labs. Don’t assume that by going downhill, you’ll reach safety. You may end up in a gully or on a cliff-face which is actually more dangerous.
Do:
Research your route in detail before you leave
Note down directions and carry them with you
Watch out for waymarkers and signposts
Take navigational tools, including a topographic map, compass and online map (downloaded)
Stay calm if you get lost
Call search and rescue if you need
Take a satellite communication device with you
Don’t:
Assume the route will be signposted
Choose a hike that is hard to navigate – until you’ve got some experience, at least!
Panic if you get lost
Waste your phone battery by calling people who can’t help you
Mistake #10: Forgetting to leave a trip plan
Leaving a trip plan is something I now do religiously, but it wasn’t always the case. The more I’ve learned about backcountry camping, the more cautious I’ve become. Leaving a trip plan basically means telling someone where you’re going and when they’re likely to hear from you. If they don’t, they can raise the alarm and a search and rescue can be initiated. Otherwise, it might not become apparent that you’re missing until days later. And when it does become clear that something’s amiss, rescuers won’t know where to look.
Do:
Leave your itinerary with someone who isn’t going on your backcountry camping trip
Tell them exactly where you intend to go, including where you expect to camp
Tell them what times you expect to set off and return
Provide them with a ‘cut off’ time, meaning the time at which they should start to get concerned
Don’t:
Hike into the backcountry without telling anyone where you’re going
Veer off-course intentionally, unless you have to
Mistake #11: Not following Leave No Trace principles
As a beginner backcountry camper, there’s no reason why you’d know about the Leave No Trace principles. But they are oh-so-very important. Together, they are the code of outdoor ethics. They are designed to reduce human impact on nature, ensuring it is preserved for the generations to come. There are seven Leave No Trace principles:
Plan ahead and prepare
Travel and camp on durable surfaces
Dispose of waste properly
Leave what you find
Minimise campfire impacts
Respect wildlife
Be considerate of others
Some common mistakes made by backcountry campers include:
Setting up camp on delicate eco-systems
Not burying poo and other waste products, such as dirty dish water
Not packing out trash, including menstrual items and wet wipes (which aren’t biodegradable, no matter what they say)
If you’re not accustomed to tramping around the great outdoors, then you probably won’t be au fait with the wildlife either. That can be a bit scary, whether you’re facing down a herd of angry cows or trying to pass a rattlesnake coiled up on the path. Then there are bears, cougars, coyotes, ticks and a multitude of other creatures lurking in the shadows.
The advice for each type of animal encounter is different, so you’ll need to do some research based on your locale. Look Big by Rachel Levin provides a definite guide for everything from alligators to wolves.
Finally, always remember that wild animals are just that: wild. They mustn’t be fed human food, whether from your hand (as with birds) or from left-behind trash (as often happens with bears). It’s also important to store your food properly while you’re at camp. Again, this depends on what wildlife are around you. If it’s just rodents, then you’ll need to store it in airtight containers to prevent them from nibbling on your favourite hiking snacks. If it’s bears, then you’ll need to use a food cache (if available) or put everything in a bear canister and hang it up high.
I once left my food outside, feeling safe in the knowledge that I wasn’t in bear country. Well guess what? The raccoons got everything.
Do:
Research how to deal with wildlife encounters, based on the area you’ll be exploring
Store your food properly at camp
Be bear aware, if you’re hiking in bear country
Use common sense around wildlife
Don’t:
Feed any type of wildlife, intentionally or unintentionally
Leave your food out while you sleep (or in your tent, depending on where you are)
Approach wildlife
Practise makes perfect
This is a lot of information to take on board. Hopefully it helps your first backcountry camping experience run smoothly. As with anything in life, practise makes perfect. You’ll learn something every time you go backcountry camping, whether that’s how many clothes you need or how much food you tend to eat on the trails.
Aunt Flow. The blob. Happy days. Whatever moniker you use, one thing’s for certain: when it comes to outdoor pursuits, there’s never a good time to be surfing the crimson wave.
In an ideal world, that time of the month would arrive when you’ve got a completely clear schedule. You’re hunkered down at home, under a duvet, and the only mountain you’re climbing is the pile of chocolate in the cupboard. Unfortunately, life doesn’t work like that. Invariably, there will come a time when you face a code red situation in the great outdoors. Backcountry camping trips. Hut trips. Mountain biking trips. Ski tours. Long-distance trail runs. Been there and birthed a blood diamond in each and every one of them.
So, what do you do? Well, you could try to organise your plans around your cycle. But that’s not always an option. Some adventures are tied to a strict timeline, whether due to conditions, logistics or prior preparations. Rather than miss out, I say go forth and enjoy yourself. A period doesn’t have to stop you from venturing into the backcountry. You can participate in all your favourite hobbies – only you get extra bonus points for doing it while one of your organs literally sheds its lining.
Eco-friendly tips for dealing with your period in the backcountry
Of course, the backcountry isn’t adorned with sanitary washroom facilities. And as always, it’s important to follow the Leave No Trace principles. Given these two factors, you might wonder how, exactly, you’re supposed to manage your lady time while out in the wilds.
So without further ado, let’s jump right in to my eco-friendly tips for dealing with your period in the backcountry.
1. Use a menstrual cup
My menstrual cup has revolutionised periods for me, especially when it comes to outdoor adventures. I recently told a friend that I use a menstrual cup and she wrinkled her nose and said “eeuuww”. I, too, used to be squeamish about such contraptions. But actually, it’s no different to using a tampon, especially a non-applicator tampon.
The main advantages of menstrual cups are that:
You can leave them in for up to 12 hours at a time. This means you only have to deal with them in the morning and the evening, when you’ll probably either be back at home or at camp
They are lightweight and don’t take up much room in your pack (or they’ll take up no room if it’s in use)
They can be used time and time again, unlike tampons and pads
I finally took the plunge and purchased a menstrual cup after a long day of ski touring while on my period. I had a heavy flow and had to continually shuffle behind a tree to ‘sort myself out’. There would follow a painful 10 minutes of taking off my gloves, wriggling out of my bibs, locating a fresh tampon in my pack and using my freezing hands to execute the necessary deeds. By the end of the day I was responsible for a stack of used tampons in my bag, red patches of snow across the mountain and a group of bemused (mostly male) touring buddies.
Menstrual cups take a bit of getting used to, so if you buy one, I highly recommend that you get comfortable with it at home first. Once you progress to using it in the backcountry, you simply need to empty it every eight to 12 hours, depending on your flow. To do this, you need to:
Dig a cathole six to eight inches deep, just like you would for a poop. The cathole should be 200 feet (about 70 steps) from any trails or water sources
Wash your hands (see tip number 4 below)
Empty the contents of the cup into the hole
Wash the cup with sterile water if you have it (skip this step if you don’t)
Reinsert the cup
Pour your hand washing water into the cathole
Fill the cathole back in
Some popular brands of menstrual cups include DivaCup, Mooncup and Tampax Menstrual Cups. You could also invest in some reusable pads and sanitary underwear, such as those from Period Aisle and Knix. These can be combined with a menstrual cup, if you’re worried about leakage.
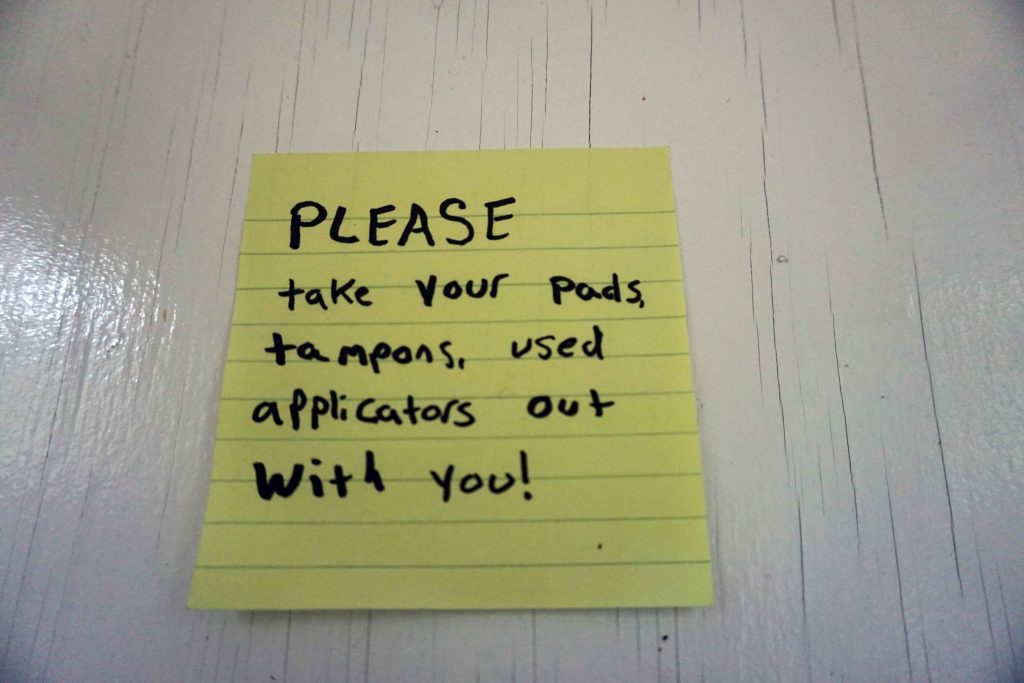
2. Pack out tampons and pads
If you feel more confident with tampons and sanitary pads, then just remember to pack them out. This might be news to you, so let me elaborate: you must not leave tampons and pads in the backcountry, even if you bury them (wildlife will dig them up). They also take forever to break down – in fact, a sanitary pad takes between 500 and 800 years to decompose! Instead, you need to take them home with you and throw them in the bin.
If you’re packing out tampons and pads, then it’s a good idea to have a plastic Ziplock bag (or something similar) to store them in, until you find a trash can. You can wash and reuse this plastic bag for future adventures.
3. Make a period go bag
It’s helpful to pack all your feminine hygiene items into a waterproof bag, such as a small dry bag or a plastic bag (which can be reused, of course). That way, you can grab everything you need in a hurry, should you feel the red army approaching. These items might include:
Your menstrual cup and/or reusable pads or underwear
Tampons and pads, plus an additional bag for used tampons and pads
Hand sanitizer and wipes
Biodegradable and phosphate-free soap
Painkillers
A pair of surgical gloves
Keeping supplies in a dry bag has the added benefit of, well, keeping everything dry. This is especially important if you’re relying on tampons, which as we all know, expand when wet.
4. Wash your hands
You should really wash your hands before you start handling items that are going to live near your lady parts for the next few hours. Evidently, this can pose something of a problem in the backcountry, where the chances of finding filtered water are slim to none.
Off for a saltwater bath
My preferred method is simply to boil some water and use a little bit of liquid soap, which I keep in a small plastic bottle. Ideally this water will come from a nearby water source, such as a stream or river, so that you don’t eat into your precious water supply. Either way, I tend to boil a bit more water than I would need for my morning tea (or evening tea for that matter). That way, it doesn’t feel like I’m expending more fuel, as I’m boiling water anyway. Then I let it cool and wash my hands – you don’t need huge amounts water to do this. The grey water should then be disposed of in the cathole.
If you’re going to use liquid soap, be sure to use a product that is biodegradable and phosphate-free. Also, never use soap near a water source, even if it’s biodegradable. This is because the soap actually needs to be filtered by the soil in order for it to degrade. I bought a bottle of Campsuds about two years ago and it’s still going strong, as you really only need a teeny amount each time. Dr Bronner’s is another trusted brand.
There are some non-eco-friendly alternatives to plain old water and soap, like wet wipes. I’m not a fan of wet wipes as they’re single use and are rarely biodegradable, despite what the packaging may say. There’s also hand sanitiser. However, alcohol-based products are not so friendly on the foof. If you cannot wash your hands – perhaps because you’re on the move or water is scarce – then you could wear a pair of surgical gloves instead.
5. Give yourself a break
Everyone reacts differently to menstruation. Personally, I find it a physical struggle. I feel weak, low on energy and a lot less confident of my abilities. Trails I would normally breeze along suddenly require a huge amount of effort, and altitude takes a heavier toll than normal.
If this happens to you, too, then give yourself a break. I used to be hard on myself and wonder why my fitness was in such a shoddy state. It’s only now that I’ve joined the dots and realised that when I’ve got my period, I experience a temporary pause in normal service. Listen to your body and respond accordingly – whether that’s giving yourself more time, taking regular breaks, eating more chocolate, taking the easy route, or staying at camp rather than tackling that extra peak. You probably won’t feel like conquering the world, and that’s OK.
Hiking while menstruating can be a struggle
6. Manage period pains
Period cramps suck. There’s no two ways about it. They can blight even the best day out, making you wish you were at home in bed rather than tearing around the backcountry. The good news is that light exercise can actually help combat period pains. Painkillers are another tool to have in your arsenal, as are nalgene bottles that double as hot water bottles. Finally, there’s research that shows dark chocolate can reduce menstrual cramps – a great excuse for doubling your normal ration.
7. Don’t worry about bears and menstrual odours
The idea that black/grizzly bears are attracted to menstrual blood has been circulating since the 1960s. There is no science to support this theory, so it can be discarded as a myth. Bears will, however, be drawn to all that delicious food you’re packing. So if you’re in bear country, be bear aware.
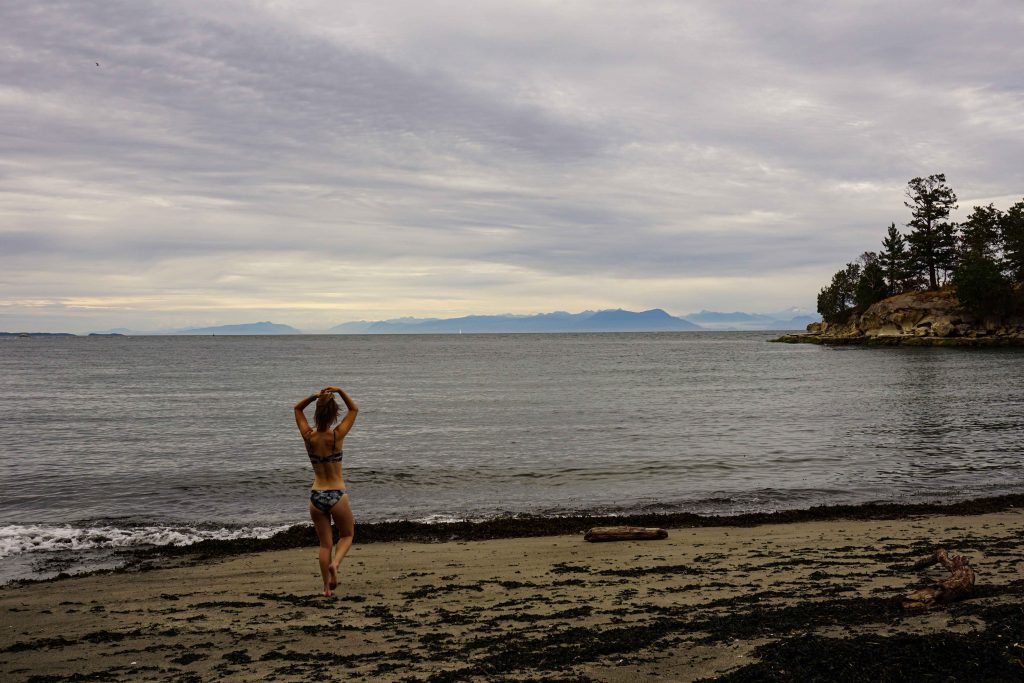
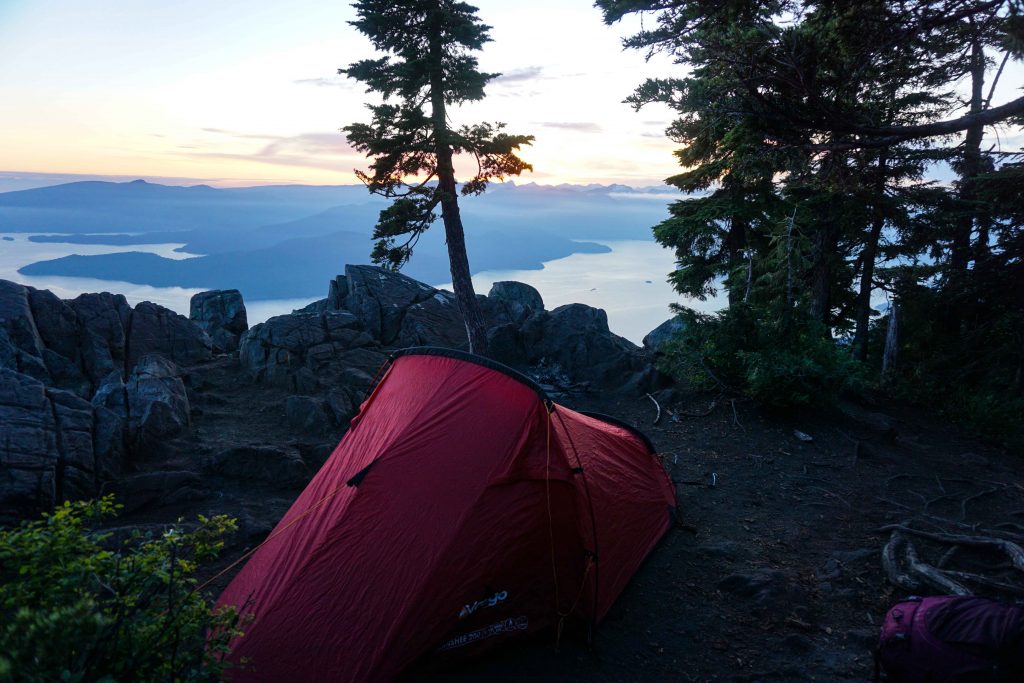
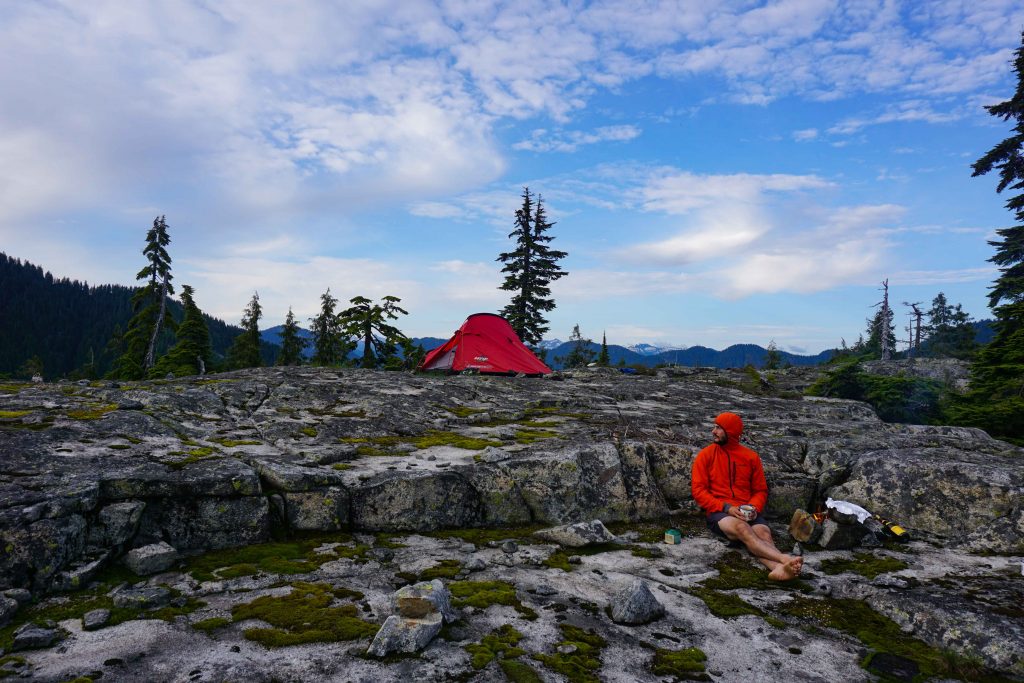
It’s a warm summer’s night. Mosquitoes flit around my head, looking for a patch of bare skin on which to dine. The sun has just dipped below the horizon, and around me the snow-capped mountains fall into darkness. Nature’s goliaths; magnificent by day, menacing by night. Below me, the lights of Vancouver are twinkling. I take a one last glug of red wine and decide it’s time for sleep. It’s been a big Friday evening, after all.
But instead of a queen-sized bed adorned with a fluffy duvet, my shelter for the night is a miniscule two-person tent. A blow-up mattress provides a degree of luxury, while my ‘pillow’ is a rolled up down jacket. For you see, I’m camping. But I’m not at a campsite. There’s no one else here, no wardens, no fees to pay and no designated pitches. I’m backcountry camping. Or to use the European vernacular, ‘wild camping’.
A Friday night well-spent
Earlier in the day, I packed my backpack with all the essentials required to keep me alive (red wine included). I cycled to a trailhead and hauled myself and my overstuffed backpack halfway up a mountain. Accompanied by my boyfriend, I set up camp on a rocky plateau, cooked dinner and just…relaxed. There’s no need to ‘do’ anything. It’s a gorgeous spot. Soaking up the views is entertainment enough.
In the morning we enjoy some coffee and hot porridge, watching as the sun burns through the clouds to reveal the coastal mountain range once again. We pack up and make the return journey, by now our thoughts turned to all the chores that must be achieved over the weekend. Before we leave, I take one last look around me. There is absolutely no indication that we’ve been here.
I consider it a Friday night well-spent. The alternative would have been a pizza eaten on the sofa while watching something mindless on Netflix. Instead, I’ve immersed myself in nature, and this makes me happy. Why? There are so many reasons. Because it’s beautiful. Because it’s a fun adventure. Because I prefer the simple life. Because I enjoy being in splendid isolation; a welcome retreat from the chaos that we call civilisation.
Backcountry camping near Squamish, British Columbia
The science of ecopsychology
I’ve known for a long-time that being outdoors is good for me. Now, science has confirmed what I’ve suspected all along: that time spent in nature is an antidote for stress. The scientific movement of ‘ecopsychology’ has discovered that exposure to nature has all kinds of incredible benefits. Not only does it do things like enhance your mood and lower your blood pressure, it even reduces crime rates and improves cognitive functioning.
The notion of reconnecting with nature has seeped into the public consciousness of late. People are realising how distanced they are from the natural world – and just how much better they feel after a walk in the park or a good stomp along a woodland trail. The Japanese concept of forest bathing is gaining traction in the western world, and is even an ‘experience’ offered by some hotels and tour operators. But it doesn’t have to cost anything. I just packed my bag on a Friday afternoon and walked out my front door.
Leave no trace
Yet this revitalised interest in the natural world is a double-edged sword. There have been reports in the UK of people camping across the Lake District, leaving litter and trampling across the natural habitat. One woman even found a wheelie suitcase, left abandoned for someone else to deal with. This, of course, is not OK. There are rules to wild camping, which are known collectively as the Leave No Trace principles.
This disregard for the natural environment does little to help the cause of wild campers – something which is already viewed with suspicion in England. In fact, it’s only legal in Dartmoor National Park. Pitch your tent anywhere else and the whole thing becomes a very shady business. You’re advised to arrive late and leave early to avoid detection. Get caught and you risk a fine for trespassing and a severe telling off from the landowner. And you can never really relax for fear that you’ll be found out.
Having lived in Canada for four years, this now seems laughable. Wild camping – or backcountry camping as it’s known state-side – is practically a birth-right. A whopping 94% of British Columbia is Crown land, meaning it can be accessed by the public, so long as that does not mean infringing on a First Nations community. Sleeping in the wilds is considered the norm, and even heavily protected provincial parks have designated backcountry camping sites.
The USA also has vast swathes of public land, held in trust for the American people. Compare this to England, where almost all the land is privately owned. The right to roam is severely restricted. Even where public footpaths exist, they are typically located on private land – meaning you cannot camp there without the landowner’s permission.
Wild camping in Dartmoor National Park
Cultural disparity
In four years of living in B.C., I have been on numerous backcountry camping trips. Not once have I been moved on, told off, been called irresponsible or looked at with distaste. Quite the contrary. Most people want to know where you’re going, what route you took and where the nearest water supply is – all information logged so they, too, can recreate a similar excursion. It’s just a part of the lifestyle.
This cultural disparity struck a chord recently when I read The Salt Path by Raynor Winn. While walking the South West Coastal Path in England, Raynor and her husband camp on a beach one night. In the morning, a passing dog-walker calls them “disgusting”. I found this shocking. Have we become so removed from nature that sleeping under the stars is something to be reviled? Why exactly is wild camping all-but outlawed in England, but positively encouraged elsewhere?
Perhaps places like Canada are just more ‘outdoorsy’? Maybe it’s because the population is considerably smaller, yet has far more space to enjoy – space which is actually open to the public? Or is it because people (for the most part) obey the rules regarding backcountry camping? Most likely, it’s a combination of all these things.
Wild camping is not “disgusting”
All I know is that when done properly, there is nothing disgusting about wild camping. Evidently, a degree of education and respect is needed. Litterbugs can’t be tolerated and the habitat must be handled delicately. If the whole of the UK descends on Dartmoor for a Saturday night, then clearly there will be problems. But there are ways to manage the situation. In British Columbia, for example, backcountry camping permits are required for provincial parks, and rangers patrol the area to enforce the rules.
Some might question why you can’t just go to a campsite. But actually, campgrounds can be expensive, not to mention noisy and overrun with people. It’s completely different to being in the wilderness. You don’t get the sense of freedom or the enjoyment of the untamed landscape. It’s also unavailable to those who – like Raynor Winn and her husband – cannot afford the cost of a campground night after night.
The fact that sleeping on a beach is viewed with antipathy just goes to show how disconnected from nature we still are. In this day and age when we’re all being told to go outside more, this seems very contradictory. Perhaps it’s time to see wild camping for what it really is – not a crime, but a perfectly acceptable outdoor activity. Ultimately, this could have so many benefits. For our physical health. For our mental health. And who knows, perhaps even for Mother Nature herself. Because if others are anything like me, the more time they spend living up close and personal to nature, the more they’ll want to protect it.
If you love a backcountry cabin, then Tetrahedron Provincial Park is for you. With four maintained huts to choose from and a network of hiking trails to explore, it makes for a perfect weekend adventure.
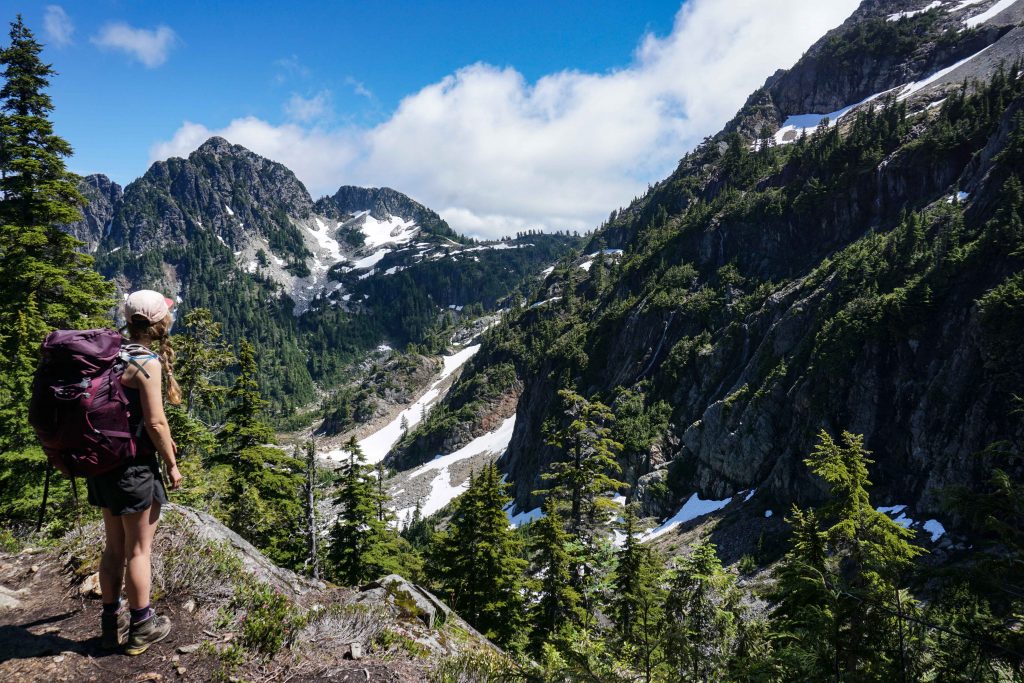
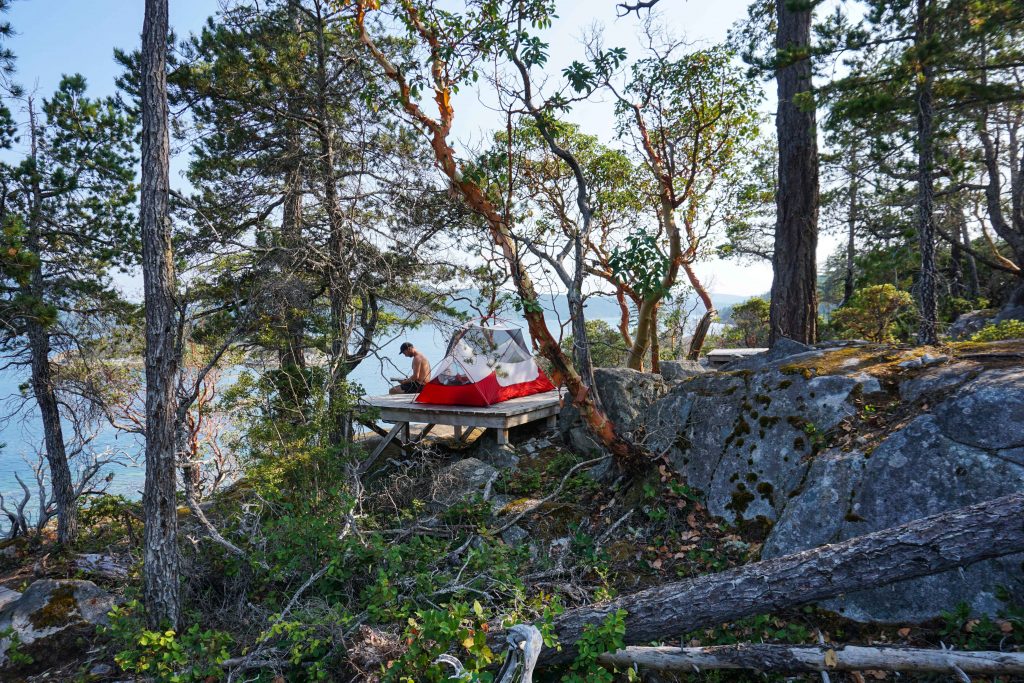
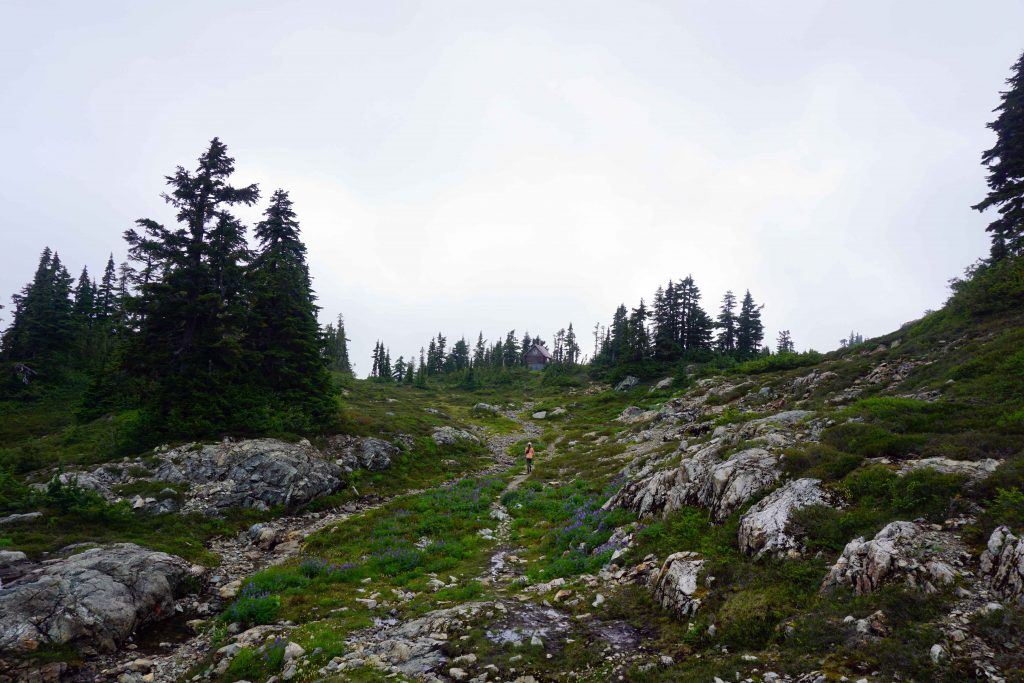
Tetrahedron Provincial Park is located on the Sunshine Coast, near Sechelt. In winter it’s a haven for backcountry skiers, who skin up to Mount Steele and Panther Peak in search of fresh lines. Come the warmer months, hikers hit the trails – although not in any great numbers, it seems. When we visited on a sunny Friday evening in August, ours was the only car in the parking lot.
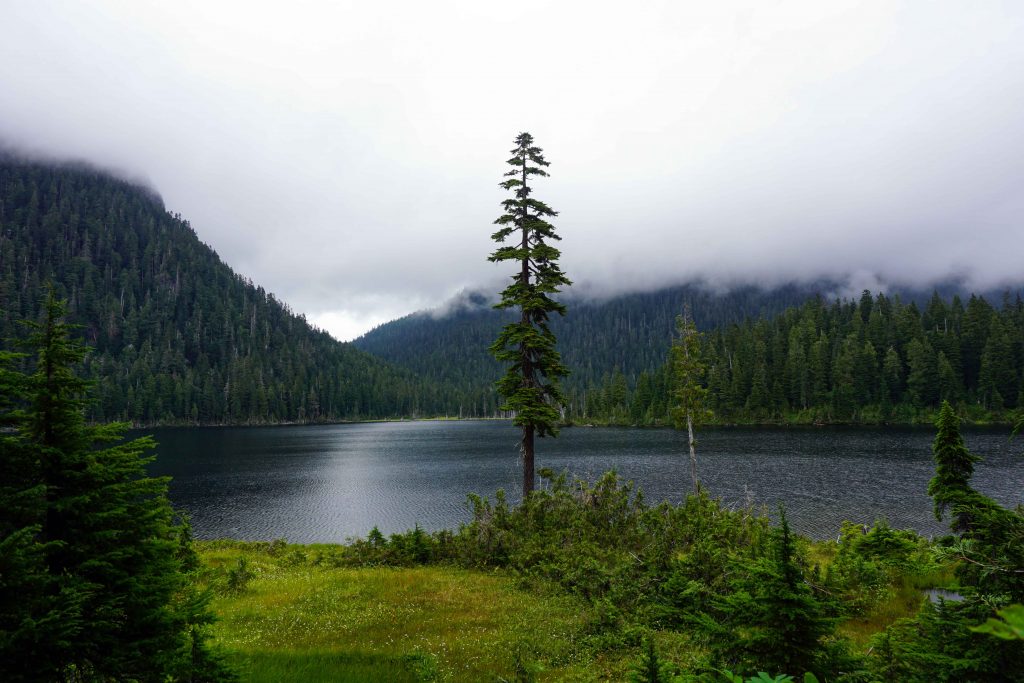
The hiking here isn’t difficult, if you don’t want it to be. You gain a significant amount of elevation when you drive up the logging road to the trailhead. From then on, you can weave your way along undulating trails, past subalpine lakes and boggy wetlands. If you prefer more of an ascent, the hike to Mount Steele is available and is around 8kms (one way) to the summit.
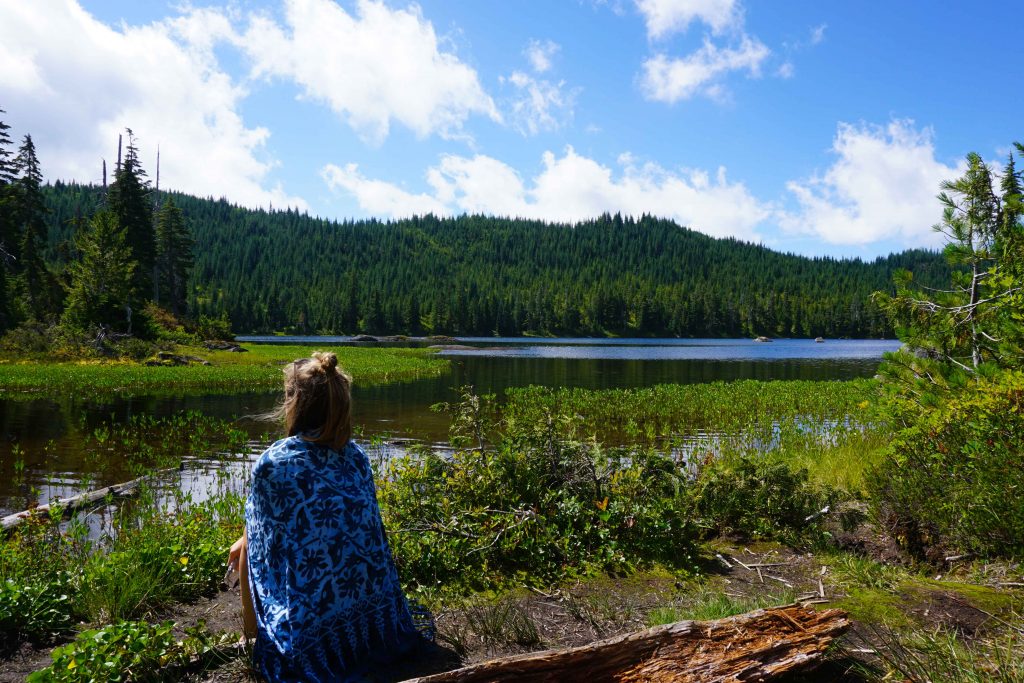
Chapman Lake
There are four backcountry cabins in the park, making this an ideal opportunity to stay overnight. While the cabins are rustic, they are brilliantly maintained by volunteers at the Tetrahedron Outdoor Club. Each has a stove stocked with firewood, a sink and grey water bucket (but no running water), a dining table and benches, an outhouse and a range of survival equipment. Even comfy sleeping pads are provided.
You cannot reserve these cabins – they are first come, first serve. You have to be prepared to share. The upstairs sleeping quarters are cosy, so you might want to take some ear plugs. In theory, the only other items you need are your sleeping bag, cooking equipment, water, toilet roll and dishwashing soap. I always recommend taking a tent, just in case the cabins are full. And you must pack out what you pack in – including food waste.
The hiking route
The great thing about hiking in Tetrahedron Provincial Park is that there are numerous options open to you. I wanted to see as much as possible in 48 hours, so devised a loop that incorporated all four cabins.
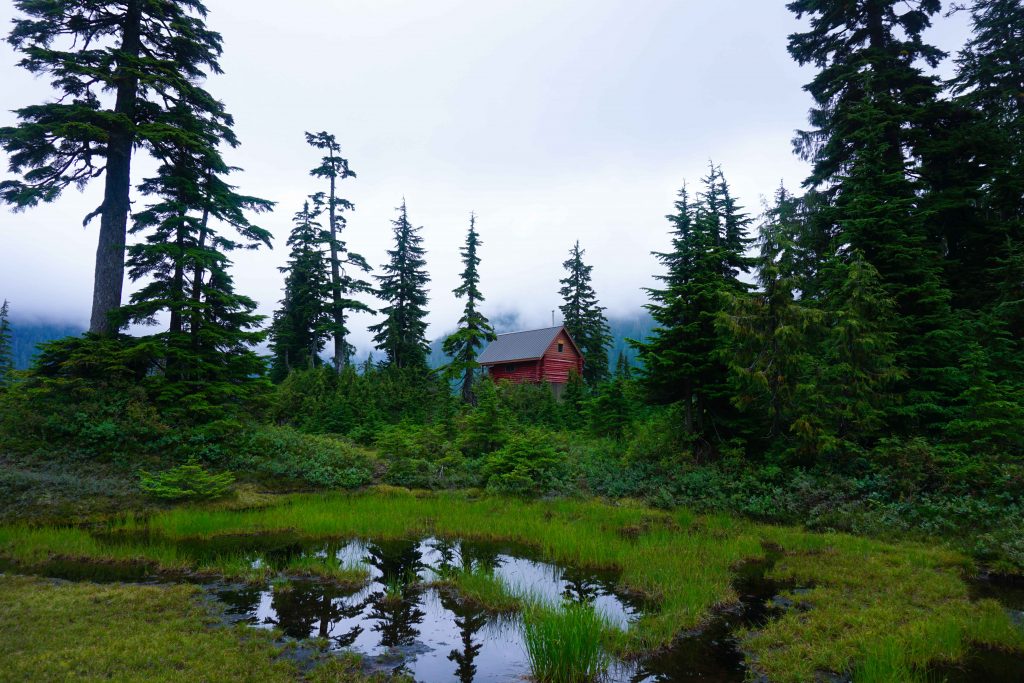
From the parking lot, we hiked the 4.5kms to Edwards Lake cabin. The first section is along an old logging trail, which if truth be told, isn’t very inspirational. Then, all of a sudden, you’re deep within the forest. The bushes are teeming with berries in August (and bears!) The terrain is easy-going, so it doesn’t take long until you skirt the edges of Edwards Lake. The cabin itself is a little further along the trail.
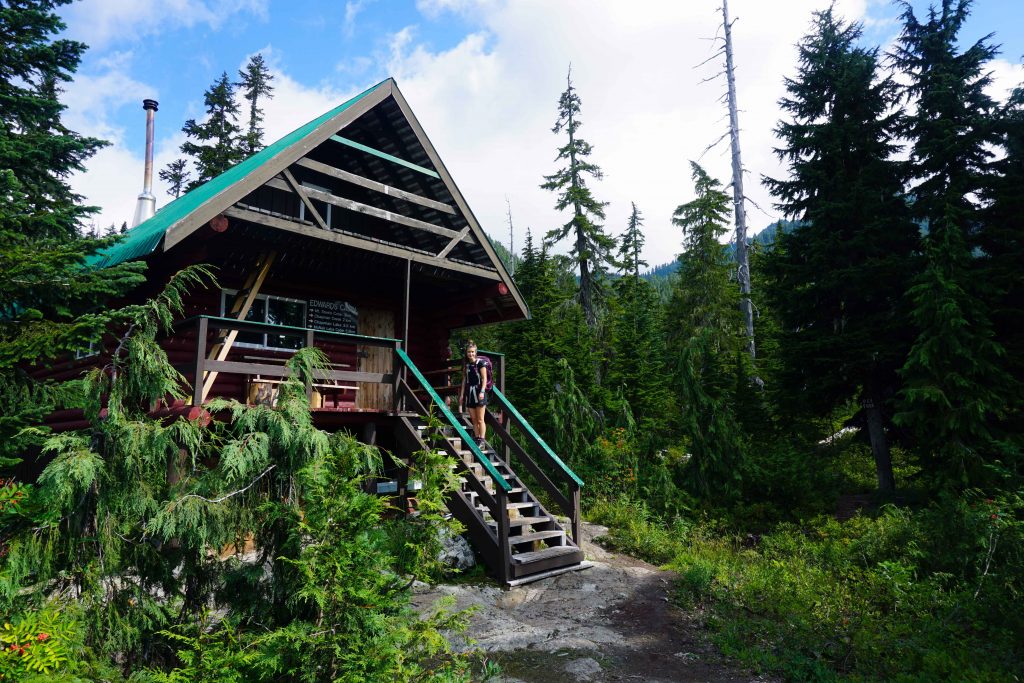
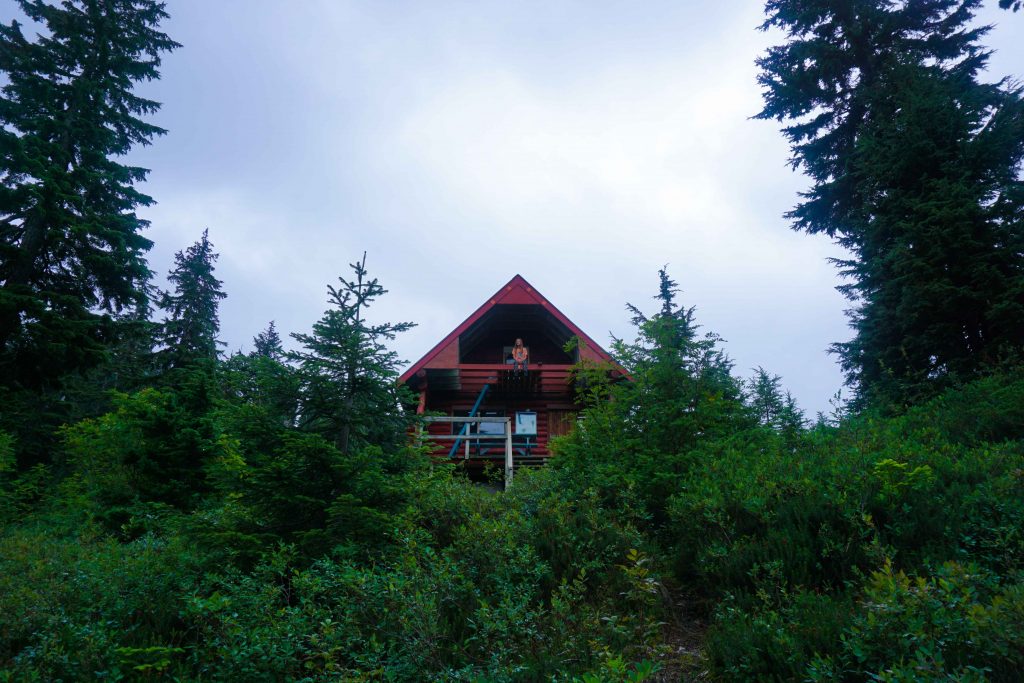
Edwards Lake cabin
We stayed the night at Edwards Lake cabin, which we had entirely to ourselves. In the morning, we left our big packs behind and put together a day hiking bag. We then headed over to McNair Lake cabin, which is 5kms (one way). The trail rolls up and down, over roots and creeks – some with questionable bridges. As you get closer to Chapman’s Lake, the ground gets wet and boggy. McNair Lake cabin appears shortly afterwards.
McNair Lake cabin
At this point we still hadn’t seen another human being since entering the park. In fact, we didn’t see anyone else until later that afternoon, when we came across a big group heading to Mount Steele. Walking alone to McNair Cabin was almost eerie, and strange for a Saturday in mid-summer. In Tetrahedron, it feels like you don’t have to go far to achieve a sense of isolation and remoteness.
After eating lunch, we retraced our footsteps almost to Edwards Lake cabin. But instead of turning left to the cabin, we continued upwards to Mount Steele cabin, which from this point is 3km one way. It’s a steep climb, so it’s much easier without a fully loaded backpack. From Mount Steele cabin, it’s a short hike up to the summit. We then returned to Edward’s Lake cabin for a second night, and this time we were joined by a local couple.
Walking up towards Mount Steele cabin
In the morning, we packed up all our belongings and returned almost to the parking lot. However, when we got to Victor’s Landing, we took a left turn towards Bachelor Lake cabin. There’s also a stone arrow on the floor to point you in the right direction. This is not a well-trodden path and is overgrown, so you need to follow your nose. You skirt the edge of the valley before descending down into the forest.
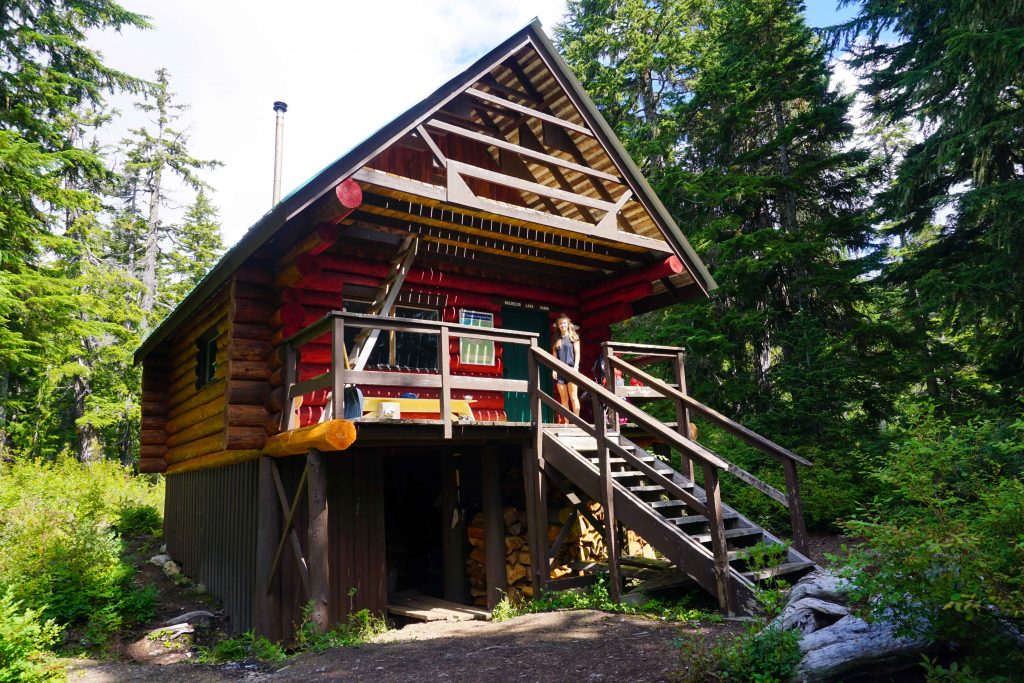
Bachelor Lake cabin
Apparently, Bachelor Lake cabin is the party cabin. We didn’t find any hungover souls, but we did have lunch and a sunbathe by the lake. We then returned to the parking lot via the normal summer trail – just follow the orange trail markers. And there you have it! Two days, four cabins and a few kms under our belts.
Bachelor Lake
Of course, you don’t have to follow this route. You can pick and choose which cabins or lakes you want to go to. Some might prefer the out and back to Mount Steele. This seemed to be the preferred destination for the hikers we did meet. Others may opt for the loop from the parking lot to Edwards Lake, returning via Bachelor Lake. For solitude, I suspect McNair Lake cabin is the best bet. It’s entirely up to you.
Know before you go
The road to the parking lot is steep and extremely rough. We just about managed it in a Honda Odyssey – but only just. If you do not have a 4WD with good clearance, do not attempt to make it to the upper parking lot. If you visit in winter, 4WD and snow chains are essential.
The cabins are maintained by volunteers from the Tetrahedron Outdoor Club. If you’re staying, they ask for a donation of $15 per person, per night, or $25 per family, per night. Fees are payable to the Tetrahedron Outdoor Club can be paid online. If you want to send a cheque, there are pre-addressed envelopes in the cabins.
There is no running water in the cabins. In the summer, you can refill at the creeks and the lakes. Water should be boiled or treated. Swimming is prohibited in the lakes and streams within the park because it’s a watershed.
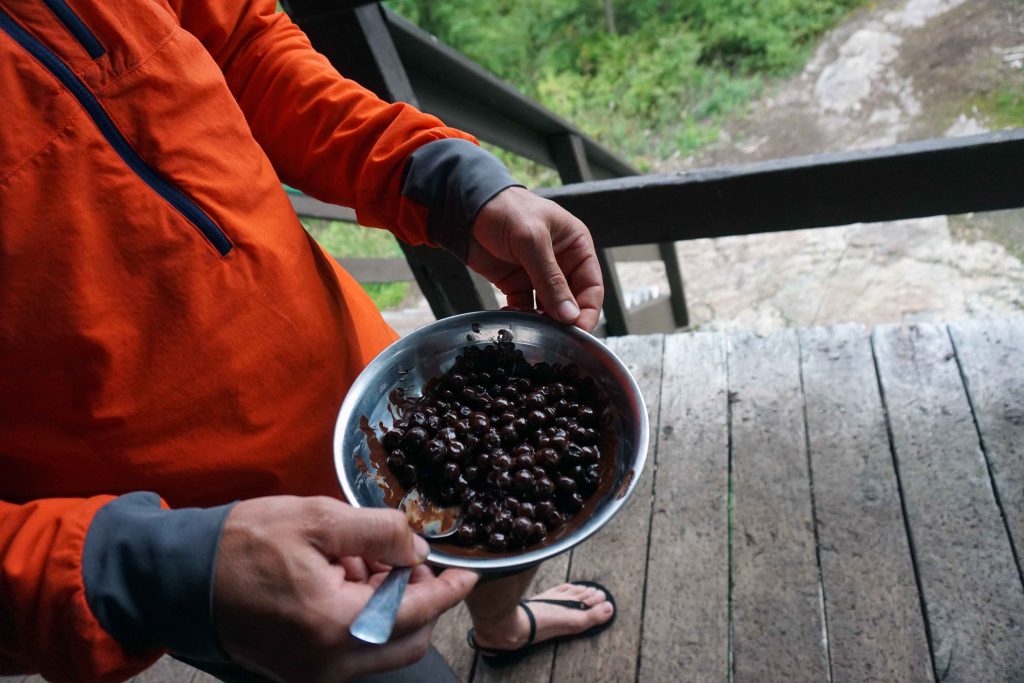
In the summer months the park is bursting with berries. Where you find berries, you inevitably find bears (we saw two). So, be bear aware!
Freshly picked berries covered in chocolate
There is little-to-no cell reception in the park.
Conditions are very different in winter. The lakes may be frozen and avalanche hazards exist.
Sure, expensive hotels are nice, with their fluffy towels and pressed linens. But if you ask me, nothing beats packing up your rucksack, venturing into the wilderness and setting up camp for the night. Not even The Ritz.
Overnight hikes into the backcountry are a challenge, of course. But they’re also so rewarding. You can go further than you otherwise would during a day hike, and it gives you more time to spend at a favourite lake or a beautiful vista. You can also set up a basecamp and explore the area further, without your bag weighing you down.
However, if you’ve never done an overnight hike before – also known as wild or backcountry camping – then it can seem a little intimidating. You might be asking yourself: ‘can I really pack everything I will need for a night (or more) and carry it for miles on end…and then carry it back again?’
Let me tell you – with the right planning and the right mindset, the answer is undoubtedly yes!
However, I’m obliged to warn you that it can take a lot of practise to hone your backcountry camping skills. I remember doing my first overnight hike at school as part of my Duke of Edinburgh Award. I had an impossibly big bag which weighed a ton. After many gruelling hours of walking I arrived at camp, my shoulders torn to shreds, my hips in agony, and little desire for a repeat performance.
Thankfully I did give it a second go, and a third, and then I got hooked. There were times when I took too much, and times when I took too little, but now (a little bit like Goldilocks’ porridge) I feel like I’ve got it ‘just right’. Yet it would be nice if you didn’t have to go through the same trauma as me. So, if you’ve always wanted to try an overnight hike but you’re not sure where to start, here are a few tips to help you along your way.
Get the right bag
Having the wrong backpack can result in tortuous discomfort, particularly on the shoulders, back and hips. Therefore it is well worth getting your mitts on a backpack which fits your body. Play around with the straps and continue to adjust them until it feels comfortable. About 80% of the weight should be rest on your hips and 20% should rest on your shoulders.
You might be tempted to go for the smallest bag you can find, but don’t forget, you need to have enough room for all your stuff! It’s difficult to say what size is best as it will depend on so many factors, such as how long you’re going for, how small your gear packs down, and how good you are at cutting the non-essentials from your life. Generally, something between 50L and 65L is suitable. If you’re planning on sleeping in a hammock, you can get away with less.
Invest in lightweight gear
Buy, rent or borrow lightweight gear. Seriously, it makes a huge difference. In particular, having a small lightweight tent, roll-mat or mattress, and compact sleeping bag are key. Not only will it leave more space in your bag for other essentials, it will reduce the amount of weight you’re carrying. Which is, as I’m about to explain, absolutely vital.
What do you really need? Really?
It falls on your shoulders to take everything you need – quite literally. Unless you really enjoy pain, you’re going to want to make your bag as light as possible. That means that every single thing you pack needs to be there for a reason.
Now then, that doesn’t mean you should leave out sensible things, like a medical kit. Rather, cut down on the luxuries and non-essentials. Remember, you’re going backcountry camping, not to luxuriate at the Fairmont. If you’re going for one night, you don’t need seven outfits. And no, you don’t need your favourite fluffy pillow!
Think carefully about food and water
When you arrive at your destination, there won’t be a 7/11 will aisles full of delicious snacks and hot coffee on tap. Oh no. And if you don’t have enough food and water, it will make for a very miserable (and potentially dangerous) adventure.
When it comes to water, you’ll probably need more than you think. Hiking with heavy backpacks on is thirsty work, and you may also need water for cooking. Check whether there are any fresh water sources en route where you can refill, bearing in mind that creeks and rivers can dry up during the warmer months. If there aren’t any, carefully consider how much water you will need and load up your bag. Yes, it’s heavy. But you’re going to need it.
As for food, there are a variety of options available. Lots of people opt for the pouches of freeze-dried food. If possible, I avoid these in favour of homemade food. If you do too, don’t plan meals that require every single pot, pan and utensil in your kitchen cupboard (or lots of water). Instead, think about what is going to be easiest on a single gas-burner.
If I’m just going for one night, I’ll normally pre-cook a meal and simmer it for hours, meaning it reduces right down and can be easily packed into a small jar. When it comes to dinnertime at camp, I simply need to heat it up and rehydrate it with some water. Et voilà, a delicious meal is served!
Prepare for Leave No Trace principles
Whenever you are in the great outdoors, practice Leave No Trace principles. Pack out what you pack in, taking all your rubbish and trash home with you. If you need to relieve yourself (you know what I mean!) then bury it. And if you are camping for the night, don’t disturb the local flora and fauna when pitching your tent.
Have a practise run
It can be a great idea to have a practice run. Lay out everything you think you would take on an overnight hike, pack it in your bag, then go on a short walk or hike (preferably a trail you know well, so you don’t get lost). This will give you a good idea of how it feels to hike with a backpack, and whether you can realistically manage to carry the weight for an extended period of time. If not, you may need to shave a few pounds.
Start with something easy
For your first backcountry camping experience, don’t go crazy. You don’t need to conquer the world just yet. Instead, choose an easy route with minimal elevation gain, little to no technical sections and pleasant weather conditions. Once you’ve refined your skills and grown in confidence, you can start on some more difficult trails, or even multi-day hikes. It won’t be long before you’re eyeing up Everest basecamp.