Dressing for winter hiking is an exact science. Dress too warmly and you’ll get too hot. You’ll then sweat, which as it turns out, will only make you colder (that’s the very point of sweat, after all). But if you wear too little then you’ll be cold anyway. And guess what – you don’t want to be cold, because that’s dangerous. Instead, you want your body temperature to be just right.
What a conundrum.
I’ve been in pursuit of the perfect winter hiking wardrobe for many years now. I’ve made plenty of mistakes. I’ve worn ridiculously heavy coats. I’ve cried because my hands were so cold. I’ve had trench foot and made numerous other rookie errors. Now, however, I know what works and what doesn’t.
You’ll probably go through the same learning curve, because despite all the advice out there, it’s always relative to the situation. What’s ‘right’ and what’s ‘wrong’ very much depends on who you are and where you are in the world. Some of you will be living in a polar vortex, while others will think it’s cold at 15°c.
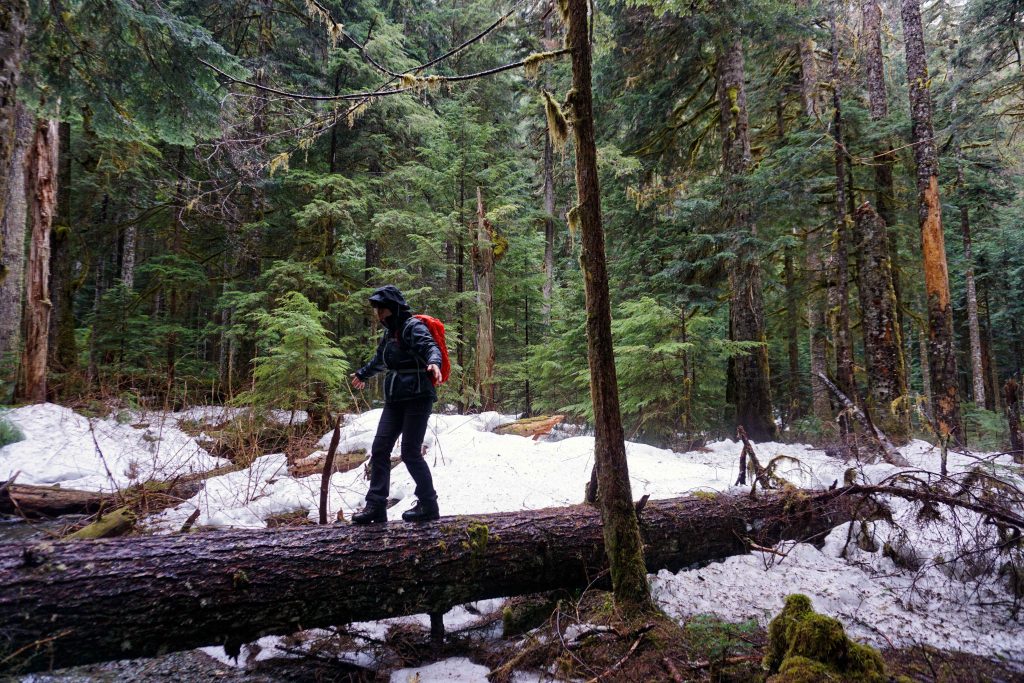
Ultimately, the key to winter hiking is to dress in layers, including a base layer, a mid-layer and an outer shell. This is known as the three-layer system. You can peel these layers off as required – hence the expression ‘dress like an onion’. Then you need to add a few extra accessories to keep your extremities toasty.
What to wear winter hiking
If you live in a cold, wet or snowy climate, then here’s what I suggest you wear for winter hikes.
On the top half
Let’s start with the top half of the body.
Underwear
Wow, straight in there with the underwear. But seriously, if you’re wearing a sports bra/underwear, be sure to choose woollen or synthetic materials. You don’t want to wear any cotton while hiking, even if it’s your undies.
Base layer
Next up is a base layer. This is a lightweight layer which should preferably be made from merino wool or synthetic materials. I run very cold (honestly, you’ve never met someone as cold as me) which is why I actually wear two base layers – one short-sleeve and one long-sleeve. They are both snug fitting but not cut-your-circulation-off kind of tight.
You can spend a lot of money on technical base layers, and honestly, it would be money well spent. But unfortunately, that’s not a luxury we can all afford. I do perfectly well with an acrylic base layer I bought from Marks & Spencer (in the UK) and a polyester top I bought from Go Outdoors (also in the UK). I use both of them for skiing, too. The main problem with these is that they retain body odour, meaning they get quite stinky.
Base layers are categorised in terms of the weight. The heavier it is, the thicker it will be. If you’re in the market for a winter hiking base layer, I recommend a mid-weight base layer from Icebreaker. Woolx, Patagonia and Smartwool also have some great options. If you run warm or you want something more versatile that you can use year-round, get a lightweight base layer instead.
Mid-layer
On top of your base layer, you should wear a mid-layer. This should insulate you, but it should also be breathable. You don’t want anything too heavy duty or you’ll get too hot. A fleece or a lightweight woollen jumper is ideal. As always, stay away from cotton. I wear a 100% wool jumper that I found in a thrift store.
Some people also use lightweight down jackets or vests, like the Nano Puff from Patagonia. This is great if it’s very cold and dry. However, you may get too warm. Also, down isn’t effective when it’s wet, unlike fleece which dries quickly. If you’re looking to buy, then anything rated ‘R1’ by Patagonia is a sound investment.
Your mid-layer is actually the hardest layer to get right because the amount of insulation you need fluctuates according to the air temperature and your body temperature. On the ascent, I can sometimes do without a mid-layer if it’s very mild outside. On the flip side, I can get very cold on the descent, meaning I actually need several mid-layers. That’s why you need to dress like an onion. Peel layers off (and add layers on) as needed.
Outer shell jacket
The final piece of the three-layer system for hiking is your shell jacket. You’re probably used to wearing a nice big coat when you’re out and about in winter. But this isn’t what you want for winter hiking. Instead, you need a lightweight jacket that’s waterproof and breathable. Remember, it’s your mid-layers that are keeping you warm. Your jacket’s job is to protect you from the elements, be it the rain, wind or snow.
Although it costs more money, I really recommend getting a jacket with Gore-Tex technology. This ensures that it’s waterproof AND breathable. Otherwise, you’ll get wet when it rains. You’ll also retain moisture when you sweat, making you overheat.
I wear a North Face Gore-Tex rain jacket (which is no longer in production) or the Women’s Calcite Jacket from Patagonia (which I also wear for ski touring).
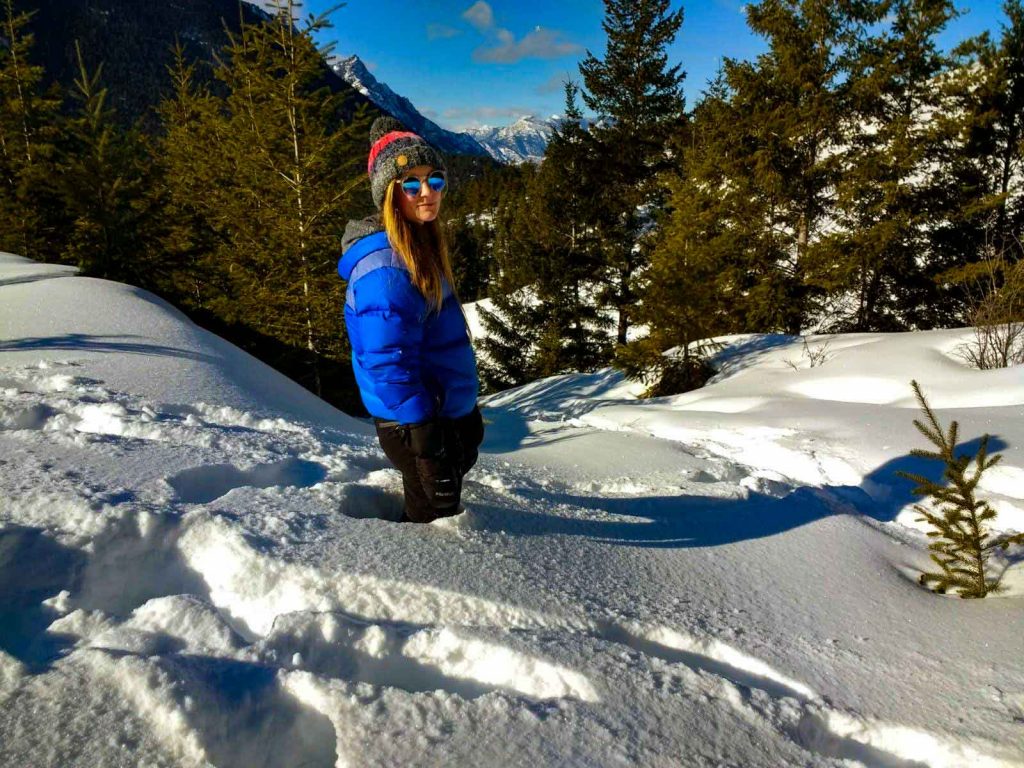
Hat
You lose a lot of heat through your head, which is why it’s a good idea to wear a warm hat. This has the added benefit of keeping your ears warm, which I find tend to really suffer in cold winds. When it’s dry, I usually wear a woolly bobble hat (or beanie/toque). If it’s raining then I’ll swap this for a cap which I wear under my jacket hood. This does a good job of keeping the rain off my face.
If I want to wear my hair in a pony tail then I might ditch the hat and use a headband/rolled up buff instead. This ensures my ears stay warm.
Gloves
Personally, I find it very difficult to keep my hands warm while hiking in winter. Even when the rest of me is nice and toasty, my hands are like little ice cubes. That’s why I wear two pairs of gloves. This includes some heavy-duty mittens from Marmot and a glove liner from MEC. I pack spare gloves in my backpack and a re-suable hand warmer.
Buff/Balaclava
If it’s really cold and windy outside, then you don’t want any part of your body to be exposed. Wind chill on your face can really hurt. Because of this, you might want a buff or balaclava to cover your neck and face.
Eyewear
If you’re hiking in snow, then the glare from the sun can be blinding. Consider taking a pair of sunglasses, even if it’s overcast. Conversely, if there’s a cold wind whipping around you (or a snow storm) then this can affect your eyes. If so, a pair of ski goggles provides good protection. This is reserved for extreme weather and you probably won’t encounter such elements if you’re new to winter hiking.
On the bottom half
Now on to the bottom half of your body. There are lots of options when it comes to layering the bottom half of your body. I don’t always stick to the traditional three-layer system. Sometimes I just wear leggings, or leggings and soft shell pants, or leggings and rain pants. The right combination depends on how cold it is and whether or not you’re hiking in rain, mud or snow.
Base layer leggings/tights/pants
Usually, I wear winter running tights as my base layer. These are thicker than your average exercise leggings. Or I wear thermal leggings (often called thermal underwear or long johns) which I also use for skiing. You can get these in pretty much any activewear range. For top specification, take a look at midweight base layer leggings/tights from brands such as Woolx and Icebreaker. Don’t wear denim or cotton.
Soft shell pants
If it’s really cold, I’ll then wear a pair of soft shell pants over the top of my leggings. (If not, I just stick to my winter running tights). Soft shell pants are wind and water resistant, but not waterproof. Sometimes they are insulated and/or fleece lined. Ideally, they will have zippered vents so you can cool down without having to take anything off.
If you’re in to backcountry skiing or splitboarding, then you can re-purpose your touring pants/bibs for winter hiking. I use a pair of lightweight hiking pants because I prefer to have a more dynamic range of movement, rather than be too bulky or hot. More technical options are available from brands such as Fjallraven, Patagonia and Arc’teryx.
Hard shell pants/rain pants
Soft shell pants aren’t normally waterproof, which is why you might also want a pair of hard shell pants or rain pants. I only wear rain pants (from MEC) if the heavens open because otherwise I find them to be too sweaty. The rest of the time they live in my backpack.
Winter hiking socks
Specialist hiking socks are always preferable over ‘normal’ socks because they are designed to wick away moisture and limit blisters. Winter hiking socks are that little bit thicker for added warmth. I’ve recently been testing out some waterproof socks from Seal Skinz. Wool socks from Icebreaker, Smartwool and Darn Tough are also good options.
Hiking boots
You can get hiking boots specifically designed for winter. These have more insulation. However, any hiking boot that is waterproof, has good traction and ankle support will do. I use La Sportiva Trango TRK GTX hiking boots year-round.
Related: Kit Review – La Sportiva Trango TRK GTX hiking boots
Gaiters
Mud, snow and water can all spill over the top of your hiking boots and get your socks wet. The result will be cold, soggy feet. Gaiters stop this from happening, making them a useful hiking tool, especially in the winter.
What else to pack
The above is what I’d expect to be wearing when I arrive at the trailhead, aside from gaiters/ski goggles which are dependent on the conditions. I will also have:
- Extra mid-layers that I can add/remove when I get too cold/hot
- A down jacket that I wear underneath my shell jacket when I stop for a break. I might also wear it if I’m not generating much body heat – for example, on the descent
- Extra socks and gloves
- The 10 Essentials for hiking safety
- Micro-spikes and snowshoes, if hiking in ice or snow
- A shovel, probe and transceiver, if hiking in avalanche terrain
Your backpack
Because you need so much extra stuff when hiking in winter, you’ll probably need a larger backpack than you would for summer day hikes. I use the Norrøna Lyngen 35L ski touring pack (which, as you might guess, I also use for ski touring).
Related: Kit Review – Norrøna Lyngen 35L ski touring pack.
What else do you need to know?
When it comes to dressing for winter hikes, there are a few important things to remember.
Be bold, start cold
The first is to ‘be bold, start cold’. In other words, you should be slightly cold at the start of the trailhead. Don’t worry, you’ll soon warm up.
Act quickly if you’re too hot or too cold
If you are too hot or too cold, take action straightaway. Don’t wait until you’re really freezing or you’re sweating profusely. Both things will work against you. Stop immediately and add/remove layers as needed, even if that means stopping your group.
Add layers as soon as you stop for a break
If you break for lunch, to admire the view or simply for a rest, put more layers on right away. Even if you feel hot, you will cool down incredibly quickly. Pre-empt this by putting on a down jacket or more mid-layers.
Keep moving but don’t sweat it
If you’ve stopped and you start to shiver, the best thing is to get moving again. Having said that, you don’t want to adopt such a quick pace that you start to sweat.
Cotton is rotten
I’ve mentioned this a few times, but never wear cotton while hiking. Hikers practically chant the mantra ‘cotton is rotten’. This is because if it gets wet, it stays wet (therefore making you cold). Choose wool or synthetic materials. Generally, synthetic clothing is cheaper but is worse for the environment, as it’s essentially plastic. Wool garments are naturally odour resistant.
Related: Top Tips for Winter Hiking