Hiking can absolutely be a year-round activity. However, hiking in winter is a little different to hiking in summer. It’s cold and dark. There are more hazards. And having the right gear can make the difference between a great day out and a downright miserable experience.
If you’re hoping to hit the trails this winter, here are some top tips to keep you safe and warm.
Check the trail conditions
If you’re planning a hike, then you probably have an objective in mind. Do some research to find out what the trail conditions are like.
For recent events, find the nearest mountain listed on mountain-forecast.com and cross-reference the week’s weather with your intended destination. If the hike is in the vicinity of a ski resort, check snow-forecast.com instead. The resort might also have webcams you can check. Then take a look at local hiking forums and social media. Reach out to anyone who’s recently been in the area and ask them questions – was there snow on the trail? Was it horrendously muddy? How’s the access road? Hikers are a friendly bunch and will be more than happy to share information with you.
Let the conditions guide your decision-making. If the trail is likely to present difficulties – such as snow, ice or swollen waterways – then ask yourself if you’re equipped to deal with those kinds of conditions. If not, explore alternative options instead.
Check the weather and time of sunrise/sunset
Checking the weather forecast on the day of your hike is good practice, no matter what month it is. But it’s particularly important during the winter months when small temperature drops can make the difference between hiking in the rain and hiking in a blizzard.
If the weather is less than favourable, don’t be afraid to shelve your plans for another day. Remember, heavy rains can cause rivers to swell, low visibility can make navigation impossible, high winds can cause trees to fall and unstable loading in avalanche terrain. If the weather is going to compromise your safety, don’t go.
Also pay close attention to the number of daylight hours you have available. When checking the forecast, take note of when the sun sets. You can of course hike in the dark if you want (provided you have a sufficient light source), but don’t let it catch you out. You might prefer to start early and finish early. That way, you can be home safe and sound by the time darkness falls.
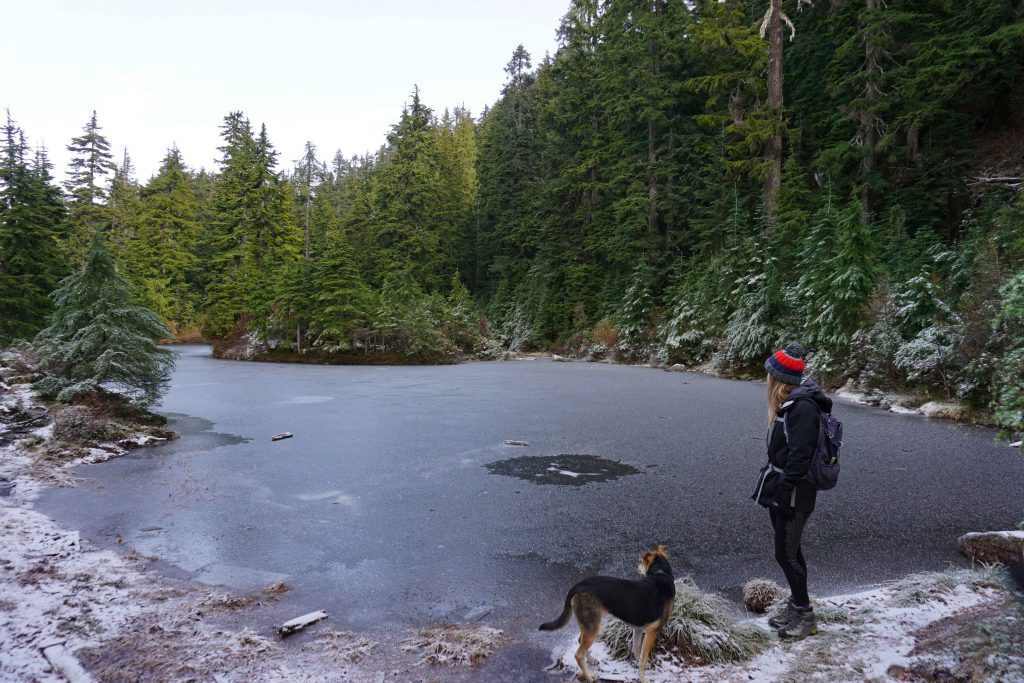
Wear and carry layers – and lots of them!
Once you’re on the trails, the key is to dress in layers. Actually, this applies year-round, but all the more so in winter when you’ll quickly switch between hot and cold.
In the past, I’d arrive at the trailhead shivering and put all my layers on. Then I’d hike for about five minutes, be sweltering hot and have to take them all off again. I’ve finally learned that I’ll quickly warm up once I get moving. I’ve also learned that it’s bad to overheat while hiking in the winter. Someone once said to me: “you sweat; you die.” This is slightly alarmist, but I get the point. If you start sweating, that moisture will cool on your skin. When you stop, you’ll suddenly be extremely cold.
So, dress in layers. During the hike, remove and add layers as needed. If you’re getting hot, stop and peel some clothes off. If you’re getting cold, stop and add more. It can be tempting to ignore your body temperature and carry on hiking. However, you either risk over-heating – meaning you’ll get sweaty and then eventually become very cold. Or you risk a steady descent into mild hypothermia, from which it can be very difficult to warm up from. Don’t worry about stopping your group so you can layer/un-layer. Chances are, everyone else will want to do the same thing.
On the top, you’ll want a base layer which wicks sweat away. Don’t wear cotton – it retains moisture and will make you colder in the long-run. Then you’ll want a mid-layer, which is something a little warmer like a fleece. Then you’ll want a shell jacket for your outer layer. A waterproof jacket is ideal because it prevents wind chill and keeps you dry. When you stop (or if you get cold), whip out a down jacket and some additional mid-layers to keep you toasty. On your lower half, you’ll want moisture wicking tights/leggings and some waterproof trousers (pants) on top. You can remove the latter if you get hot or conditions are dry.
You should also take a warm hat, gloves and a buff to protect your face from wind chill. I like to take spare gloves and socks, just in case the pair I’m wearing get wet or I’m really, really cold. Take more clothes than you think you need – even if that means taking a bigger bag than you normally would on a day hike.
Top tip – when you stop for lunch or to admire the view, put your warmer layers on immediately! You might feel fine to begin with but you’ll cool down very quickly. Stave off the cold by layering up straightaway.
Related: What to Wear Hiking in Winter
Wear the right footwear
You can get away with hiking in trainers in the summer. Not so in the winter. You’ll absolutely need waterproof hiking boots. They should be high-cut, meaning they wrap around your ankle. They should also have aggressive lugs which allow for better traction in wet, slippery conditions. If it’s going to be really cold, you can invest in a pair of insulated hiking boots.
Synthetic or wool socks will help keep your feet dry. Gaiters can also be helpful if you’re going to be wading through mud, slush or snow.

Carry micro spikes and snowshoes
If the trail is snow-covered, you’ll either need micro spikes, snowshoes or both. Lots of people automatically reach for snowshoes when they’re hiking in snow. However, snowshoes are only useful for floating in deep snow. They provide a greater surface area so prevent you from sinking. But they don’t have very good grip. If the trail is full of compressed, icy snow, then micro spikes are better. If it’s steep, then you might need crampons.
It’s very easy to slip and hurt yourself in winter conditions. In fact, this is a common cause of winter hiking accidents. Even the first snowfall of the season can turn the trail into an ice rink. If you don’t want to be sliding down on your backside, be sure to carry micro spikes and/or snowshoes with you. Micro spikes can be easily stashed in your bag when you don’t need them, while snowshoes can be lashed onto the outside of your rucksack.
Keep eating and drinking
You might not feel very hungry or thirsty while hiking in winter, yet it’s vital that you keep eating and drinking.
You actually burn more calories while hiking in winter because your body is working harder to keep warm. Stay fuelled by guzzling high-energy snacks at regular intervals. Some foods become solid at low temperatures, so things like a traditional sandwich might not be too palatable. Hunks of hard cheese and dark chocolate work well. I also like to take a flask of hot soup to glug at lunchtime.
Stay hydrated by taking regular sips of water. You might not sweat as much as you do when hiking in summer, but you’re still losing moisture. The tubes on hydration bladders often freeze in cold weather. You can combat this by filling your bladder with warm water and sipping on it frequently throughout the day. You can also try an insulated tube cover, or simply switch to insulated bottles instead.
Prepare for the unexpected
I once read that when even if you’re planning on a day hike, you should be prepared for an overnight hike. This is all the more pertinent in winter when you have fewer daylight hours to get yourself out of a jam.
Always carry the 10 Essentials with you. Then, think like a catastrophist and pack extra of everything. This includes extra layers, food, lights and batteries or chargers for electronics (which often die in cold weather!) Take a bivvy bag just in case you end up camping overnight. Stick some handwarmers in your bag which will save your fingers if you get really cold. And always leave a trip plan with a friend or family member.
Get avalanche safety training
If you plan on venturing into avalanche terrain, then you need to attend an Avalanche Skills Training (AST) course. This gives you the knowledge required to identify avalanche hazards and minimise the risks. You and every member of your party will need to carry an avalanche receiver, probe and shovel – and know how to use them!
It’s a common misconception that only skiers and snowboarders get caught in avalanches. Actually, snowshoers and winter hikers are frequently killed or injured in the mountains, be it in avalanches or collapsed cornices. Obviously, it all depends on where you’re hiking. If you’re trudging across the Mendip Hills in England, you don’t need to know the meaning of surface hoar. But if you’re headed to snowy peaks, it could be crucial. If you’re not sure, book yourself onto a course anyway. You’ll learn a bunch of interesting (and potentially life-saving) information and maybe even make some new hiking buddies in the process.
If you have any other tips for winter hiking then I’d love to hear them!
