Camping in snowy conditions presents its own set of challenges – but it can be done with the right know-how. Here’s how to make your snowy camping trip a success.
Match your sleeping gear to the conditions
As with any other type of camping, you’ll need a tent, a sleeping bag and a sleeping mat. When it comes to winter camping, you need to make sure these items are equipped to deal with the conditions.
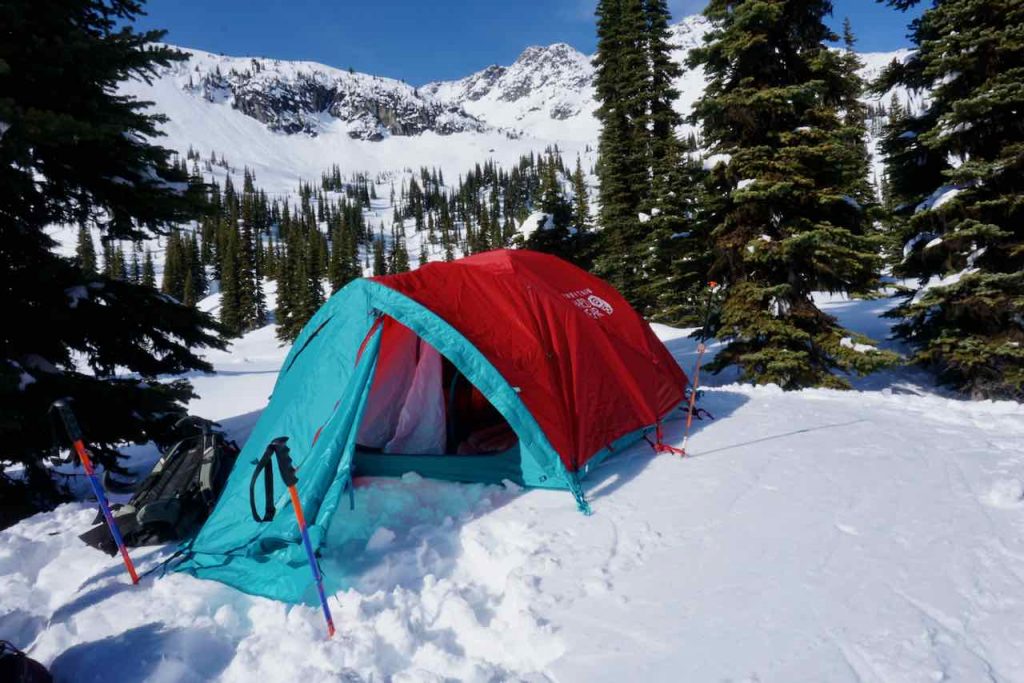
If you’re camping in mild weather and you won’t encounter much wind or snow, then a three-season tent will suffice. This is especially true if you’re camping below the treeline. Otherwise, you’ll want a four-season tent. These can handle high winds and snow loading thanks to their shape, strong poles and robust fabrics.
Sleeping bags are given temperature ratings. Your sleeping bag needs to fall well within the range of the temperatures you’ll likely experience. Like a tent, this probably means getting a four-season sleeping bag, or a three-season sleeping bag if it’s not too cold. You can also use a sleeping bag liner to up the warmth by a few degrees.
Inflatable sleeping pads are given an R-value. This denotes how well the pad’s insulation resists the transfer of heat. Camping on snow requires an R-value of 4.5 and up. Anything lower and you’ll find the cold seeps up from the ground beneath you. Placing a closed-cell foam mat under your sleeping pad, or using two sleeping pads, adds greater insulation.
Select a good site for your tent
When you reach your desired destination, take some time to find a suitable site to pitch your tent. You want somewhere that’s:
- Flat
- Not too exposed to the wind
- Not underneath dead or decaying trees/branches
- Not underneath tree branches that are heavily loaded with snow – tree bombs are a risk!
- Not in an avalanche path
Pack down the snow
Pack down the snow your tent is going to sit on. The best way to do this is to stomp on it while wearing your skis, snowshoes or boots. Compact snow is more comfortable to sleep on. It also insulates heat better than loose snow.
Spread your weight evenly while you’re inside the tent. If you kneel on the floorspace of your tent – or lean on an elbow – then you’ll create a divot in the snow beneath you.
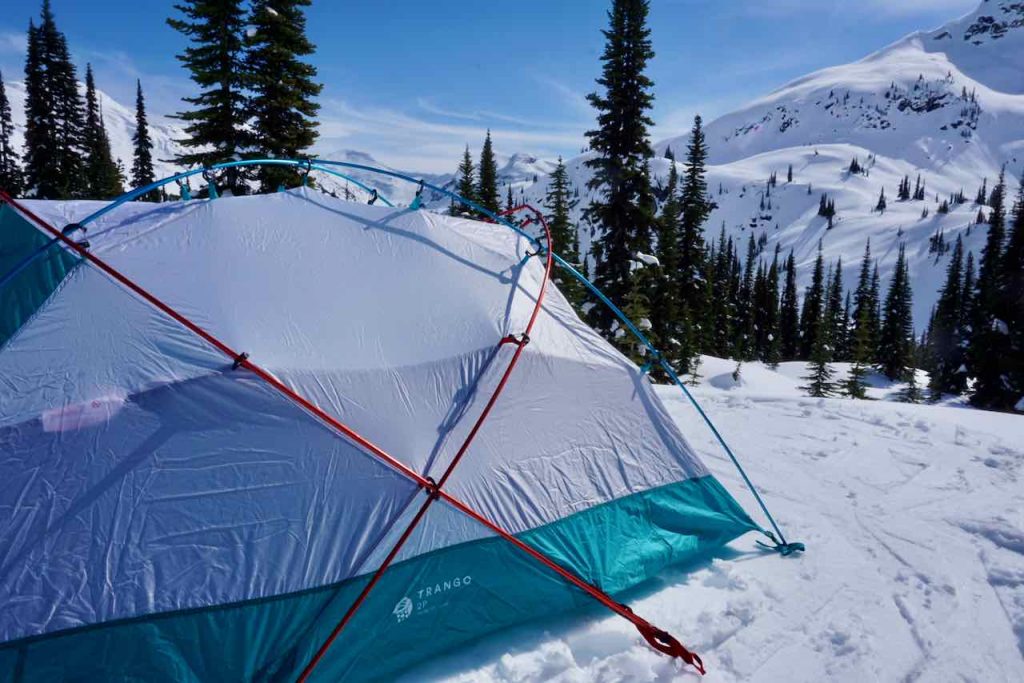
Pitch the lowest part of your tent towards the wind
If you’re in an exposed location, pitch your tent so the opening is downwind. Otherwise, when you open the zip, the wind could rush in and create a balloon. Ideally, you want the lowest and narrowest part of your tent towards the wind.
Use snow stakes
Ordinary tent stakes don’t work in snow, which is why you need to use special snow stakes. If you don’t have any, you can always bury the stake in the snow. Or you can use something to weigh down the guy lines, such as a nearby rock, log, or stuff sacks filled with snow.
Build a snow wall
For extra wind protection, build a snow wall around your tent, or at least in the direction of the prevailing winds. You’ll want a shovel to do this as it needs to be about the height of your tent. The idea is that the wind gets trapped behind the wall, rather than blasting directly into your tent.
Digging two to three feet of snow out of your tent’s vestibule space is another trick, as the cold air settles at the bottom. This has an added benefit because you can dangle your legs into the space, allowing you to sit up comfortably in the tent. If you do this, you can use the discarded snow to build a wall!
You can also pile snow on top of the snow skirt, if your tent has one. However, this can reduce ventilation inside the tent.
Create a camp kitchen
The great thing about snow is that you can use it to build tables, benches and cooking stations. Get your shovel ready to create the camp kitchen of your dreams. It’s easier to dig away the snow, leaving a perfectly formed table or bench in situ. Just remember to sit on something waterproof – and preferably insulated – to prevent your bum from getting cold and wet. A foam mat is a good example.
Consider taking camping chairs if the snow isn’t deep enough to create a camp kitchen, or you aren’t worried about travelling lightly.
Use a liquid fuel stove
Butane and isobutane canisters don’t work well in cold temperatures. Instead, use a liquid fuel stove. These run on white fuel and perform much better in freezing conditions.
Melt snow for your water
Unless you take enough water for your entire trip, you’ll have to melt snow for your drinking water. Melting a big chunk of snow takes a surprisingly long time and produces a surprisingly small amount of water. Prepare for this in terms of the amount of fuel you take, and the amount of time you allocate to the task.
Get everyone in your group to pee in the same place so you don’t inadvertently collect yellow snow for drinking water.
Also remember that water can freeze in frigid conditions. Store your water inside your tent, and turn any water bottles upside (with the lid securely fasted, of course!) This is because water freezes from the top down.
Sleep with your gear in the tent, or in your sleeping bag
Bring all your gear inside the tent, aside from anything with sharp edges, such as skis, snowshoes and crampons. You really don’t want to tear the tent while camping in snow. Spread everything else out on the floor space around you. This provides more insulation from the cold ground beneath you.
Also sleep with your clothes, electronics and ski boot liners (if relevant) inside your sleeping bag. Again, this provides more insultation. It also ensures they’re nice and toasty in the morning. As for electronics, the cold zaps their power, so keeping them warm preserves the battery.
Wear layers
Wear lots of layers. Steer clear of cotton because it has poor moisture-wicking abilities, meaning it will make you very cold if it gets wet. Instead opt for clothes made out of synthetic materials, down and merino wool. Use midweight base layers, topped with warm mid layers, and a puffy down jacket. A waterproof jacket can be worn over the top to protect you again wind and snow. You’ll want a similar layering system on the bottom, with fleece long johns and waterproof pants. Finish the look with a warm hat and sunglasses/goggles.
Pay close attention to your hands and feet – they are much more likely to suffer. Keep your feet dry by using waterproof hiking boots and gaiters (if hiking/snowshoeing). Take a few pairs of socks and gloves so you can swap them out if they get damp. Hand and toe warmers can also be life savers.
Stay warm
Along with wearing layers, there are some other things you can do to keep yourself warm.
Keep active but don’t sweat. Sweat is designed to cool you down, which you don’t want in a snowy environment. Pitching your tent and creating a camp kitchen will keep the blood pumping. If you start to get chilly, do some star jumps or jog on the spot.
Remove any wet or damp clothes as soon as you arrive at your camp. Also, put your warm layers on immediately, even if you don’t feel particularly cold. You’ll soon cool down, and it’s better to trap the warm air inside your clothes while you can.
As mentioned above, the right sleep systems can go a long way in keeping you warm while winter camping. Get into your sleeping bag while you have an elevated body temperature. Sleeping bags work by trapping the warm air radiating from your body, so try doing some gentle exercises before bedding down for the night.
Pop a hot water bottle or hand warmers into your sleeping bag. Nalgene bottles work especially well as hot water bottles, and can also be used as drinking receptacles during the daytime. Slip a sock over the bottle if it’s too hot to handle. Be sure to do the lid up tightly – any leakages could scald you, and will also leave your sleeping bag sopping wet.
Eat regularly and stay hydrated. Hunger and dehydration make it hard to maintain your body temperature. Hot meals that are quick to prepare and easy to wash up are ideal.
Finally, pee when you need to (see below to find out why!)
Pee when you need to
When you need to pee, your body uses energy keeping the urine in your bladder warm – energy which could have been used keeping the rest of your body warm. So, pee when you need to. Don’t hold it in, as it’ll actually make you colder. Pee before you get into your sleeping bag. If you don’t want to get up in the night and shuffle outside into the cold, try peeing into a bottle. Ladies, there are contraptions available to help you achieve this, such as the Shewee.
Pack it out
In the absence of a toilet, you’ll be forced to do your business outside. There’s no point in burying your poop and toilet paper because it’ll just be exposed when the snow melts. That’s why Leave No Trace principles stipulate that you have to pack it out with you in snowy conditions.
Bring entertainment
If you’re camping in snow, then it’s probably winter. And in winter, the days are short and the nights are long. Getting into bed when it’s dark can mean a very early night indeed. If you’re not keen on sleeping at 4pm, remember to bring some entertainment. This could be a pack of cards, a book, a kindle, some podcasts or a journal.
