Hiking requires fuel, and that means snacks! But you can do better than your bog-standard Cliff Bar. Instead, why not try these healthy vegetarian hiking snacks, nearly all of which are homemade. They’re everything a hiking snack needs to be: robust, high in energy and goddamn tasty. They’re also great for trail running, ski touring and multi-day hikes.
Good old raisins and peanuts (GORP)
Chuck some raisins and some peanuts in a bag and voila: you’ve made good old raisins and peanuts. A simple hiking snack that’s ready in approximately five seconds, but still packs a nutritional punch.
Zero-waste tips: store your GORP in a nut milk bag, or a resealable silicone/plastic bag which you can wash and re-use. If possible, buy the ingredients from a dispensary.
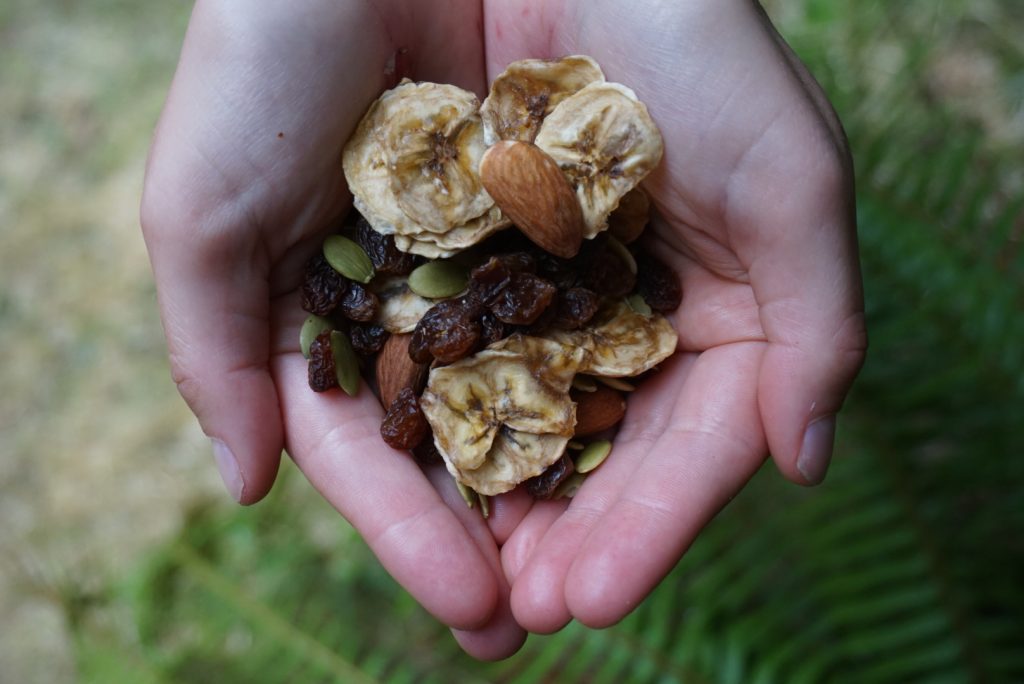
Trail mix
If GORP is a bit plain Jane for you, take things up a notch by throwing in some other nuts, seeds, chocolate chips or dried fruit. You can buy trail mix from stores, but it’s more fun to make your own. My favourite trail mix goodies include pumpkin seeds, cashew nuts, sultanas, chunks of dark chocolate and banana chips.
Zero-waste tips: store your trail mix in a nut milk bag, or a resealable silicone/plastic bag which you can wash and re-use. If possible, buy the ingredients from a dispensary.
Logan bread
Logan bread is a dense bread which was actually created with mountaineering in mind. Legend has it that a team setting out to summit Mount Logan in 1950 required a quick, calorie-rich, indestructible snack: and so, Logan bread was born.
The great thing about Logan bread is that you can adapt the ingredients to suit your taste, budget and basically whatever you have in the cupboard. One batch also creates a lot of bars which you can share amongst your hiking buddies or freeze for future use.
Check out this Logan bread recipe from How to Wilderness.
Zero-waste tips: If possible, buy the ingredients from a dispensary. Wrap your Logan bread in beeswax wraps when you head out hiking. Freeze anything you don’t need to eat right away.
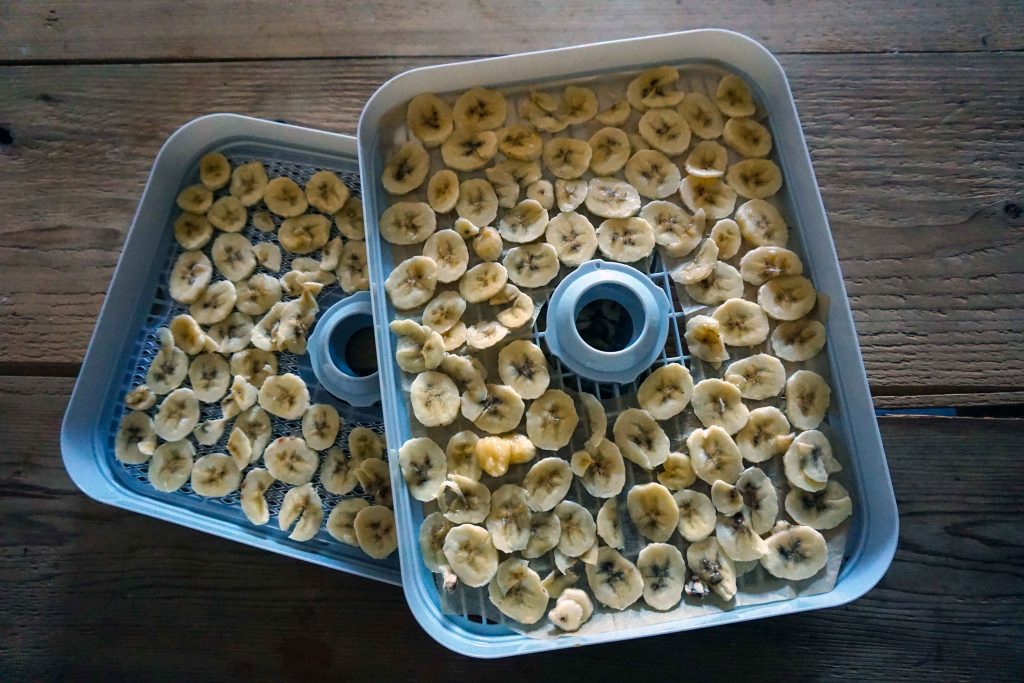
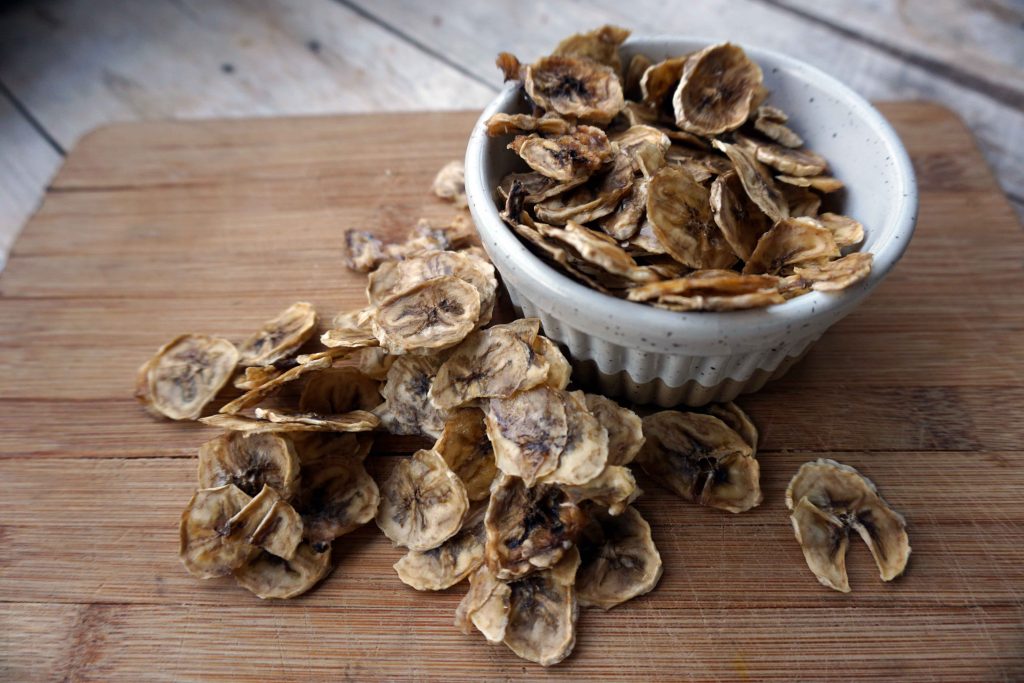
Dehydrated banana chips
Homemade banana chips take a little bit of foresight, but the results are downright delicious. If you have dehydrator, you simply need to:
- Line the trays of your dehydrator with baking parchment
- Thinly slice some bananas – the riper the better
- Spread the banana slices across the trays
- Turn the machine on and leave for around 12 hours, or less if you prefer them a little bit chewy
When they’re done, carefully peel them off the baking parchment and pop them in a plastic/paper bag. Homemade banana chips are way healthier than the shop-bought ones, which are sometimes fried and often contain added sugar.
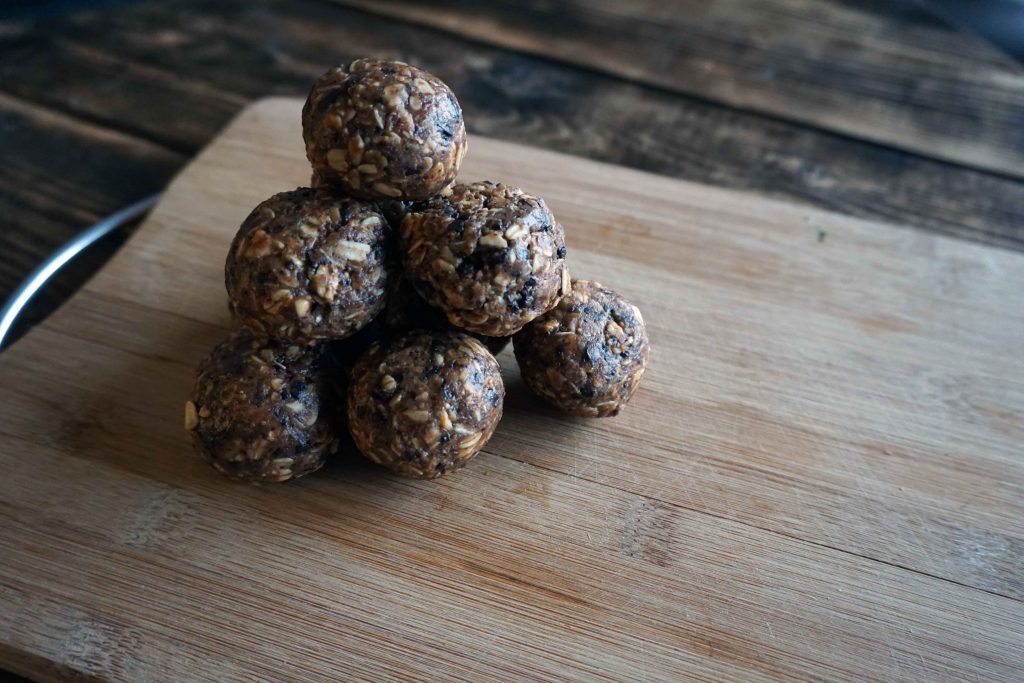
Oat, peanut butter and chocolate energy balls
Energy balls, power balls, energy bites, bliss balls: call them what you will. In essence, I’m talking about a mish mash of yummy, high-energy ingredients that you can chomp down in a bite or two.
These no-bake energy balls are my go-to option. They make around 12 balls depending on how large you roll them.
Ingredients:
- 1 cup of rolled oats
- ½ cup of crunchy peanut butter
- ½ cup of dark chocolate chips (or break up a chocolate bar and put it in a food blender)
- ½ cup of ground flax seed (or pumpkin seeds which you can grind up in a blender)
- ⅓ cup of honey
Method:
- Mix all the ingredients together in a bowl
- Grab half a handful of mixture and use your hands to roll into a ball – continue until there’s no mixture left
- Place all the balls on a plate or chopping board and refrigerate overnight
For more inspiration, check out these 33 energy ball recipes from Greatist.
Zero-waste tips: If possible, buy the ingredients from a dispensary. Wrap your energy bites in beeswax wraps or store in a resealable silicone/plastic bag which you can wash and re-use.
Banana and oat snack bars
There are a whole lot of companies selling snack bars these days, but homemade bars are cheaper, healthier and don’t come wrapped in plastic. Make the day before your hike and chomp at your leisure.
These banana and oat bars are my favourite. The following recipe makes about 12, depending on how big you cut them.
Ingredients:
- 4 cups of rolled oats
- 6 large over-ripe bananas, mashed up
- ¼ cup of pitted dates, chopped up
- ¼ cup of chopped nuts, such as peanuts, cashew nuts or walnuts
- 6 tablespoons of honey or agave nectar
- 1 teaspoon of cinnamon
- ½ cup of shredded coconut (optional)
- Baking parchment
Method:
- Pre-heat oven to 350°F/175°C
- Mix everything together in a bowl
- Line a baking tray with baking parchment
- Tip ingredients onto the tray, pressing down to compact
- Bake for 30 minutes until golden
- Leave to cool, turn out of the baking tray and cut into squares
Zero-waste tips: If possible, buy the ingredients from a dispensary. Wrap your snack bars in beeswax wraps.
Sugar free cookies/banana bread
Sugar-free snacks can be difficult to come by. Even supposedly ‘sugar-free’ recipes often contain honey, which really doesn’t count. If you’re looking to avoid sugar, I like these sugar-free cookies from Super Healthy Kids (disclaimer: can be eaten by adults too). This sugar-free banana bread is also delicious.
Sandwiches
This list wouldn’t be complete without the inclusion of the time-honoured sandwich. Get two pieces of bread or a bun and slap whatever filling you like in the middle. Peanut butter and jam sammies are a firm favourite amongst hikers. Hard cheese such as cheddar is another good option as it’s durable and high in calories. For something a bit different, try peanut butter and roasted sweet potato fries.
Zero-waste tips: wrap your snack bars in beeswax wraps.

Soups
Plot twist: you can eat hot food while hiking! This is especially great if you’re hiking in cold conditions. Simply make your soup-of-choice, warm it up in the morning and decant it into an insulated flask (like a Thermos or a Yeti). It should stay hot for up to 12 hours. If you have a stove with you, you can always carry the soup cold and warm it up when you stop for a break.
I love a miso soup or a ramen, but really, I’m happy to glug down any veggie soup going.
Zero-waste tips: make your own soups from old veggies. Store in a re-usable flask and take your own cutlery/chopsticks if needed.
Cheese and crackers
The cheese and cracker combo is another classic among hikers. Hard cheese travels well and is an energy-dense food. The cracker acts as a vehicle, adding a little bit of crunch to the party. Even if the crackers are stale and slightly battered, it’ll still satisfy your hungry belly. Just remember to slice the cheese before you go, or take a pocket-knife with you.
Zero-waste tips: this isn’t really a zero-waste tip, but try to buy crackers that don’t contain palm oil (because palm oil is bad – if you don’t know why, Google it). You can also buy cheese that isn’t wrapped in plastic from a cheese counter. Store it in a reusable container instead.